Configure and Activate Your Lead Nurturing Agent
Learning Objectives
After completing this unit, you’ll be able to:
- Build a new agent.
- Test the agent’s responses.
Introduction
In the previous unit, you set up the system to support building and maintaining your agent. Now let’s set up the agent.

Build a New Sales Agent
The guided setup experience of Salesforce Go streamlines the creation, testing, and activation of your agent. Follow along to set up yourEngagement agent.
- In the Engagement Agent setup area, next to Build and Manage Agent, click Go
 . Please note that this step opens in the new Agentforce Studio feature.

- This opens the guided setup experience. Click Get Started.
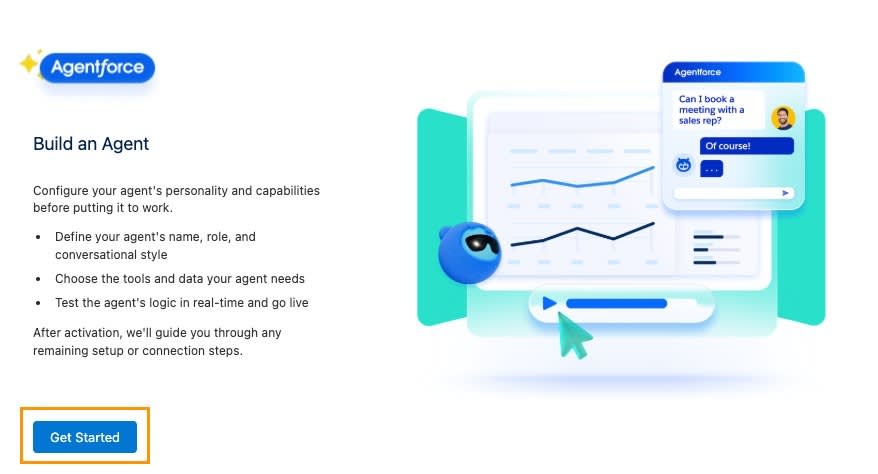 [alt text: Build a new Sales Agent screen of the Agentforce Builder Setup wizard with Get Started highlighted.
- Click the Engagement template.
- Click Continue.
Getting Started
Follow the steps to set up your agent’s key details.
- On the Getting Started page, the User Record field is prefilled with the agent user you created earlier. If you created multiple agent users, all of them will be listed here, allowing you to choose the one you want. Enter these details:
- Agent Name:
Lead Nurturing - Company Name:
Welo - For Company Description, paste the following:
- Agent Name:
Welo is a premier provider of IT solutions and services, specializing in cutting-edge hardware and comprehensive services for managing data centers.
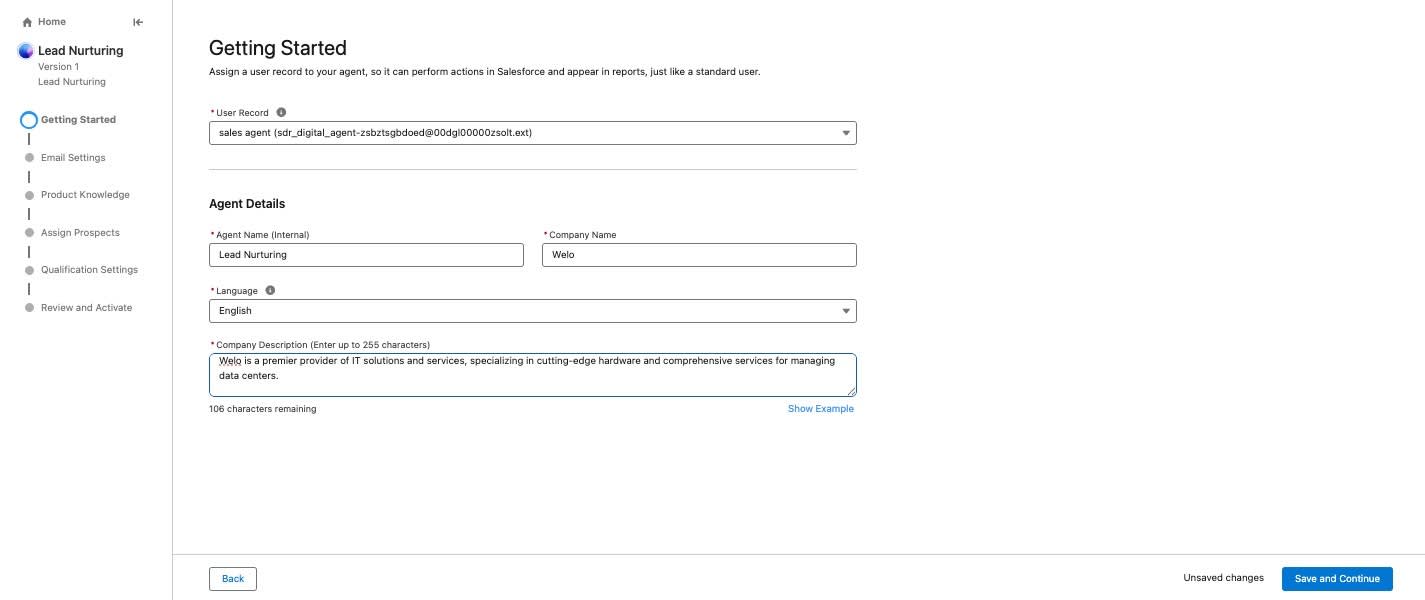
- Click Save and Continue.
Configure the Email Settings
Your agent sends an initial outreach email to each prospect and follows up with timely nudges if there is no reply. In Email Settings, you set up the core messaging by adding a primary value proposition, proof points, nudge settings, and message tone. Here’s how.
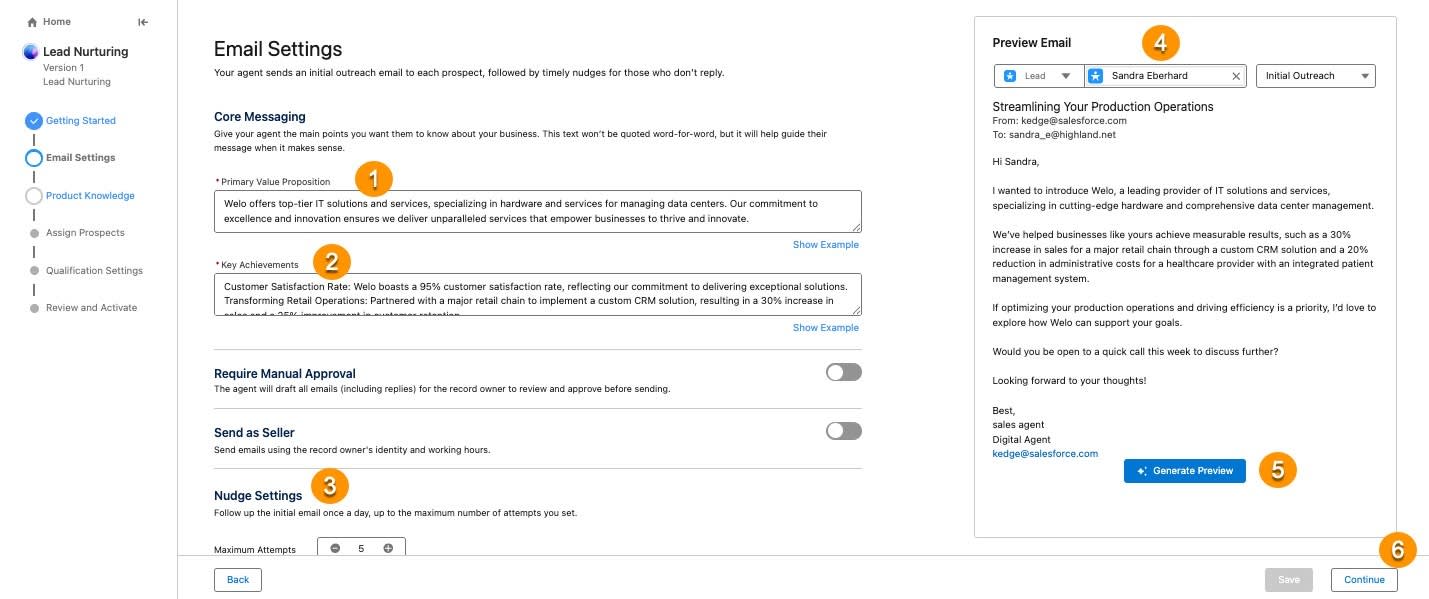
- For Primary Value Proposition, paste the following:
Welo offers top-tier IT solutions and services, specializing in hardware and services for managing data centers. Our commitment to excellence and innovation ensures we deliver unparalleled services that empower businesses to thrive and innovate.
- For Key Achievements, the following:
Customer Satisfaction Rate: Welo boasts a 95% customer satisfaction rate, reflecting our commitment to delivering exceptional solutions.
Transforming Retail Operations: Partnered with a major retail chain to implement a custom CRM solution, resulting in a 30% increase in sales and a 25% improvement in customer retention.
Streamlining Healthcare Services: Collaborated with a healthcare provider to develop an integrated patient management system, reducing administrative costs by 20% and improving patient satisfaction scores by 15%.
- Leave the nudge and additional settings as they are. You’re now ready to test the agent’s initial outreach email.
- In the Preview Email section, click the Select a Lead field and look for
Sandra Eberhard.
- Click Try it out. You can now see the response grounded in the lead’s account name and the information you provided. This preview lets you review the responses before moving on to the next step in the guided experience.
- Click Continue.
Test Agent Responses
With the initial outreach email set up and tested, it’s time to configure your agent’s responses to customer replies and queries. In this step of the guided setup, you have the option to create a data library and add data sources.

- If you created a Data Library in the previous step during setup, you would select that library from the dropdown here.
- In the Preview Agent section, click the Select a Lead field and look for
Andy Young.
- Click Try It Out.
- After you review the response, click Continue.
You can use a file data source to upload your company’s return policies and product data and equip your agent to answer refund or product-related queries all from one place. Note that Content files added as data sources may take up to 24 hours to appear in agent responses.
Set Qualification Settings for Your Agent
In the Qualification Settings step, you evaluate potential customers and their level of interest, making it easier to prioritize those with the highest potential as well as manage outreach and follow-ups.
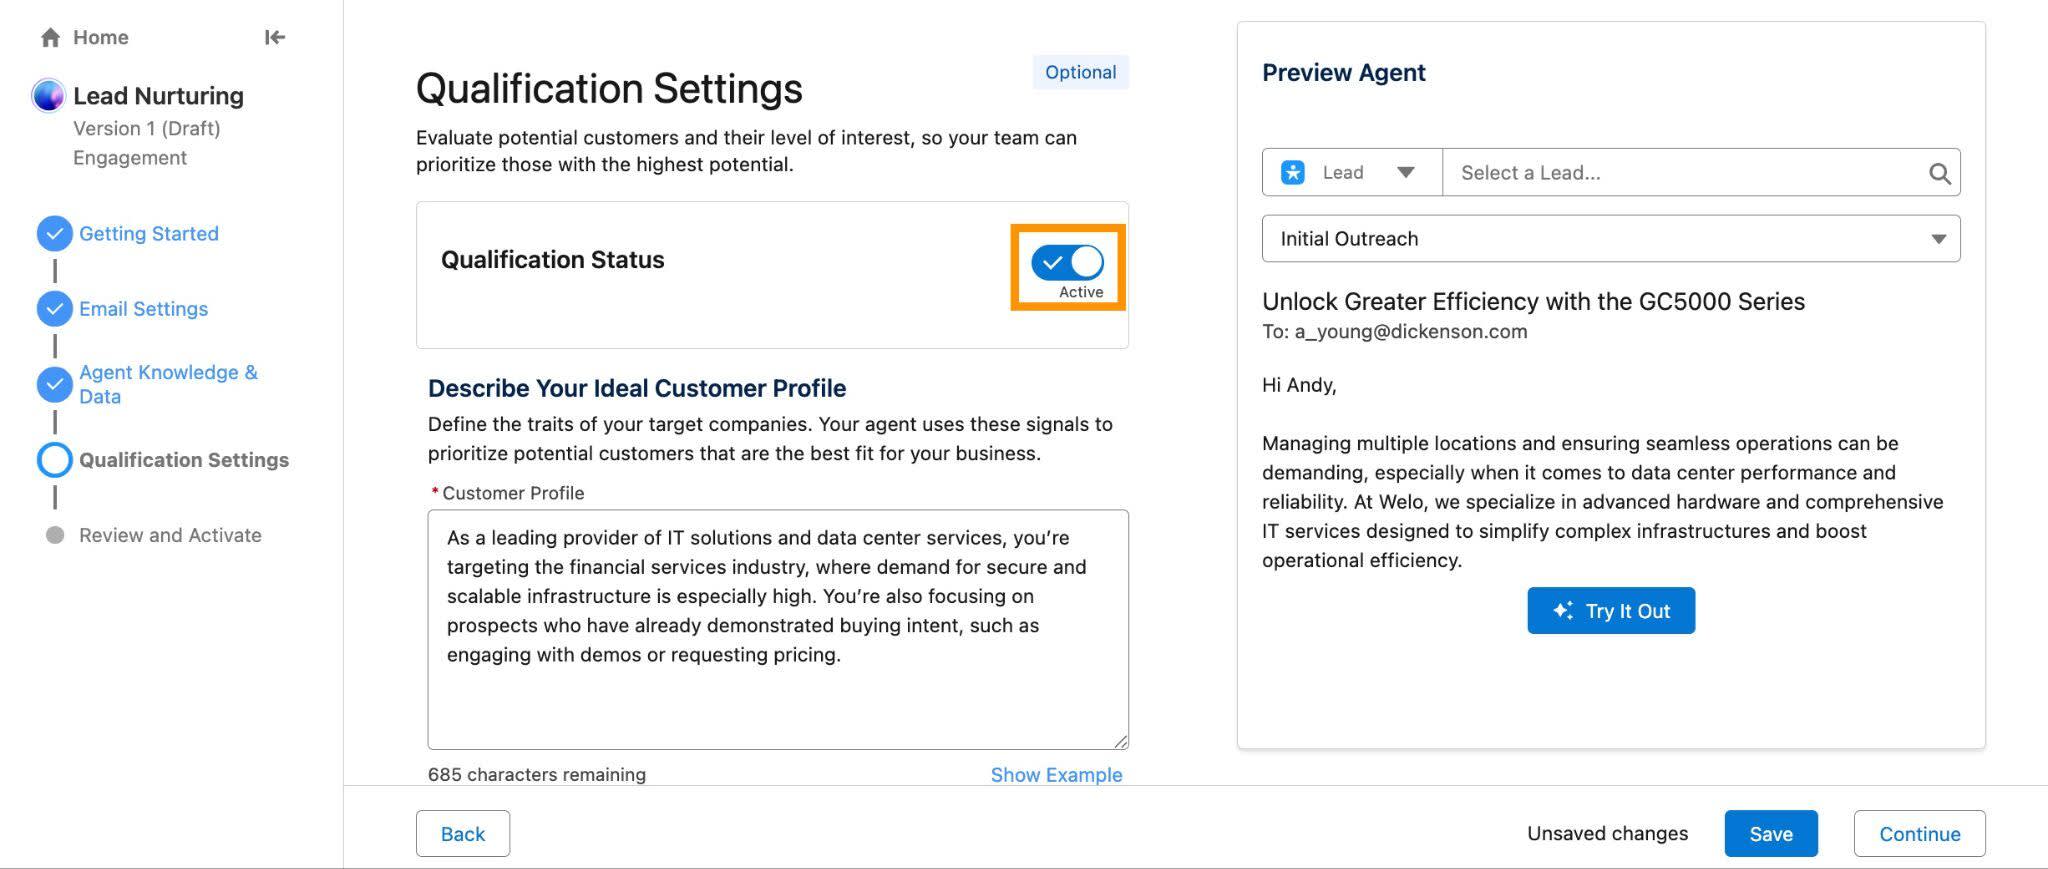
- Toggle the Qualification Status button on.
- Enter the following into the Customer Profile box:
As a leading provider of IT solutions and data center services, you’re targeting the financial services industry, where demand for secure and scalable infrastructure is especially high. You’re also focusing on prospects who have already demonstrated buying intent, such as engaging with demos or requesting pricing.
- Scroll down to the Additional Data to Capture section.
- Enter
Industryinto the search box and select it from the dropdown.
- Enter
Ratinginto the search box and select it from the dropdown.
- Click Continue.
Review and Activate the Agent
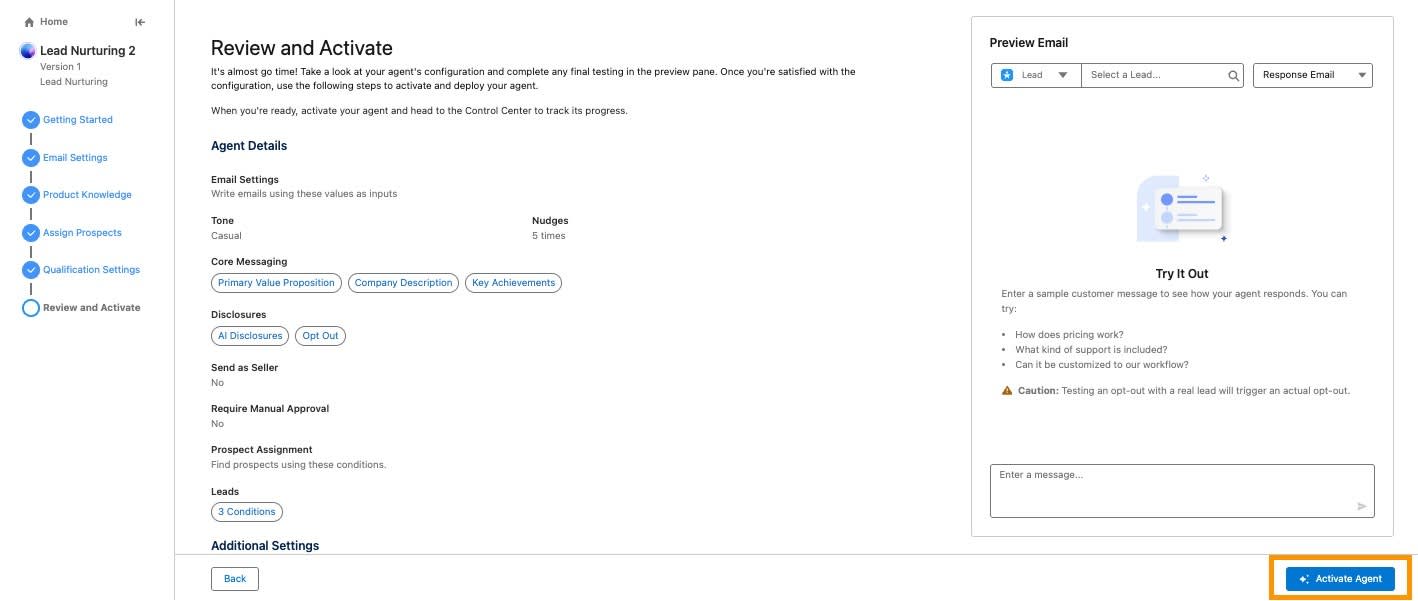
The final step is to review all your configurations and test how your agent handles initial outreach, sends nudges, and responds to customer queries. You can do this in the Preview Email section. Once you’re happy with everything, click Activate Agent to launch your agent.
Wrap Up!
And that’s a wrap! You’ve built your agent, set up its outreach and nudges, connected it to your data library, and even tested how it handles real customer questions. With everything configured, your agent is ready to take the wheel and help you engage prospects smarter, faster, and more effectively. Time to sit back and let your new digital teammate get to work.