Configure the Prospecting Agent
Learning Objectives
After completing this unit, you’ll be able to:
- Configure the prospecting agent template in Agentforce Builder.
- Define account research and prospect qualification criteria for your agent.
- Activate the prospecting agent and verify your configuration results.
Prospecting Before the Agent Takes Over
Right now, prospecting at Ursa Major Solar is still done the old way. Sales reps pull lists from marketing, cross-check them against other data sources and company websites by hand, then decide account by account whether a lead is worth chasing. It’s slow. inconsistent, and depends entirely on whoever’s doing the research that day. One rep might know to skip a company because it’s a residential customer that already has a system installed. Another rep, new to the team, can waste an afternoon on that same account before finding out the hard way. And even when a rep lands on a genuinely promising account, there’s no reliable way to know who at that company actually controls the energy budget versus who just manages the building.
You’ve turned on Agentforce Prospecting. It’s ready to take this work off your sales reps’ plates, but only once it knows what a great Ursa Major Solar prospect actually looks like. Right now, it doesn’t. This means you need to define what an ideal account worth pursuing looks like and set guardrails to ensure your agent understands your specific requirement criterias.
Let’s configure the agent.
Configure Prospecting Agent for Ursa Major Solar
Make sure you're on the Prospecting card on the Agentforce for Sales setup page in Salesforce Go, right where you left off in the previous unit. Then follow these steps.
- Click Go next to Build and Manage Agent. This opens Agentforce Builder in a new tab. This is where you create a new prospecting agent and configure it.
- Click Get Started. Refresh the page if it fails to load.
- Choose Prospecting in the Select an Agent Template screen and click Continue.
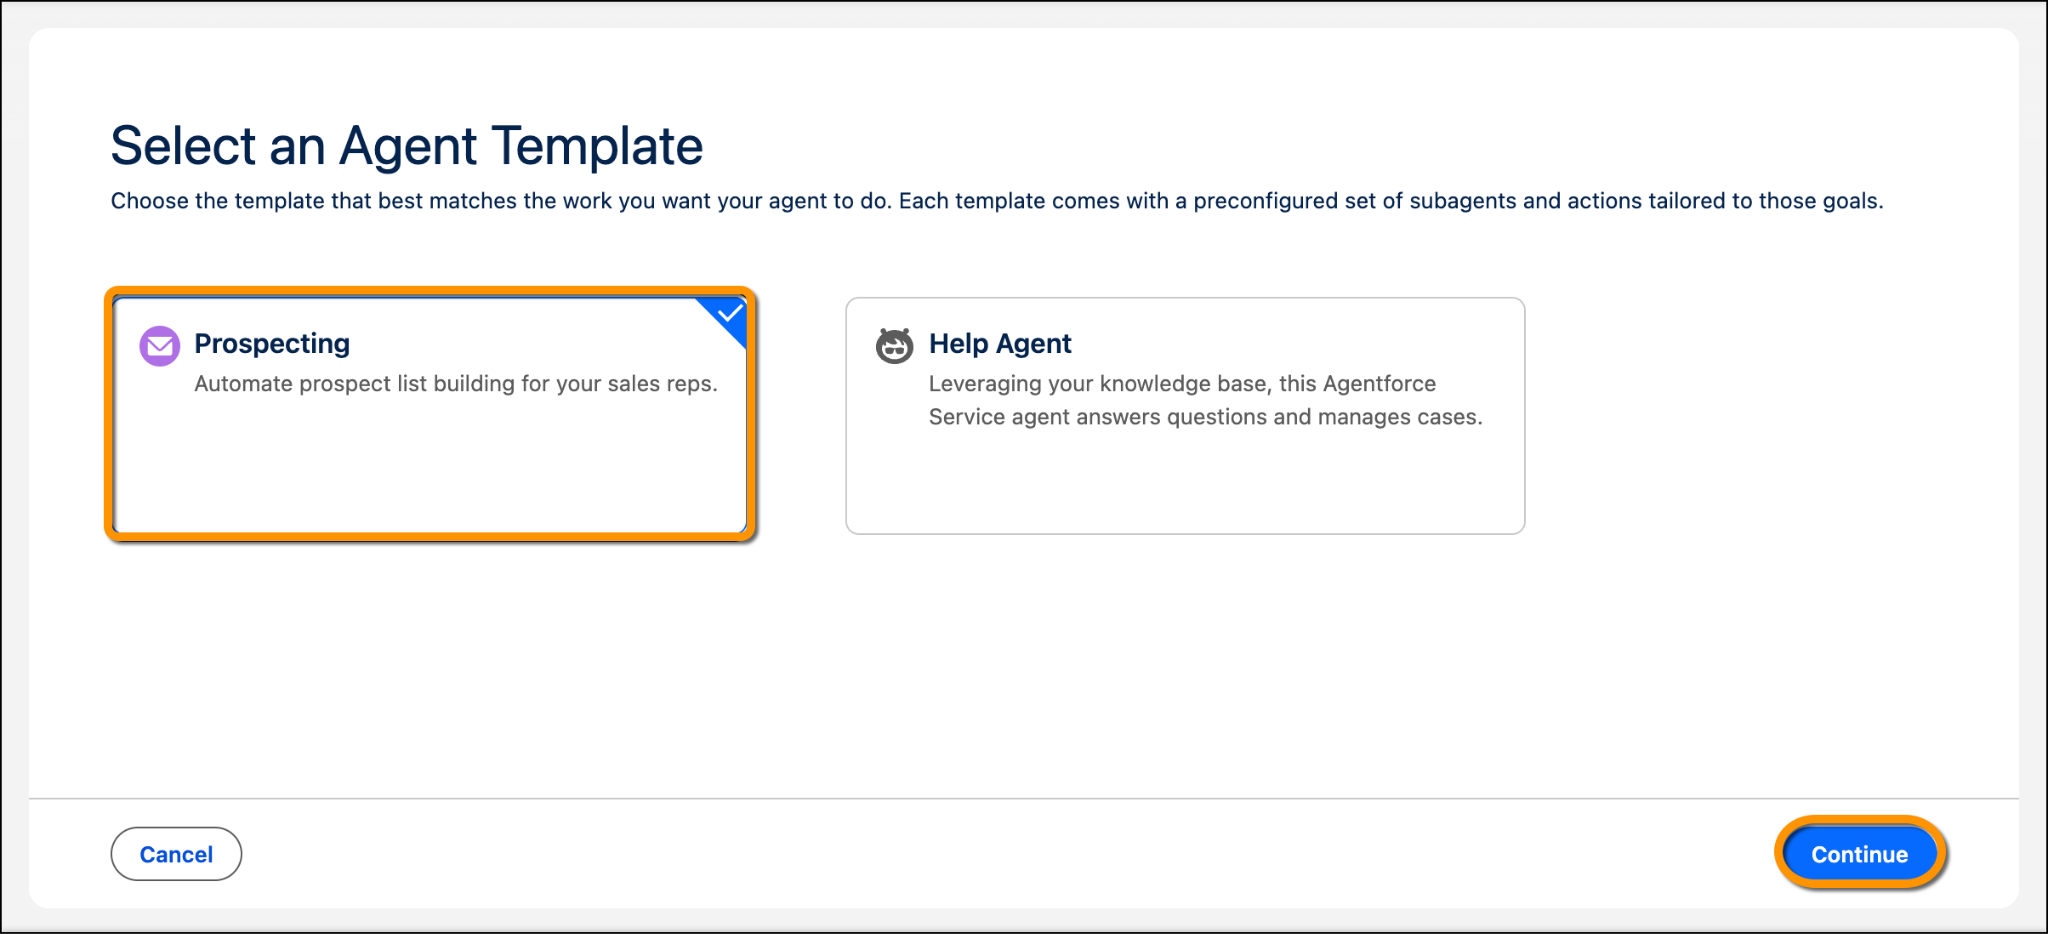
This brings you to the page that offers a guided configuration setup experience. Let’s configure the agent to support Ursa Major Solar’s autonomous prospecting requirements.
Getting Started
- Enter
Prospecting Agentin the Agent Name field.
- Keep the Language field set to English.
- Click Save and Continue.
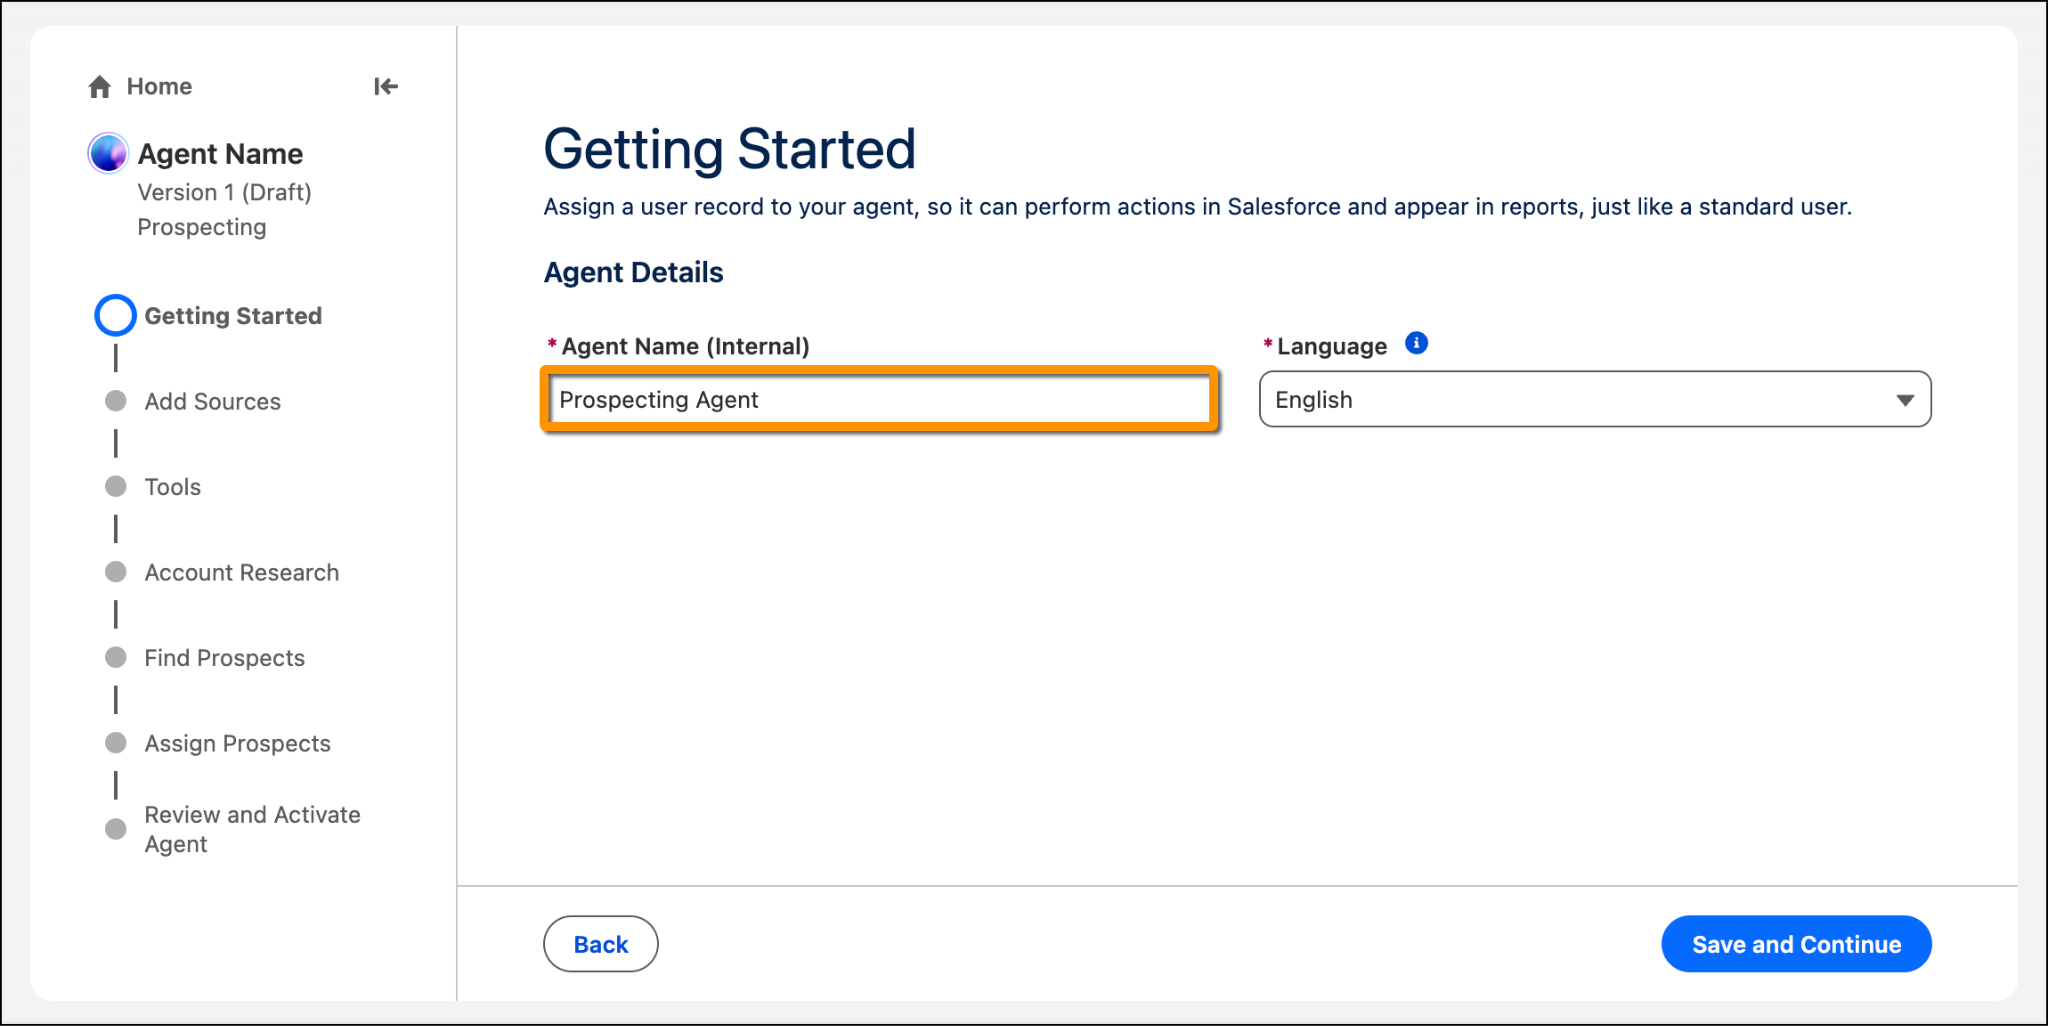
Add Sources
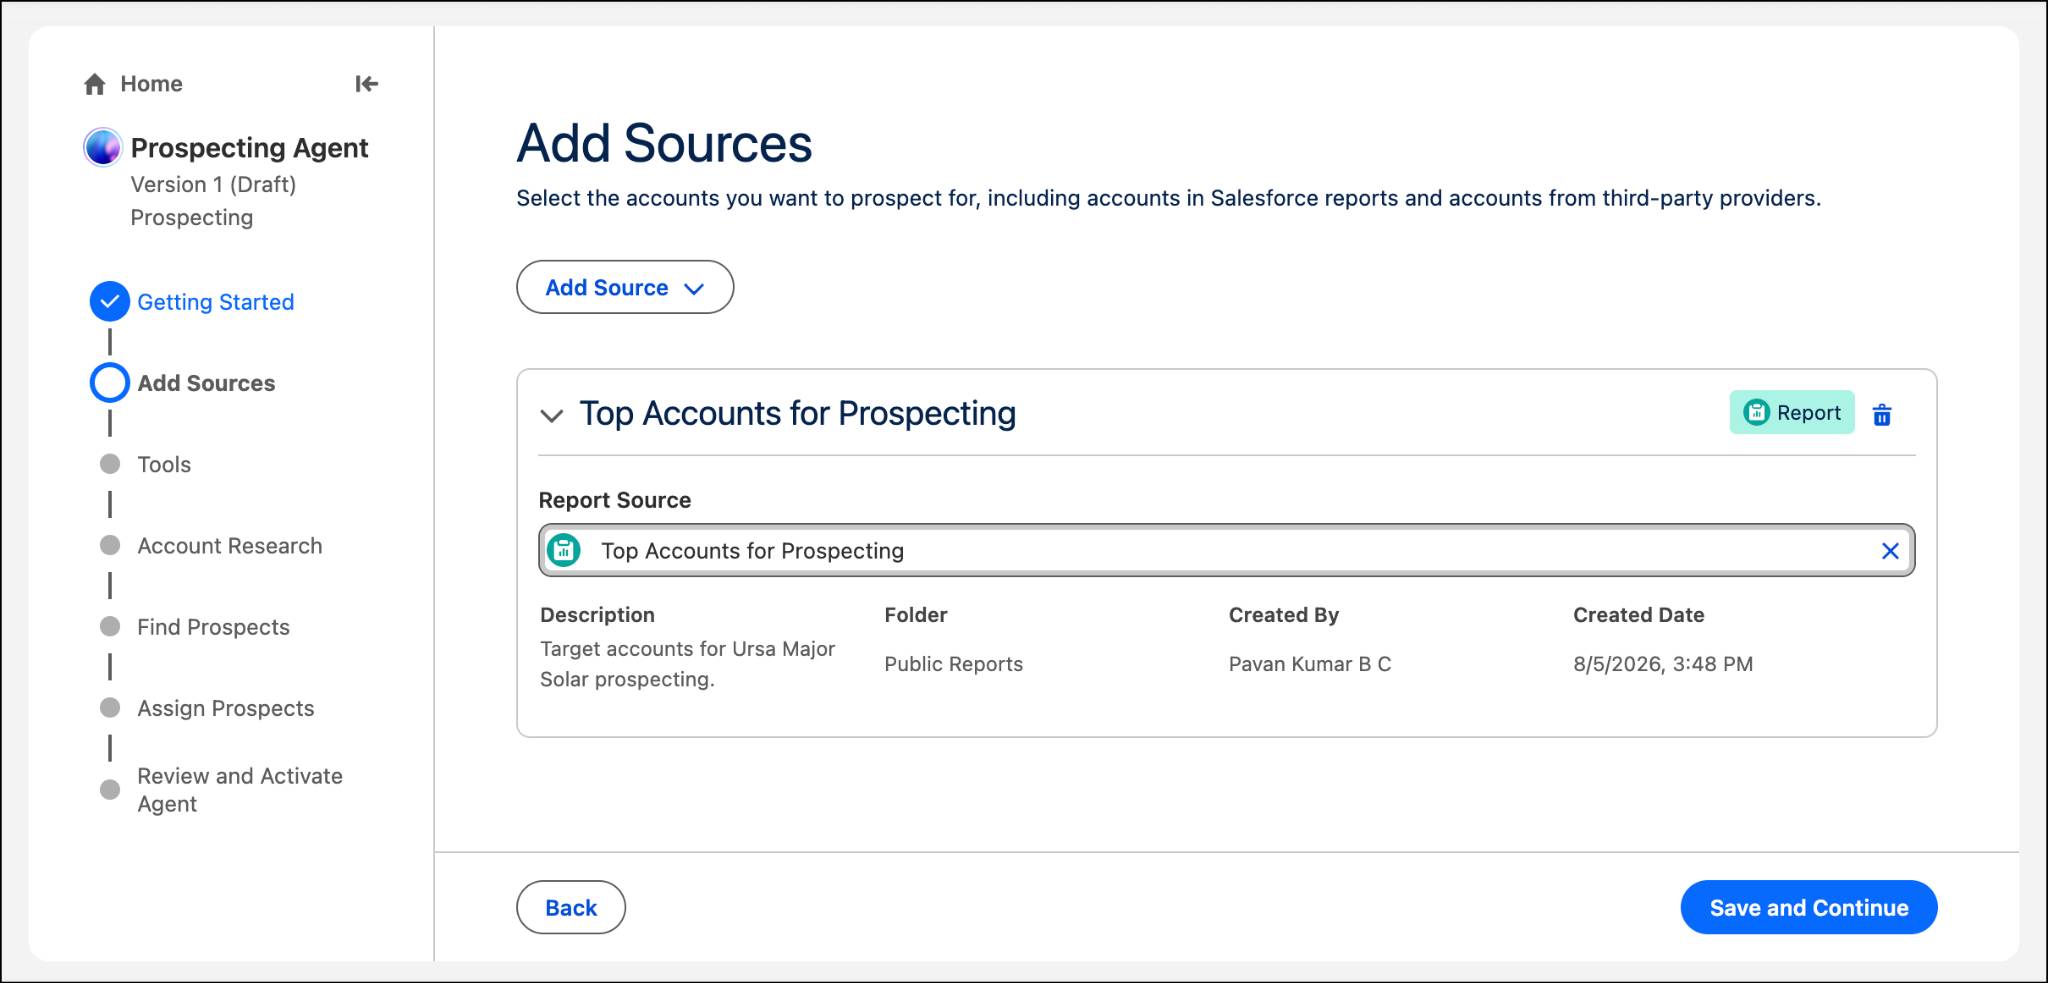
In this step, you select the accounts you want to build a prospect list from, using a Salesforce report as your source. Normally, you'd start by creating a Salesforce report filtered to the chosen account criteria for this prospecting effort.
For this example, that report has already been created for you, so instead of building one from scratch, you simply select it.
- Click Add on the Salesforce Report tile.
- Under Report Source, search for
Top Accounts for Prospectingand select it.
- Click Save and Continue.
Tools
In this step, you review and enable the tools that power your agent’s prospecting capabilities. Since we’re only using Salesforce reports for now, Query Salesforce Data is the key tool here. It’s auto-enabled and lets the agent search Salesforce account records for prospecting. Integrate Past Conversations is also auto-enabled, pulling in call transcripts, email, and notes to give the agent context. For this example, we will not be connecting to any third-party sources or integrations like ZoomInfo.

- Leave everything as is, and click Save and Continue.
Account Research
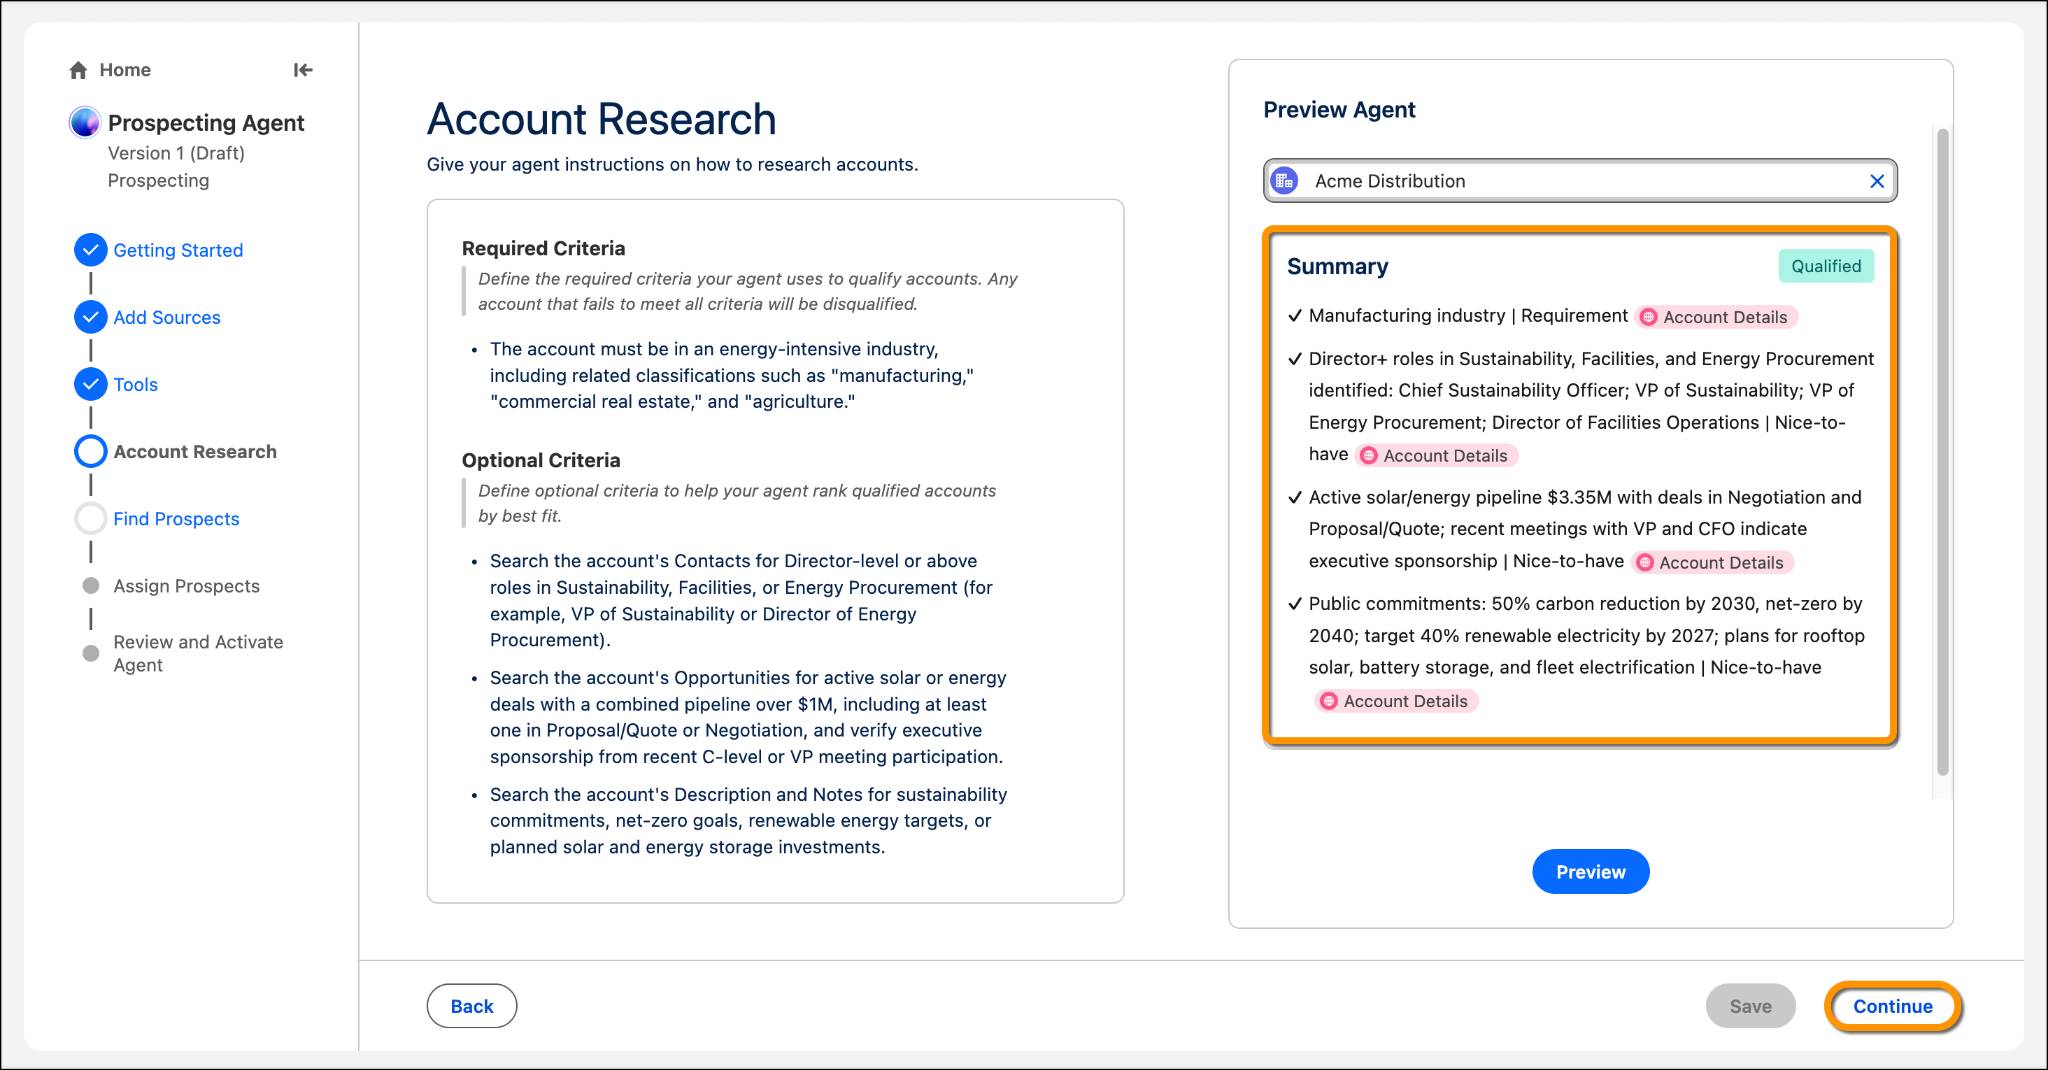
This step defines how your agent researches and qualifies accounts. Specify the required qualification criteria that every account must meet. Any account that doesn't meet these criteria is automatically disqualified. You can also define optional criteria that help the agent rank qualified accounts based on overall fit.
- Select the existing required and optional criteria and delete it.
- Add the following:
Criteria Type
Instructions
Required Criteria
The account must be in an energy-intensive industry, including related classifications such as "manufacturing," "commercial real estate," and "agriculture."Optional Criteria
Search the account's Contacts for Director-level or above roles in Sustainability, Facilities, or Energy Procurement (for example, VP of Sustainability or Director of Energy Procurement).Search the account's Opportunities for active solar or energy deals with a combined pipeline over $1M, including at least one in Proposal/Quote or Negotiation, and verify executive sponsorship from recent C-level or VP meeting participation.Search the account's Description and Notes for sustainability commitments, net-zero goals, renewable energy targets, or planned solar and energy storage investments.
- Click Save.
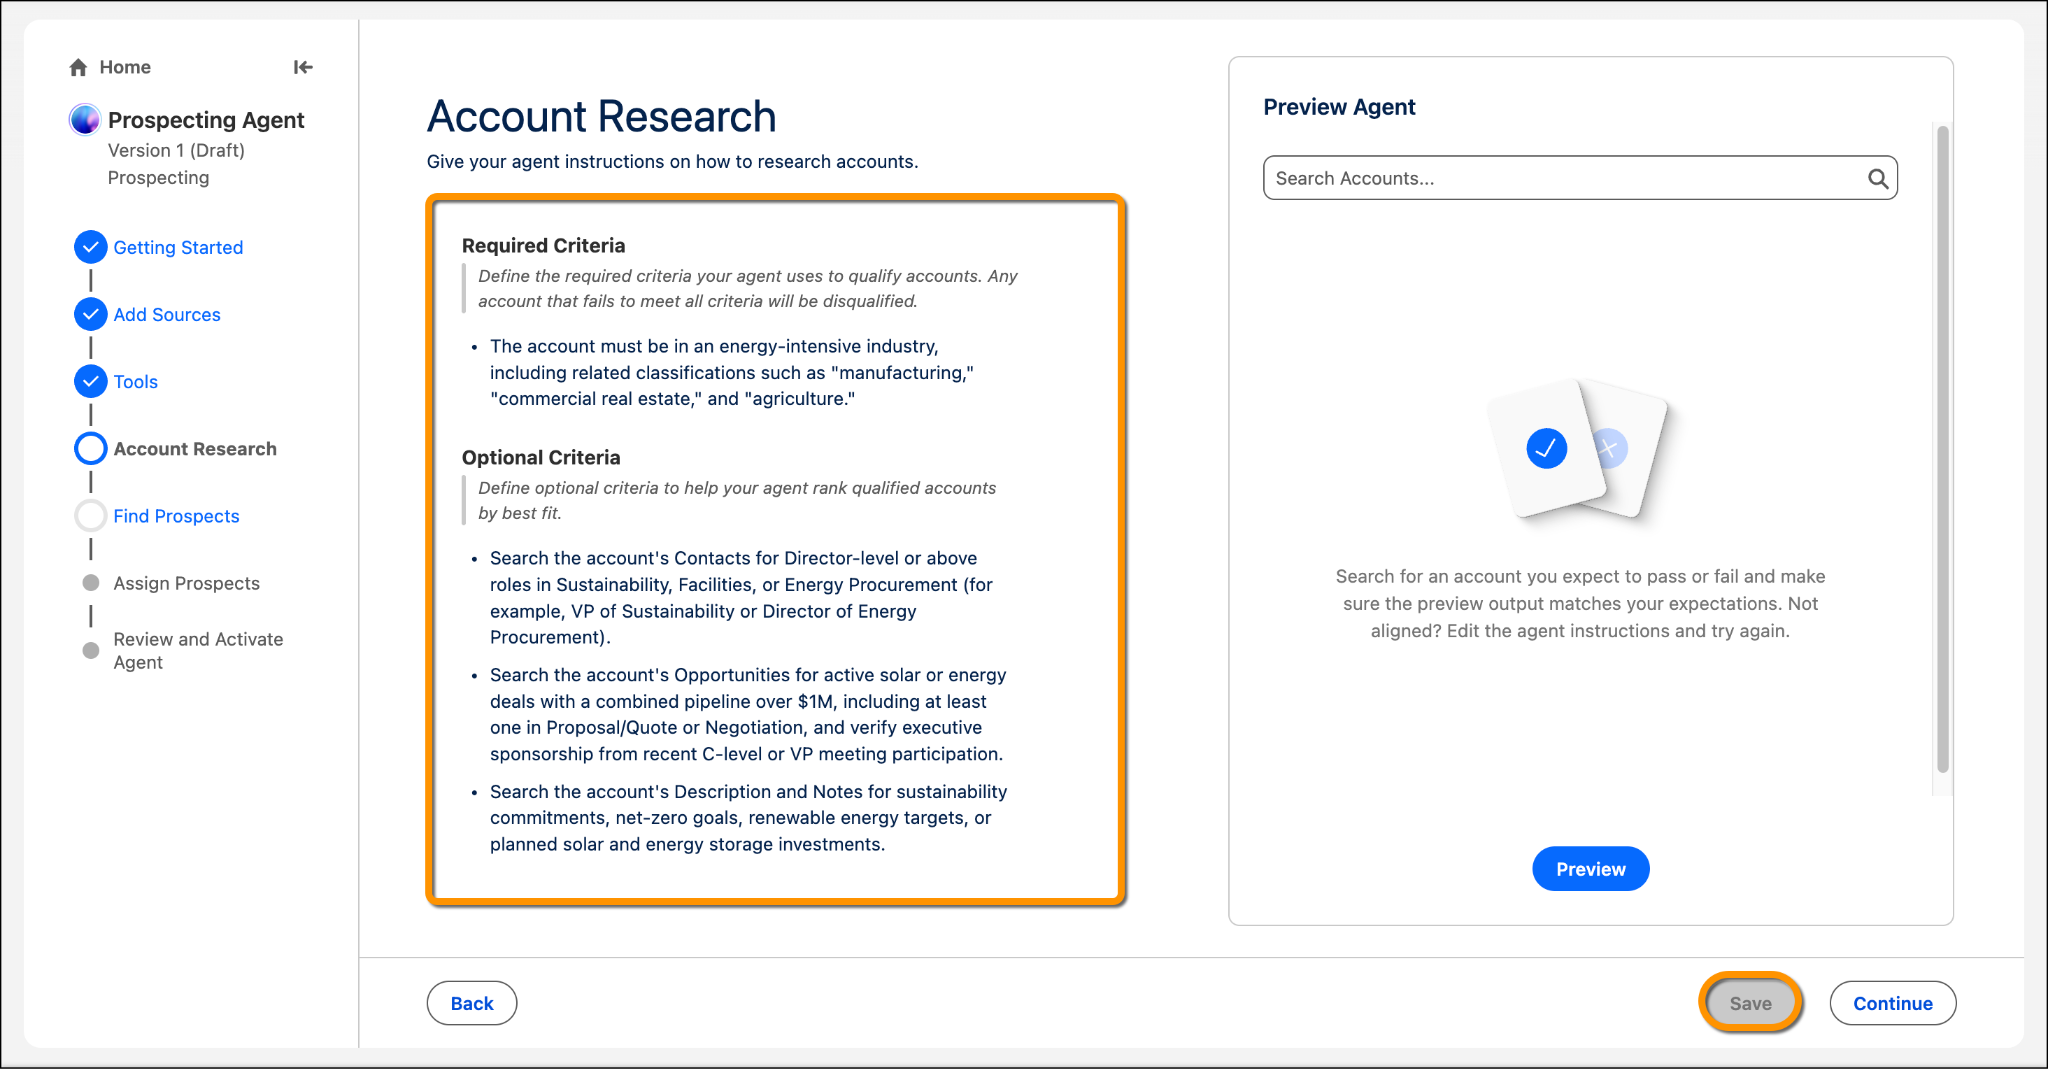
- In the Preview Agent section, click Search Accounts and enter then select
Acme Distribution.
- Click Preview to see how the agent compares the selected account against your qualification criteria and determines how well it qualifies. This process may take a few minutes.
- Review the summary and click Continue.
Find Prospects
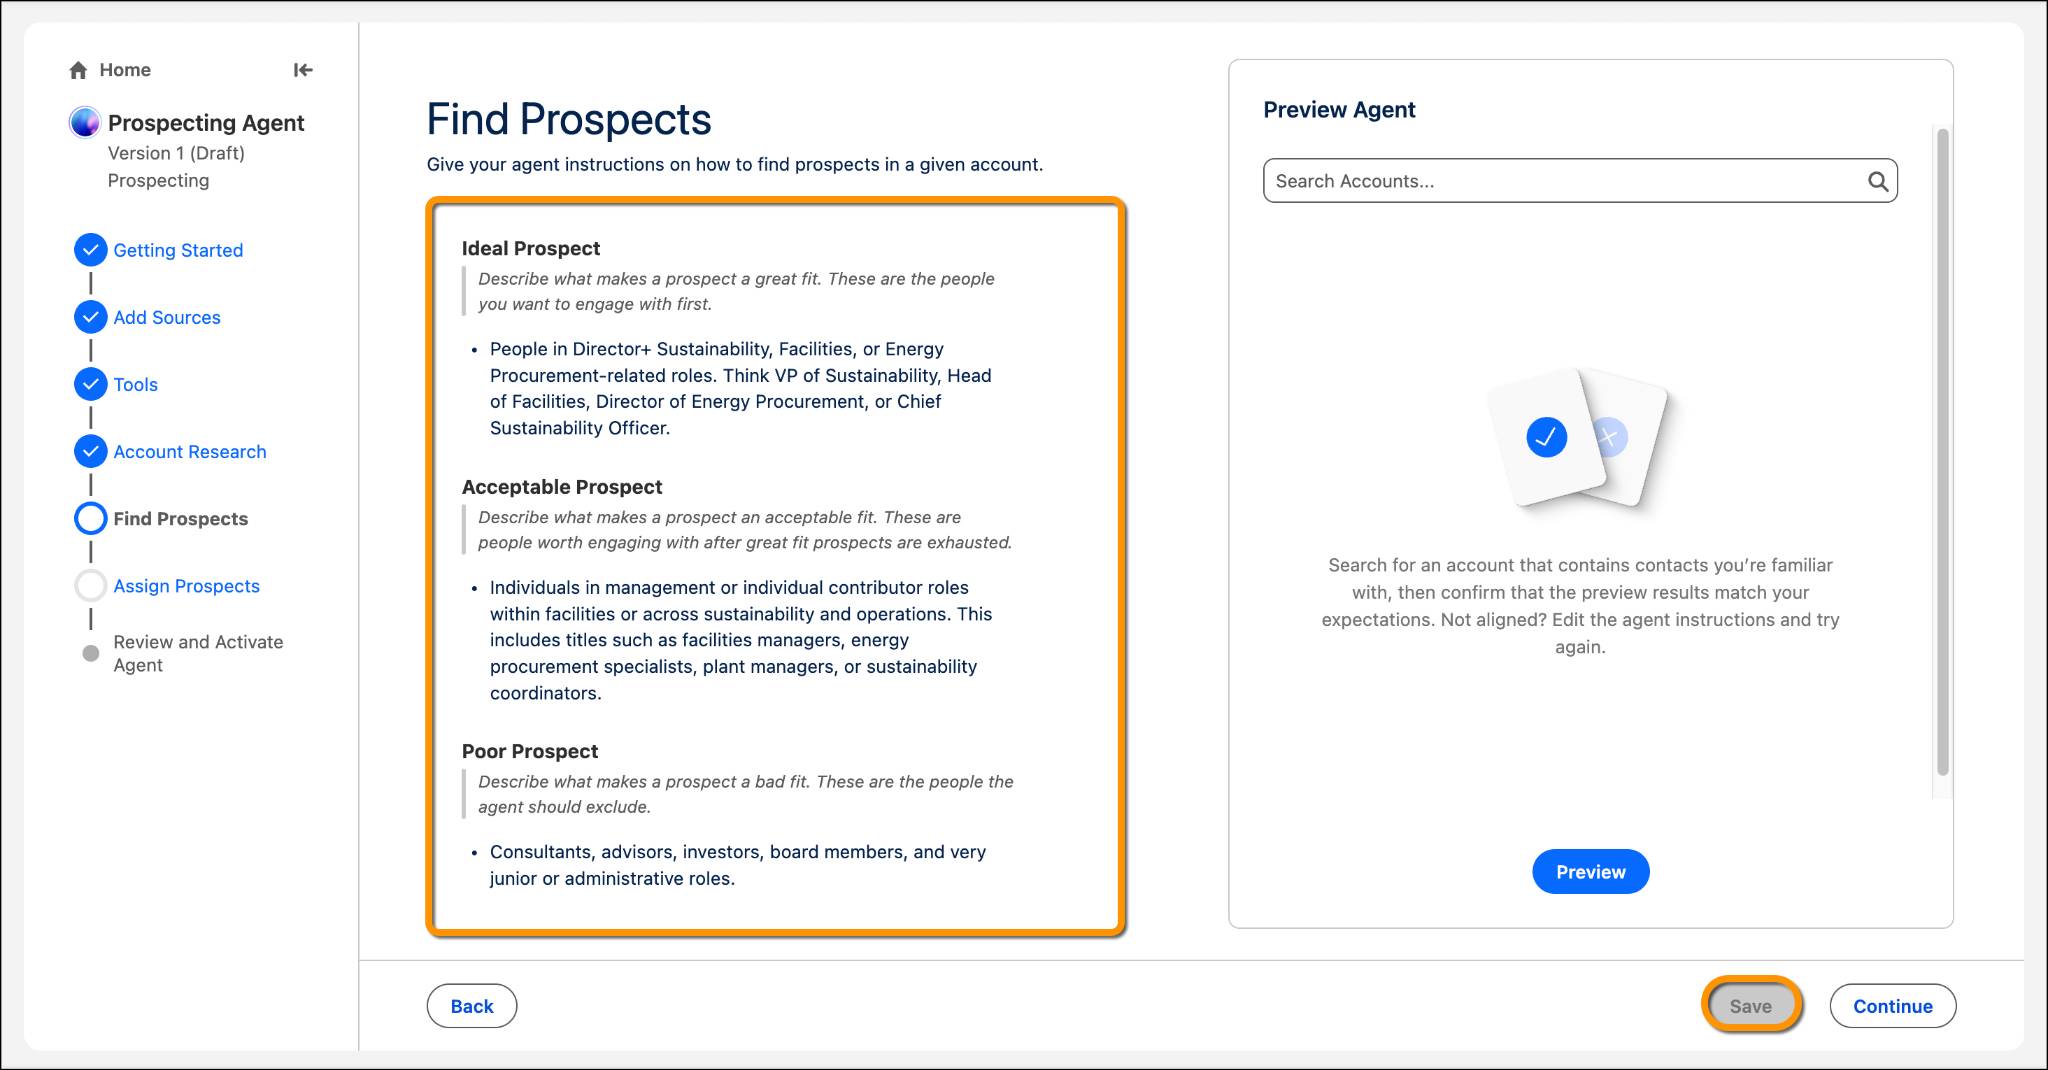
This step allows you to provide instructions to your agent on how to find prospects. Use this space to clearly define your ideal prospect, including the characteristics they should have and those the agent should exclude.
- Remove the existing instructions.
- Enter the below instructions, then click Add Instructions.
- Add the following:
Criteria Type
Instructions
Ideal Prospect
People in Director+ Sustainability, Facilities, or Energy Procurement-related roles. Think VP of Sustainability, Head of Facilities, Director of Energy Procurement, or Chief Sustainability Officer.Acceptable Prospect
Individuals in management or individual contributor roles within facilities or across sustainability and operations. This includes titles such as facilities managers, energy procurement specialists, plant managers, or sustainability coordinators.Poor Prospect
Consultants, advisors, investors, board members, and very junior or administrative roles. - Click Save.
- In the Preview Agent section, click Search Accounts and enter then select
Acme Distribution.
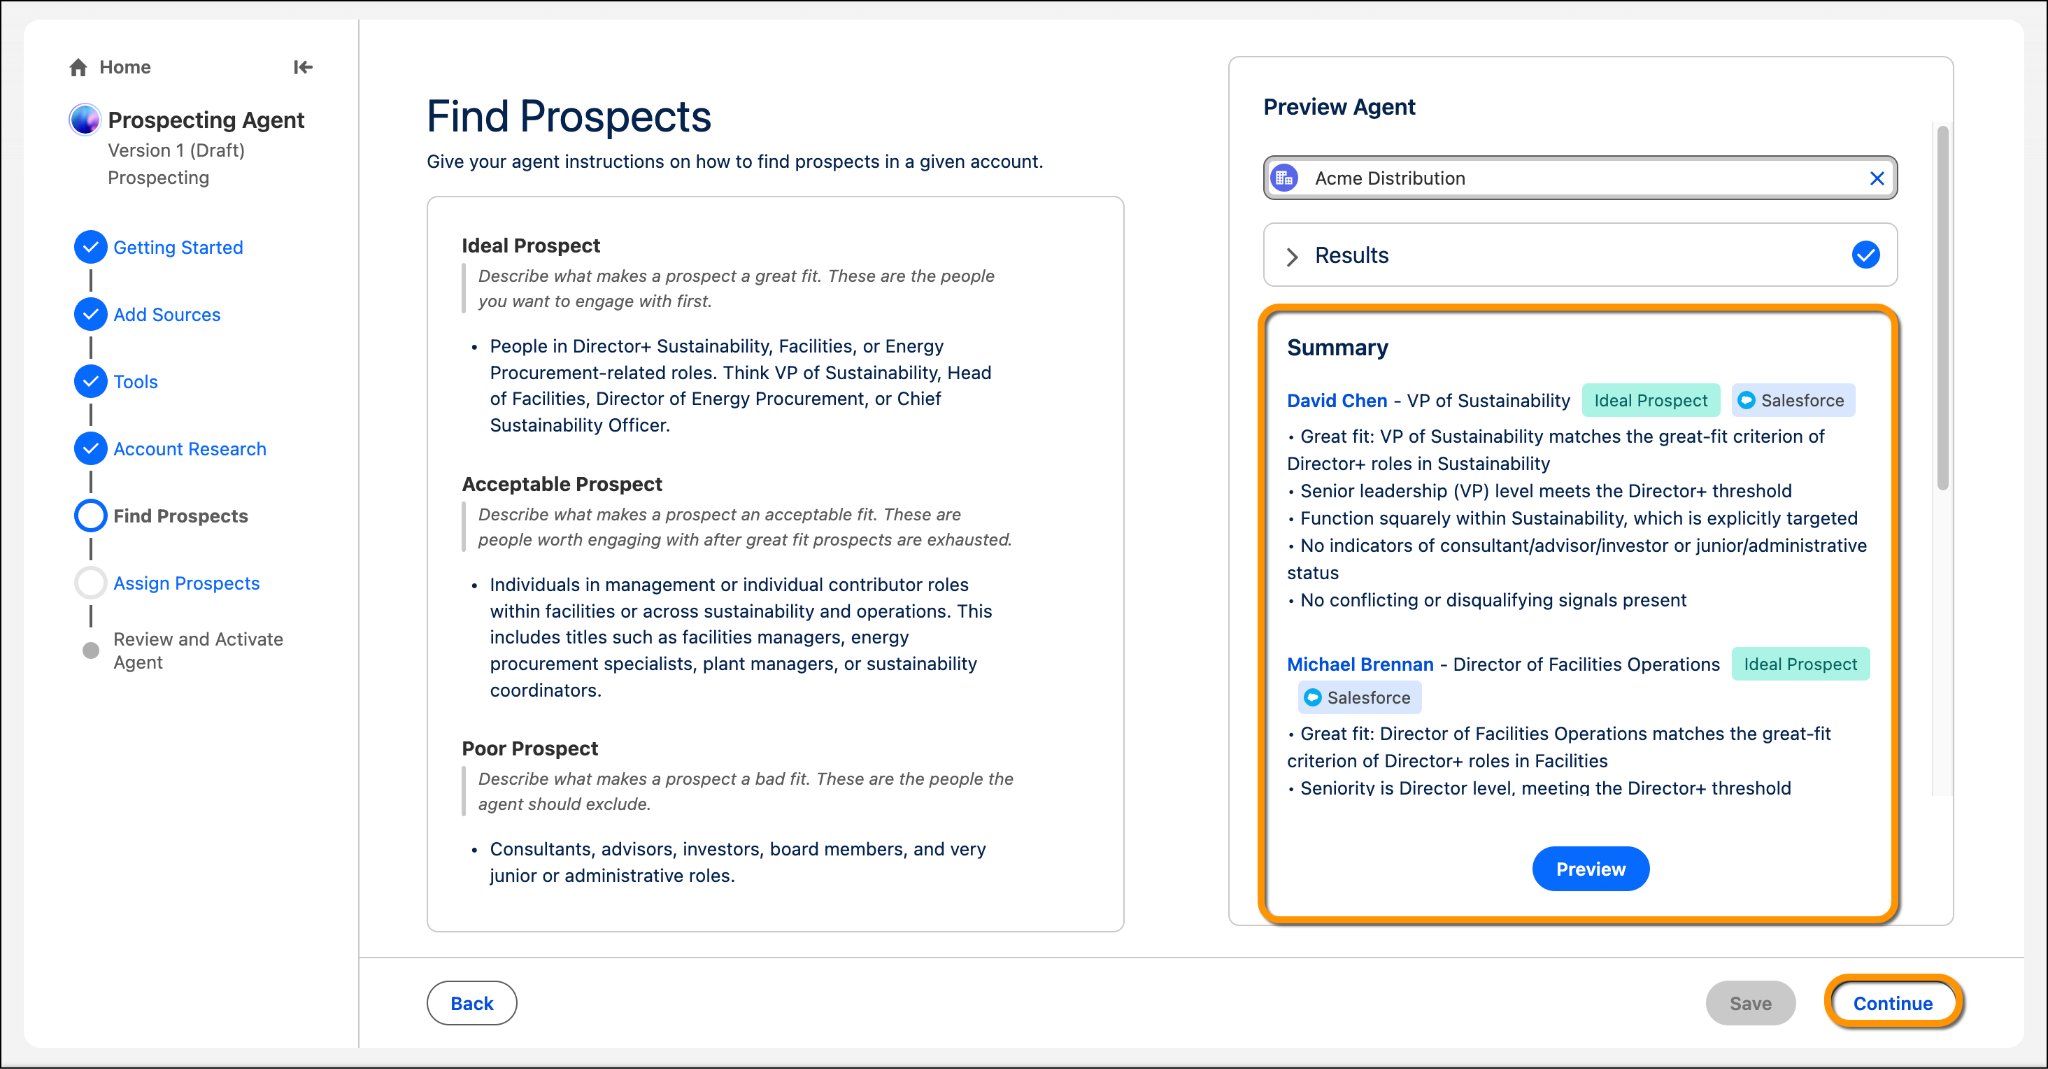
- Click Preview to see how the agent compares the selected account against your qualification criteria and determines the right prospects. This process may take a few minutes.
- Review the summary and click Continue.
Assign Prospects
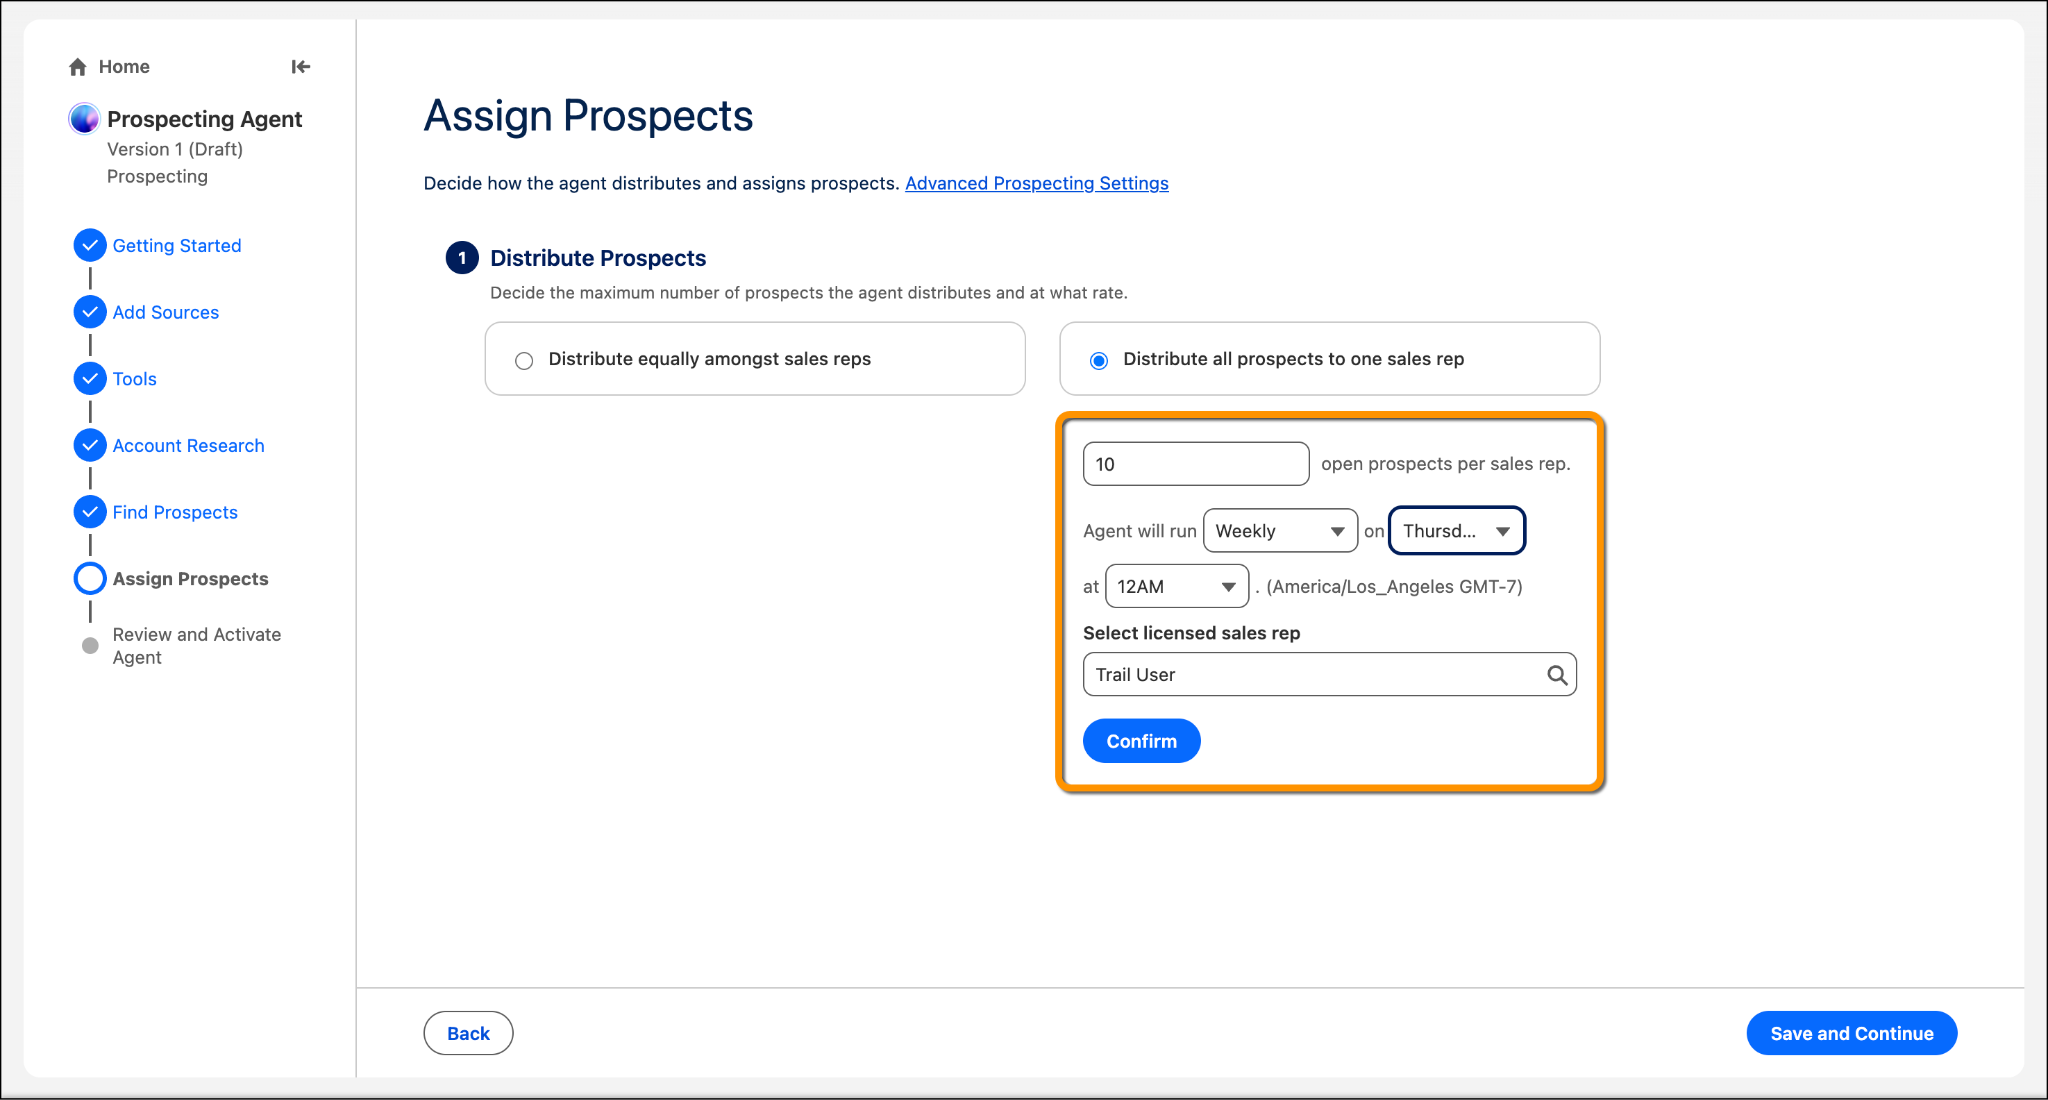
The agent can automatically assign the prospects it finds. In this step, you decide how those prospects are distributed to your sales team. You can either distribute prospects evenly among sales reps or assign every prospect to a single sales rep. For this example, assign all prospects to one sales rep.
- Select Distribute all prospects to one sales rep.
- For Prospects per week, enter
10.
- Under Select licensed sales rep, click Search users, and select your user.
- Leave everything else as is and click Confirm, then click Save and Continue.
Review and Activate Agent
Review your settings. When you're satisfied with the results, click Activate Agent. Wait for a few moments until you see the message that your agent is live.
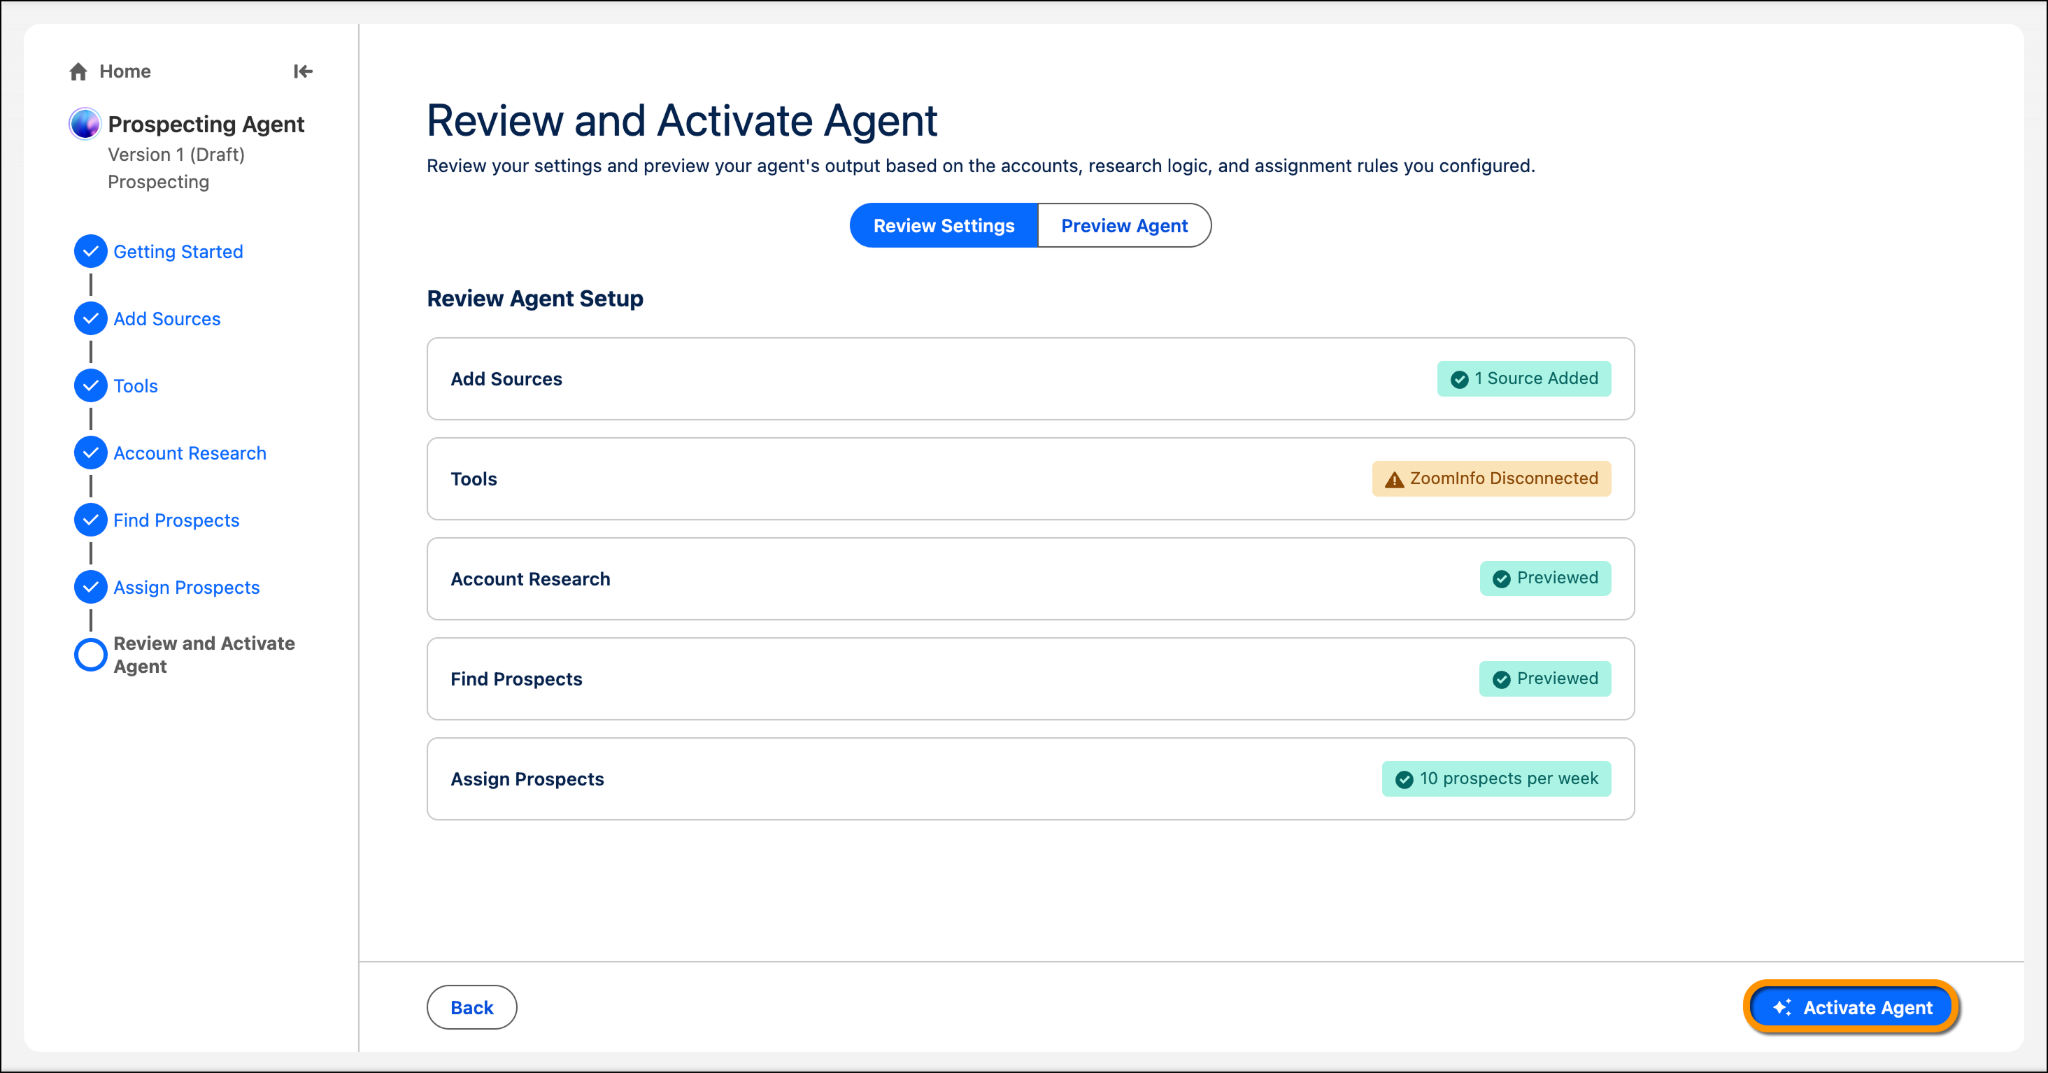
Congratulations! You successfully configured and activated your Agentforce Prospecting agent. Your agent is now ready to identify prospects within your target accounts based on the prospecting instructions and assignment rules you configured.
See Prospecting in Action
With your prospecting agent now active, it begins working in the background to identify the most promising prospects. It reviews the accounts you've assigned and applies the qualification criteria you defined to determine which accounts are worth pursuing.
Each account is evaluated across two dimensions: how closely it matches your ideal customer profile (ICP) and its propensity to buy. The accounts that rank highest in both areas become your top priorities, helping your sales team focus on the opportunities most likely to convert.
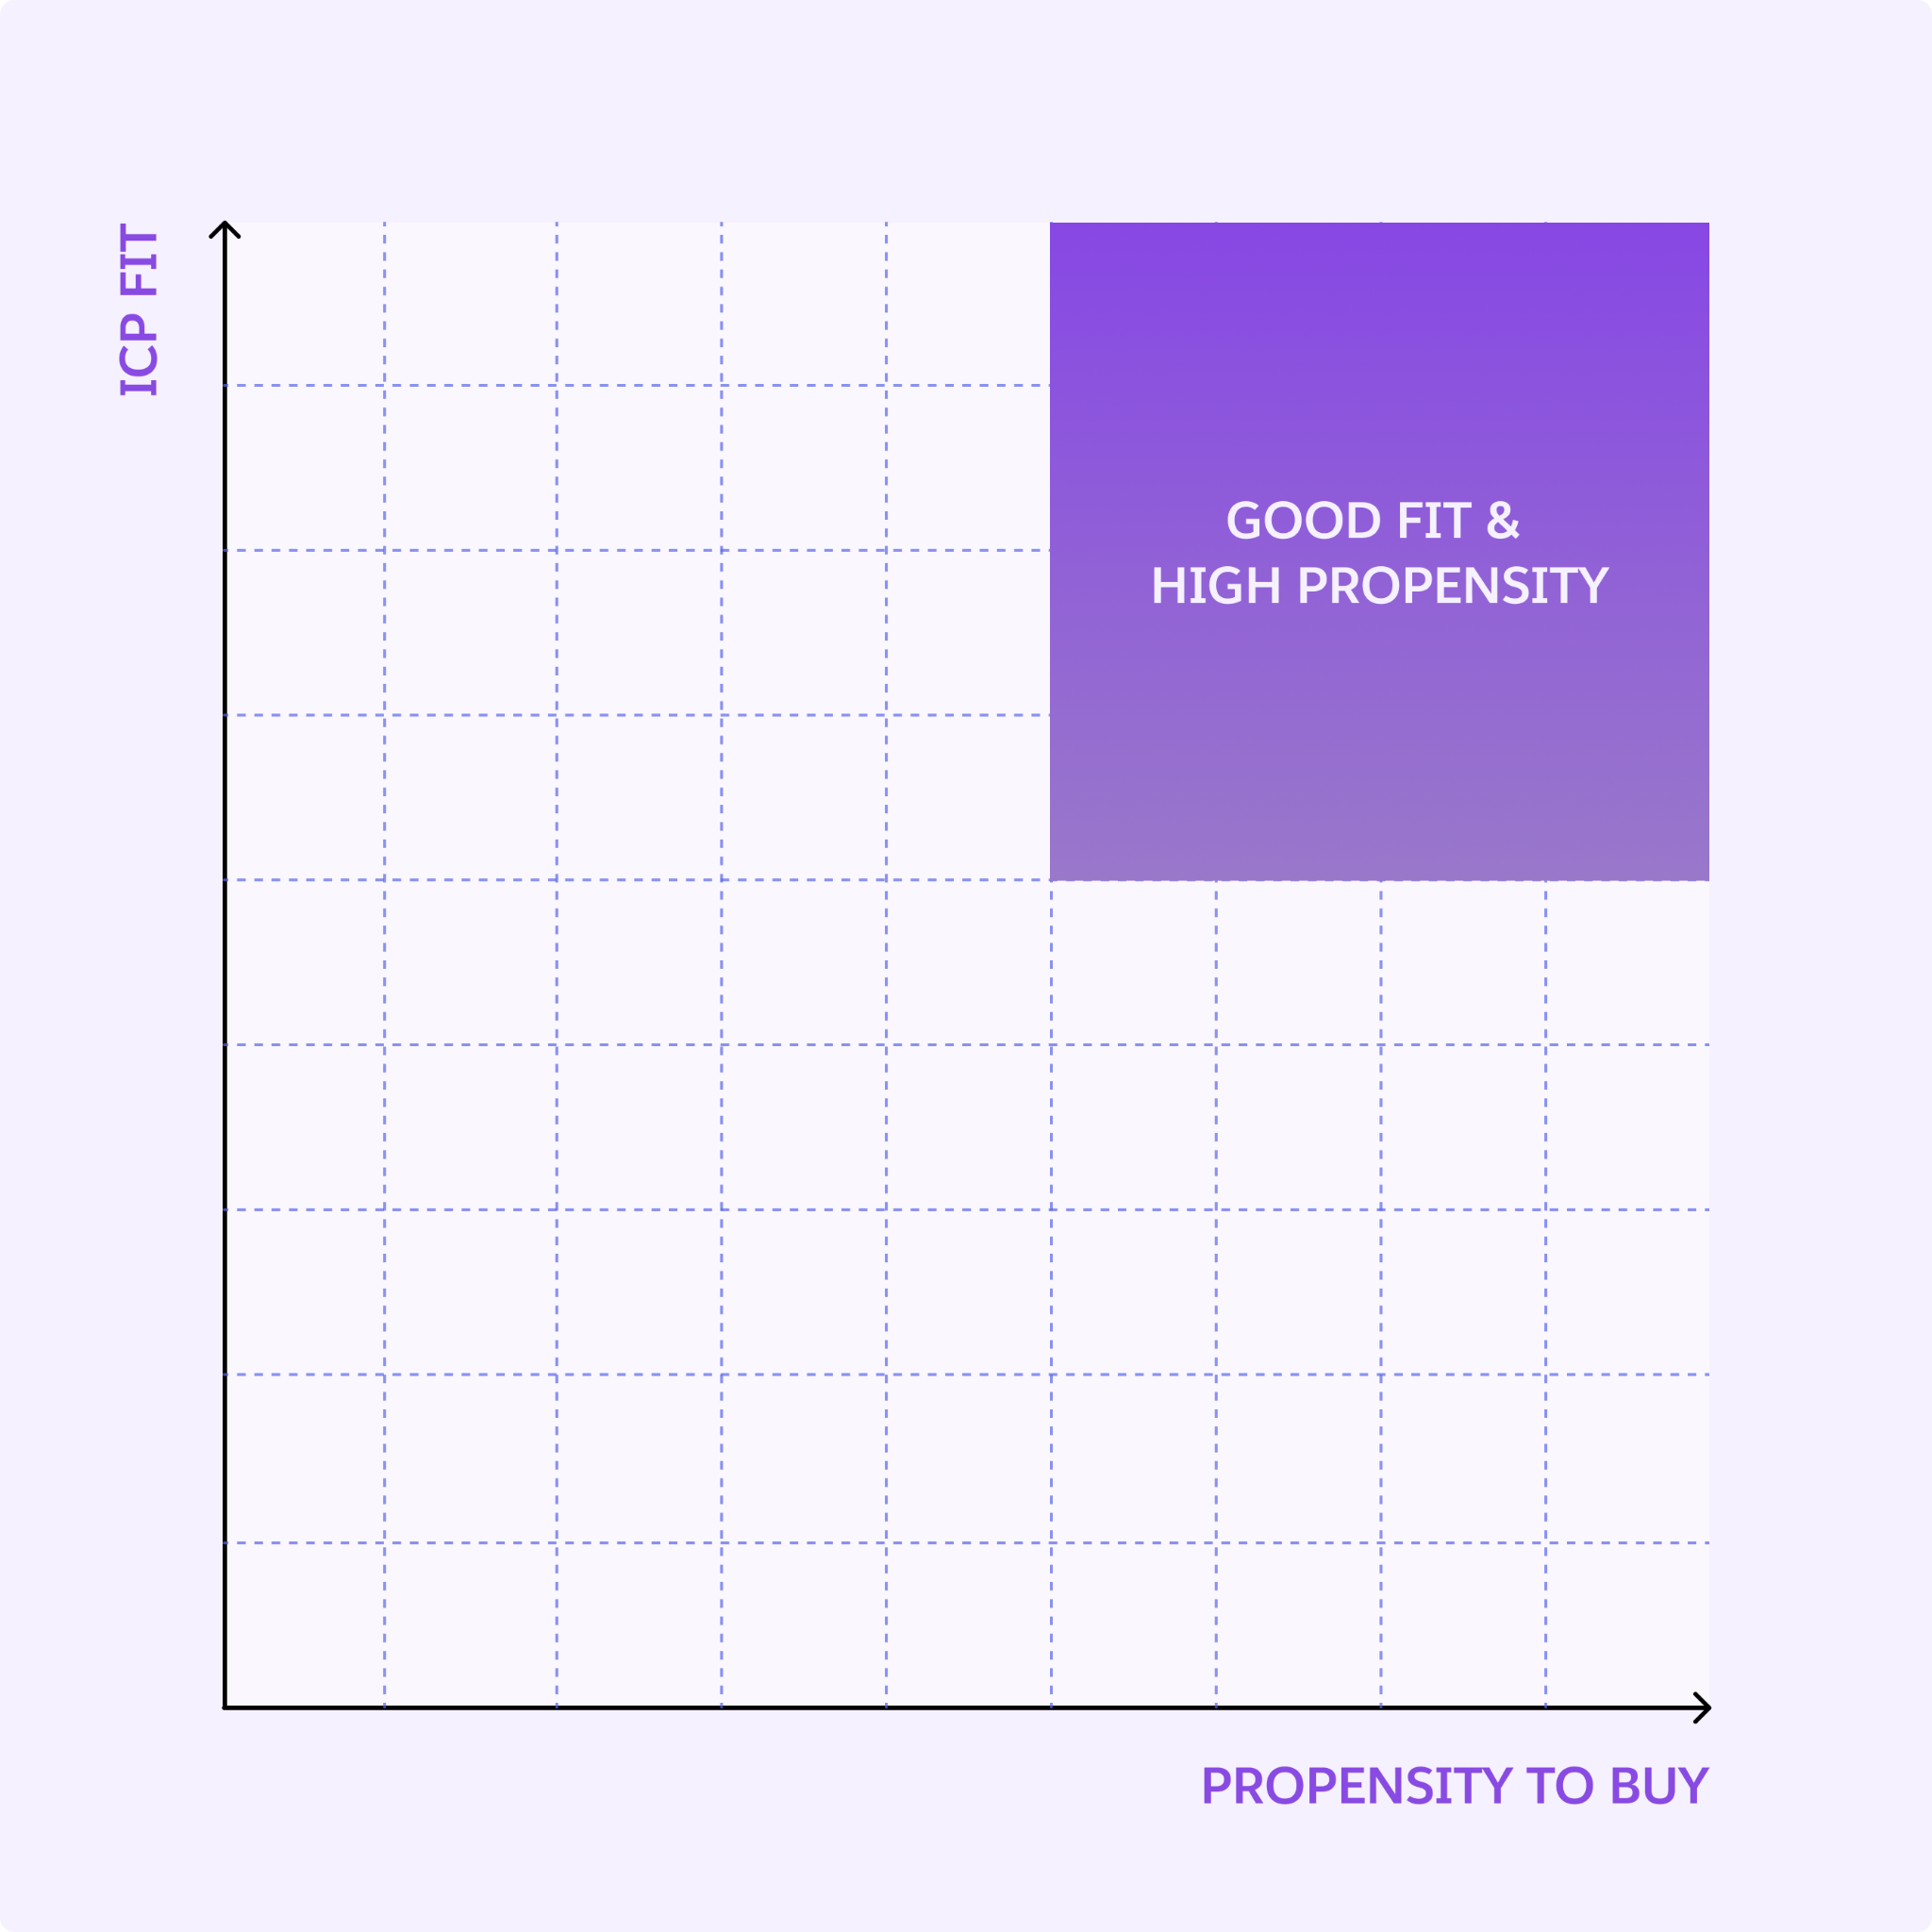
Let's take a look at the results.
- Click
 , type
Prospect, and select Prospecting. This opens the Prospects tab and shows all the new prospects the agent has generated for you.
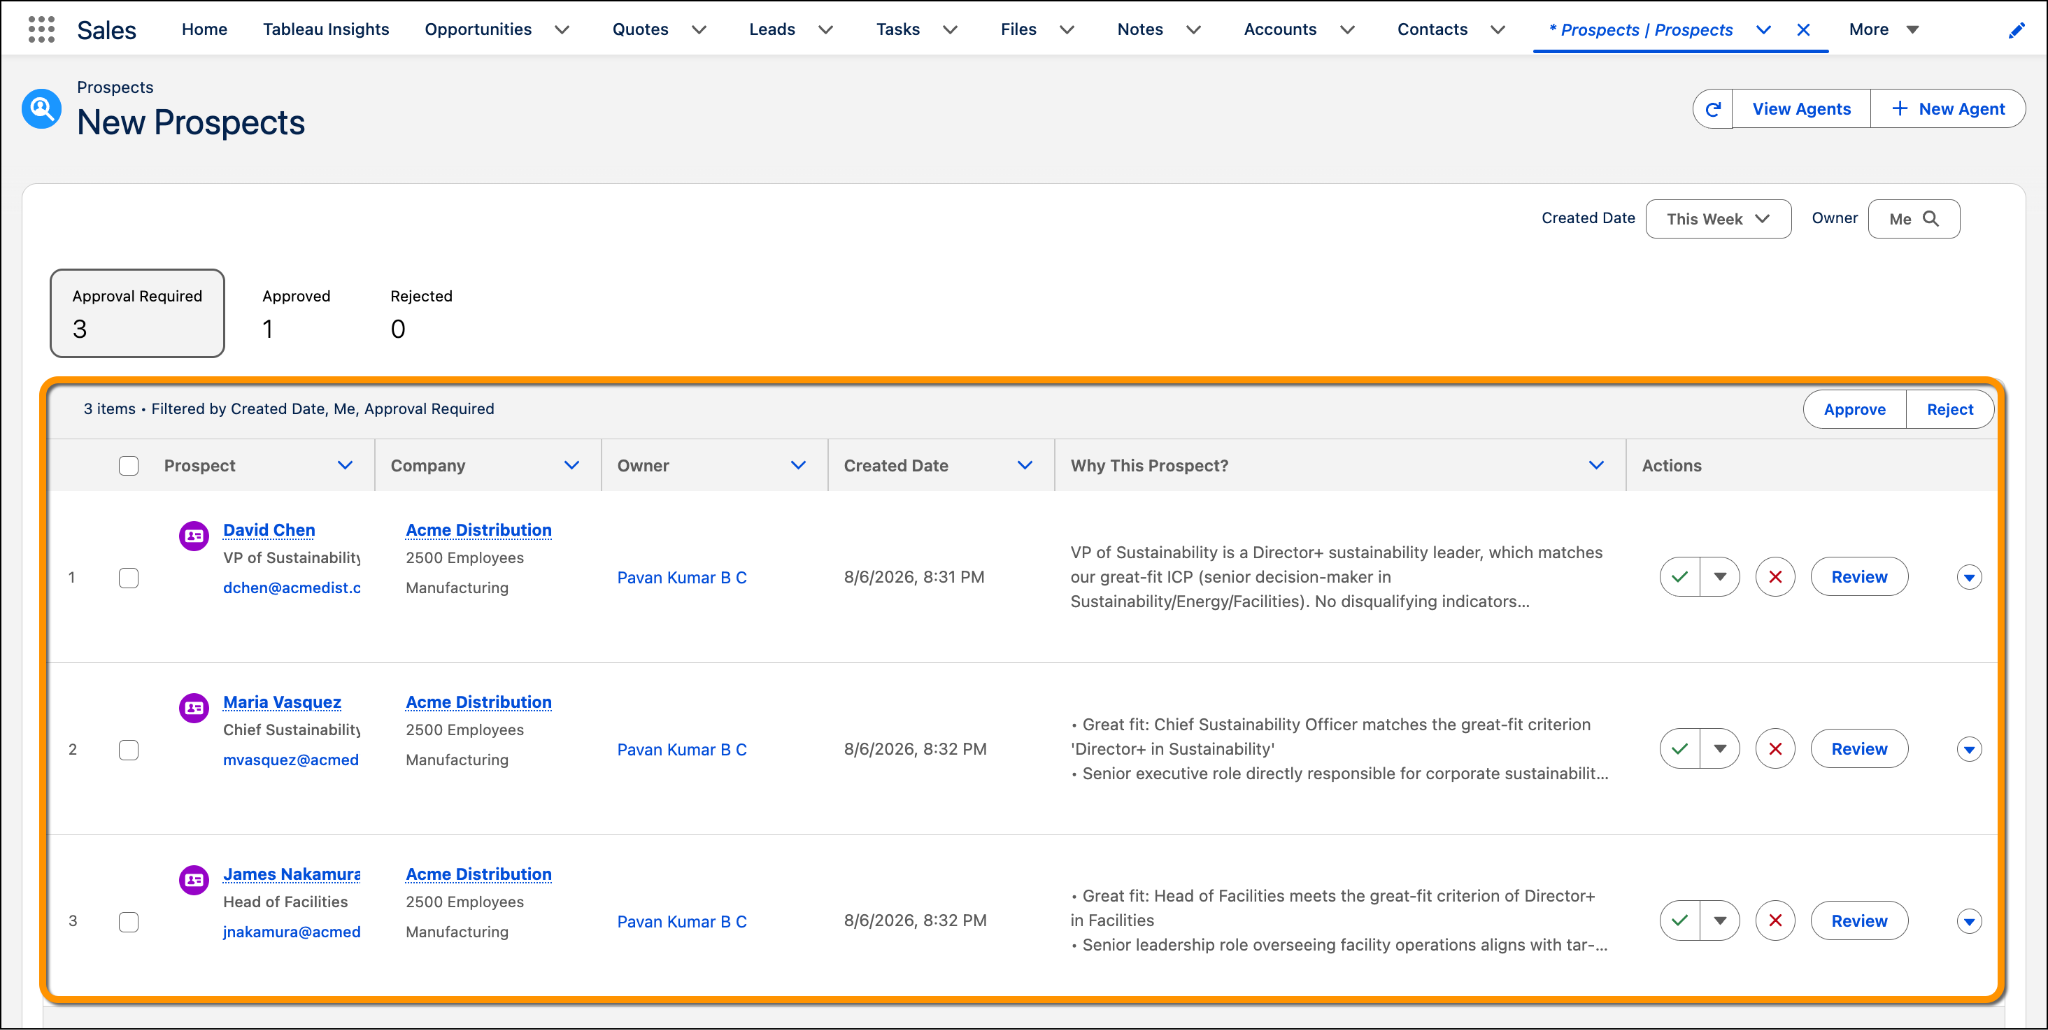
Take a look at the Why This Prospect? column to understand why each prospect was selected for the account.
- Click Review to see the detailed reasoning behind the recommendation, including why the account qualified and why the prospect was selected. Based on these insights, you can approve or reject the recommendation.
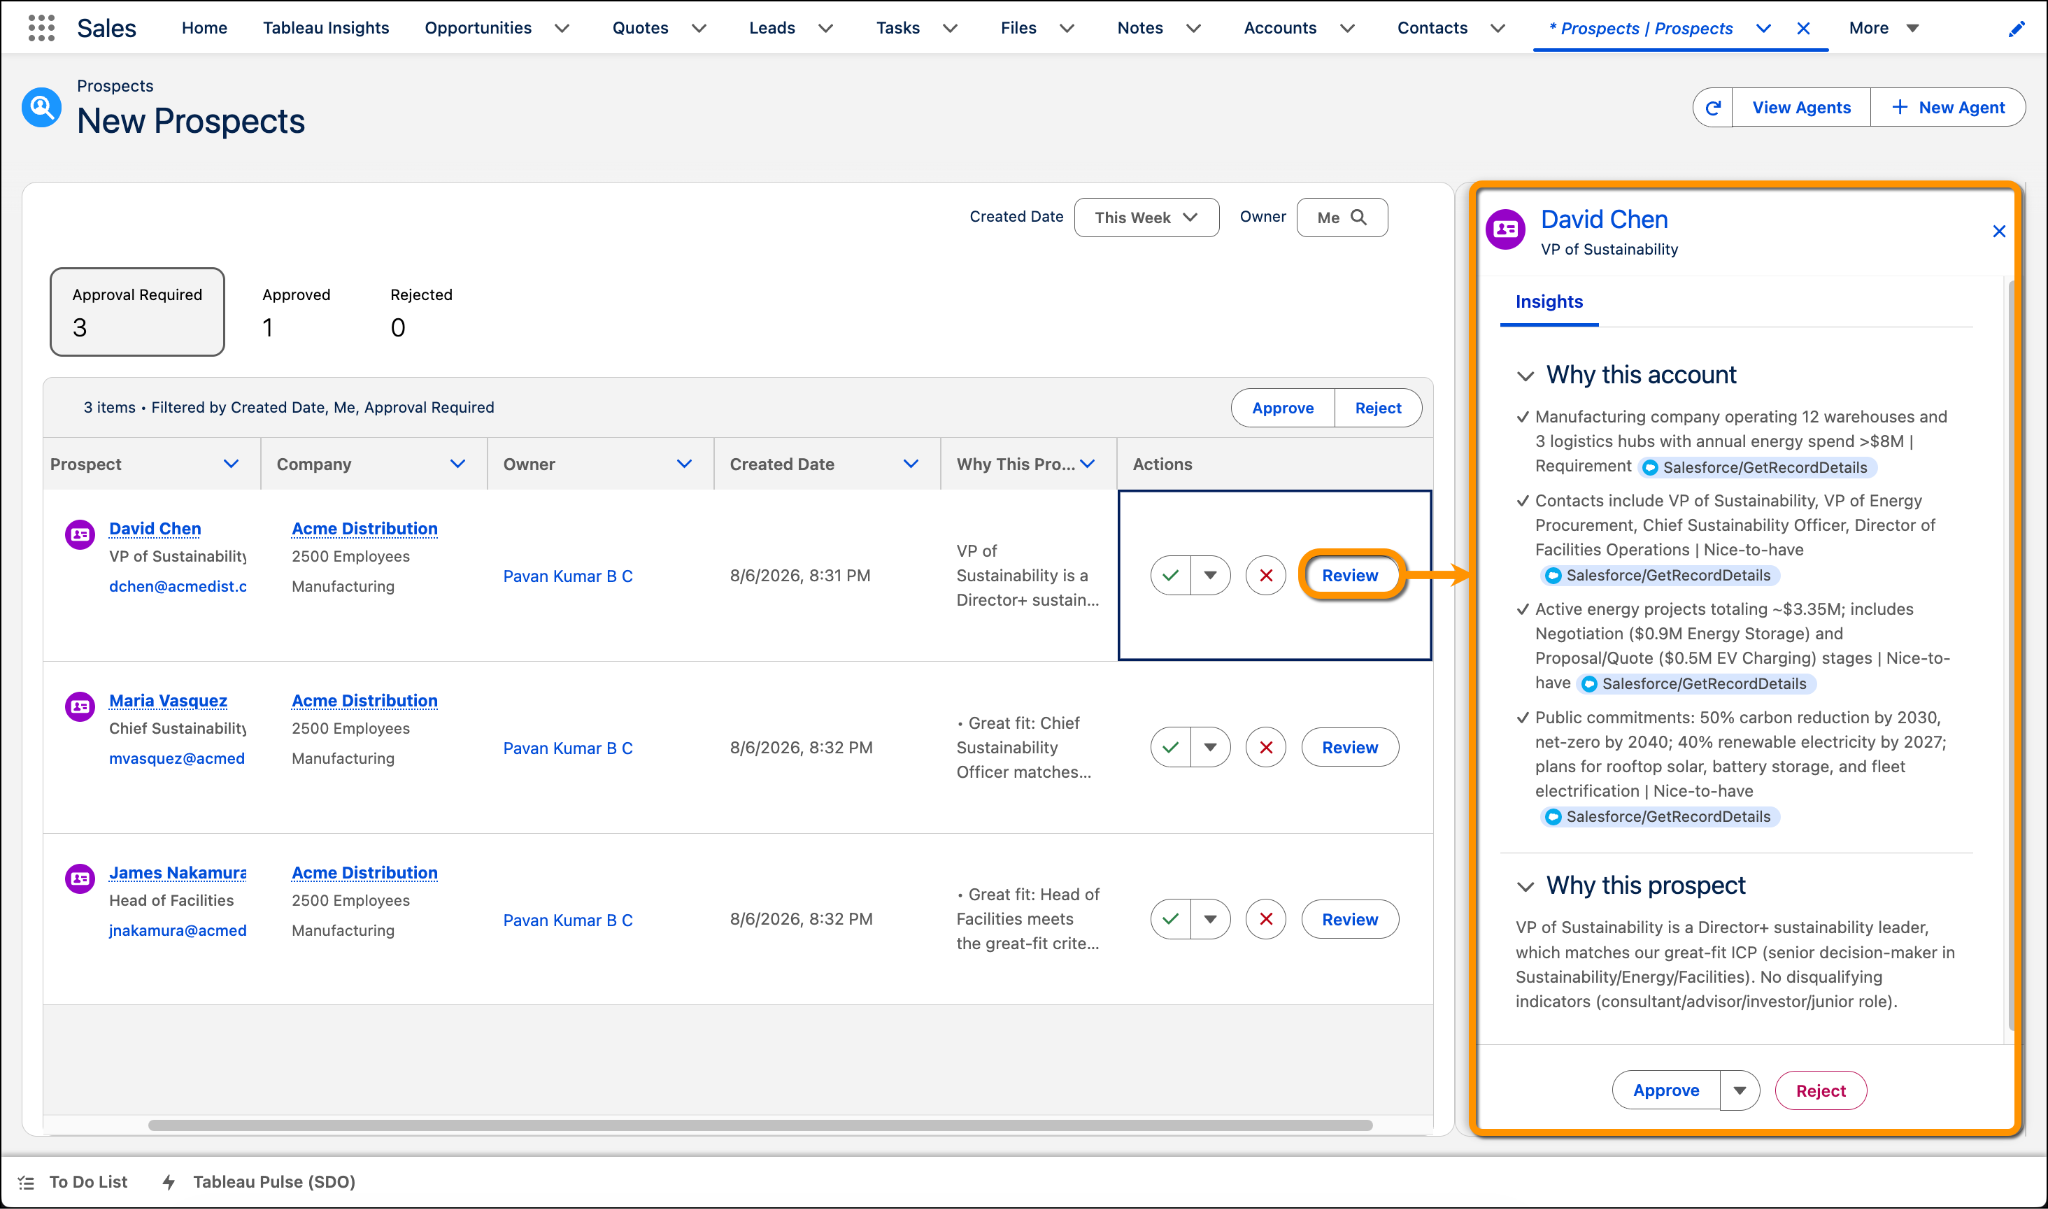
With your approved prospects in place, the next step is to engage them. You can add prospects to a Sales Engagement cadence to automate and schedule outreach, ensuring timely and consistent follow-up. Alternatively, assign approved prospects to an engagement agent, which can initiate personalized email outreach and nurture conversations until they're ready for a sales rep.
You can also create multiple prospecting agents for different types of work. For example, one agent could focus on accounts in a specific region, while another works through a backlog of low-priority accounts your team hasn’t had time to research. You might create separate agents for enterprise customers, SMB accounts, a specific industry, or accounts related to a new product launch. Instead of trying to manage every prospecting effort yourself, let each agent handle a specific bucket of accounts so your sales team always has qualified prospects ready to review.
Wrap Up!
You’ve done it! You’ve gone from manual tab-switching to autonomous prospecting. By enabling and configuring your prospecting agent, you’ve given your sales team a powerful new ally that handles the heavy lifting of research and prioritization. Now, instead of hunting for data, your reps can spend their time where it matters most: building genuine relationships and closing deals.