Automate Case Management
Learning Objectives
After completing this unit, you’ll be able to:
- Turn on basic case management tools with Salesforce Go.
- Customize queues from which service reps can share workloads.
- Assign cases automatically and escalate them when necessary.
- Respond to customers automatically.
Case Management in Salesforce Go
Case management means organizing customer cases into one place and making sure they go to the right person, for the right answer, by the right time. Salesforce Go Service does all that behind the scenes with a little input from you.
Before you begin, here’s some of the basic case management features you set up with Salesforce Go.
Feature |
Description |
|---|---|
Queues |
Automatically prioritize your service team’s workload by creating lists from which specific reps can jump in to solve certain types of cases. |
Assignment Rules |
Automatically assign incoming cases to specific reps so that the right people work on the right cases. |
Escalation Rules |
Automatically escalate cases to the right people when the cases aren’t solved by a certain time. |
Auto-Response Rules |
Automatically send personalized email responses to customers based on each case’s details. |
Plan for Case Automation
As with most feature implementations, it’s best to plan ahead. Ask your service team some questions about how they handle customer issues and what they need from basic case automation.
Your team’s answers help determine which tools to use. Here are some examples of questions and answers to figure out the right tools.
Question |
Answer |
Tool |
|---|---|---|
Do service reps work as a team on specific issues? |
Yes, some reps work off a list of emails as they arrive from customers. |
Queues |
How is the service team structured? |
We have Gold and Platinum support teams. Platinum support shares a workload. |
Queues or Assignment Rules |
Do service reps work on specific products or have special skills? |
Some reps work on product installation while others work on product performance performance or quality. |
Assignment Rules |
Do cases need to escalate to someone if they’re not solved by a specific time? |
Yes, we can’t have customers waiting more than 5 hours to get their issues solved. |
Escalation Rules |
Should customers receive automatic responses? |
Yes, we want customers to know that we received their issue and that we care about them. |
Auto-response Rules |
Share Case Lists or Workloads with Queues
Based on case automation planning, you know that the Platinum Support team shares a workload of incoming cases. These cases are from customers who pay extra for the best service.
To help these reps find and work off this list of cases from high-priority customers, create a queue.
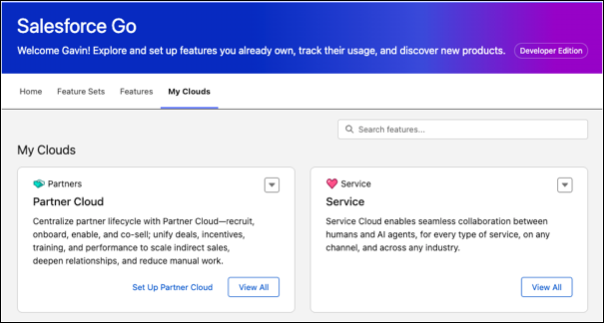
- Select Salesforce Go from the Setup Menu.

- Click My Clouds and then View All from Service.
- From the Features tab, click Set Up on Case Management.

- Click Get Started, then Turn On and Confirm to install a number of case management features. The installation might take a few minutes.
- After the installation is complete, click Review next to Create sample queues.

- In the Queues Setup page, click Edit next to one of the sample queues.

- Update the Label and Name for the queue to
Platinum Support.
- Make sure Case is added to Selected Objects.
- Add members, including yourself, to the queue and save your changes. Now that the queue is created, check it out as if you’re a service rep.
- Select the Service Console app from the App Launcher. Then click the Cases tab.
- From Search lists, choose Platinum Support.

- Here’s the queue, which is empty at this time.

Add Automatic Case Assignment with Rules
While planning for case automation, you learn that you can assign incoming cases to one person, groups of people, or even queues.
Since some of your service reps work on product installation, create an assignment rule so that any case with a reason that includes “installation” is automatically assigned to them.
- Select Salesforce Go from the Setup Menu.
- In Search Features, search for
Case Management.
- Click Review next to Create sample case assignment rules.
- Click New.

- Type
Installationand click Save.
- Select the rule you just created, and next to Rule Entries, Click New.
- Here’s where you add the details that determine case assignment.

- In Sort Order, type
1so that the entry you add is processed first. Typically, you’d create one assignment rule with many different entries, which are processed in chronological order. When a case matches an entry, it’s assigned without proceeding to other entries.
- For entry criteria, select Case: Case Reason equals Installation. One of the many useful things about case assignment rules is that you can determine how cases are assigned based on fields from records other than cases. For example, you can choose case assignment based on fields from accounts, contacts, assets, or users.
- Add yourself as the User assigned to the rule entry. (Assume you’re a service rep who’s an expert at installation.)
- In Email Template, click the lookup and choose a template so that you receive an email whenever a case with an installation reason is assigned to you.
- Save your changes.
- Click Edit to mark the rule as Active, then save your changes. When you activate an assignment rule, it disables any other assignment rules in your organization, so make sure that your active rule includes all of the assignment entries that your service team needs.
Now any cases about installation issues are automatically assigned.
Add Automatic Case Escalation with Rules
When planning case management with the service team, you learn that certain cases must escalate to the right person within 5 hours. A lingering customer case can ruin a big deal or tarnish your brand.
Just like assignment rules, you can use escalation rules to specify criteria that automatically trigger an action on a case. For case escalation, you use your org’s default business hours, which simply means your service team is available 24 hours a day, 7 days a week. You can change Business Hours later from Company Settings in Service Setup.
Service Setup–unlike Salesforce Go–is a straight path to building or implementing only service features. Salesforce Go is a feature discovery and set up hub across all Salesforce features and products like Sales, Service, Revenue, and more. Since you’re familiar with Salesforce Go, set the escalation rule with the alternative setup path.
- Select Service Setup from the Setup Menu.

- Enter
Escalation Rulesin the Quick Find box, then select Escalation Rules.
- Click New.
- Type
Gold Support, then click Active and save your changes. Activating a rule deactivates any existing active rules.
- Select the rule you just created, and click New to add a rule entry. Here’s where you add the details that determine when the case gets escalated.

- In Sort Order, type
1so that the entry you add is processed first. In the real world, you’d create one escalation rule with many different entries, which are processed in chronological order. When a customer issue comes in and is converted to a case, it’s assigned based on the first entry it matches.
- For entry criteria, select Case: Status equals New. Similar to other rules, you can determine automatic case escalation based on fields from records other than cases.
- Set business hours to your organization’s default 24/7 support.
- Set that escalation times are based on when cases are created.
- Save your changes, then click New to add an escalation action.
- In Age Over, enter
5. Here, 5 is the number of hours at which cases escalate when they have a status of New. Remember, you want cases Closed after 5 hours. You can set up escalation actions in 30-minute increments by selecting 30 from the minutes dropdown.

- Auto-assign cases to you, and from Notification Template, click the lookup icon to pick any template. At a real company, you’d assign cases to a service manager or team.
- Select yourself as the user to notify, and from Notification Template, click the lookup icon to add a template to see how this works.
- Save your changes.
Now any cases that haven’t been closed in 5 hours are assigned to the right person.
Note: To keep the Assign using active assignment rule box checked by default on cases, update the Layout Properties on case page layouts.
Add Automatic Responses to Customers with Rules
From your case automation planning, you know the service team wants customers to receive a confirmation when their case is received. With auto-response rules, you can make sure each customer knows that their voice is heard.
Set up response rules so that customers are automatically sent a personalized email when they ask for help.
- From Service Setup, enter
Case Auto-Response Rulesin the Quick Find box, then select Case Auto-Response Rules.
- Click New.
- Type
Welcome to Support, then Click Active and save your changes. Activating a rule deactivates any existing active rules.
- Select the rule you just created, and click New to add a rule entry. Here’s where you add a few details that determine which email template to send to a customer.

- In Sort Order, type
1so that the entry we add is processed first. In the real world, you’d create one response rule with many different entries, which are processed in chronological order. When a customer issue comes in and is converted to a case, it’s assigned based on the first entry it matches.
- For entry criteria, select Case: Case Origin equals email. Similar to escalation rules, you can determine the automatic response to send to a customer based on fields from records other than cases.
- Add a name and email address to include in the From line of the email template to send to customers.
- From the lookup field, pick any template to see how this works.

- Save your changes and you’re done.
With some case management features set up, you’re ready to add some basic channels from which your customers can reach your service team.
Resources
- Salesforce Help: Set Up Queues
- Salesforce Help: Assignment Rules
- Salesforce Help: Set Up Escalation Rules
- Salesforce Help: Set Up Auto-Response Rules