Set Up the Validation Status
Learning Objectives
After completing this unit, you’ll be able to:
- Enable the validation status for articles.
- Display the validation status at the top of the article.
- Change the validation status.
- Add an item to the validation status picklist.
Enable the Validation Status
Validation status indicates the state of a knowledge article. Right now, at Ursa Major, articles have one of the following statuses.
- Not validated. An article still must go through review and validation.
- Validated. Ada has reviewed and validated an article, and it’s ready to go.
But before agents use the validation status on their articles, Maria must activate it.
- From
 , select Setup.
- In the Quick Find box, enter
Knowledge Settings.
- Click Knowledge Settings.
- Click Edit.
- Select Activate Validation Status field. In new Trailhead Playgrounds, this is automatically selected.
Now agents can use the validation status, but Maria wants to make sure they can easily find it.
Add Fields to the Compact Layout
The section at the top of each record is called the compact layout. It’s a quick summary of key fields. Maria configures the compact layout to include the validation status field so agents see it right away.
- From
 , choose Setup.
- Click Object Manager and select Knowledge.
- Click Compact Layouts.
- Click New.
- For Label, enter
Knowledge Compact Layout for Agents.
- Move Validation Status to Selected Fields.
- Move Article Number, Article Record Type, Version Number, Publication Status, and Last Modified Date to Selected Fields.
- Click Save.
Make sure that the right users see this compact layout assignment by assigning it to users based on their record type.
- Click Compact Layout Assignment.
- Click Edit Assignment.
- Click the record type to assign. Maria selects FAQ and shift-clicks to select Procedure.
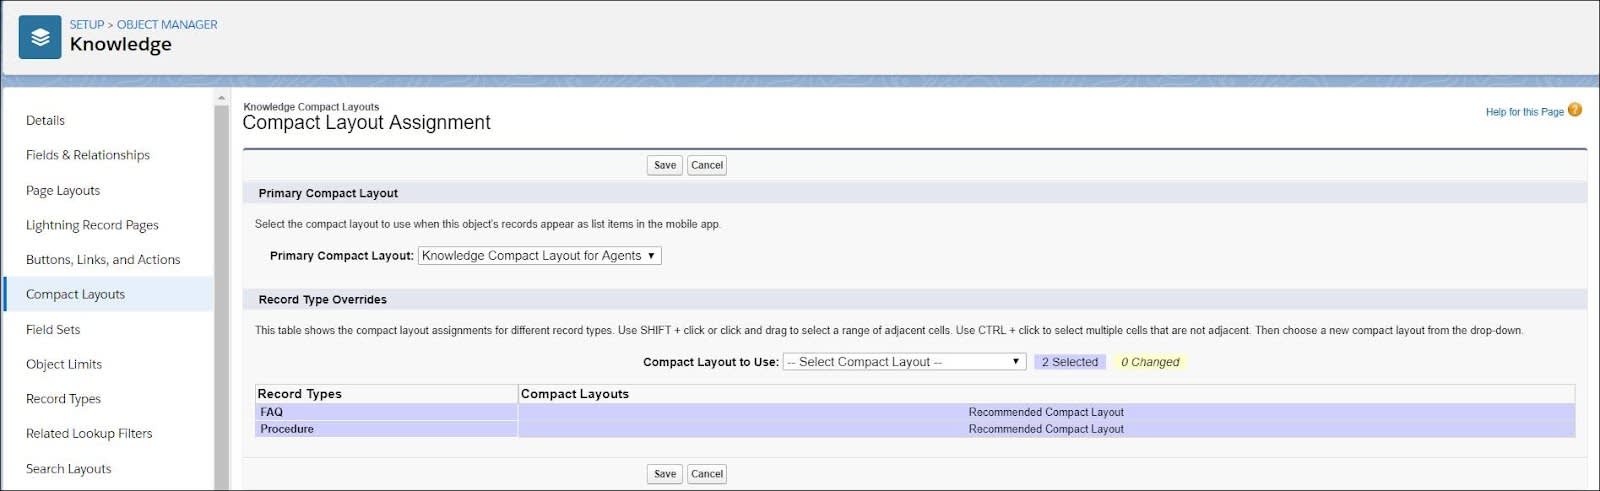
- From Compact Layout to Use, select Knowledge Compact Layout for Agents.
- Click Save.
Now, when Ursa Major agents view an article, they see its validation status right there at the top.

Edit the Validation Status
Maria has enabled validation status. Now agents want to know how they can change the validation status.
Since Maria didn’t initially add a validation status field to her page layouts, she does that now.
- From Setup, click Object Manager and select Knowledge.
- Select Page Layouts.
- Select a page layout such as Procedure - Author.
- Drag Validation Status from the Fields palette to the Article Details section. Save your work.
- Repeat for any other page layouts for articles where you want agents to be able to change the validation status.
Now agents (and Maria) can change the validation status of an article.
- From the App Launcher, find and select Service, then click Knowledge in the navigation bar.
- If no articles are listed, change the list view.
If you’re following along in a Trailhead Playground or other org, you might not have any articles to edit yet. If that's the case, we recommend that you create a few articles to test. Keep a couple of them as drafts and publish a couple of others. You can change the validation status for both draft and published articles.
3. Choose the Draft Articles list view.
4. From an article's dropdown, choose Edit.
5. Select a new status from the Validation Status picklist and save your work.
6. Repeat for any other articles (draft or published) whose validation status you want to change.
Create a Validation Status
At Ursa Major more agents are starting to write articles now, and Ada thinks that adding a Work in Progress status might help her track them. Work in progress indicates that an agent is working on an article and it’s not ready for her to validate.
Note: If you're using the Service Cloud trial org, the Work in Progress picklist item has already been created.
Here’s how Maria adds this new status to the Validation Status picklist.
- From
 , choose Setup.
- In the Quick Find box, enter
Validation Statuses.
- Click Validation Statuses.
- Click New.
- Enter the picklist item. Maria enters
Work in Progress.
- Select the record types that use this picklist value. Maria selects all listed record types.
- Click Save.
- Maria makes Work in Progress the default value by checking Default.
Validation statuses can be powerful when used with validation rules. You can use them to control the results of data entry, approval processes, and publishing actions. These constraints are based on a combination of user profiles, article state (validation status), and criteria in a record (validation rules). Maria’s excited by the possibilities.
Maria has helped Ada’s agents to easily view an article’s validation status and also added a Work in Progress validation status for articles. Now she and Ada start thinking about how to deliver finished articles to the right readers.
Resources
-
Salesforce Help: Compact Layouts
-
Salesforce Help: Define Validation Status Picklist Values
-
Trailhead: Lightning App Builder