Build Your Voice-Enabled Agent
Learning Objectives
After completing this unit, you’ll be able to:
- Create a voice-enabled service agent.
- Tune the voice settings for your agent.
Setting up an agent to handle inbound calls through Agentforce is a two-step process that brings structure, intelligence, and efficiency to your voice channel. First, you create an Agentforce agent that’s configured to receive and respond to inbound voice calls. This agent becomes the AI-powered frontline of your contact center, equipped to understand intent, answer questions, and resolve routine inquiries with speed and consistency.
In this unit you walk through the process of creating a voice-enabled agent.
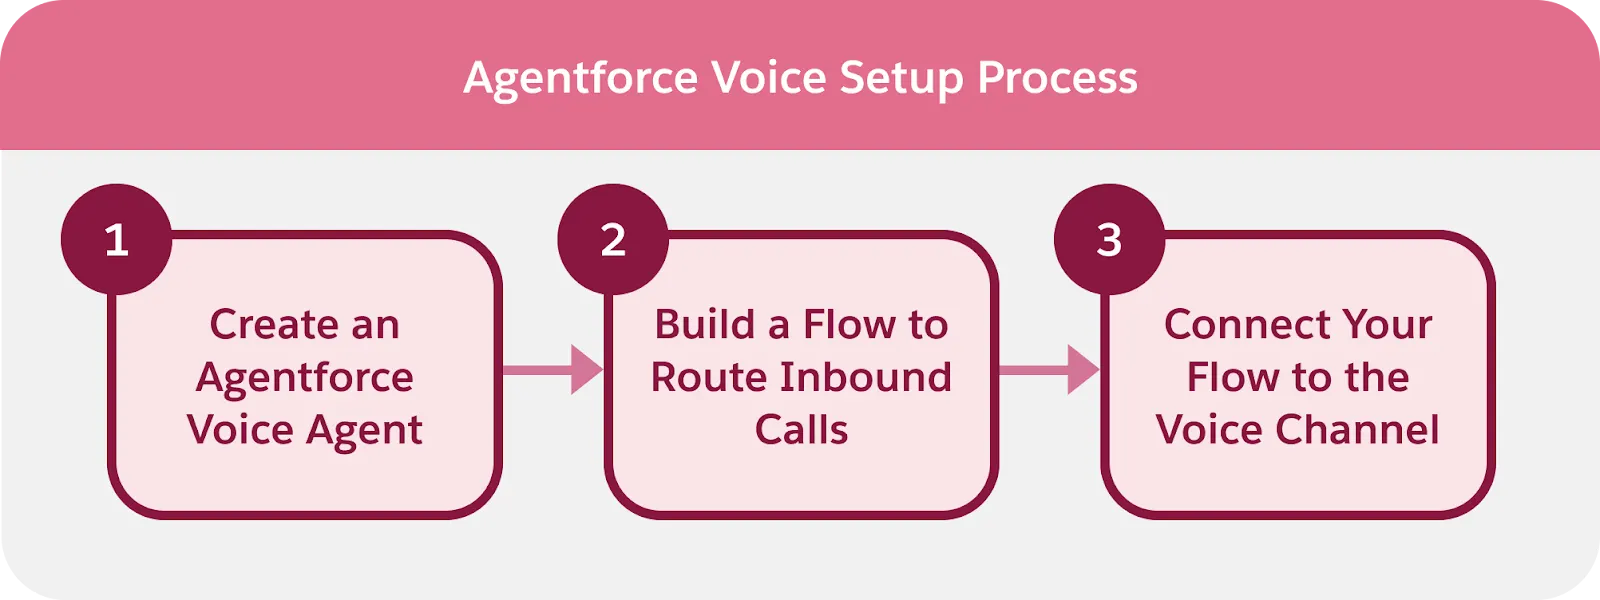
In the next unit, you build a flow that connects this agent to your telephony routing. This flow determines how calls are passed to the agent, how customer context is captured, and when a conversation should transition to a human representative. Together, these steps create a scalable voice experience that elevates customer support.
Create an Agentforce Voice Agent
Before you begin, ensure Agentforce is enabled in your org. Agentforce must be turned on to create AI agents and use its full set of capabilities.
- From the App Launcher, enter Agent, and then select the Agentforce Studio app.
- On the Agents tab, select New Agent.
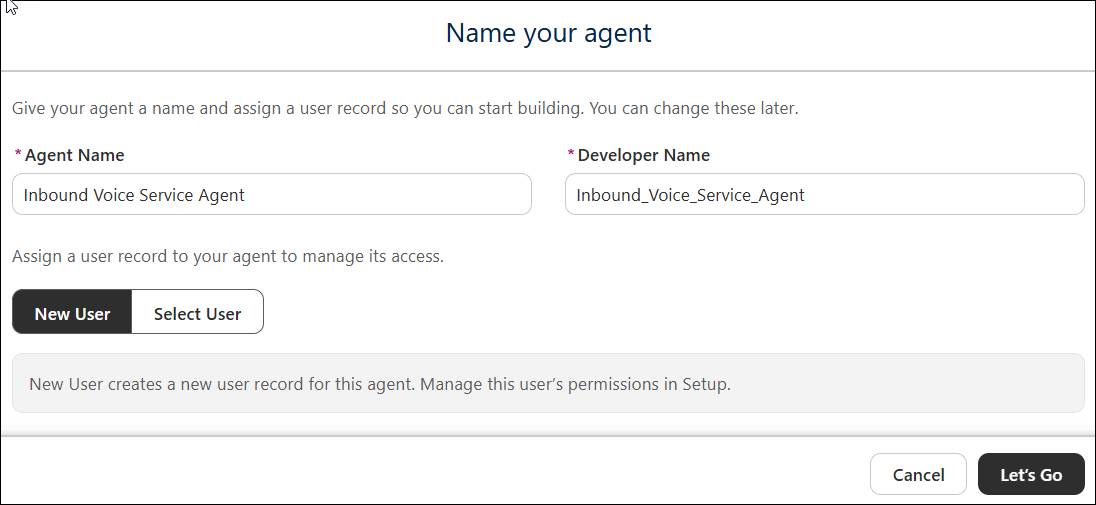
- Select the Agentforce Service Agent template. Under Agent Details, select or create an Agent's User Record for this agent.
- Enter the name: Inbound Voice Service Agent. Then select Let's Go.
- In the Settings section, select Agent Details and enter this description:
Deliver personalized customer interactions with an autonomous AI agent. Inbound Voice Service Agent intelligently supports your customers with common inquiries and escalates complex issues. - In the Settings section, select System. In the Agent level instructions field, enter:
An AI customer service agent whose job is to help customers with support questions or other issues. You represent Ursa Major Solar, which provides reliable, high-efficiency solar solutions for homes and businesses.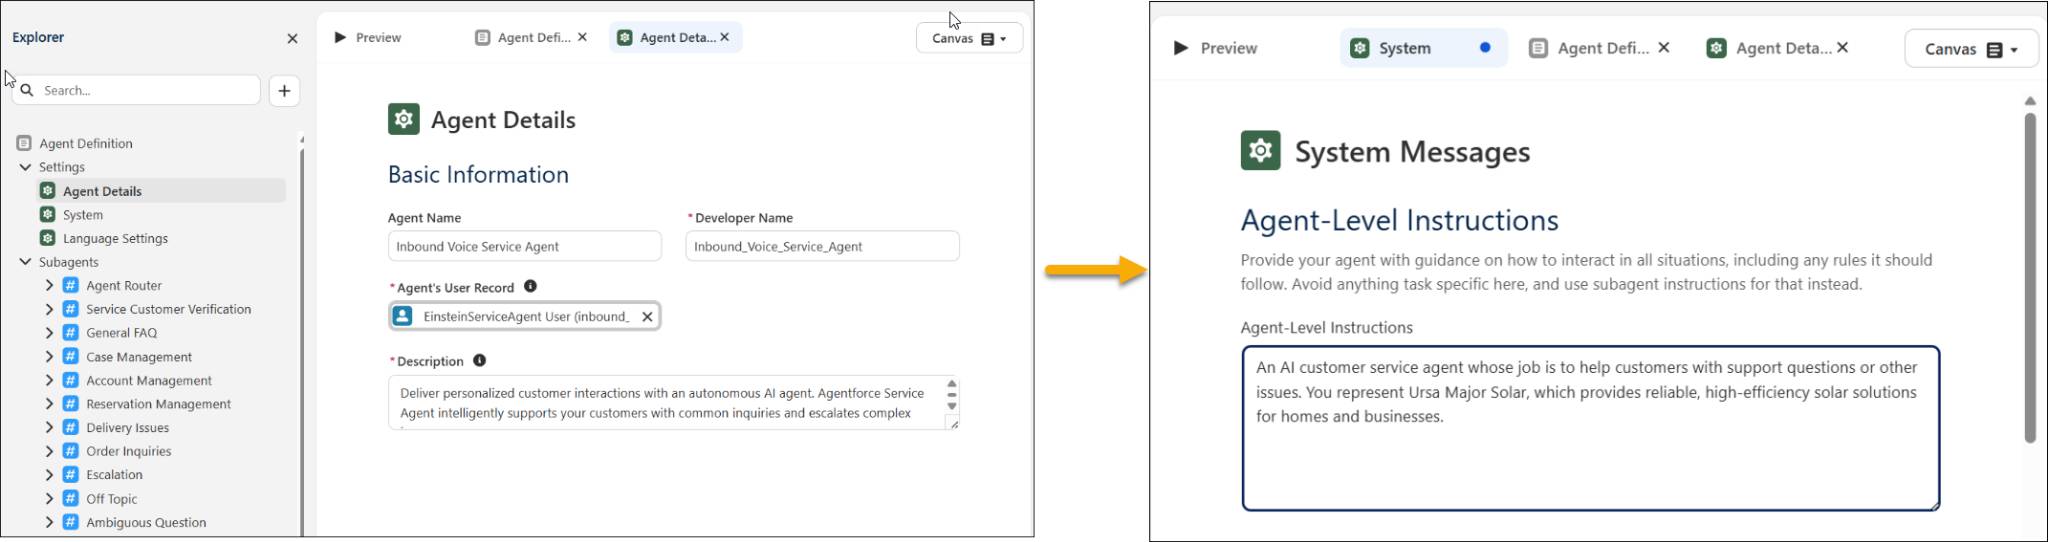
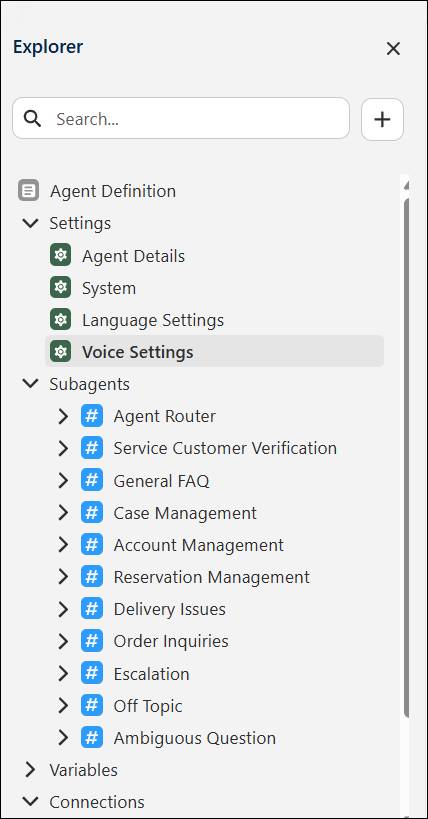
- Under Language Settings, set the default language to a language supported for voice.
- In the Subagents section, review and customize your agent's subagents and actions.
- Select Save.
You successfully created a new agent to handle the inbound voice traffic. The next step is to connect this agent to your telephony system, so it can receive routed calls and participate in live customer conversations.
Add a Telephony Connection
- In the Explorer panel, under Connections, select Add Connection.

- In the Add Connections window, select Telephony.
- Select Add to Agent.
A success banner confirms the connection was added and prompts you to go to Voice Settings to customize and preview your agent’s voice.
Just like that, you added the telephony connection to your agent and you’re ready to complete the setup.
Customize the Persona for Your Agent
When your agent speaks in a voice that reflects your brand and resonates with your audience, every interaction feels more natural, trustworthy, and human. Choosing the right voice improves clarity, reduces caller frustration, and reinforces the experience you want customers to have whenever they reach your service center.
Now that the telephony connection is in place, your next step is to select a persona—the voice your agent uses to speak with customers.
- In the Explorer panel, under Agent Definition Settings, select Voice Settings.
- Under Basic, select a persona from the dropdown list. For each option, review the description and parameters such as gender, primary language, style, age, and accent to understand what the voice offers, and select Play to hear a preview. This is the voice your customers will hear when they engage with the AI agent, so choose one that complements your brand.
- Under Advanced, fine-tune the selected persona by adjusting speed, similarity, and stability so the agent sounds as natural, dynamic, or consistent as you need. You can slow the delivery or speed it up, make the voice more or less similar to the base style, and control how much variation or monotone delivery it uses. You can also define a pronunciation dictionary to specify exactly how the agent should say key words or phrases. Key-term prompting is designed to improve recognition of critical terms such as brand names or internal jargon, but should be used only carefully and only if you find the voice-enabled agent not recognizing certain terms. Make sure to test and preview these settings before deploying it to production.
 [Alt text: Voice settings screen in Agentforce Builder showing basic configuration for a voice and advanced tuning sliders for speed, similarity, and stability.]
- Once you’re satisfied with the agent’s voice, select Save, and then select Commit Version.
- Activate the agent. You’ll need to commit the version of the agent and activate before you can configure inbound routing.
Wrap It Up
You successfully configured and activated a voice agent to engage with customers and scale contact center operations. In the next unit, you set up the flow that routes calls to the agent. Then, you connect that flow to the voice channel to bring the full experience together.