Set Up Business Manager Users
Learning Objectives
After completing this unit, you’ll be able to:
- Explain how to create a Business Manager user.
- Explain unified authentication.
- Explain why it’s important to create passwords for a storefront that’s under development.
- Explain what admins must do to change a password.
Define Agentforce Commerce User Roles
Account Manager and Business Manager roles are different. Account Manager roles pertain to actions within Account Manager, while Business Manager roles pertain to actions within Business Manager.
Account Manager creates, maintains, and disables Agentforce Commerce accounts. It also grants (or denies) access to selected apps based on the account's credentials. All Agentforce Commerce for B2C users require an account set up in Account Manager.
Use Account Manager to make user records and assign users to Account Manager roles. For instance, if you’re an Agentforce Commerce for B2C admin, you have the Business Manager Administrator role, which gives you admin access to Business Manager. Business Manager also has roles and permission requirements to access those roles.
Manage User Accounts with Account Manager
Account Manager supports two different types of users: account admins and non-admin users. Account admins can do everything non-admin users can do. Account admins can also create accounts, disable accounts, and so on. Each organization has at least one account admin.
The account admin assigns various roles to each account in Account Manager. Some roles grant a user access to Business Manager. Account Manager provides Business Manager users with multi-factor authentication (MFA) security. Depending on an organization’s settings, accounts can be local or linked to Salesforce Identity, which helps companies manage apps, users, and data sharing.
- With local accounts, all Account Manager roles require MFA to log into Account Manager.
- With Salesforce Identity, new users log in to Account Manager with MFA to complete linking their account with Salesforce Identity.
Refer to Register Verification Methods for Multi-Factor Authentication for more details.
Log Into Account Manager
Local Account
Here’s how you log into Account Manager with a local account.
- In a web browser, go to https://account.demandware.com/. (Requires an Account Manager account.)
- Enter your username (email address).
- Click LOG IN.
- Enter your password.
- Click LOG IN.
- Verify your identity with MFA.
Account Linked to Salesforce Identity
Here’s how you log into Account Manager with an account linked to Salesforce Identity.
- In a web browser, go to https://account.demandware.com/. (Requires an Account Manager account.)
- Enter your username (email address).
- Click LOG IN.
You’re redirected to Salesforce to log in. After successfully logging into Salesforce, you’re redirected to Account Manager and logged in without any further steps.
Change Account Information
Here’s how you change account information.
- Log into Account Manager.
- Click Account Details.
The Account Details page shows several fields whose values you can modify: First Name, Last Name, Business Phone, Mobile Phone, Home Phone, and Preferred Language.
- After you change the field values, click Update.
A message appears indicating that your account details are successfully updated.
- Click Continue.
Edit an Organization
The Account Manager account admin can edit an organization for each of these requirements.
-
Password policies: Set the length, history, and days until expiration.
-
MFA: Select the verification methods available users need to log in to Agentforce Commerce for B2C apps.
-
Link accounts: Enable users to link their Account Manager accounts to an existing Salesforce Platform account.
Here’s how to edit an organization.
- Log into Account Manager.
- Click Organization.
- Click the organization you want to edit.
- Edit the user’s name.
- Edit the password policy settings.
- Minimum password length
- Length of password history: number of passwords remembered
- Days until password expires
- Configure password settings:
- Minimum number of alphabetic characters in a password: 1
- Minimum number of digits in a password: 1
- Number of password policy categories that are cross-checked: 2
- Maximum number of failed login attempts until an account is locked for 30 minutes: 6
- Enable users to link their Account Manager accounts with their Salesforce accounts in your Salesforce organization to provide Single-Sign-On (SSO) across Salesforce products: allow, enforce, or disable.
- Define which MFA methods your users can choose: Salesforce Authenticator, TOTP authenticator apps, or FIDO U2F/WebAuthn (FIDO2) compatible security keys.
- Click Save.
For most organizations, Salesforce has integrated MFA into the Agentforce B2C Commerce login experience and you can’t disable MFA. If MFA isn’t enforced for your organization, Salesforce strongly recommends that you enable it. There are two options.
- Select MFA enabled for all users in the organization to turn on MFA for everyone who logs in to Agentforce Commerce for B2C apps.
- Enable MFA by role.
- Click Add next to MFA User Settings.
- Search and select the roles that require MFA.
- To enable MFA for the selected roles, click Add.
To disable MFA for a role, click the trash bin icon next to the role.
Create Business Manager Users
Best practice: Use a naming convention for user IDs and email addresses.
In this example, you create Agentforce Commerce accounts for two individuals, Peter Wong and Lisa Beck.
- In Account Manager on the User tab, click Add User.
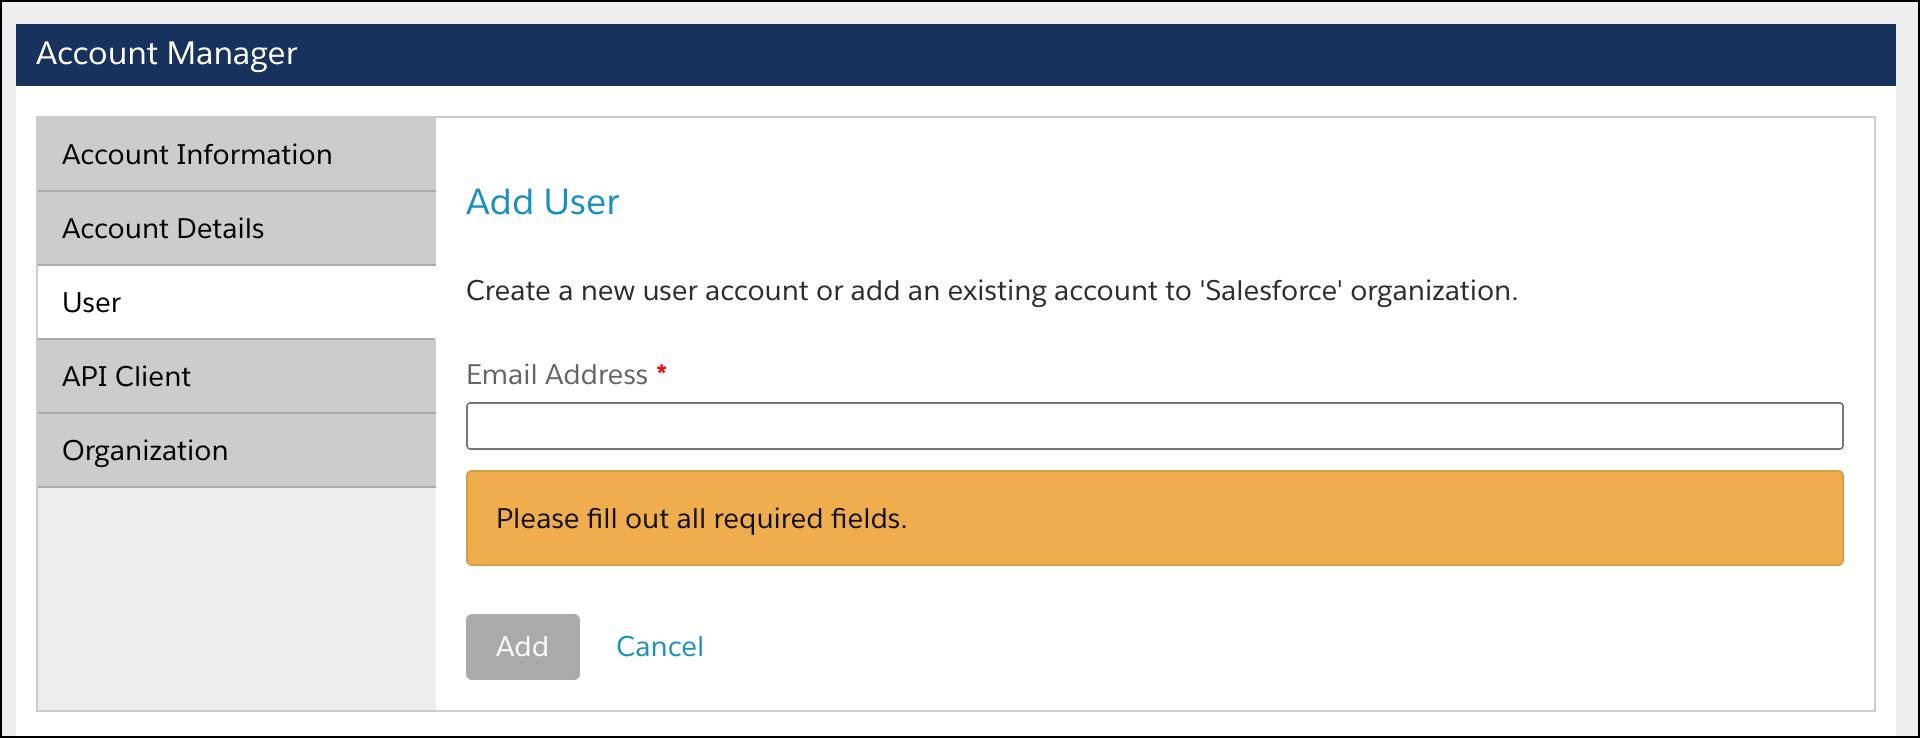
- Enter the email address: Peter Wong
- Click Add.
- Add user details.
- Email Address: p_wong@cloudkicks.com
- First Name: Peter
- Last Name: Wong
- (Optional) phone numbers and preferred language
- In the Organizations section, click Add.
- Select each organization to which the account belongs and click Add.
- Select Peter’s primary organization.
Only account admins for the primary organization can manage Peter’s account.
- In the Roles section, click Add.
- Select Business Manager Administrator for Peter in the eCommerce Platform section. This role requires access to a specific sandbox or PIG instances and a role scope.
- Click Add.
- Select the filter icon.
- Click the Add Instances Filters tab and select an organization.
- Enter the names of the instances you want Peter to access.
- Select the instances that Peter needs to connect to.
- Click Add.
Account Manager sends a message to Peter’s email address, which he can use to activate his account.
You create a record for Lisa in the same way, except with the Business Manager User role. The preferred data locale that displays when Lisa creates data is important because Lisa creates promotions, products, and content in that language. When the business expands to new geographic locations, the admin adds new languages to the appropriate users. For now, the default is English.
After you click Apply, Account Manager automatically sends an email to Peter and Lisa with a system-generated password that asks them to create a new password. The system requires users to update their password every 90 days.
Password Requirements
User passwords must meet certain requirements to access Business Manager.
- They must contain numbers.
- They must contain upper and lower case letters.
- The default minimum length is 8, and the default maximum length is 25. (You can change the defaults.)
- They must contain at least one special character by default.
Change User Info
With Account Manager, you can change all user account information, except the email address. If you experience an email policy change, you create new user records to change email addresses.
Expired Passwords
Account Manager automates some tasks, such as notifying the user by email 7 days and then 1 day before a password expires. Cloud Kicks set up this automation per its password expiration policy.
Password and ID Resets
You use Account Manager to reset a user's account. The reset option helps if the user forgets their password or if you want to unlink an Account Manager account from a Salesforce account. When you reset a user's account, the system puts the account in the initially created state. The user then reactivates the account.
Here’s how she resets an account:
- Log into Account Manager.
- Click User.
- Find the user.
- Click Reset beside their account.
- Confirm the reset.
- Click OK.
Account Manager resets the user's account. If the account is linked to a Salesforce account, Account Manager cancels the link. Account Manager sends a message to the user’s email address with an activation URL. Account Manager also shows a text message on the user's account that says the account was successfully reset and includes the activation URL. If the user doesn’t receive the email message, you can copy the activation URL and email it manually.
Unlock Locked Accounts
Sometimes users try and fail to log in too many times and end up locking their account. After six unsuccessful attempts to log in to an account, Account Manager temporarily locked the account for 30 minutes. An account admin can explicitly unlock locked accounts within the admin’s organizations.
- Log into Account Manager.
- Click Users.
- In the Organization User section, find the user’s record.
- Click Unlock next to the record.
Update User Login Settings
For this example, you update Business Manager user security settings to enforce a more secure policy.
- In Business Manager, click App Launcher, and select Administration | Global Preferences | Security.
- Configure these settings.
- Maximum invalid login attempts: Change this from 6 to 3.
- Lockout effective period: Leave this at 30 minutes.
- The number of days after which a user is required to change their password: Leave the default at 60 days.
- Accounts will be deactivated if not active: Change this from 90 to 60 days per the new policy.
- Is the user required to answer a security question to change their password? Leave this as no.
- Enforce password history: Ignore this.
- Minimum password length: Change this from 6 to 8 characters per the new policy.
- Minimum number of special characters: Leave this as 1.
- Minimum login length: Change this from 4 to 6 characters per the new policy.
Secure a New Storefront
When developing a new storefront, it’s a common practice to limit storefront access to only Business Manager users with the Access_Protected_Storefront functional permission. As storefront development continues, you expand access to some users who don’t have the Business Manager permission. To keep the storefront secure, you can use a few security options.
- Turn on password protection for the new storefront.
- Set the storefront access mode to “Access using user's password or access key.”
- Enable Storefront Toolkit access via “Access using Storefront Toolkit.”
- Create a shared site password to restrict access to development, staging, and production instances for the implementation team.
This password should only be used in limited cases. For example, for services that are unable to renew their password.
- Implement Online Protected mode to block access to dynamic and static pages.
Unauthorized login attempts result in an HTTP 401 error.
You can also invalidate the static content cache. Static content cache retains content shown on the storefront. This content is available to any user until it’s invalidated.
Here are the steps.
- In Business Manager, click App Launcher, and select Administration | Sites | Manage Sites.
- Select the new site name.
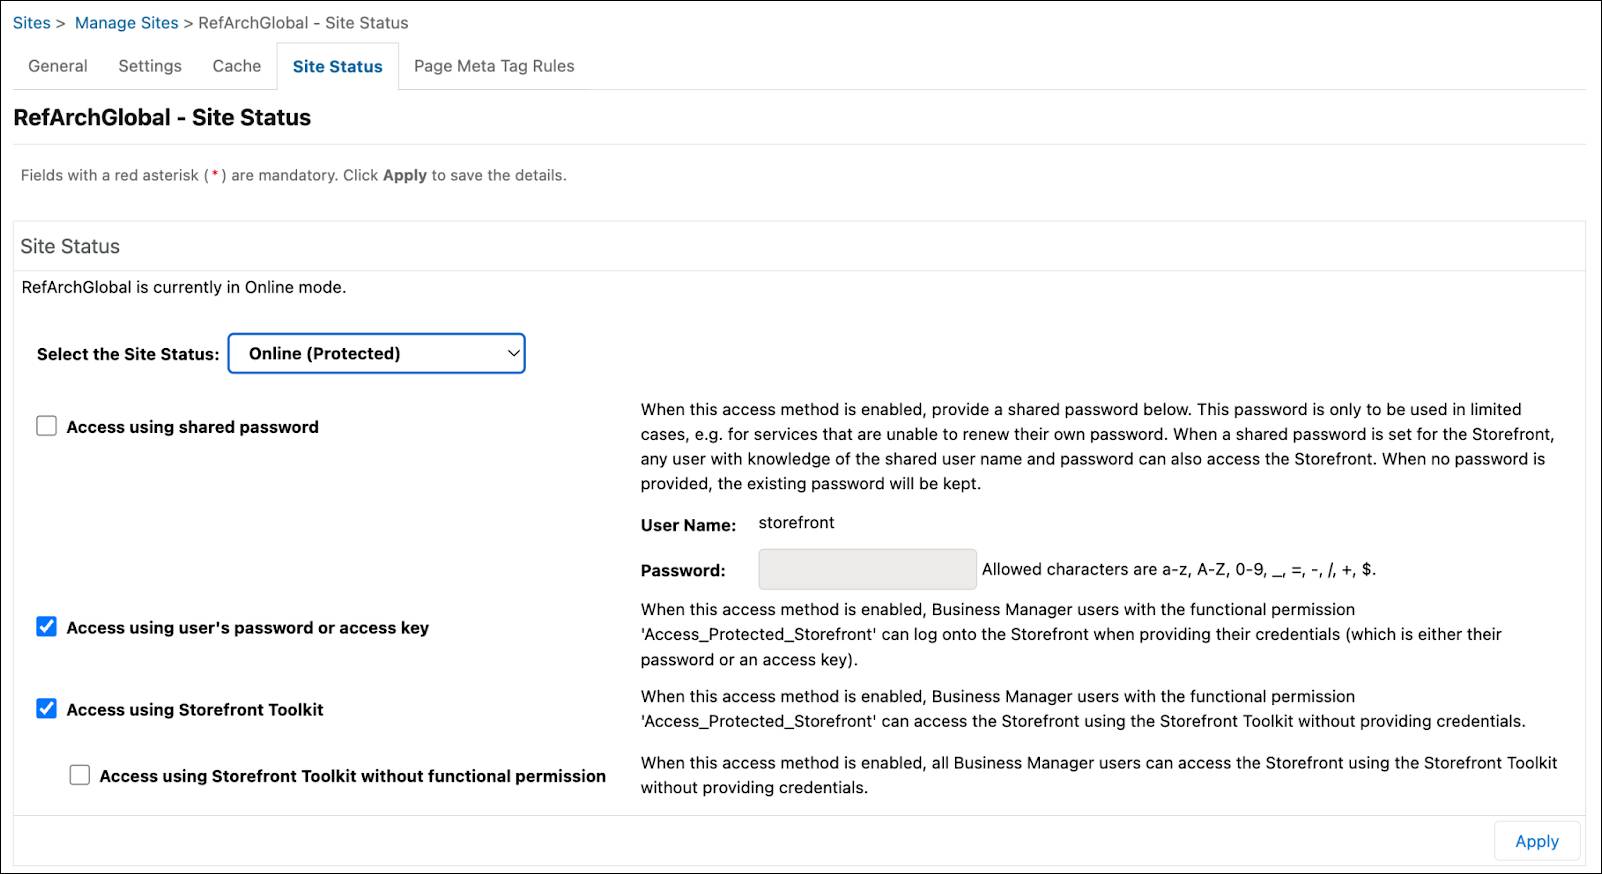
- Click the Site Status tab.
- Select the site status: Online (Protected).
- Select Access using “Access using user's password or access key” and enable the Storefront Toolkit access via “Access using Storefront Toolkit”.
- Click the Cache tab.
- Click Invalidate next to static content cache and Entire Page Cache for Site.
The storefront password doesn’t expire.
Next Steps
In this unit, you learned how to add a user and change user information in Account Manager. You also learned why it’s important to protect a fledgling storefront. In the next unit, you learn how to create roles and assign them to users.
Resources
- Trailhead: Salesforce B2C Commerce for Developers
- Trailhead: Architecture of Salesforce B2C Commerce
- Salesforce Help: Manage Salesforce B2C Commerce Users
- Salesforce Help: Link an Account Manager Account to Salesforce Identity (SSO) in B2C Commerce
- Salesforce Help: Log into Account Manager in B2C Commerce