Install K-12 Architecture Kit Into a Trailhead Playground
To install K-12 Architecture Kit into a Trailhead Playground, you’ll need to have a few things at the ready:
- The username and password for your Install K-12 Architecture Kit Trailhead Playground
- The URL to access the K-12 Architecture Kit installer: https://install.salesforce.org/products/k12/latest

Log In to Your Trailhead Playground
- Log in to Trailhead (if by chance you logged out since completing the last step). Click your photo and select Hands-On Orgs.
- From the Hands-On Orgs page, click the Launch button associated with your Install K-12 Architecture Kit Playground to open it in a new browser tab.

Run the K-12 Architecture Kit Installer
After you’ve logged into your Trailhead Playground, it’s time to run the K-12 Architecture Kit install tool (which is technically called metaDEPLOY, but we’re among friends here so we’ll continue to refer to it as the K-12 Architecture Kit installer):
- Copy and paste this URL into your browser to launch the K-12 Architecture Kit installer: https://install.salesforce.org/products/k12/latest
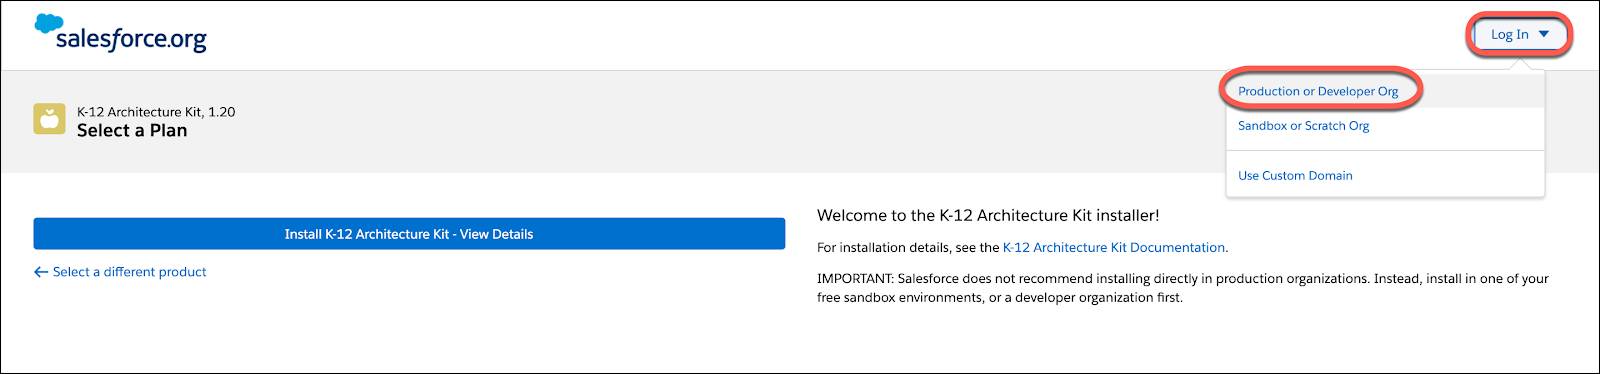
- On the K-12 Architecture Kit installer welcome page, click Log In and select Production or Developer Org. That’s the correct selection because Trailhead Playgrounds are developer orgs. Do not select the sandbox or scratch org option to install into a Trailhead Playground. Installing K-12 Architecture Kit using metaDEPLOY overwrites all existing customizations. If you’re at this step and using your production org or a different Playground, stop and make sure that’s where you want to be. If you proceed, your existing data will be deleted and customizations reset.
- The Salesforce login page will load. Log in using the username and password for your Install K-12 Architecture Kit Trailhead Playground. These are the credentials you took note of at the end of Step 1 of this project.
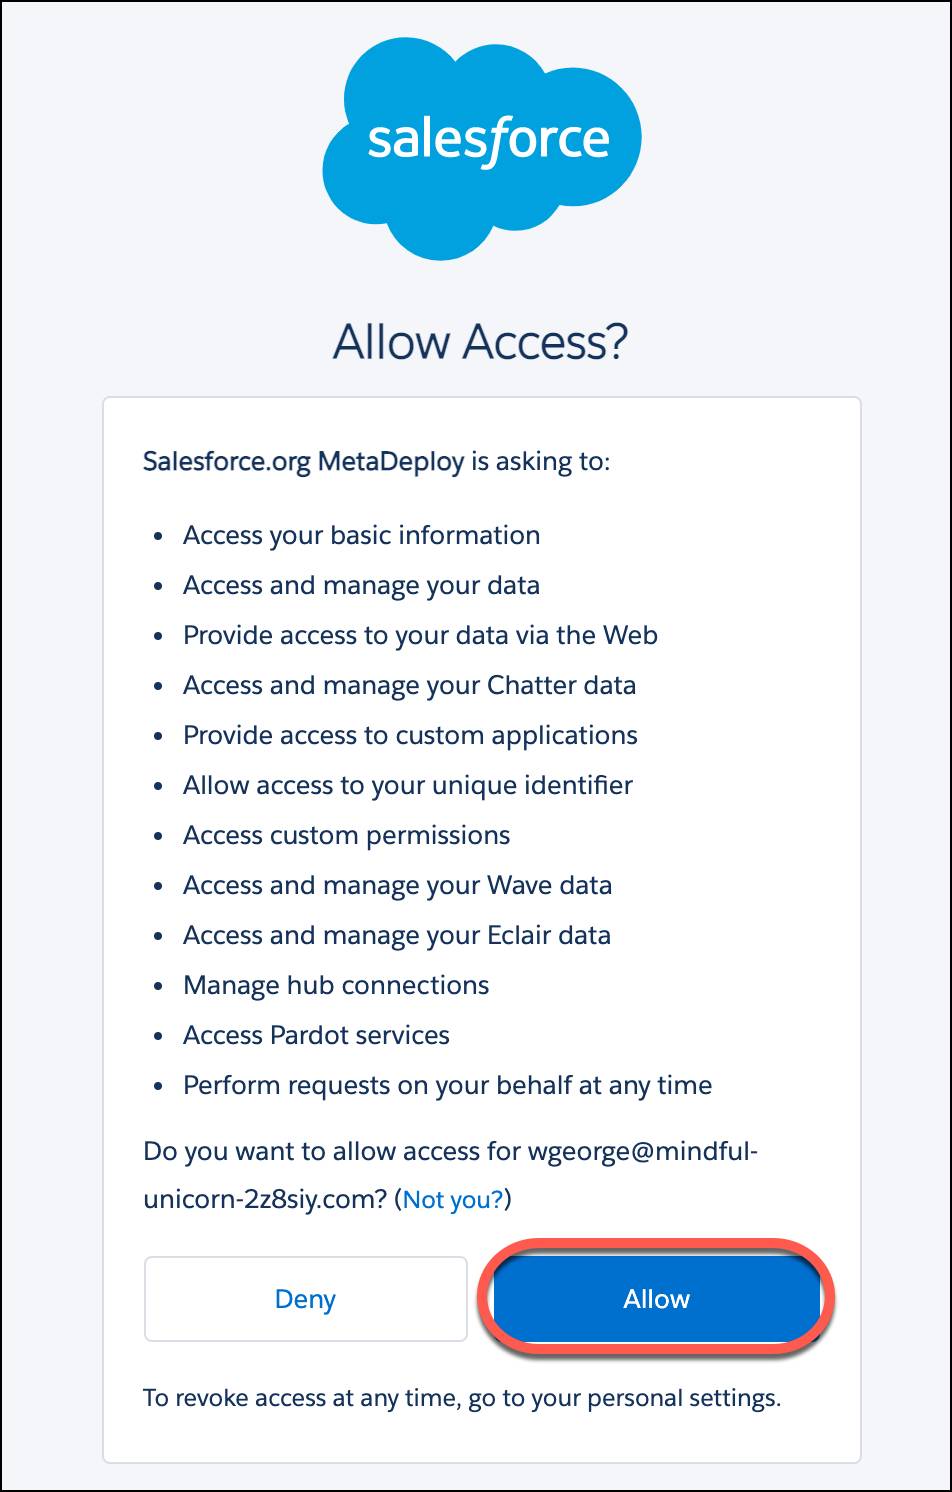
- After submitting your login credentials, you give the K-12 Architecture Kit installer permission to access your Trailhead Playground org. On the Allow Access page, click Allow.
- On the Welcome page click Install K-12 Architecture Kit - View Details.
- Review the information in the Connected to Salesforce section and verify that you’re installing into the correct org.
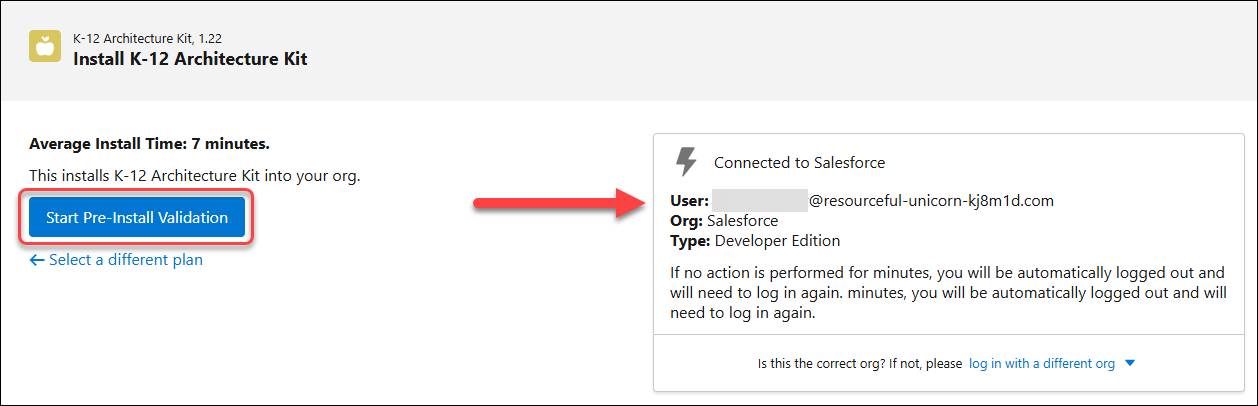
- Click Start Pre-Install Validation.
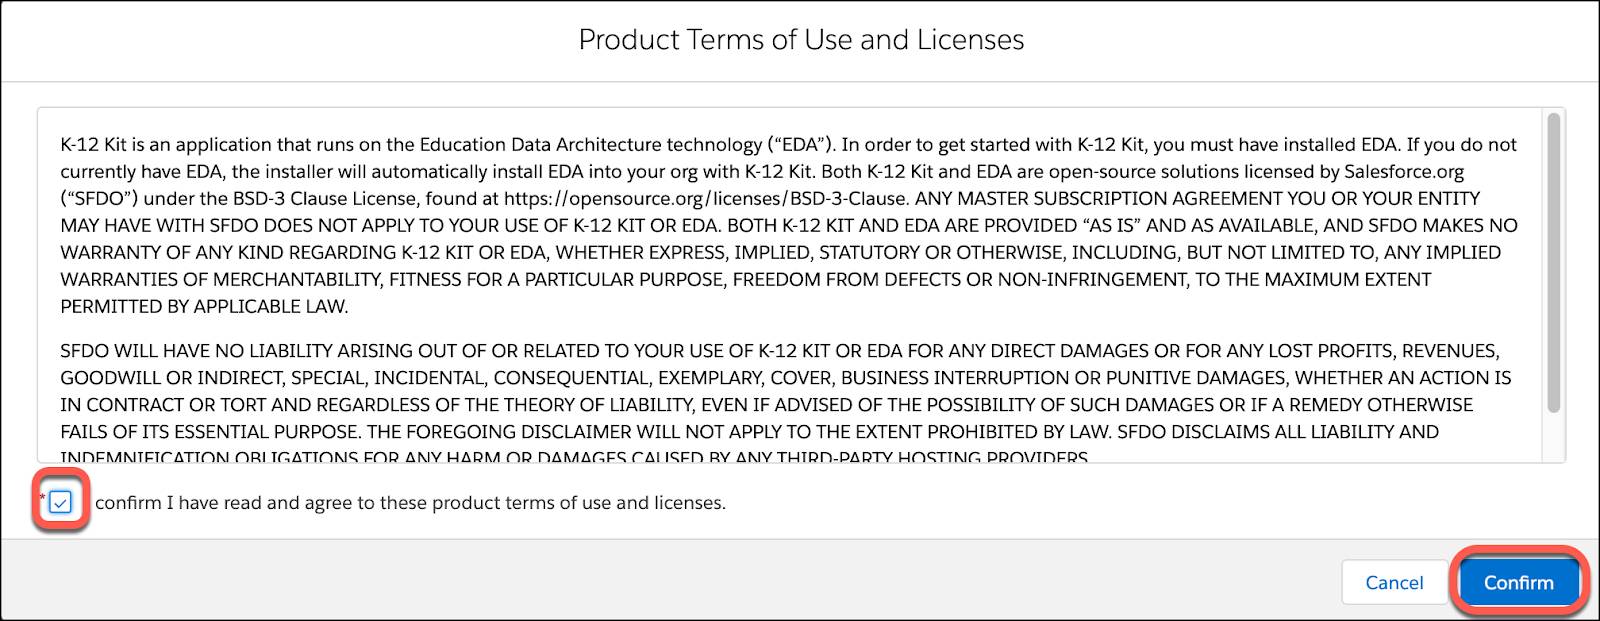
- After the validation completes, select Install.
- Tick the box at the bottom of the Product Terms of Use window to accept the Terms of Use. Click Confirm.
It will take a few minutes for all components to install, and you can watch your progress on the K-12 Architecture Kit installer page. You’ll get an email for the K-12 Architecture Kit package after it installs correctly in your Trailhead Playground. Because K-12 Architecture Kit is built on top of EDA, a successful install will also generate a few emails referencing the install of an EDA package.
When the install is complete, you’ll see a confirmation message at the top of the screen and a list of green check marks next to each package.
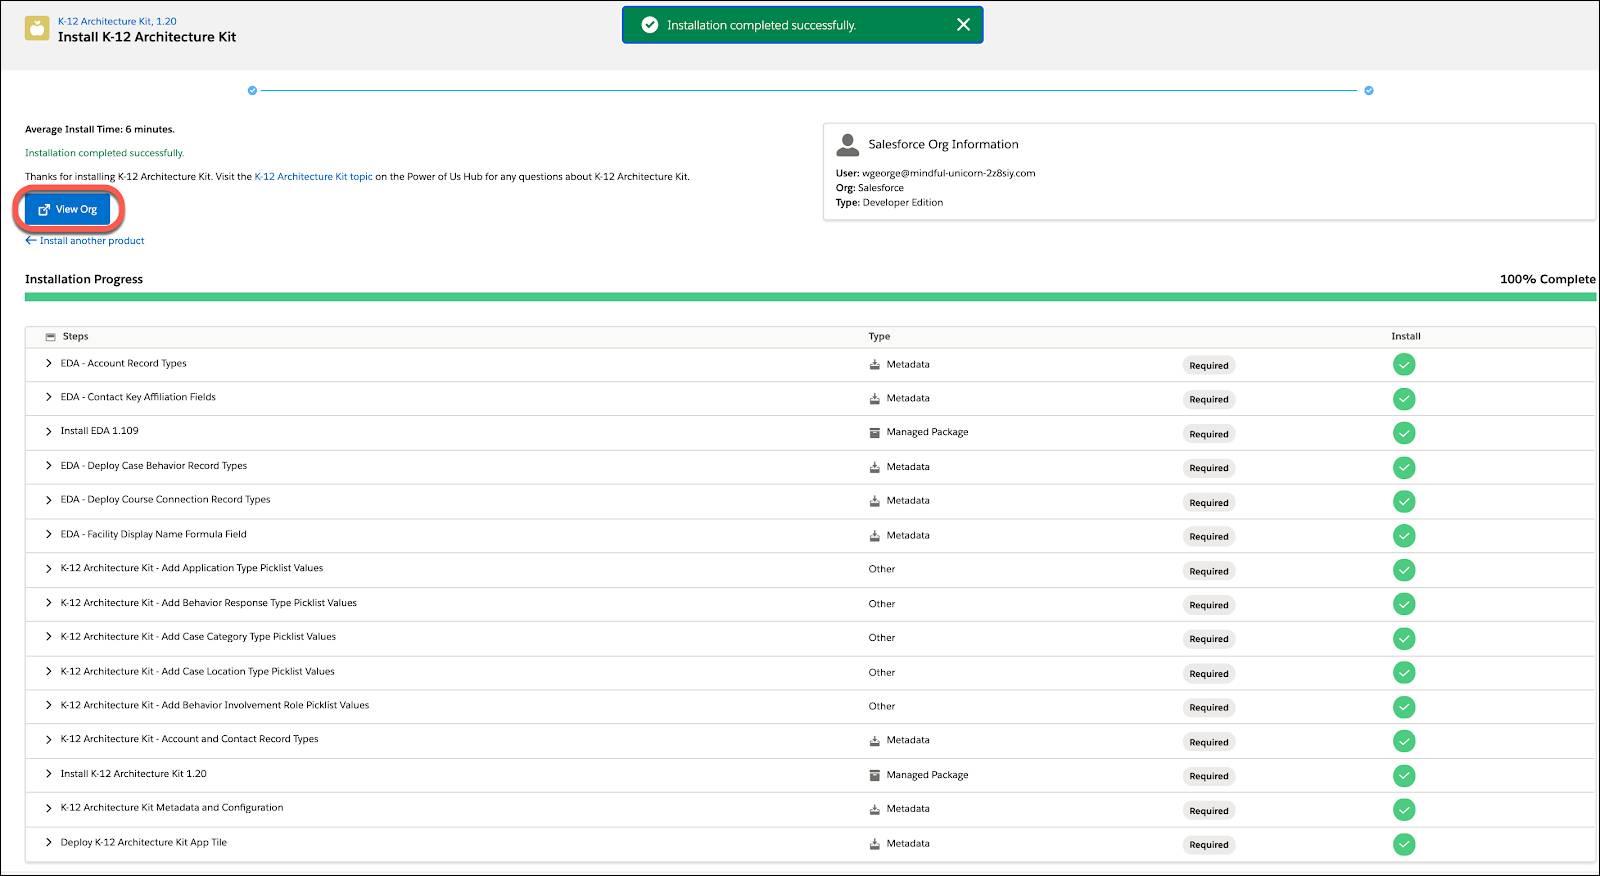
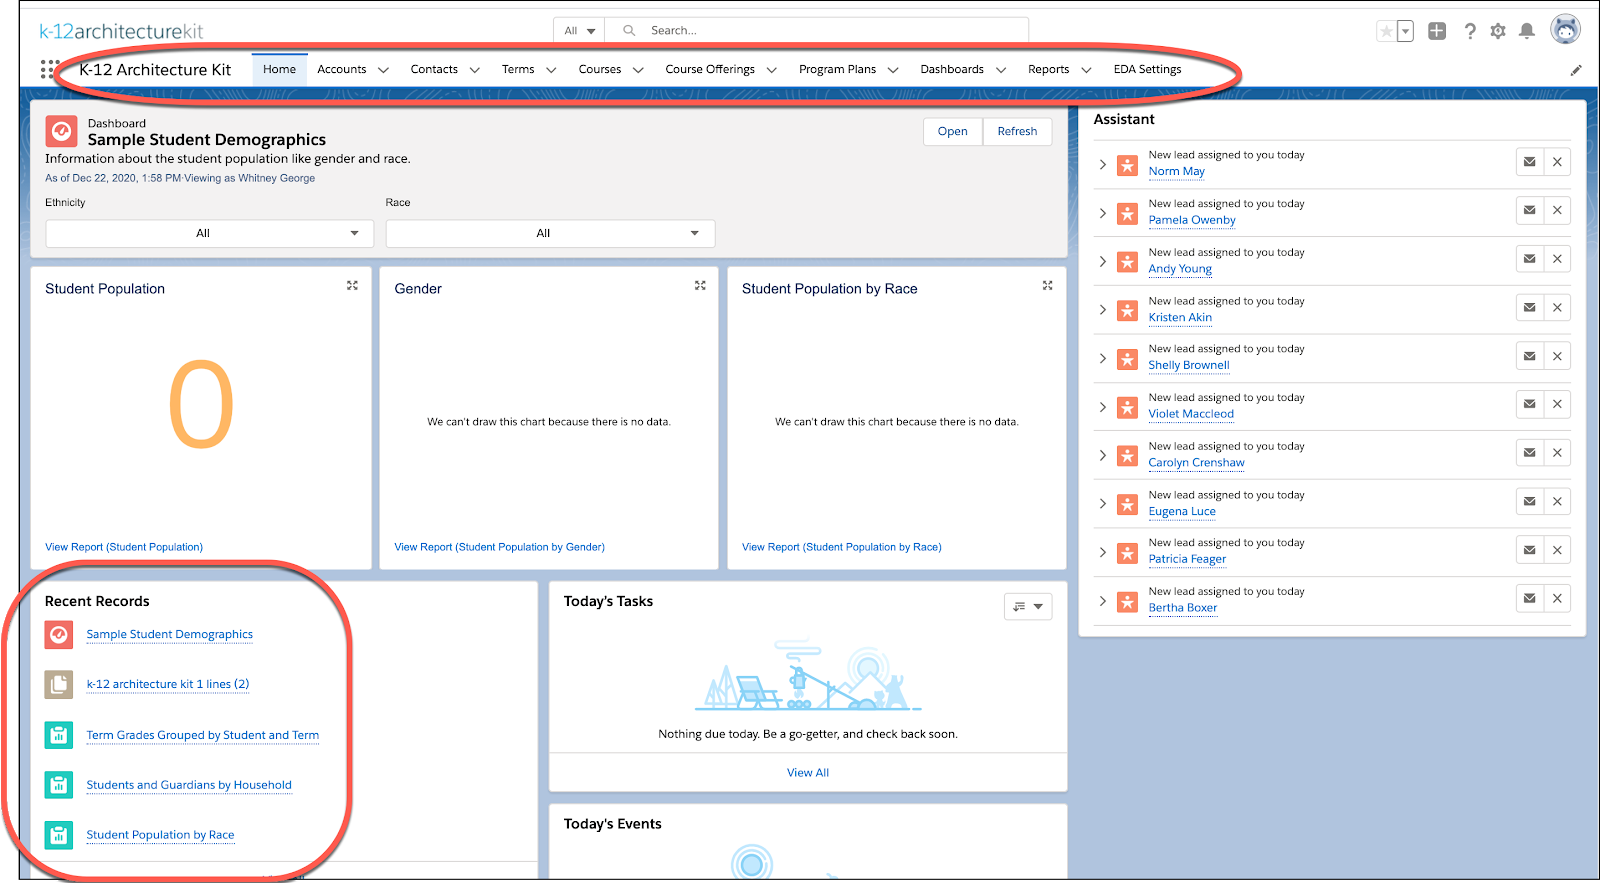
9. Now for the big reveal: click View Org to launch your newly installed K-12 Architecture Kit. If you don’t see the K-12 Architecture Kit right away, click the App Launcher and find and select K-12 Architecture Kit. You'll see all of the K-12 specific features of K-12 Architecture Kit, ready and waiting for you to explore in your Trailhead Playground.
You’re doing great! Don't forget to click the green Verify step button below to complete the project.
Ready for more? To keep learning about K-12 Architecture Kit, check out the Administer Salesforce for K-12 Institutions trail linked in the Resources section just below.
Resources
- Trailhead: Administer Salesforce for K-12 Educational Institutions
- Salesforce Help: How to Get Support from Salesforce Help