Configure Segments and Data Graphs
Learning Objectives
After completing this unit, you’ll be able to:
- Describe how to publish a segment.
- Explain how a published segment serves as the entry source for a segment flow.
- Identify the decisions an admin must make before building a data graph.
- Describe how to configure a data graph.
Build and Publish a Segment
Before Linda can launch anything, she needs an audience. That starts with building and publishing a segment.
Linda opens Data 360 and creates a new segment called Cloud Kicks Running Shoe Buyers. To build the segment, she first selects a target object. She chooses Unified Individual, the unified customer profile created through identity resolution. This ensures each customer only appears in the segment once, even if they exist across multiple systems. No duplicates, no double-sends.
Unified Individual links to each person's consent and communication preferences, which are stored separately on their contact points. When building a segment, it's worth confirming that the right consent fields are mapped to the Unified Individual. This ensures that the audience Linda builds reflects not just who bought running shoes, but who has agreed to receive marketing communications.
On the segment builder canvas, Linda uses attributes to build her filter logic. She needs two conditions to be true at once, so she groups them in a container with the following AND logic.
Product Category | Is Equal To | Running
AND
Order Date | Is Greater Than or Equal To | Last 90 Days
As she adds conditions, the canvas displays an approximate population of customers who meet the criteria, so she can validate that the filter logic is working. When Linda is satisfied, she clicks Publish Now.

Publishing makes the segment official. For a segment-triggered flow, the type Linda is creating, the published segment acts as the entry point. These flows run on a schedule, either one time or recurring. When Marketing Cloud Next runs the flow, all current segment members enter the flow together.

Use the Segment in a Flow
In Marketing Cloud Next, a campaign and a flow work together. Think of the campaign as the container and the flow as the engine that sends messages to customers. The flow is also what determines the customer journey, how customers move through the experience, what they receive, and when.
To get started, Linda creates a campaign. The campaign record offers a number of quick start options, such as email and SMS, to help her create the flow and structure the journey.

Next, she sets the schedule and selects her audience. She chooses the Cloud Kicks Running Shoe Buyers segment as the triggering segment. When the flow runs, every Unified Individual in the published segment enters the flow.
Select Audience Segments
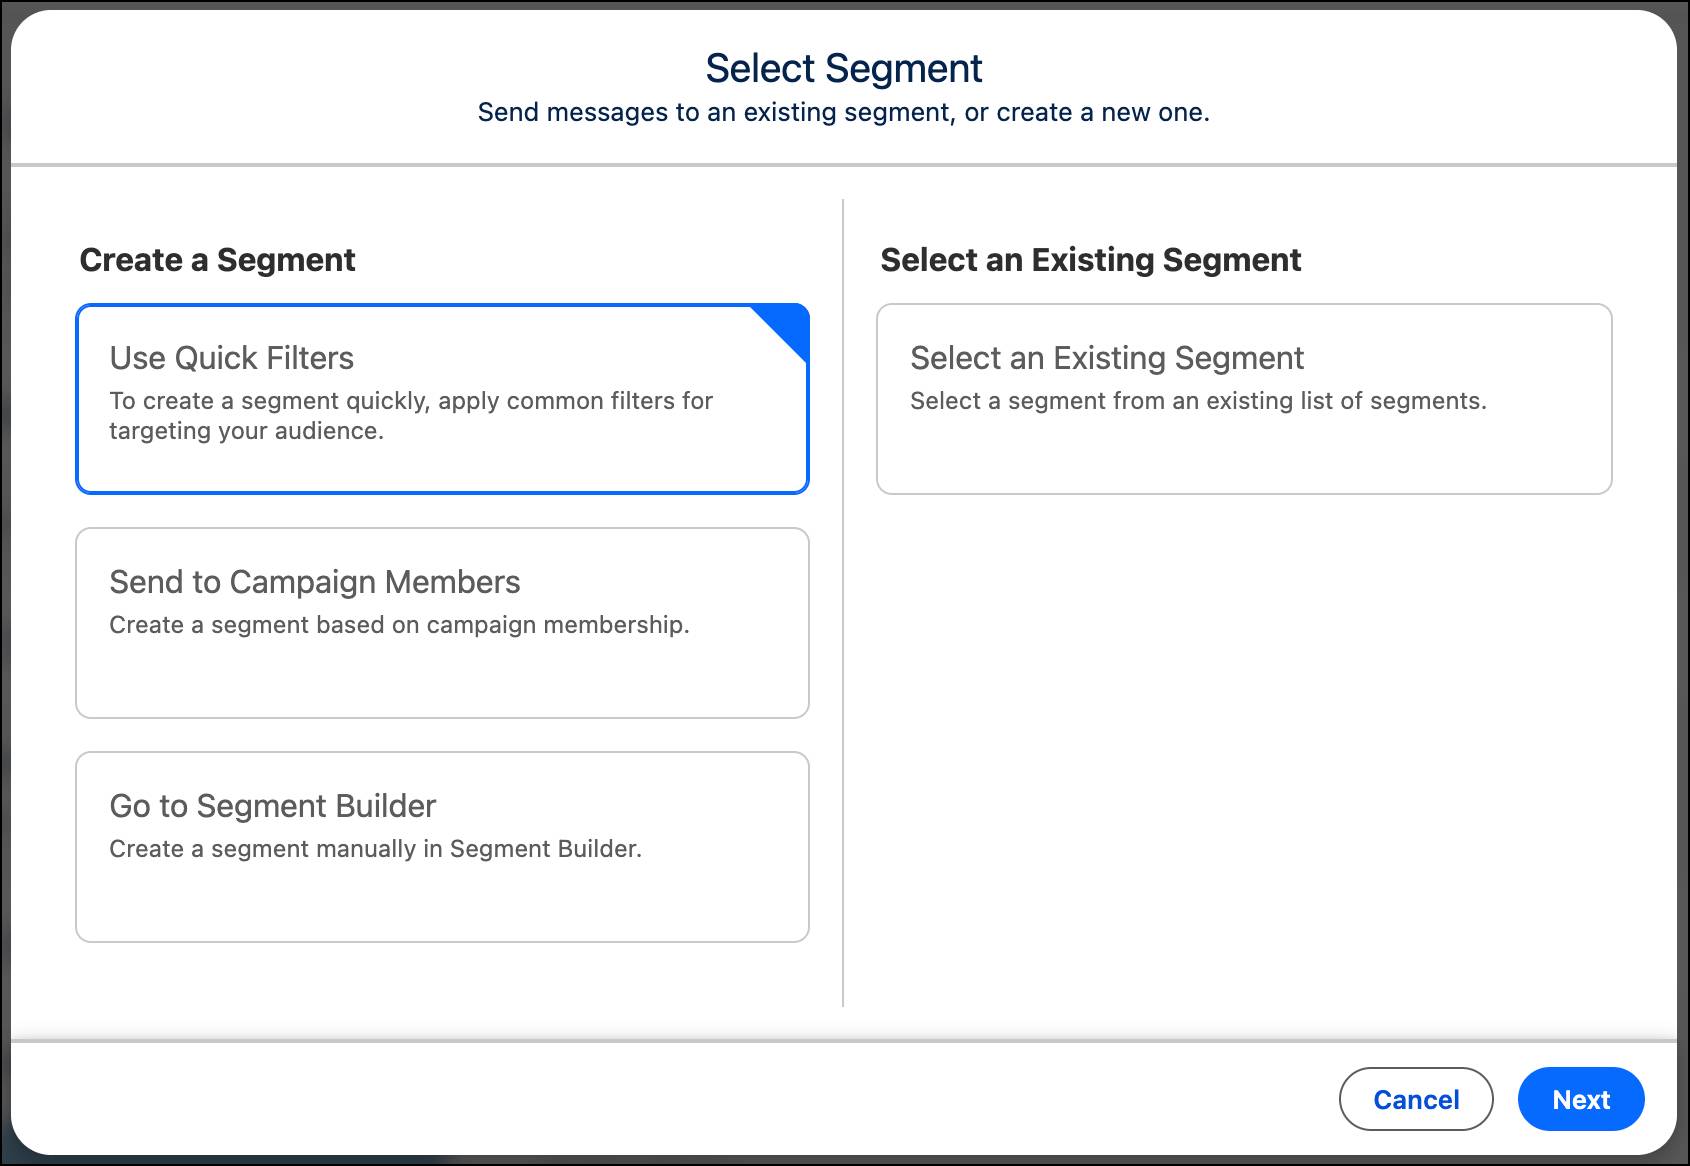
When Linda returns to build future segments, or when her teammates need to find this one, the segment selection window offers a few helpful tools to work faster.
-
Use Quick Filters: Filter audiences using common criteria such as Birthday Today, No Open Cases, or Contacts.
-
Send to Campaign Members: Create a segment based on existing Salesforce Campaign membership.
-
Go to Segment Builder: Open the full editor to define custom logic using DMO attributes.
-
Select an Existing Segment: Reuse an existing segment.
She also configures re-entry settings. In this case, she sets re-entry to never because this is a one-time post-purchase campaign.
Design a Data Graph
The segment brings customers into the flow. The data graph determines what Linda can actually do with customer data when they're in the flow. In Marketing Cloud Next, merge fields, dynamic content, and decision splits all draw from the data graph. If a field isn't in the data graph, Linda can't use the data it contains in the campaign.
Before Linda opens the data graph editor, she thinks through three things: which objects to include, which fields she actually needs, and how often the graph should refresh. It's worth being deliberate here: fields can't be removed after the data graph is saved, so less is more.
For her campaign, Linda needs two things from the data graph:
- A way to greet each customer by name
- Access to their loyalty tier, both for the email and for the decision split
That means she needs fields from two objects connected to Unified Individual.
Object |
Fields Selected |
Purpose |
|---|---|---|
Unified Individual |
First Name |
Personalized email greeting |
Loyalty Program Member |
Loyalty Tier |
Email merge field and decision split |
Linda creates a new data graph in Data 360 where she selects Unified Individual as the primary object and adds the Loyalty Program Member DMO with just the Loyalty Tier field. She sets the refresh to Daily. Loyalty tier data doesn't change by the hour, so that's plenty. She names the graph Cloud Kicks Campaign DG, and clicks Save and Build.
In Setup, she sets Cloud Kicks Campaign DG as the default data graph so it's automatically available in the email editor and Flow Builder. When the status flips to Active, she opens her email template and finds First Name and Loyalty Tier waiting in the merge field picker. She adds them to the subject line and body.
Next, she opens Flow Builder through the campaign, adds a Decision element, and configures three branches:
- Gold and Diamond members receive a discount offer
- Silver members receive a free shipping offer
- Everyone else receives a default email
With the segment published and the data graph active, Linda now has everything she needs. The segment defines who enters the flow, the data graph defines what data she can use, and the flow defines how customers move through the experience. The campaign is ready to run.
You’ve seen how to build a segment, configure a data graph, and use both in a flow. Together, they give Linda everything she needs to get the right message to the right person.
Before Linda hits send, she needs to understand how timing affects everything. Each stage in the workflow operates on its own schedule, which can affect when records become available for segmentation and activation. In the next unit, you’ll examine the full data ingestion workflow and learn how to account for timing when planning your campaigns.