Configure a Slack Agent in Salesforce
Learning Objectives
After completing this unit, you’ll be able to:
- Add Slack actions to an agent.
- Add instructions for Slack actions.
- Activate an agent in Salesforce.
- Connect an agent in Salesforce to Slack.
Configure an Agent with Slack Actions
Follow Sofia as she configures Agentforce with Slack actions in preparation to deploy the agent to Slack. You’ll want to follow along with the steps outlined in this unit to pass the challenge at the end.
Sofia is a Salesforce and Slack admin who manages a product management agent in Agentforce. She wants to incorporate this existing agent into Slack. At Sofia’s organization, many employees need product updates and ask questions to get their jobs done. There’s a lot of helpful product information in Slack channels, but sometimes multiple channels exist or messages get lost. This makes it difficult for employees to quickly find the answers they need.

Sofia has reviewed examples of how a product management agent should interact with users in Slack. When she goes into Agentforce Builder to configure the agent’s actions, she uses this example as the model for her agent’s capabilities in Slack.
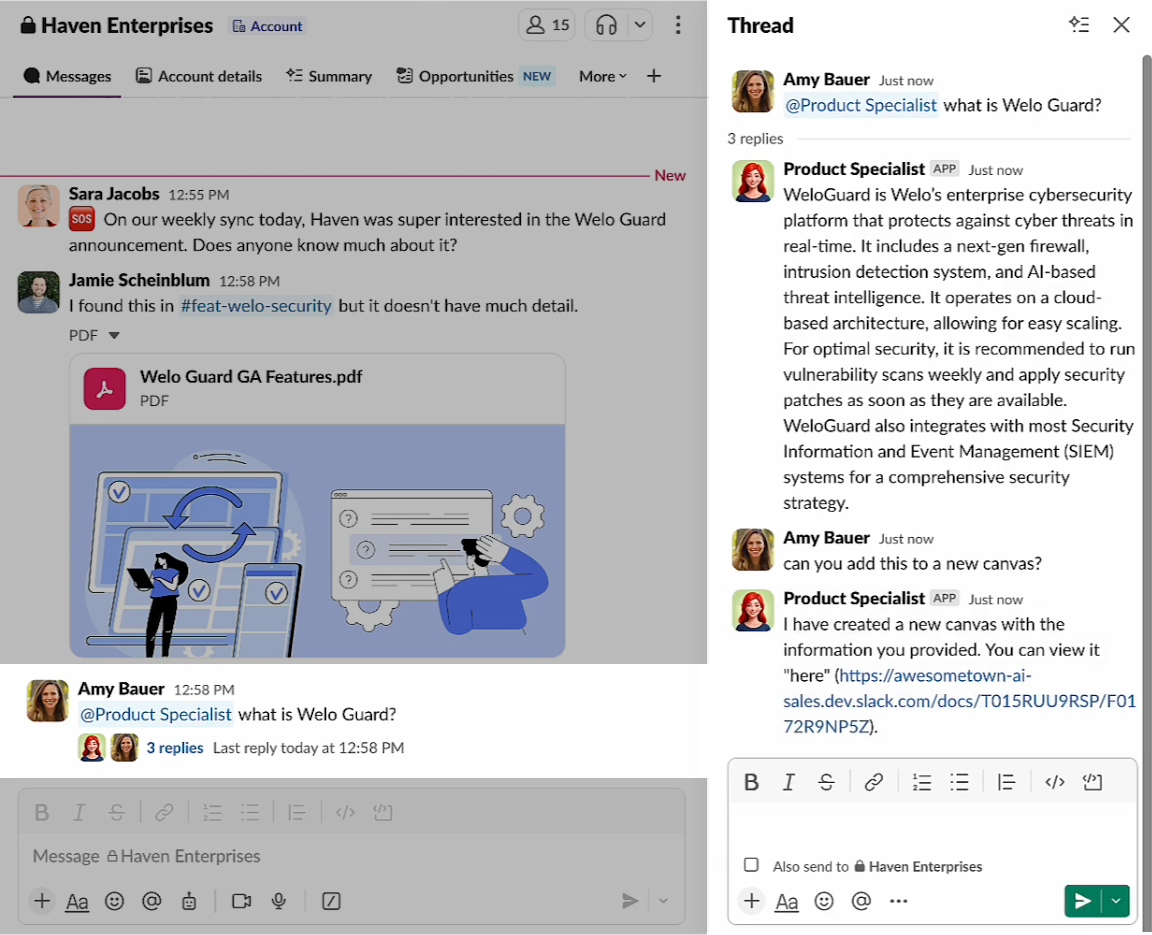
In this example, the product management agent is mentioned with a question. It provides an instant response in a thread that all channel members can benefit from. The agent acts in Slack to create a new canvas and add this information for future reference.
Connect and Launch Your Agentforce Org
In Quick Start: Connect Your Agentforce Org with Slack, you provisioned your special Agentforce Developer Edition org and integrated it with Slack. Make sure you’ve completed the quick start and have your login information handy before attempting the steps below.
- Make sure you're logged in to your Trailhead account.
- In the Challenge section at the bottom of this page, click the org name and then click Connect Org.
- On the login screen, enter the username and password for the Developer Edition you just set up.
- On the Allow Access? screen, click Allow.
- On the Want to connect this org for hands-on challenges? screen, click Yes! Save it. You are redirected back to the challenge page and ready to use your new Developer Edition to earn this badge.
It’s time for Sofia to enable the product management agent in that org with Slack actions.
- Open your special Agentforce org by scrolling down to the hands-on challenge.
- Under Choose your hands-on org, ensure your special Agentforce Developer Edition org from Quick Start: Connect Your Agentforce Org with Slack is selected.
- Then, select Launch.
Enable Slack OAuth
Enable explicit access for your agent so it can interact with users in Slack.
- Head to Setup.
- In the Quick Find box, search for and select Connected Apps OAuth Usage.
- Then, locate the row for Slack.
- In App Actions, select Load Actions.
- Then, select Install.
- This opens up the Install connected app? confirmation page. Select Install.
- If you’re taken to the Slack connect app page in the legacy experience, select Switch to Lightning Experience at the top of the navigation.
- If you’re taken to the Slack connect app page in the legacy experience, select Switch to Lightning Experience at the top of the navigation.
Add Slack Actions
This is the perfect opportunity for Sofia to add Slack actions to the Product Management agent in Agentforce Builder. Repeat what she does.
- Open App Launcher.
- Search for and select Agentforce Studio.
- Select the agent Product Management Agent.
- In the Agentforce Builder Explorer, select the subagent Product Gaps.
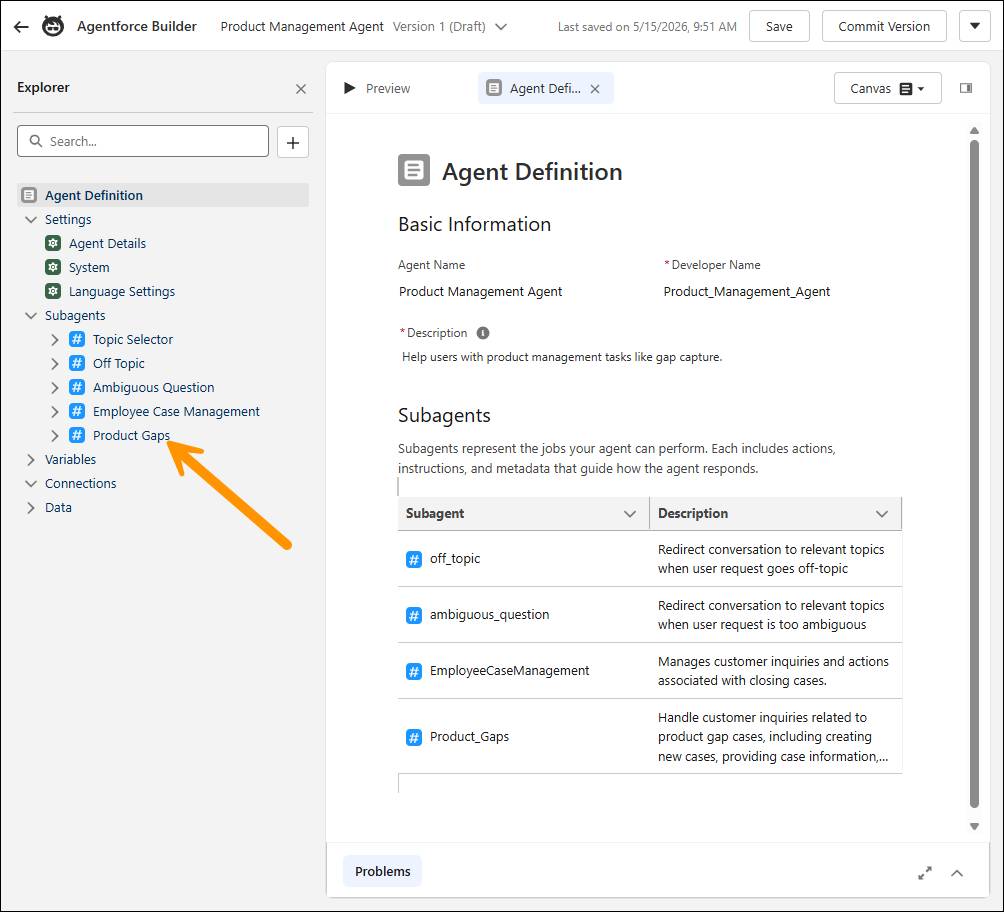
- In the Product Gaps canvas, scroll down to the section Actions Available For Reasoning.
- Put the cursor next to the last action and add a new line. This adds a Select action dropdown.
- Select Select action.
- Select Add from Asset Library.
- Search for and select several Slack actions that enable Product Management Agent to search public content and create canvases in Slack.
-
Create a Slack Canvas
-
Update a Slack Canvas
-
Search Slack
-
Send a Slack Direct Message
- Select Add to Agent.
- In case the actions were listed in the explorer but not in the canvas, you can add each—just add another line under the last action, select Select action, and then select them from the In this agent list.
- In case the actions were listed in the explorer but not in the canvas, you can add each—just add another line under the last action, select Select action, and then select them from the In this agent list.
- Select Save.
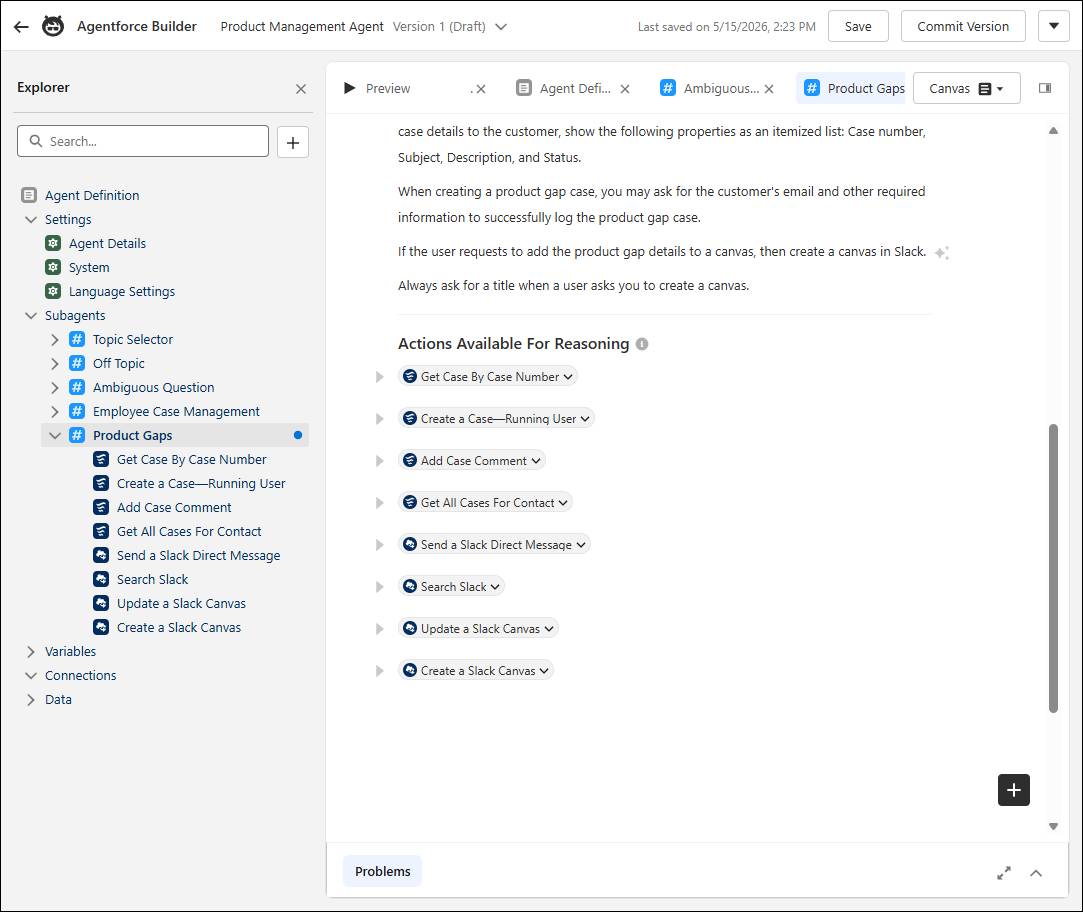
While Product Management Agent now has Slack actions it can take, there’s no context for them yet. Sofia needs to enable the agent on when to use these actions. This is done via instructions in the canvas.
Add Instructions for Slack Actions
Sofia uses subagent instructions to set boundaries and context, and to define agent behavior. Each agent will have a set of instructions and settings to dictate how they operate. In all cases, AI agents respect standard Salesforce access controls, such as licenses, permissions, field-level security, and sharing settings, which ensures secure operations.
- With the explorer open to the Product Gaps subagent canvas, go to the instruction section.
- Add the following on separate lines at the bottom of the instructions.
If the user requests to add the product gap details to a canvas, then create a canvas in Slack.
Always ask for a title when a user asks you to create a canvas.
- Select Save.
Test the Agent
Use the Conversation Preview in Agentforce Builder to enter realistic prompts and check the agent’s outputs. When you test before activating and deploying, you ensure that your agent critical functions work correctly and reliably. When you identify and fix issues, remove duplicates, and refine the agent’s components, you enhance its performance and user experience. This process also helps build trust and ensures the agent is accurate, unbiased, and secure.
- Select Preview. This saves your current settings and opens Live Test Mode.
- Walk the agent through creating a product gap case. Remember, clear and detailed instructions for what you want the agent to do work best. You can copy one of the following examples to start the chat:
Log a product gap for the Trailhead Escape Room badge. Bring it back!Product gap for a new business unit. We’re expanding!I want to automate the bookings process. Please log a gap.
- Should the agent ask for your name and email, you can use Sofia Rodriguez, sofiarodriguez@example.com.
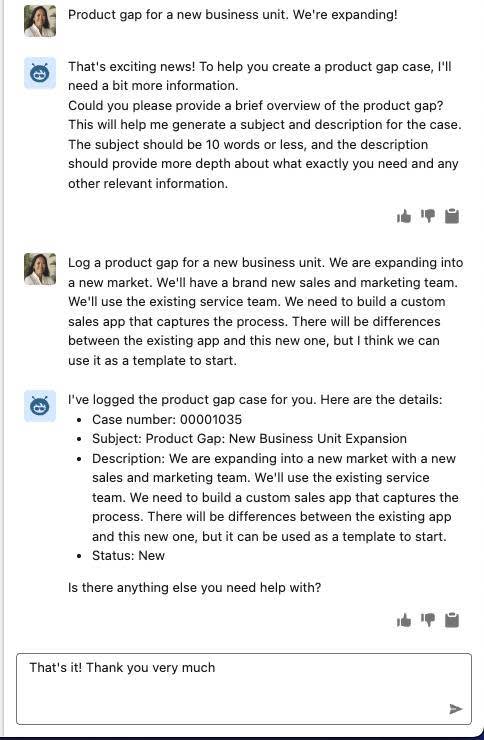
The test goes well. But when Sofia asks the agent to create a canvas, there’s an error. This is expected since she’s testing in her Salesforce org. This needs to be done in Slack.

Connect Your Agent to Slack
Once Sofia’s agent is configured with all the subagents, actions, and guardrails for her product management use case, she establishes a connection to Slack for her agent in Salesforce. Note this isn’t checked in the challenge, but it’s a critical step to successfully deploy the agent to Slack and earn the badge.
- If you don’t have the explorer open to Product Management Agent, select it from Agentforce Studio.
- Hover over the Connections section and select +.
- Select Add connections.
- In the Slack box, select the Select button.
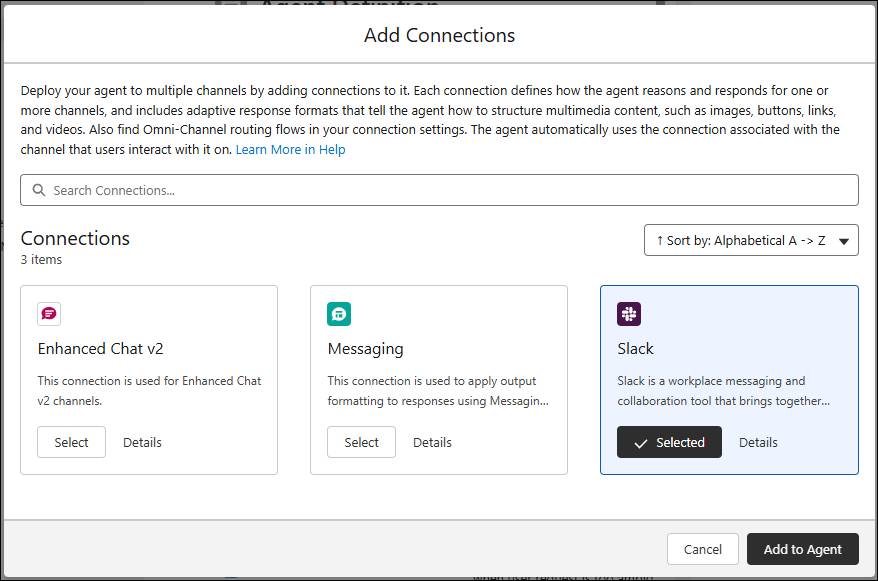
- Select Add to Agent. You’re taken back to the Agentforce Builder interface with a message that the agent is now available in Slack.
By saving the connection, Sofia makes the agent available in the associated Slack org.
Activate the Agent
Once an agent is activated, it becomes instantly accessible to your users wherever it’s been shared.
- From Agentforce Builder, select Commit Version to open the confirmation modal.
- Select Commit Version.
- Then, select Activate to open the ready modal.
- Select Activate.
- Select the back arrow to exit the builder.
To modify a live agent (for example, adding or removing topics or actions), you need to deactivate it first. This ensures that updates can be made without interrupting the agent’s ongoing functions. After making the necessary changes, you can reactivate the agent to implement the new settings.
Give Users Access
The agent is now open to be used. Next, you give users explicit permission to use the agent. Slack respects these permissions by default.
It’s best practice to do this via a permission set. In this scenario, the Access Agents permission set has already been assigned to your user. It’s time to add a new agent to it.
- Go to Setup.
- In Quick Find, search for and select Permission Sets.
- Navigate to and select Access Agents.
- Under apps, find and select Agent Access.
- Select Edit.
- Add Product Management Agent to the Enabled Agents list.
- Select Save.
In the next unit, you deploy the agent to Slack. Since Slack obeys the permissions you set in this org, you’ll be able to access it directly once the deployment is complete.