Create a Campaign and Form
Learning Objectives
After completing this unit, you’ll be able to:
- Create a campaign in Marketing Cloud Next using Campaign Quick Start.
- Configure a signup form with the right fields for your campaign.
- Set up hidden fields and default values to enrich Lead records automatically.
The Campaign Plan
So far you explored the lead capture options available in Marketing Cloud Next. Now it’s time to build. Ursa Major Solar's advertisement campaign is ready to take shape. Maria Jimenez, the Salesforce admin, has a clear plan—a hosted landing page with a signup form that the marketing team can share directly from their social posts, no web team required.
In this unit, you follow Maria as she creates the campaign, adds a signup form, customizes the fields, and sets up the hidden fields that make every Lead record more useful the moment it's created. But first, set up your own Salesforce org.
Sign Up for a Free Developer Edition with Data 360
To complete this challenge, you need a special, limited-time custom playground that contains Data 360 and Marketing Cloud Next.
- Click Create Playground.
- Your new org is automatically attached to your Trailhead account.
- Make note of your org's expiration date and complete this badge before then.
- Click Launch.
Generate an Identity Resolution Ruleset
Now let’s create an Identity Resolution ruleset. Here’s how to do it in the new org you just created.
- Select App Launcher (
 ).
).
- In the Search apps and items box, find and select Marketing.
- Select the Identity Resolution tab (if you don’t see it, select More).
- Select New | Create New Ruleset | Next.
- In the Primary Data Model Object dropdown list, select Individual.
- For Ruleset ID, enter
MKTand select Next.
- For Ruleset Name, enter
Marketingand select Save. It can take a few minutes for the ruleset to save.
- Under Match Rules, select Configure.
- Review the instructions and select Next.
- Next to Match Rule 1, select Configure.
- Select Fuzzy Name and Normalized Email | Next | Next.
- Select Save. It may take a minute or so for the ruleset to publish.
- If your Last Job Status field does not say “In Progress” after you’ve published the ruleset, select Run Ruleset.

The resulting Unified Individual gives you a consolidated customer profile that can be used across Data 360. With that foundation in place, you can now build a data graph that brings together the specific customer attributes needed for segmentation and personalization.
Create a Campaign
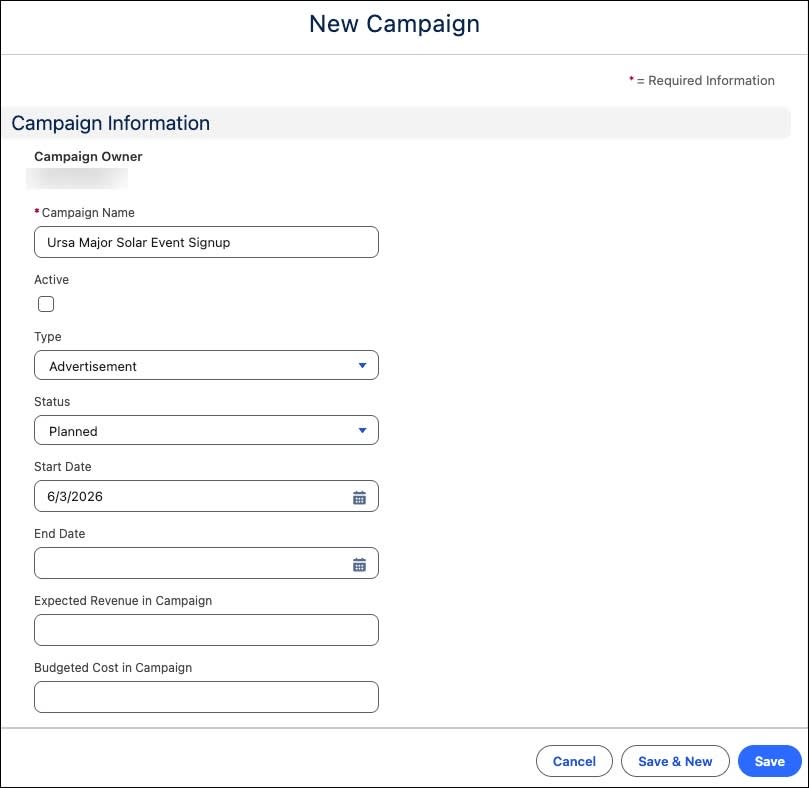
Every lead capture setup begins with a campaign. The campaign is the container that tracks who signed up, when they signed up, and which marketing effort brought them in. For Ursa Major Solar's event, Maria needs a campaign that ties every form submission back to the social media advertisement push. Here’s how you do it.
- Select the Campaigns tab | New.
- Add these details.
- Campaign Name:
Ursa Major Solar Event Signup - Type: Advertisement
- Status: Planned
- Start Date: Select today’s date
- Description:
Ursa Major Solar Event Signup
- Campaign Name:
- Select Save.
The campaign is planned. Next, Maria needs a way to capture the signups with a form that's fast to build, hosted automatically, and connected to Salesforce from the start.
Create a Signup Form
Marketing Cloud Next makes form creation fast. When you create a Signup Form from a campaign, three things happen automatically. A form is generated with standard fields, a landing page is created to host it, and a Salesforce Flow is built to process submissions. Maria doesn’t need to code anything, she just needs to customize the form to match Ursa Major Solar’s needs.
- From the Campaigns tab, select Ursa Major Solar Event Signup. This opens the campaign canvas.
- Select Quick Start tab.
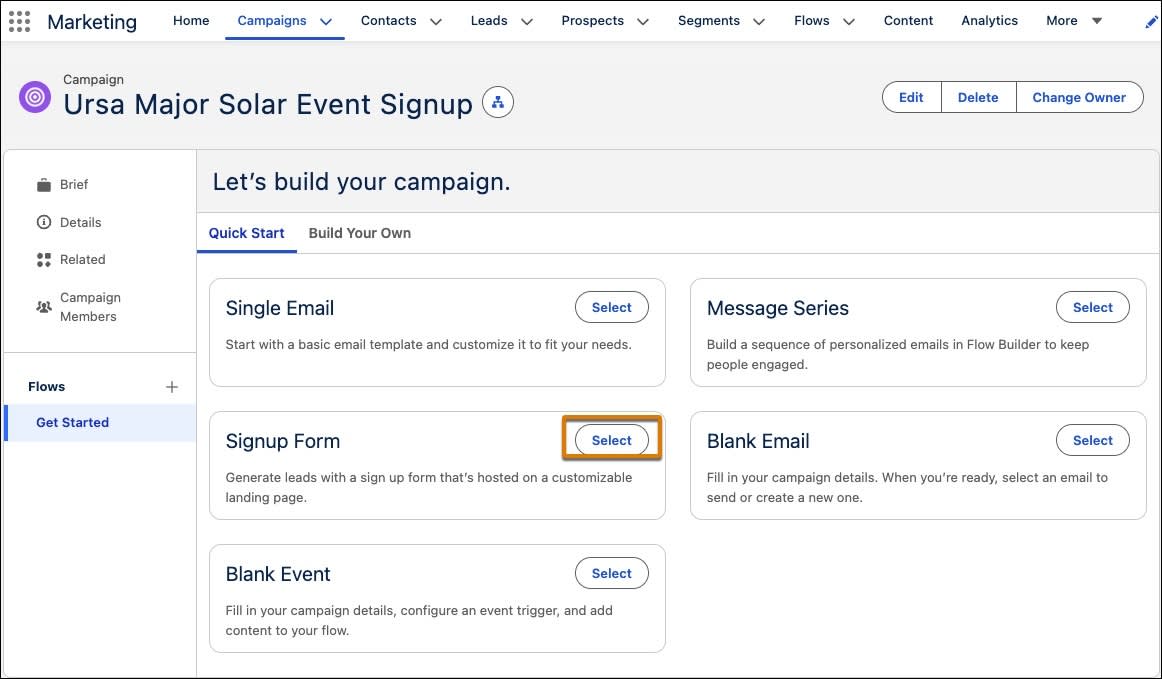
- On the Signup Form card, click Select.
- On the Template Details page, select Next.
- Add Label as
Ursa Major Solar Event Signup Formand select Next.
- In Configure Record & Consent Setting page, add these details.
- Object: Lead
- Channel: Email
- Communication Subscription: Marketing
- Consent Status: Opt-in
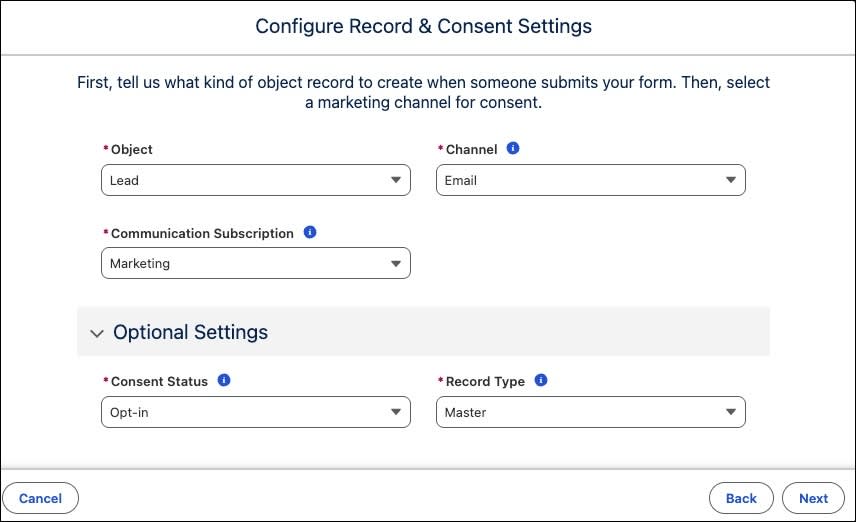
- Select Next.
- In the Add Field, select First Name. This adds the field to the form.
- Select Required.
- Drag the fields and arrange them in this sequence: First Name, Last Name, Email, Company.
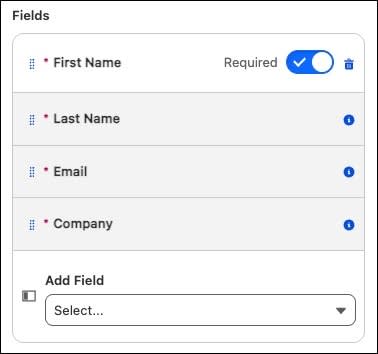
- Select Next.
- Select the toggle next to Landing Page.
- Select Save & Finish.
- On the Start section, select Edit.
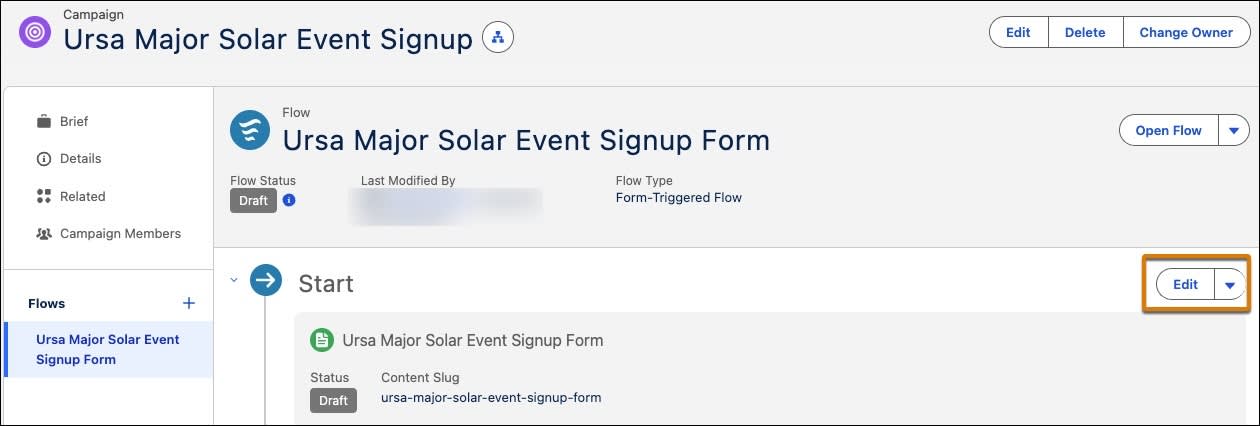
Marketing Cloud Next opens the form editor with a default set of fields. Maria reviews them and decides what to keep, what to remove, and what to add.
Customize the Form
The default form includes First Name, Last Name, Email, and Company. For this campaign, Maria doesn’t need phone numbers as she wants to keep the form short to maximize conversions. She also needs a consent checkbox for compliance and a hidden field to automatically capture where each visitor came from. Let’s update the form.
Add a Consent Checkbox
- To add components, select +.
- Under Inputs, select Checkbox, and drag it below the Company field.
- Add Details.
- Label:
I agree to receive marketing communications - Unique Name:
Consent - Make this field required: Select checkbox.
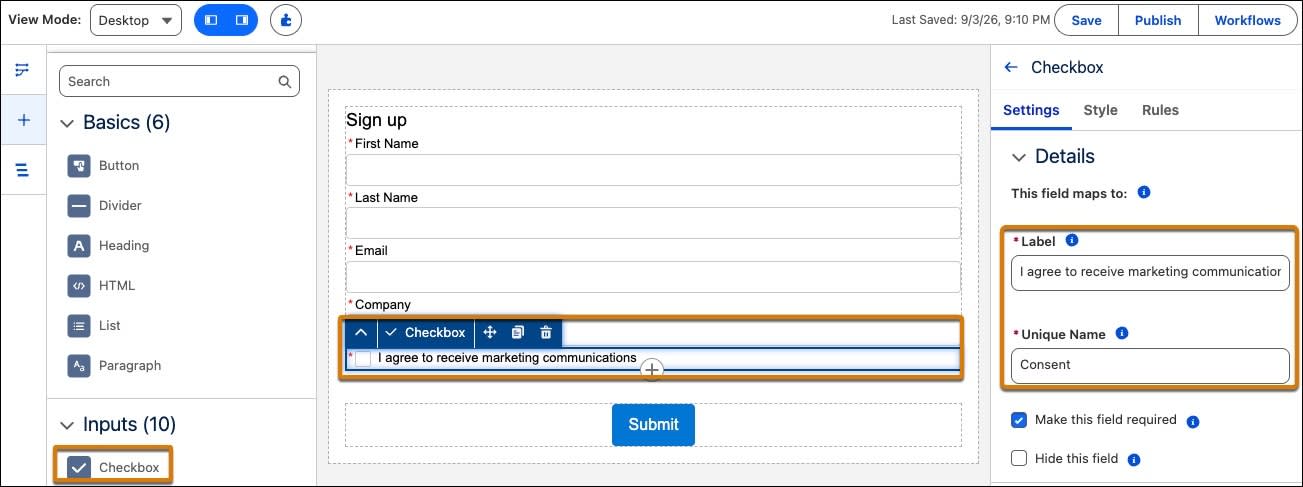
- Select Save.
The consent checkbox is ready.
Add a Hidden Field
Now, add a hidden field that visitors won’t see. This field automatically captures the traffic source for your sales team.
- To add components, select +.
- Under Inputs, select Plain Text, and then drag it below the Company field.
- Add Details.
- Label:
Source - Unique Name:
Source - Hide this field: Select the checkbox.
- Label:
- Next to Field Default Value, select the dropdown.
- To enter a default value, select URL Parameter.
- URL Parameter:
utm_source - Fallback Value:
Direct
- To enter a default value, select URL Parameter.
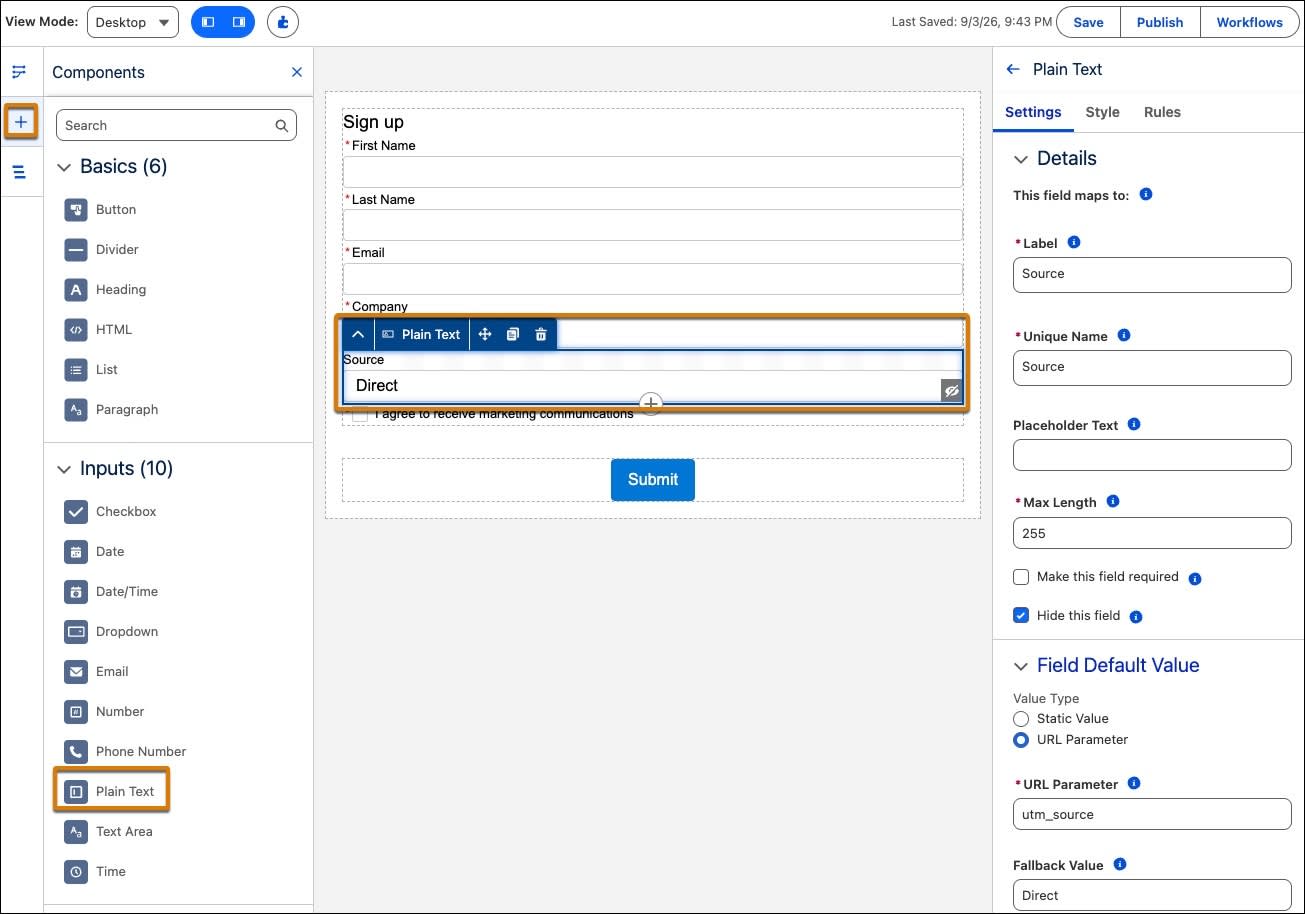
- Select Save.
- Select the Back arrow to navigate to the Ursa Major Solar Event Signup page.
Perfect. When a visitor arrives from Instagram with ?utm_source=instagram in the URL, the hidden field captures “instagram” automatically. If someone types the URL directly with no UTM tag, the fallback value “Direct” is recorded instead. Either way, no Lead record arrives in Salesforce with a blank source field.
The hidden field handles traffic attribution behind the scenes.
Next Up
Maria has laid the foundation: The campaign is live, the form is built, and the fields are configured. The form is ready, but it’s not connected to Salesforce yet. That happens in the Flow.
In the next unit, Maria opens Flow Builder, maps form fields to Lead records, activates deduplication, and captures consent.
To pass the challenge and move on to the next unit, select Check Challenge to Earn 500 Points.