Optimize a Briefcase with Advanced Rules
Learning Objectives
After completing this unit, you’ll be able to:
- Set related object rules to select records in a briefcase.
- Use a custom formula field with a briefcase.
More Records to Filter
Now that your briefcase is up and running, it is time to make sure it is working as efficiently as possible for your growing team. As your organization takes on more appointments and more field workers, a one-size-fits-all briefcase may no longer cut it. Your technicians want to see work orders that are relevant to them specifically, based on their location. The good news is that you have a couple of options for making that happen.
The first is related object rules. These allow you to sync records based on their relationship to other objects in Salesforce. For example, you can configure a rule that looks at the Work Order object and pulls in only the records whose location ID matches the briefcase user's location. This is a great option when the relationship between your objects and your users is already reflected in your data model.
The second option is custom formula fields. With this approach, you create a formula field that evaluates each record and checks whether it matches a specific attribute of the briefcase user, such as their US state. When the formula evaluates to true for a given technician, that record gets included in their briefcase. This gives you a flexible, calculation-based way to control exactly which records each user sees, without relying solely on object relationships.
Use Related Object Rules
When setting up your briefcase, filters are a great way to narrow down which records get synced to your technicians' devices. But sometimes filters alone are not enough. When the most accurate way to identify the right records involves a relationship between two objects, related object rules are the better choice.
Take the example above. Both Service Resource and Work Order objects share a LocationId field, which means there is a natural connection between a technician and the work orders in their area. Rather than relying on a broad filter, you can use a related object rule to leverage that shared field and make sure each technician only sees the work orders that are relevant to their location.
To set this up, you will start by creating a top-level rule for the Service Resource object that filters records by the current user. Here is how to do it:
- From Setup, in the Quick Find box, enter
Briefcase Builder, then select Briefcase Builder.
- Click New Briefcase.
- For name, enter
Work Orders by Location.
- Click on the Developer Name field to auto-populate it.
- Click Next.
- From the Briefcase Rules pane, click the plus sign
 .
- In the lookup field, find and select Service Resource.
-
In the filter window, enter the following values.
- Filter By: User ID.
- Criteria: Equals.
- Value: Current User ID.
- Filter By: User ID.
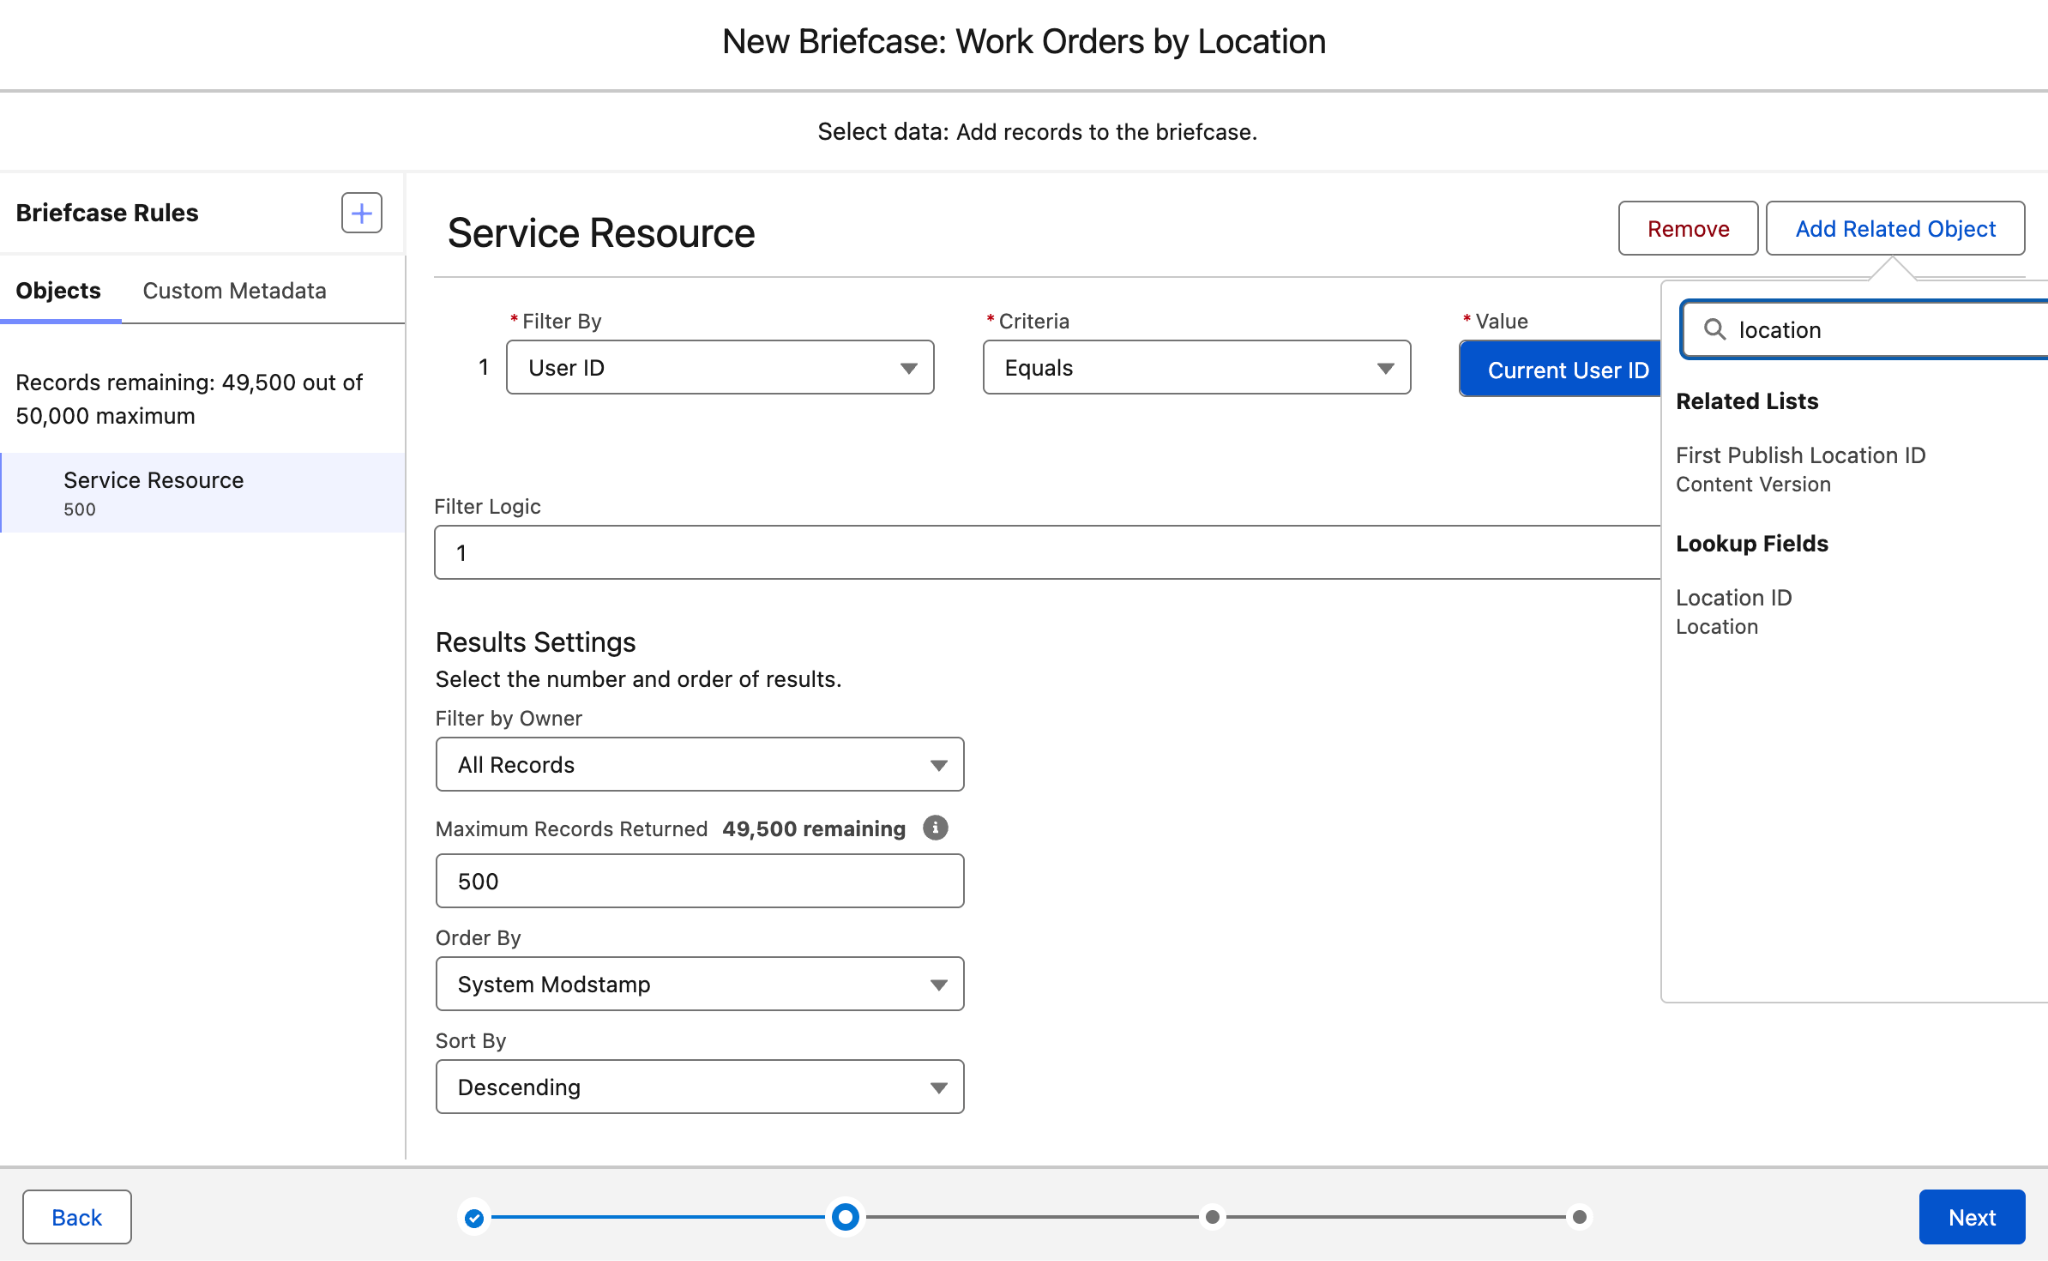
Now you can add related rules for the Location object, then the Work Order object. To do this, follow these steps.
- With the Service Resource rule still selected, click Add Related Object. Then, under Lookup Fields, click Location ID.
- In the Location briefcase rule, delete the default filter by clicking the trash icon on the right of the filter’s row.
- With the Location object rule still selected, click Add Related Object. Then, under Related Lists, click Work Order.
- In the Work Order briefcase rule, delete the default filter by clicking the trash icon on the right of the filter’s row.
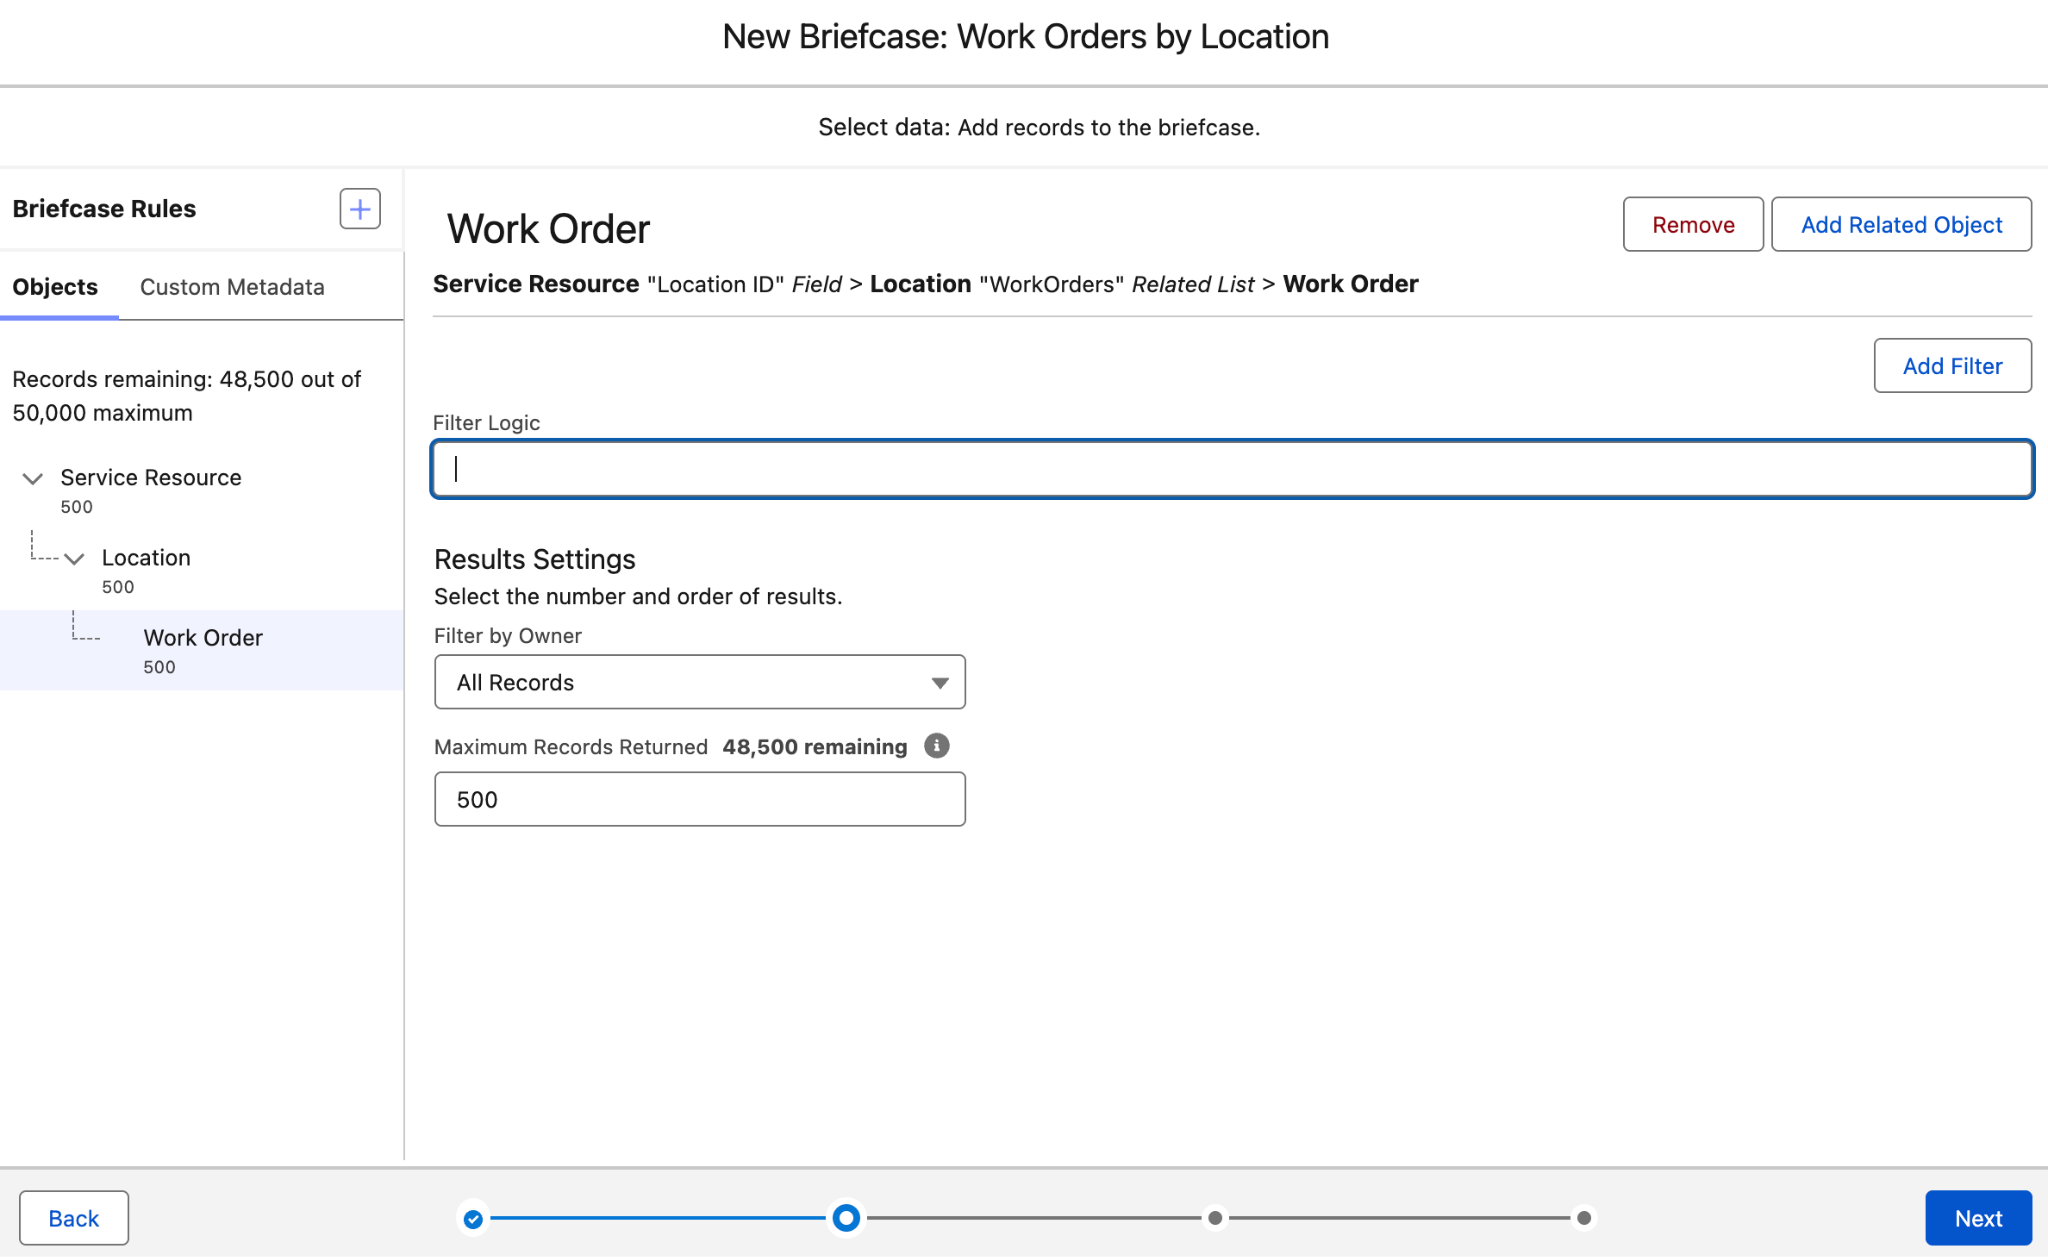
- Click Next.
- Select the users or groups assigned to this briefcase, then click Next.
- Select applications to associate with the briefcase, then click Save or Activate.
Now when your mobile workers look at records in their mobile app, they see only records from their current state.
Create a Custom Formula Field
Sometimes the logic for determining which records a technician should see goes beyond simple filters or related object rules. That is where custom formula fields come in. A custom formula field lets you store calculated data on an object based on a formula you define, and you can use that formula to reference fields across multiple objects. Once you have created the formula field, you can use it as part of your briefcase filter to control exactly which records get synced.
Let us say you want to create a briefcase that only shows technicians the records from accounts located in their same US state. To do this, you will create a custom formula field on the Account object that checks whether the account's billing state matches the current user's state. When your technician in New York opens their briefcase, they will only see records for accounts that are also in New York.
Setting up this process has two main steps - creating the custom formula field, and then using that field in your briefcase filter to control which records get synced. Let's walk through the first step.
- From Setup, enter
Object Managerin the Quick Find box, then select Object Manager.
- Click Account to view the details of the Account object.
- Click Fields & Relationships, then click New.
- For Data Type, select Formula.
- Click Next.
- For Field Label, enter
Is In Current User State.
- For Formula Return Type, select Checkbox.
- Click Next.
- Click the Advanced Formula tab, then click Insert Field.
- In the Insert Field window, select Account, then select Billing State/Province, and click Insert.
- Click Insert Operator, then select = Equal.
- Click Insert Field again, select $User, then select State/Province, and click Insert.
- Confirm that you see this formula:
BillingState = $User.State
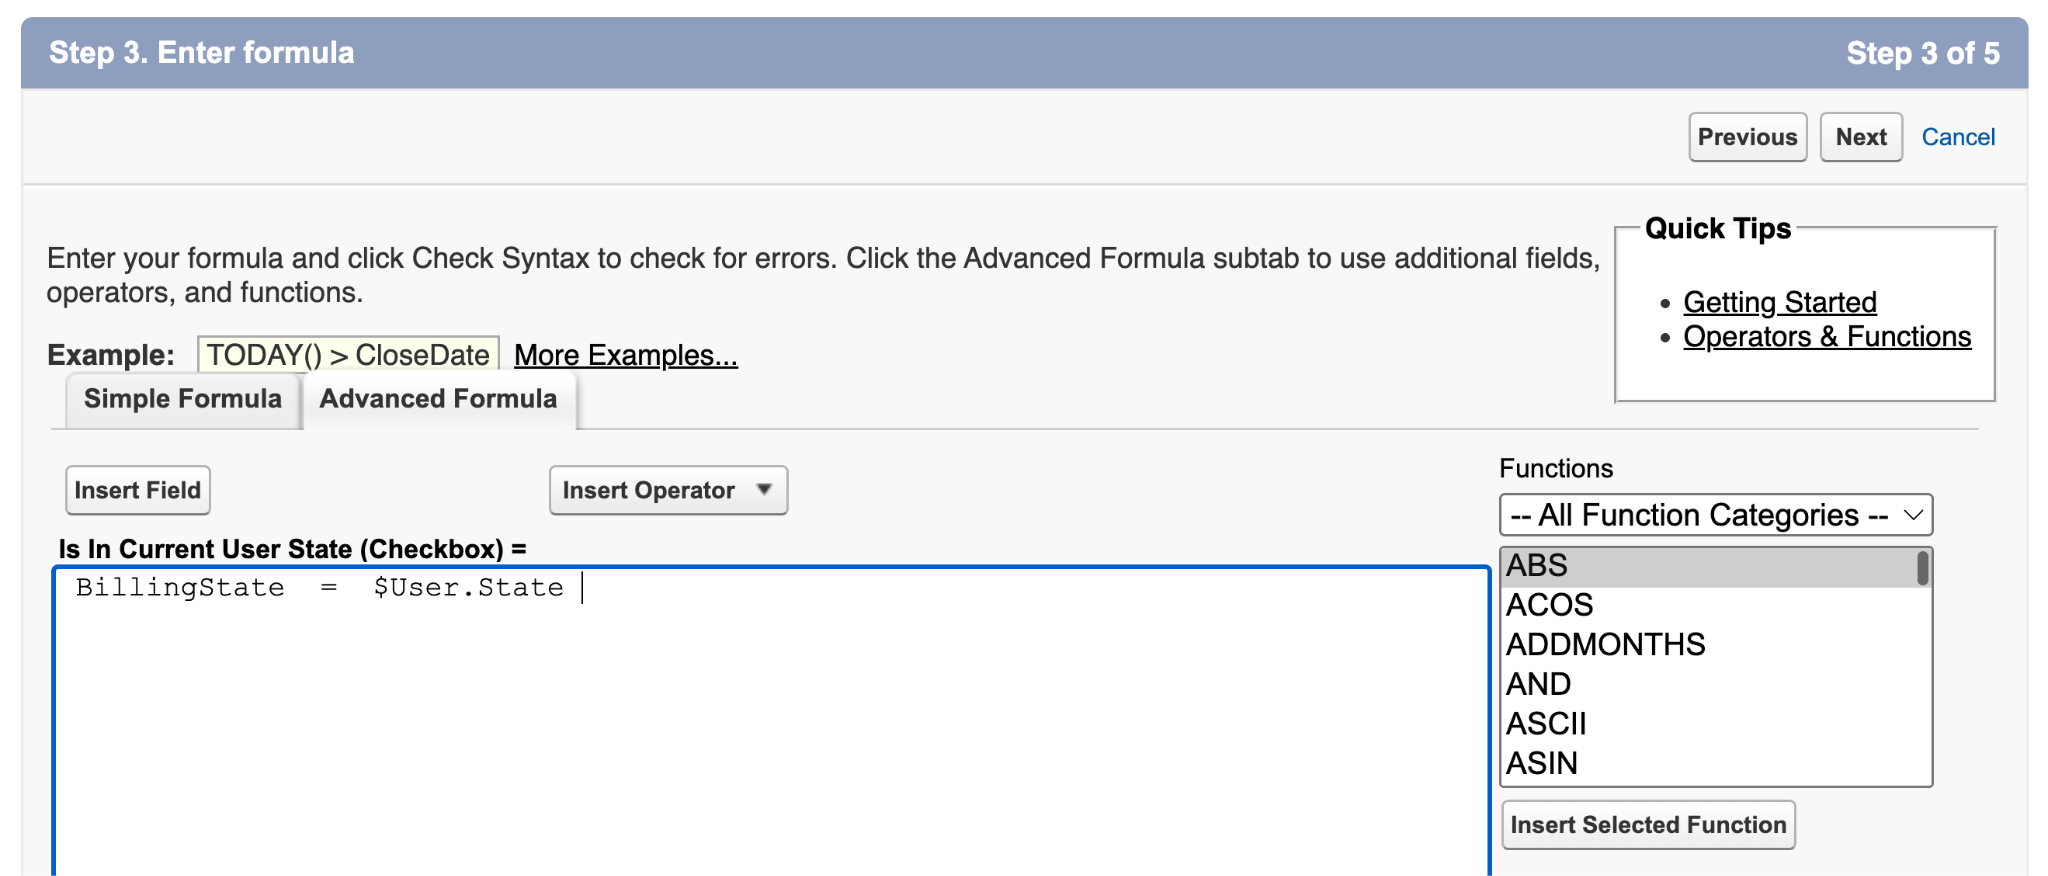
- Click Next.
- Ensure the
System Administratorprofile has access to view this field.
- Click Next
. - Select all four page layout name checkboxes, then click Save.
Next, when you create or edit your briefcase, you need to add a filter that evaluates whether the custom formula field is true. This filter checks each record and only syncs the ones where the formula returns a true value, meaning the account's state matches the technician's state.
- From Setup, in the Quick Find box, enter
Briefcase Builder, then select Briefcase Builder.
- Click New Briefcase.
- For name, enter
Work Orders by Location (Custom Field).
- Click on the Developer Name field to auto-populate it.
- Click Next.
- From the Briefcase Rules pane, click the plus sign
 .
- In the lookup field, find and select Account.
- For Filter, select the new custom formula field you created, labeled
Is In Current User State.
- For Criteria, select Equals.
- For Value, select True.
- Click Next.
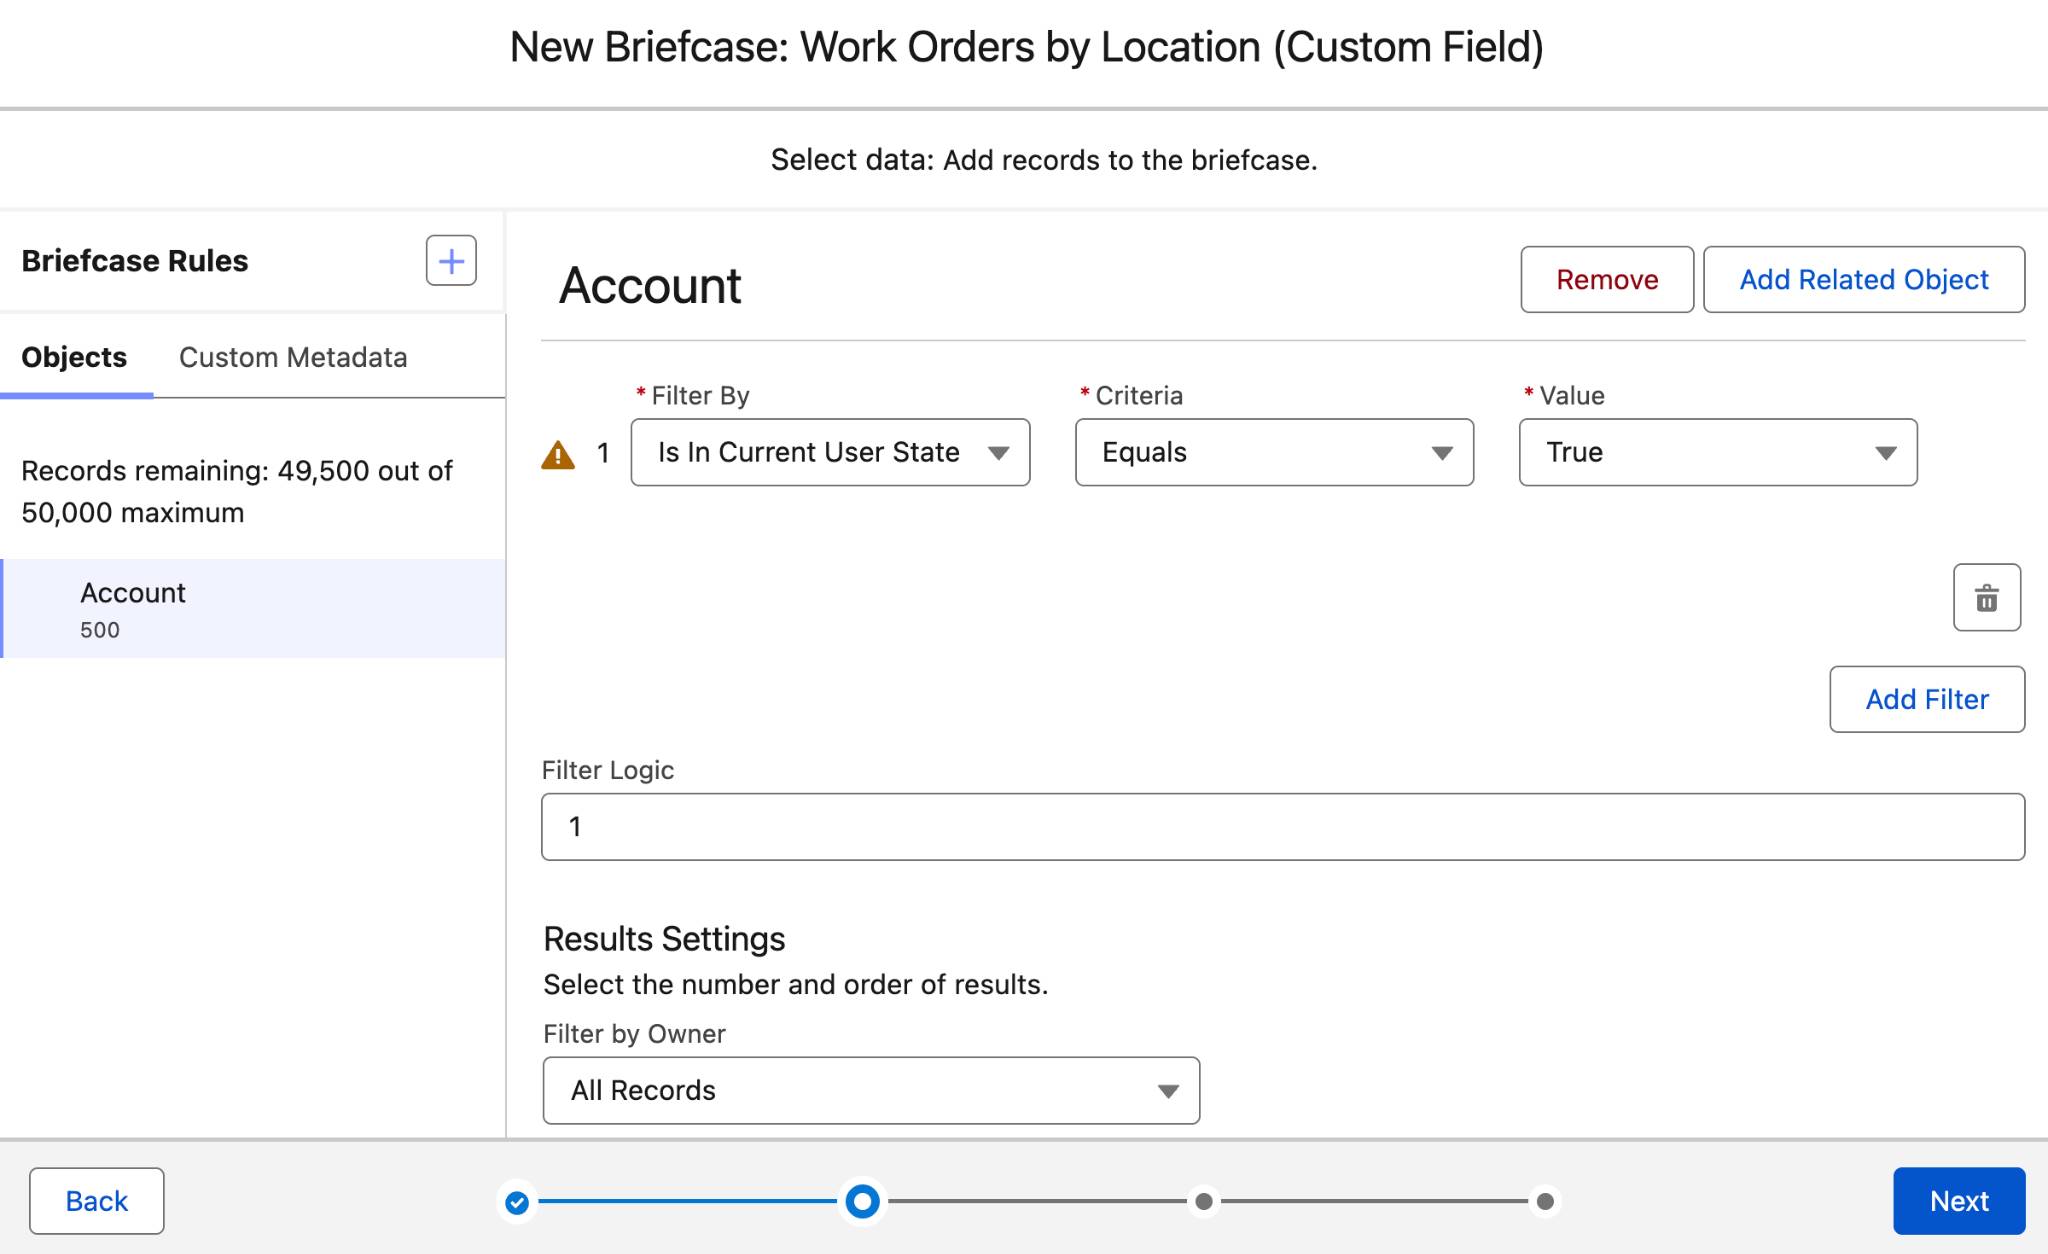
- Select the users or groups assigned to this briefcase, then click Next.
- Select applications to associate with the briefcase, then click Save or Activate.
And that's it! You have now set up a location-based briefcase using a custom formula field. This approach gives you a powerful, flexible way to match technicians with the records they need, no matter how your data is structured or how your business grows.
Whether you choose related object rules or custom formula fields depends on your use case. Related object rules work best when your data model already reflects the relationships you need. Custom formula fields give you more control when the logic is more complex or when you need to evaluate conditions across multiple objects. Either way, you now have the tools to fine-tune your briefcases and make sure your field team has exactly what they need, right when they need it.
Throughout this module, you have learned how to create and configure Offline Briefcase for your field service team. You started by building your first briefcase and adding objects with filters to keep sync times fast. You assigned briefcases to groups of users and tested them before activation. Then you took things further by exploring related object rules and custom formula fields to deliver location-specific records to your technicians.
With these skills, you are ready to keep your field team productive and informed, whether they are online, offline, or anywhere in between. Now it is time to put what you have learned into action and see the difference Offline Briefcase can make for your team.
Resources