Manage Inbound Call Routing
Learning Objectives:
After completing this unit, you’ll be able to:
- Create an omni-channel flow to route calls.
- Connect the flow to the voice channel.
Route Inbound Calls with Omni-Channel Flows
Now that you’ve set up your Agentforce voice agent, it’s time to connect it to flows so you can route calls effectively. Omni-Channel flows serve as the routing brain for Agentforce Contact Center. When an inbound call arrives through your Agentforce Contact Center, the platform uses the associated Omni-Channel inbound flow to determine which agent should handle it and then transfers the call accordingly. Now that your agent is created and customized, the next step is to configure an Omni-Channel flow that routes inbound calls directly to it.
- Click
 and select Setup.
- In the Quick Find Box, search for and select Flows.
- Click New Flow.
- In the New Automation pop-up window in Flow Builder, select Omni-Channel Flow.

- You need an input variable to store the voice call record ID. Click
 , then select New Resource.
- In the New Resource pop-up window, enter the following information.
-
Resource Type: Select Variable
-
API Name:
recordId -
Data Type: Select Text
- Available for input: Selected
-
Resource Type: Select Variable

- Click Done.
With the variable created to store the voice call record ID, you’re now ready to build the flow that routes incoming calls to your Agentforce voice agent. This flow will connect the telephony event to the AI agent, ensure the right context is passed through, and orchestrate how the call moves through your system.
- Click
 and select the Route Work component. This component hands the current work item, such as an inbound call, to Omni-Channel so it can be queued and pushed in real time to the agent you created earlier.

- In the Route Work side panel, enter the following information:
-
Label:
Inbound Voice Routing Flow -
API Name:
Inbound_Voice_Routing_Flow -
How Many Work Records to Route? Select Single
-
Record ID Variable: Select recordID (The variable you created in the last section)
-
Service Channel: Select Phone
-
Route to: Select Agentforce Service Agent
-
Agentforce Service Agent: Inbound Voice Service Agent (The agent you created previously)
-
Fallback Queue: Select Queue
-
Fallback Queue ID: Select Default Queue Salesforce (or another queue you want to use as a safety net when your primary routing target can't accept the work.)
-
Label:

- Click Save and enter the following:
-
Flow Label: Select Voice Call Handling Flow
-
Flow API Name: Voice_Call_Handling_Flow
-
Flow Label: Select Voice Call Handling Flow
- Click Save, then Activate.
With your agent fully configured and your Omni-Channel flow activated, your call routing framework is complete.
You’ve built and customized an agent that’s ready to face customers. You’ve also created a flow that seamlessly works with this agent to route calls based on how the conversation unfolds. The final step is to connect this flow to your voice channel, ensuring every incoming call enters this omnichannel experience. From there, the agent can interact with customers, resolve issues as designed, and when needed, smoothly hand things off to a service rep to take over.
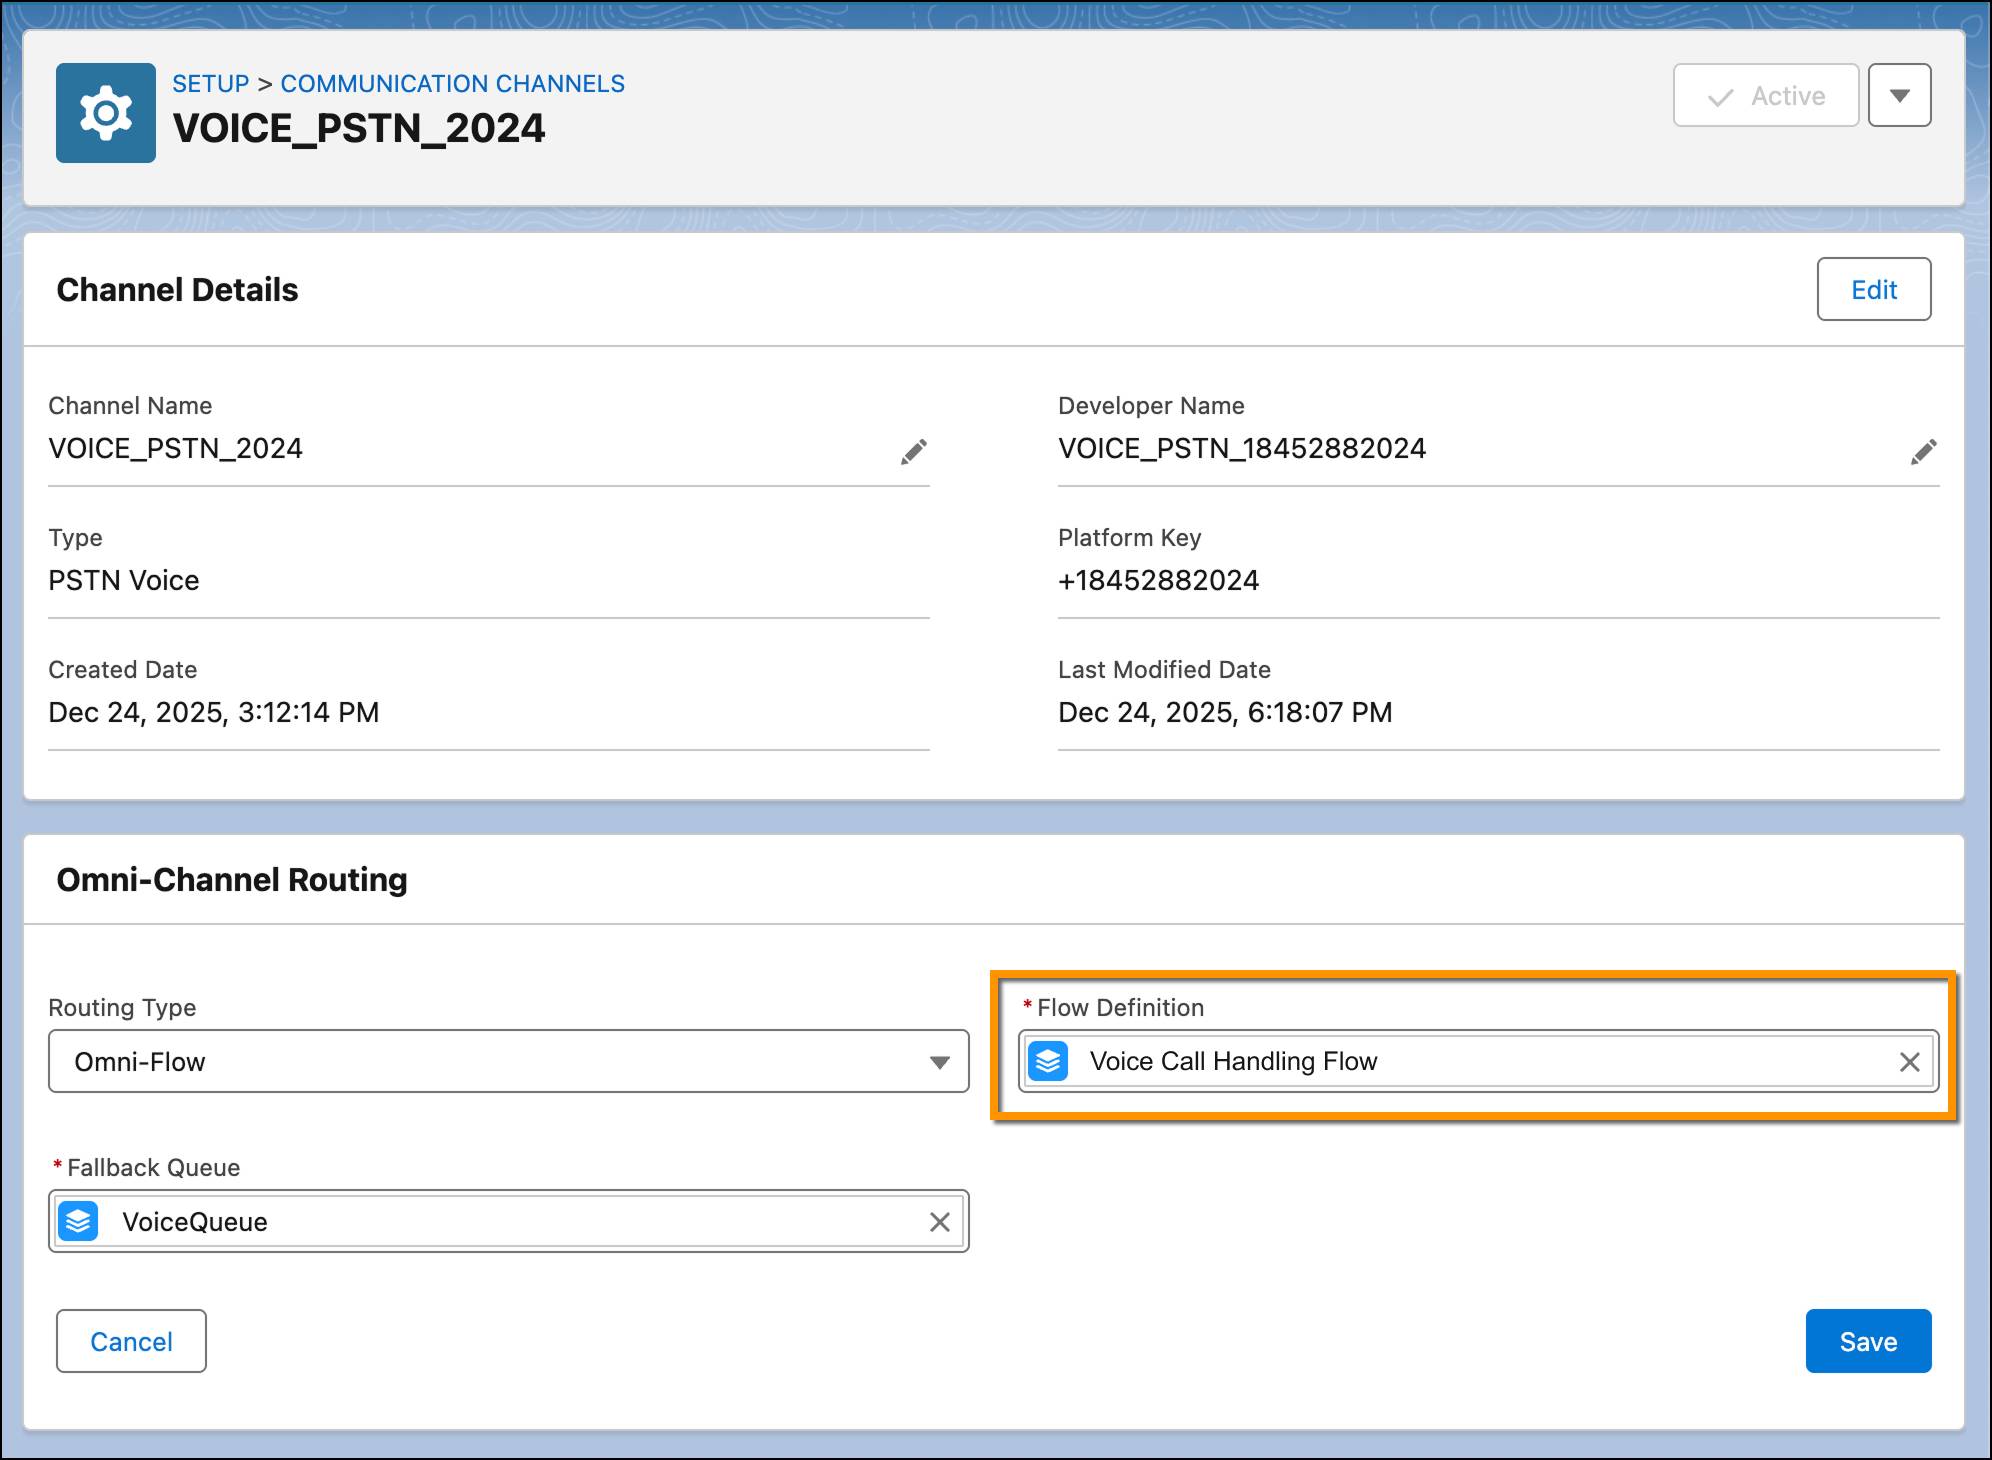
Connect Your Flow to the Voice Channel
- From Setup, in the Quick Find Box, search for and select Communication Channels.
- Click and open your voice channel from the All Channels tab.
- Click Edit in the Omni-Channel Routing section.
- Search for and select the flow you created in the Flow Definition field.
- Add a Fallback Queue.
- Click Save.
And that’s it. With the flow embedded in the voice channel, the calls are now routed to this flow, powered by AI agents to handle customer queries and a routing mechanism to make your service rep more productive and your contact center more efficient.

Wrap It Up
You have effectively connected the critical pieces of the experience: the AI-powered agent capable of handling real-time voice interactions, the telephony connection that brings calls into the system, and the routing logic that ensures every call reaches the right destination.
This foundation not only streamlines your current voice support operations but also prepares you for future enhancements, whether that means expanding to additional channels and agents, enriching your agent’s knowledge, or scaling to meet growing customer demand.
Your voice support strategy is now smarter, more efficient, and ready to deliver the responsive, high-quality experiences your customers expect.