Set Up the Lightning Service Console
Learning Objectives
After completing this unit, you’ll be able to:
- Create your own Service Console app.
- Customize the Lightning Console pages with productivity tools and custom layouts.
Before You Start
Before you start this project, consider completing this recommended content.
Ada Balewa, a product support specialist at Ursa Major Solar, Inc., wants to optimize her customer service team’s productivity. Her Southwest US–based company, which supplies solar components and systems, has grown—and so has its volume of support cases. As Ursa Major Solar’s admin, you want to help the team achieve their productivity goals by creating a Service Console. The Service Console is a Lightning console app that serves as the hub for multi-channel service delivery. You can customize it to meet the team’s case management needs, allowing them to access cases, customer information, knowledge articles, and productivity tools—all from one screen.
Create a User and Enable Knowledge
Before you create Ursa Major Solar’s Service Console app, ensure that all of the settings are enabled for the tools you need to access in the service console. One of these tools is Salesforce Knowledge–a library of articles that reps can search and attach directly from case records to help customers faster. Enable Knowledge for Ursa Major Solar.

- Click the gear icon
 and select Salesforce Go.
- In Quick Find, search for and select Users, then click New User.
- Fill in the information:
- First Name:
Ada - Last Name:
Balewa - Email:
ada.balewa + your initials + today’s date @ursamajorsolar.com
- User License: Salesforce Platform
- Profile: Standard Platform User
- Click the checkbox next to the box for Knowledge User.
- Click Save.
- Navigate back to the Users list and click Edit next to your user name.
- Click the checkbox next to the box for Knowledge User.
- Click Save.
- Return to Salesforce Go.
- In the Salesforce Go search bar, search for and select the Knowledge setup for Service, and click Set Up.
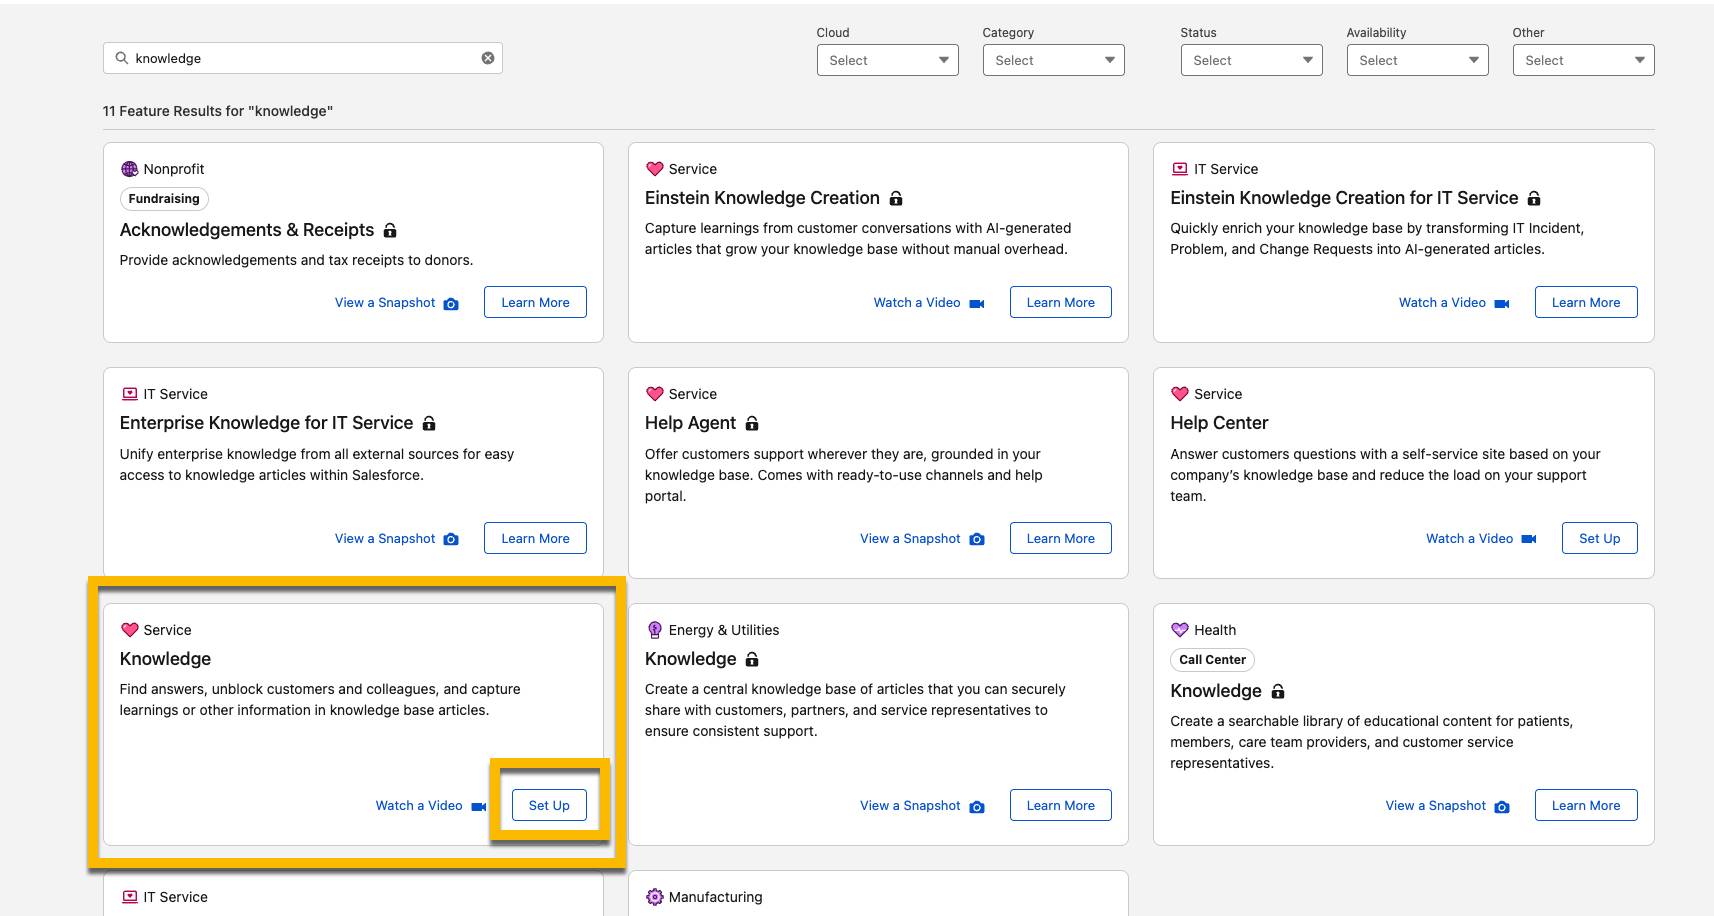
- Click Set Up.
- Click Get Started.
- Click Turn On and Turn On.
- Scroll down to Assign Your Knowledge Authors and Create Data Categories and click Manage, then click Start.
- From the Choose Your Lightning Knowledge Authors page, ensure Ada Balewa and yourself are selected, and click Next, Next, and Finish.
Set Up the Salesforce Service Console in Lightning
Now that Knowledge is enabled, create Ursa Major Solar’s Service Console app, which serves as the center for case management. Use the Setup Flow to get started customizing all the features the Lightning Service Console has to offer.
- Click the gear icon
 and select Setup.
- In the Quick Find box, search for and select App Manager.
- Click the New Lightning App button and follow the fill in the App Details & Branding information.
- App Name:
Ursa Major Solar Service Console - Developer Name: (This field auto-populates.)
- Description:
Ursa Major Solar’s one-screen case management interface
- Click Next.
- On the App Options page for Navigation Style, select Console Navigation.
- Click Next.
- On the Utility Items page, click Add Utility Item.
- Click History.
- Repeat steps 8 and 9 to add Macros. The utility bar is where reps access productivity tools and channel-specific features, such as macros for automating repetitive tasks. These tools stay accessible no matter which record the rep is viewing.
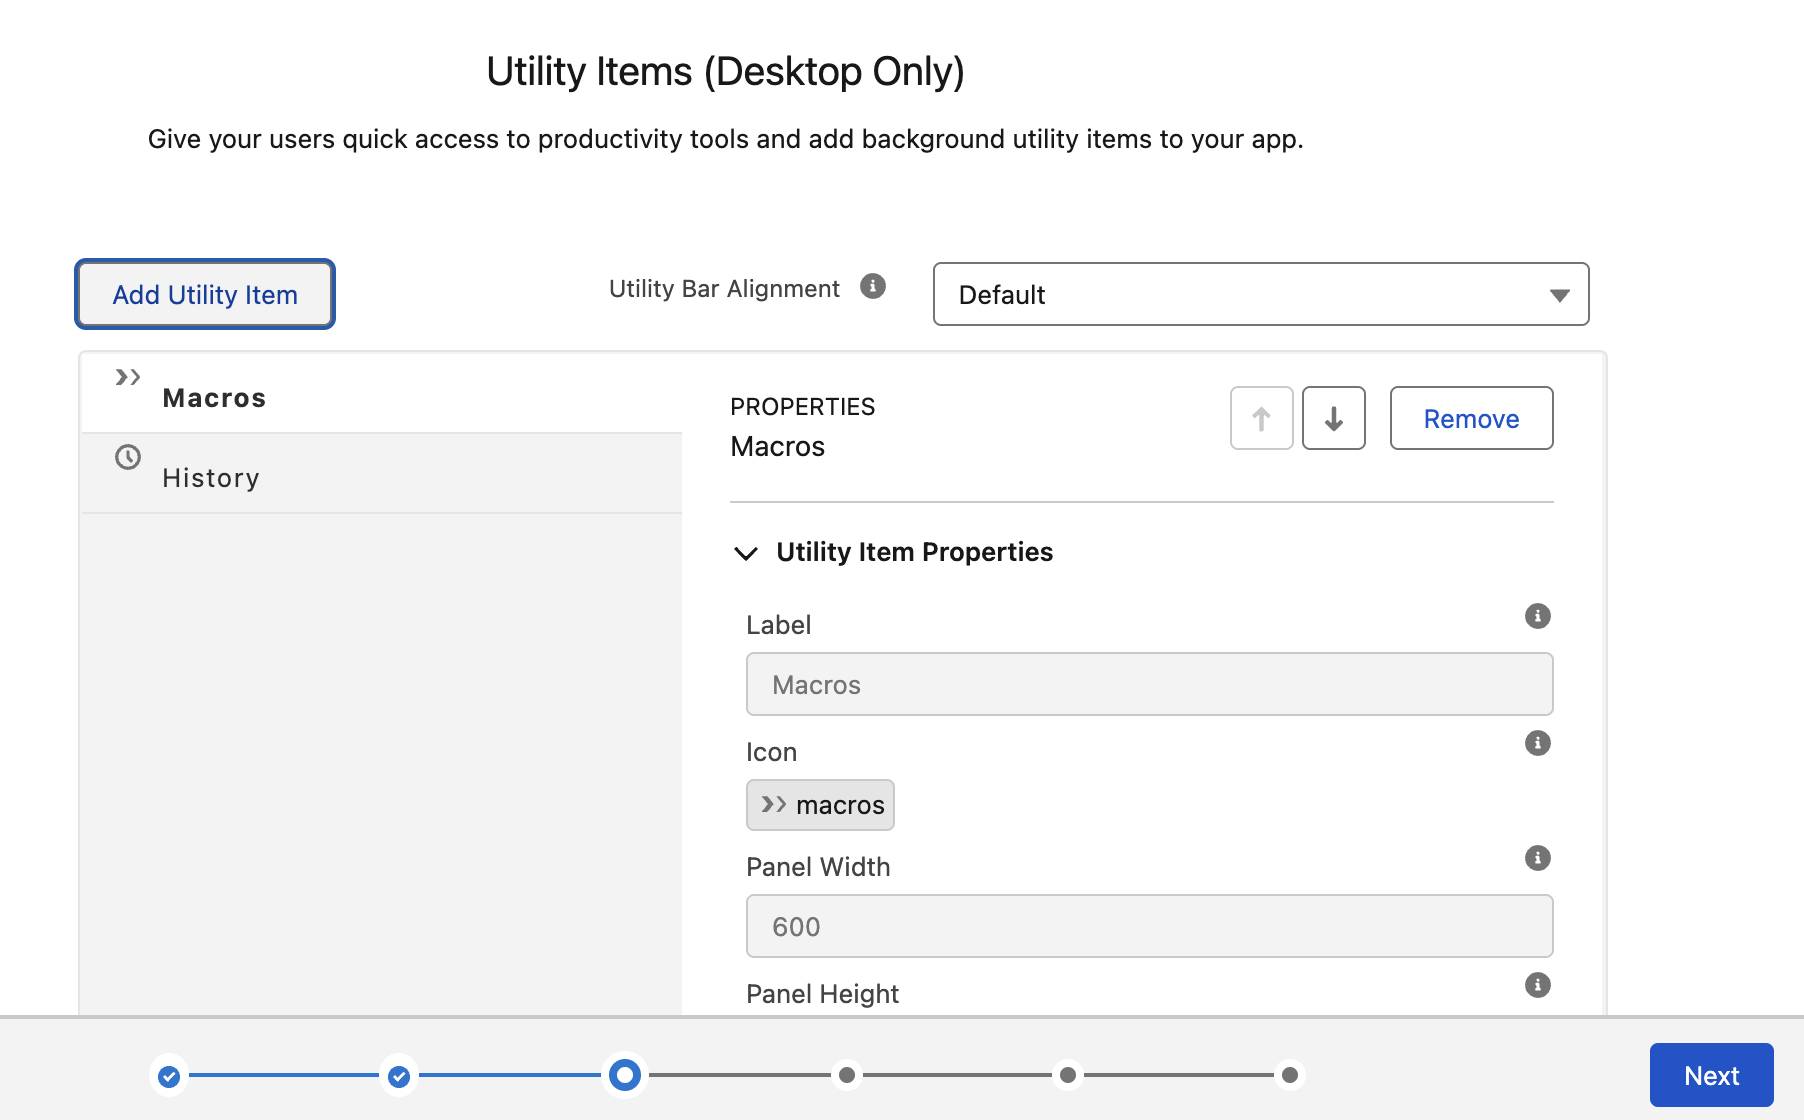
- Click Next.
- On the Navigation Items page, use the arrow
 to move Accounts, Cases, Contacts, and Knowledge from the Available Items list, to the Selected Items list.
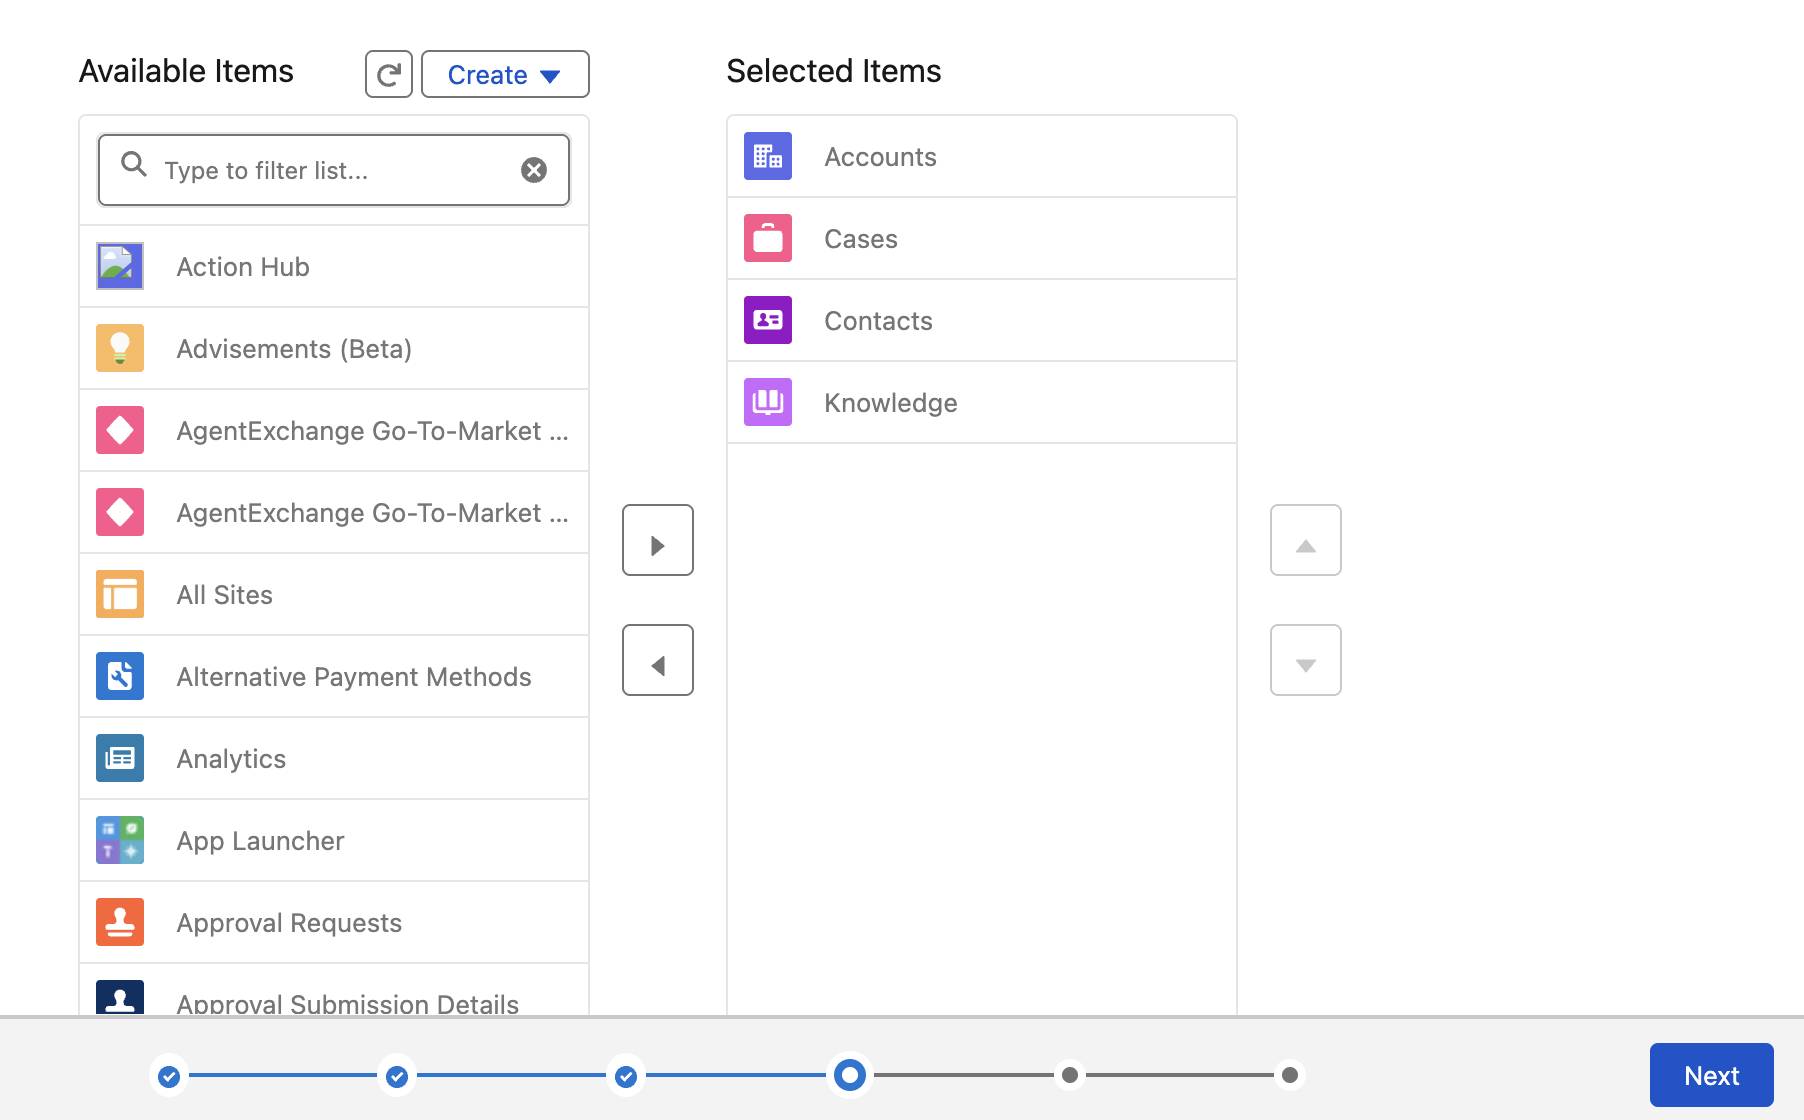
- Click Next.
- On the Navigation Rules page, choose how the following open.
- Accounts: Select the Workspace tabs radio button.
- Cases: Select the Subtabs of radio button and choose Parent Case (Case) from the picklist.
- Contacts: Select the Subtabs of radio button and choose Account (Account) from the picklist.
- Accounts: Select the Workspace tabs radio button.
- Click Next.
- On the User Profiles page, use the arrow
 to add Custom: Support Profile and System Administrator to the Selected Profiles list.
- Click Save & Finish.
Test Your Work
You just set up and customized the Service Console for Ursa Major Solar. Now test the console experience. Explore split view, workspace tabs, and subtabs to see how reps can multitask without losing context. This is the foundation for efficient case management.
- Click
 to open the App Launcher and select Ursa Major Solar Service Console.
- Fro the Accounts tab select All Accounts from the dropdown.
- Click the Pyramid Construction account link under the name column. The account record opens as a workspace tab on the right.
- Note that the Accounts list view remains open on the left side of the console, and the account information for Pyramid Construction opens on the right, in the main workspace of the console. This is called split view. You can change this view to Kanban or back to Table by clicking
 under the Accounts list view palette. Now, leave it as a split view.
- Scroll down and click Pat Stumuller under the Contacts related list. The contact record for Pat Stumuller opens as a subtab of the account.
- Scroll down and click New under the Cases related list. The case record opens as a subtab, and the Account Name and Contact Name fields auto-populate.
- Log a case by filling in the rest of the information.
- Case Origin: Phone
- Subject:
Solar Panel Warranty - Description:
What is the warranty on the Solar Panels when they get installed?
- Click Save.
- Click the History component in the utility bar at the bottom of the console to view your history. Click the arrow next to Pyramid Construction to expand the history for this account.
Great! You set up the Service Console for Ada and her team. They can now access all the productivity tools and information needed to efficiently manage cases all from one screen. Next, customize the console to include all of the features and layouts that Ada and her team request.