Presentar pantallas de confirmación

Tiene un flujo funcional que crea y actualiza contactos, pero ¿desea que el flujo realice el cambio sin avisarle al usuario que lo solicitó? Un buen diseño de experiencia de usuario comunica los cambios a los usuarios. Por lo tanto, terminemos este flujo con un par de pantallas informativas que establezcan un vínculo con el registro creado o actualizado.
Crear una fórmula de URL
Para generar los vínculos de las pantallas, cree una fórmula de texto.
- En la caja de herramientas (
 ), haga clic en New Resource (Nuevo recurso).
- En Resource Type (Tipo de recurso), seleccione Formula (Fórmula).
- En API Name (Nombre de API), ingrese
contactURL.
- En Data Type (Tipo de datos), seleccione Text (Texto).
- En Formula (Fórmula), ingrese el siguiente texto.
"/lightning/r/Contact/" & {!contact.Id} & "/view"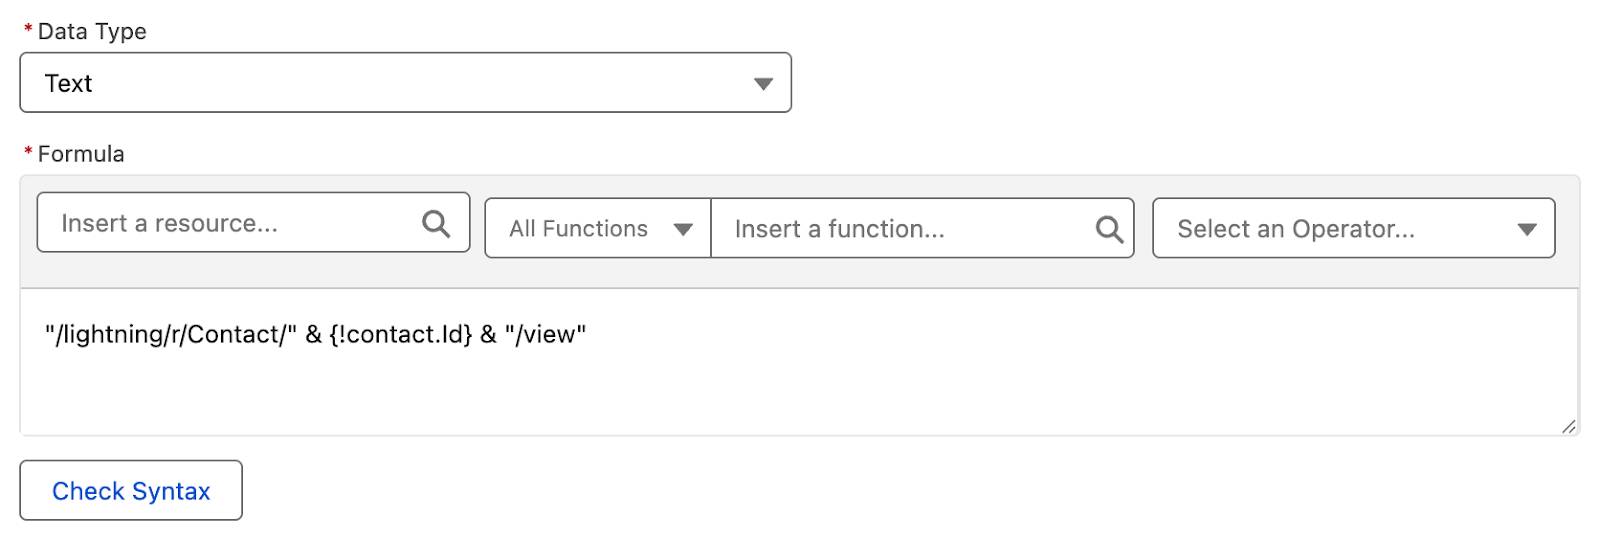
En esta fórmula se usa el operador & para concatenar varias cadenas de texto en una URL dinámica. La cadena{!contact.Id}inserta el Id. del contacto que se creó o actualizó.
- Haga clic en Check Syntax (Comprobar sintaxis) para asegurarse de que la fórmula tenga la estructura correcta.
- Haga clic en Done (Listo).
- Guarde el flujo.
Agregar una pantalla de contacto actualizado
Ahora, cree una pantalla para mostrar cuando un contacto se actualizó.
- En la ruta Update Existing (Actualizar existente), después del elemento Update Contact (Actualizar contacto), haga clic en
 .
.
- Seleccione Screen (Pantalla).
- En Label (Etiqueta), ingrese
Contact Updated(Contacto actualizado).
El nombre de API se establece automáticamente enContact_Updated.
Agregar un componente Display Text (Mostrar texto) a la pantalla de contacto actualizado
Agregue un componente que le indica al usuario que el contacto se actualizó junto con un vínculo que lo dirige al registro actualizado.
- En la ficha Components (Componentes), ingrese
Display(Mostrar) en el cuadro de búsqueda de componentes.
- Haga clic en el componente Display Text (Mostrar texto) para agregarlo al lienzo de la pantalla.
- En el panel de propiedades del componente Display Text (Mostrar texto), en API Name (Nombre de API), ingrese
contactUpdatedText.
- En el editor de texto, ingrese el siguiente texto.
The contact has been updated.
{!contact.FirstName} {!contact.LastName}- Haga clic y arrastre para resaltar
{!contact.FirstName} {!contact.LastName}.
- Haga clic en
 para abrir el editor de vínculos.
El campo Link Title (Título de vínculo) debería contener{!contact.FirstName} {!contact.LastName}.
- En Link URL (URL de vínculo), ingrese
{!contactURL}.
Este texto hace referencia a la fórmula contactURL, por lo tanto, el vínculo abre la URL dinámica de la fórmula.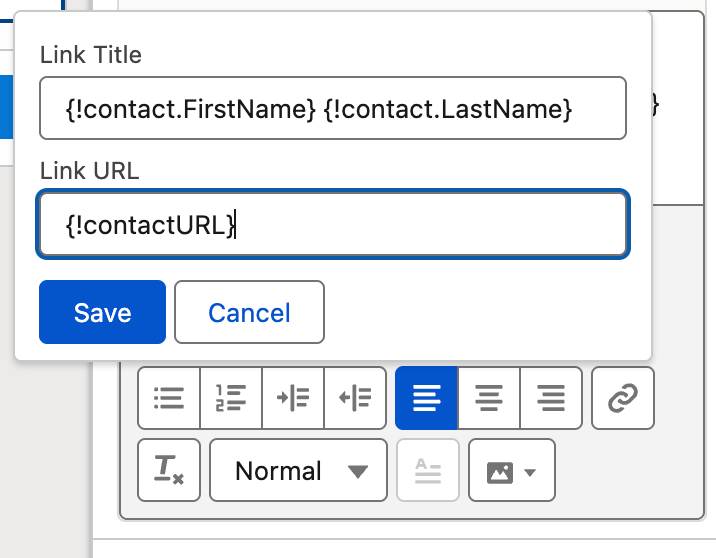 [Texto alternativo: El editor de vínculos correspondiente al paso anterior].
- Haga clic en Save (Guardar) en el editor de vínculos.

Cuando se ejecute esta pantalla, el flujo mostrará el nombre y apellido del contacto actualizado como un vínculo en el que se puede hacer clic y que lleva al usuario directamente al contacto actualizado.
- Haga clic en Done (Listo) para cerrar la ventana Edit Screen (Modificar pantalla).
- Guarde el flujo.
Agregar una pantalla de contacto creado
Debe crear un último elemento: la pantalla que muestra cuando un contacto se creó. Como debe ser muy similar al elemento Contact Updated (Contacto actualizado), agilicemos el proceso: copie y pegue ese elemento y modifique la copia.
- Pase el cursor sobre el elemento Contact Updated (Contacto actualizado) y haga clic en
 .
.
- Seleccione Copy Element (Copiar elemento).
- En la ruta Not Found (No encontrado), detrás del elemento Create Contact (Crear contacto), haga clic en
 .
.
- Seleccione Paste 1 Element (Pegar 1 elemento).
Con esta acción se crea un elemento: Copy 1 of Contact Updated (Copia 1 del contacto actualizado).
Vamos a ajustarlo para cumplir con las necesidades de esta ruta.
- Haga clic en el elemento Copy 1 of Contact Updated (Copia 1 del contacto actualizado).
- Actualice los valores en el panel Screen Properties (Propiedades de pantalla).
- En Label (Etiqueta), ingrese
Contact Created(Contacto creado).
- En API Name (Nombre de API), ingrese
Contact_Created.
- En Label (Etiqueta), ingrese
- En el lienzo de la pantalla, haga clic en el componente Display Text (Mostrar texto) (el área que dice “The contact has been updated” [El contacto se actualizó]).
- Actualice los valores en el panel de configuración Display Text (Mostrar texto).
- En API Name (Nombre de API), cambie el valor existente por
contactCreatedText.
Cambie este valor porque cada nombre de API debe ser único dentro del flujo.
- En el editor de texto, reemplace
updated(actualizado) porcreated(creado).
- En API Name (Nombre de API), cambie el valor existente por
- Haga clic en Done (Listo).
- Guarde el flujo.

¡Terminó de construir el flujo! Puede hacer clic en Run (Ejecutar) para ejecutar el flujo y confirmar que los contactos en su organización se crean o actualizan. Para obtener información más detallada de lo que el flujo hace cuando se ejecuta, haga clic en Debug (Depurar) y, luego, en Run (Ejecutar).