Configure a Recommender
Learning Objectives
After completing this unit, you’ll be able to:
- Launch the Einstein Product Recommender.
- Use the Einstein Configurator to configure a recommender.
To create recommenders, you use the Configurator tool. The Configurator controls the strategy (algorithm) that Einstein Product Recommendations uses to generate the list of products. When the storefront renders the final list of recommended products, they’re in the optimal order as defined by your strategy and rules.
Here’s how you configure a recommender that recommends more products of the same brand.

- In a web browser, go to Einstein Configurator. Access to the configurator requires permissions provided by your B2C Commerce admin.
- Log in to the Configurator.

- Click the Site Recommendations tab.
- Click New Recommender.
- Select your site.
- Select a recommender type: Product to Product.
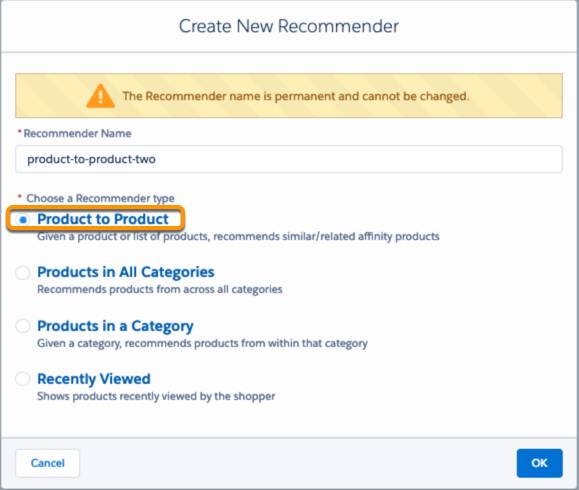
- Enter the recommender name (which looks like related-product-brand-x), and click OK. Make sure that the name is unique for the site and contains fewer than 100 characters. It can contain letters, hyphens, and underscores (no spaces).

- Click the General tab in the left pane, and enter these values.
- Description: Related products with the same brand.
- Maximum number of recommendations: 4. (This field isn’t always available.)
- Select two products to appear at the top of the list.
- Description: Related products with the same brand.
- Click the Strategies tab (1).

- Each row of the table is one strategy, and is in priority order. (This tab isn’t always available.)
- Click Add Strategy (2). This action creates a new row at the bottom of the table.
- Select the strategy: Product Affinity Algorithm, and click Save.
- Click the Rules tab.
An empty table with up to two columns appears.
- Click the Rules tab.
-
If the shopper sees this: This column appears when you create rules for the Product to Product type. Specify an anchor field and anchor field value. Anchors help you narrow in on a specific product or catalog.
-
Recommend products according to the following criteria: This column appears for all recommender types. Specify an action, field, and field value.
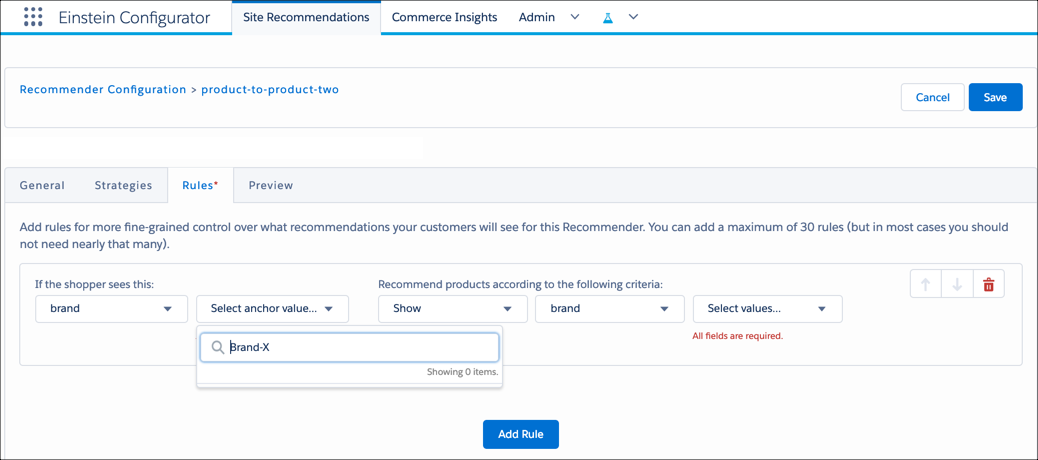
- Click Add Rule.
- Select If the shopper sees this anchor field (Brand) and anchor value (Brand-X).
- Select the action: Show.
- For the recommended product criteria, select the field (Brand) and value (Brand-Y).
You can’t change a recommender’s name, but you can create one with a different name and delete the old one.
Preview a Recommender
As you add, delete, or change the order of your strategies or rules, you can preview them to see how the changes affect recommendations.
- Open Configurator.
- Select a recommender.
- Click the Preview tab.

- For a Product in a Category recommender, specify a category anchor (category-id).
- For a Product to Product recommender, specify a product anchor (product-id).
- Other recommender types don’t require an anchor when previewed.
- Click Go. You see a list of products returned by the recommender.
Next
In this unit, you learned how to set up recommenders in Configurator. Next, learn how to work with a developer on an ISML template so shoppers see the personalized product recommendations on your storefront.