Enable Agentforce Pipeline Management
Learning Objectives
After completing this badge, you’ll be able to:
- Enable required features of the agent.
- Assign correct permission sets so users can access the agent.
- Test your Pipeline Management agent.
Agentforce Pipeline Management
Agentforce Sales is here with another valuable tool to help free up time for your sales team and boost seller productivity. When you enable Agentforce Pipeline Management as part of your Sales Management agent, the agent analyzes data sources such as recent notes, emails, and voice or video calls to offer actionable suggestions for managing seller’s opportunities.
With Agentforce Pipeline Management, sales reps never miss a beat. Intelligent suggestions surface directly from notes, email, and calls—prompting reps to update key fields, follow up on important emails, or schedule meetings at exactly the right moment. By streamlining these actions into just a few clicks, Agentforce Pipeline Management moves deals forward while freeing reps to focus on higher-impact work that drives revenue.
Sign Up for a Developer Edition Org for Pipeline Management Agent
To complete this project, you need a special Developer Edition org that has Agentforce enabled. Get the free Developer Edition and connect it to Trailhead now so you can complete the challenges in this badge. Note that this Developer Edition is designed to work with the challenges in this badge, and might not work for other badges. Always check that you’re using the Trailhead Playground or the special Developer Edition org that we recommend.
- Sign up for a free Developer Edition org for Pipeline Management Agent.
- Fill out the form.
- For Email, enter an active email address.
- For Username, enter a username that looks like an email address and is unique, but it doesn’t need to be a valid email account (for example, yourname@pipelinemanagement.com).
- For Email, enter an active email address.
- After you fill out the form, click Sign me up. A confirmation message appears.
- When you receive the activation email (this might take a few minutes), open it and click Verify Account.
- Complete your registration by completing the verification and setting your password and challenge question.
- You are logged in to your Developer Edition.
Now connect your new Developer Edition org to Trailhead.
- Make sure you’re logged in to your Trailhead account.
- In the Verify Step section at the bottom of this page, click the playground name and then click Connect Org.
- On the login screen, enter the username (the username is listed in the email you just received) and password for the Developer Edition you just set up.
- On the Allow Access? screen, click Allow.
- On the Want to connect this org for hands-on challenges? screen, click Yes! Save it. You are redirected back to the challenge page and ready to use your new Developer Edition to earn this badge.
Enable Pipeline Management Supporting Features
Before being able to begin managing your sales pipeline or help teams track, manage, and accelerate deals, we need to set up the Pipeline Management agent. With Salesforce Go this process is faster. Let’s go ahead and get the agent set up now.
- Click
 and click Setup. The Setup page opens in a new tab.
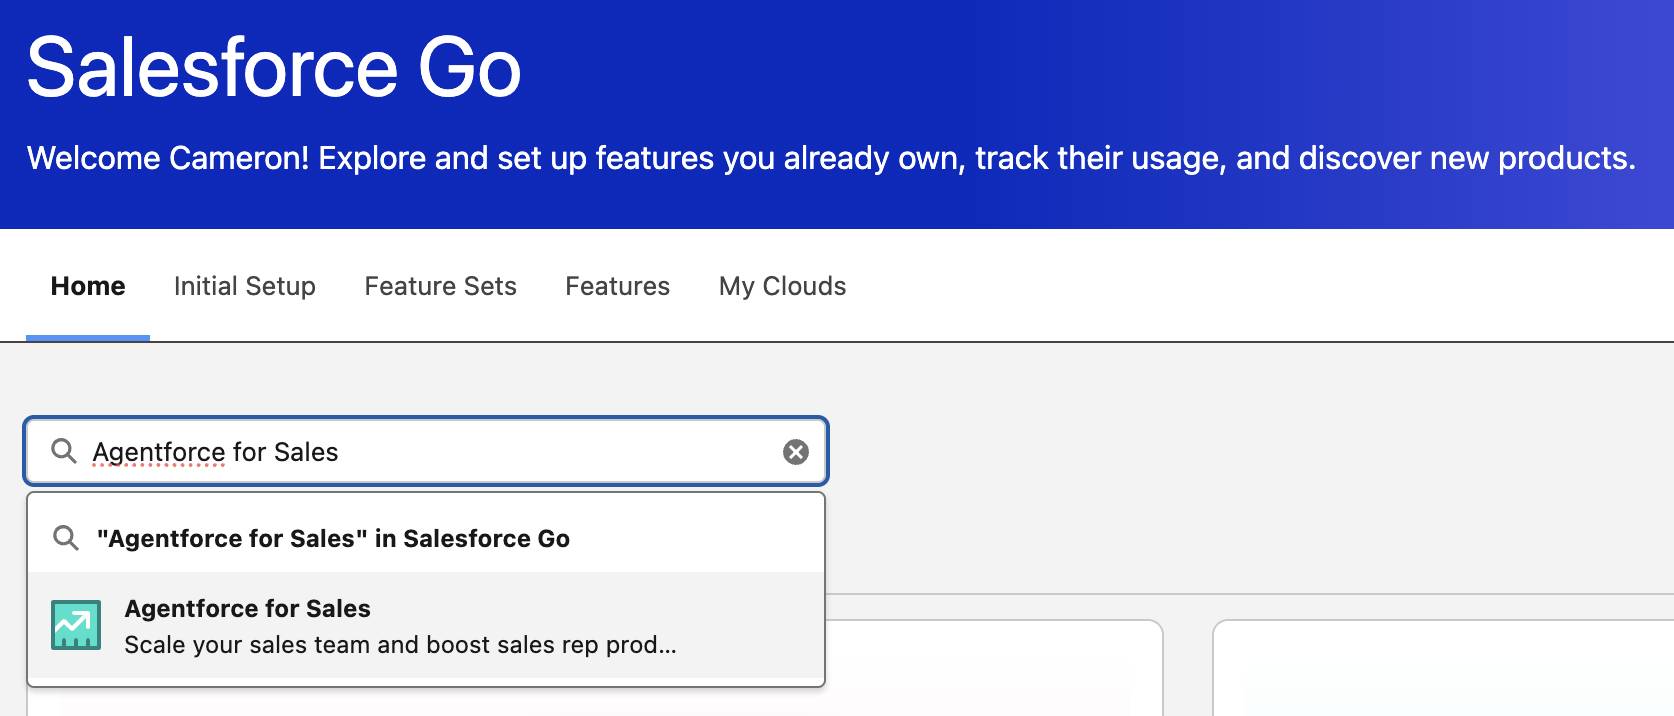
- In the Setup Quick Find, search for and select Salesforce Go.
- In the Search features… text box, search for and select Agentforce Studio.

- Click Get Started.
- Click Turn On.
- Click Confirm.
- Click Salesforce Go to return to the Salesforce Go menu.

- In the Search features… text box, search for and select Agentforce for Sales.
Enable Pipeline Management Flows
- With Agentforce for Sales open in Salesforce Go, scroll down and click the right arrow next to Pipeline Management to expand this section.
- Turn on the Pipeline Management feature by switching the toggle to On.

- Click Confirm.
- Scroll down to Customize Pipeline Management Flows section and click Process Field Update Suggestions Flow to open that flow.

- Leave this tab open (you’ll need it in a later step when you work with that flow) and return to the Pipeline Management section on the Salesforce Go page.
- Check the following boxes, then refresh your browser window:
-
Customize Pipeline Management Flows
-
Set Up Conversation Intelligence (formerly Einstein Conversation Insights)
-
Set Up Einstein Activity Capture
-
Set Up Inbox
-
Define Opportunity Stage Descriptions
-
Update Fields Autonomously
-
Customize Pipeline Management Flows

Add Notes to the Opportunity Record Page
Before you start testing your agent, you need to add a notes section to the opportunity record.
- With Setup still open, click the Object Manager tab.
- Enter
Opportunityinto the Quick Find search bar and select Opportunity.
- Select Page Layouts.
- Select Opportunity Layout.
- Select Related Lists from the menu.

- Click and drag Notes to the related lists section.
- Click Save then click Yes in the Overwrite Users’ Related List Customizations popup window.
Update Your Timezone
In the next unit, the agent uses the Customize Pipeline Management Flows that are based on specific start times. To make these start times align with your local time, ensure that both your org’s default time zone and your user’s default time zone is accurate. The org is set to Pacific Time by default.
- From Setup, click the Home tab.
- In the Setup Quick Find, search for and select Company Information.
- Click Edit.
- Enter your name and email address. Enter
1234567890for the phone number.
- Scroll down to the Locale Settings and update the Default Time Zone to your time zone.
- Click Save.
Now update your user’s time zone.
- In the Setup Quick Find, search for and select Users.
- Click Edit next to your name.
- Scroll down to the Locale Settings and update the Default Time Zone to your time zone.
- Click Save.
Great work! You enabled your new Pipeline Management Agent and assigned access to the agent for all your sales reps. Next, we are going to test and activate the agent to help your sales team save time to focus on the more complex tasks.