Choose a Channel and Deploy Your Agent
Learning Objectives
After completing this unit, you’ll be able to:
- Select a deployment channel for your Help agent.
- Validate your agent’s conversational responses using the preview panel.
- Deploy your agent to your help portal.
Choose Your Channel
Now that you established your agent’s identity and grounded it with knowledge, it’s time to choose a channel for your agent that fits your business.
All three channels—Web Chat, Help Portal, and Voice—are available in the guided setup. (Note: The practice org you’re working in does not have Voice enabled.) And you’re not limited to a single channel. From the Add to Channels screen, you can add your agent to any combination of these channels, for example, help portal and voice together.
-
Web Chat: If you have an existing external help site, this is the fastest path. Salesforce automatically generates an asynchronous JavaScript code snippet mapped specifically to your site and your new agent. Before copying the snippet, you’re asked to enter the domain of the website where you’ll deploy the agent (for example, yourcompany.com). This is a security requirement—the generated JavaScript is authorized to run only on the domain you specify. If someone copies your snippet and drops it onto an unauthorized domain, the agent won’t activate. This protects your agent and your customers’ data.
-
Help Portal: If you don’t have an existing help site—or want a purpose-built AI-first experience—you can deploy to a help portal directly from this flow. This portal is an Agentforce Customer Service Portal. Clicking this option gives you a sample portal with a prompt bar and conversation interface to get started quickly. It is a starter portal—not a fully customized, production-ready site. Think of it as your foundation. You can extend it later through Experience Builder to add suggested themes, personalizations, branded components, and multiple workflow-driven agents.
-
Voice: You can also deploy your agent as a voice AI agent. The setup walks you through configuring greetings, choosing a voice tone, assigning a default phone number, and setting an escalation path (including handoff to human agents). Voice deployment integrates with Agentforce Contact Center and Salesforce telephony partners. Note: The practice org you’re working in does not have Voice enabled. To learn more about setting up Agentforce Voice, earn the AI Integration for Agentforce Contact Center Trailhead badge.
Beyond these three channels, the Help Agent also supports deployment to Salesforce Experience Sites and third-party communication channels like WhatsApp. Configuring third-party communication channels requires manual setup outside of the guided setup. See the Provide Conversation Support with Messaging documentation for instructions on adding agents to other service channels.
Create the Help Portal
The Help Portal channel is one of the quickest ways to see your new Help Agent in action.
- Click Manage under Help Portal.

- For Site Name, enter
CCHelpPortal.
- Feel free to adjust the colors of this sample help portal.
- Click Create and Deploy. Note: It can take a few minutes for your new sample Help Portal to be created.
- Important Note: Wait for the Help Portal status to equal Ready in the Your Agent section—this can take a few minutes.
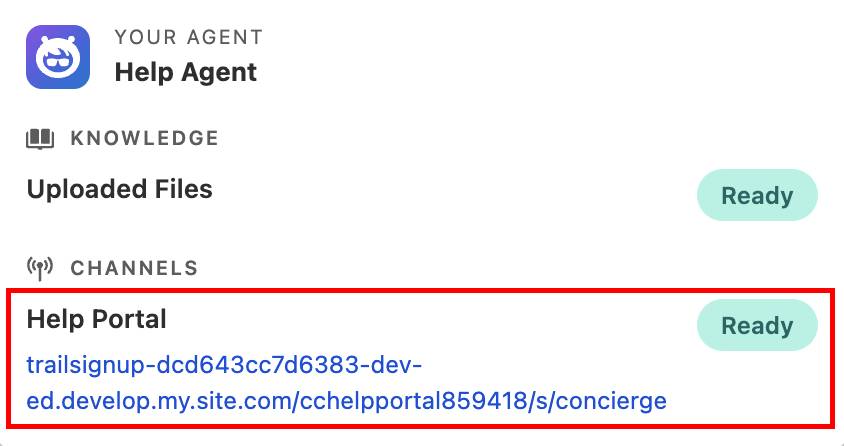
Note: Your Help Portal URL will be different from the example above.
- Once the Help Portal URL is listed in the Your Agent section, click Continue.
See the Help Agent in Action
Time to see your Help Agent in two different channels, Help Portal and Experience Site.
- Review the Next steps and Agent details section.
- Scroll down to the Channels section and click the CCHelpPortal URL link to open your new Help Portal in a new web browser tab.
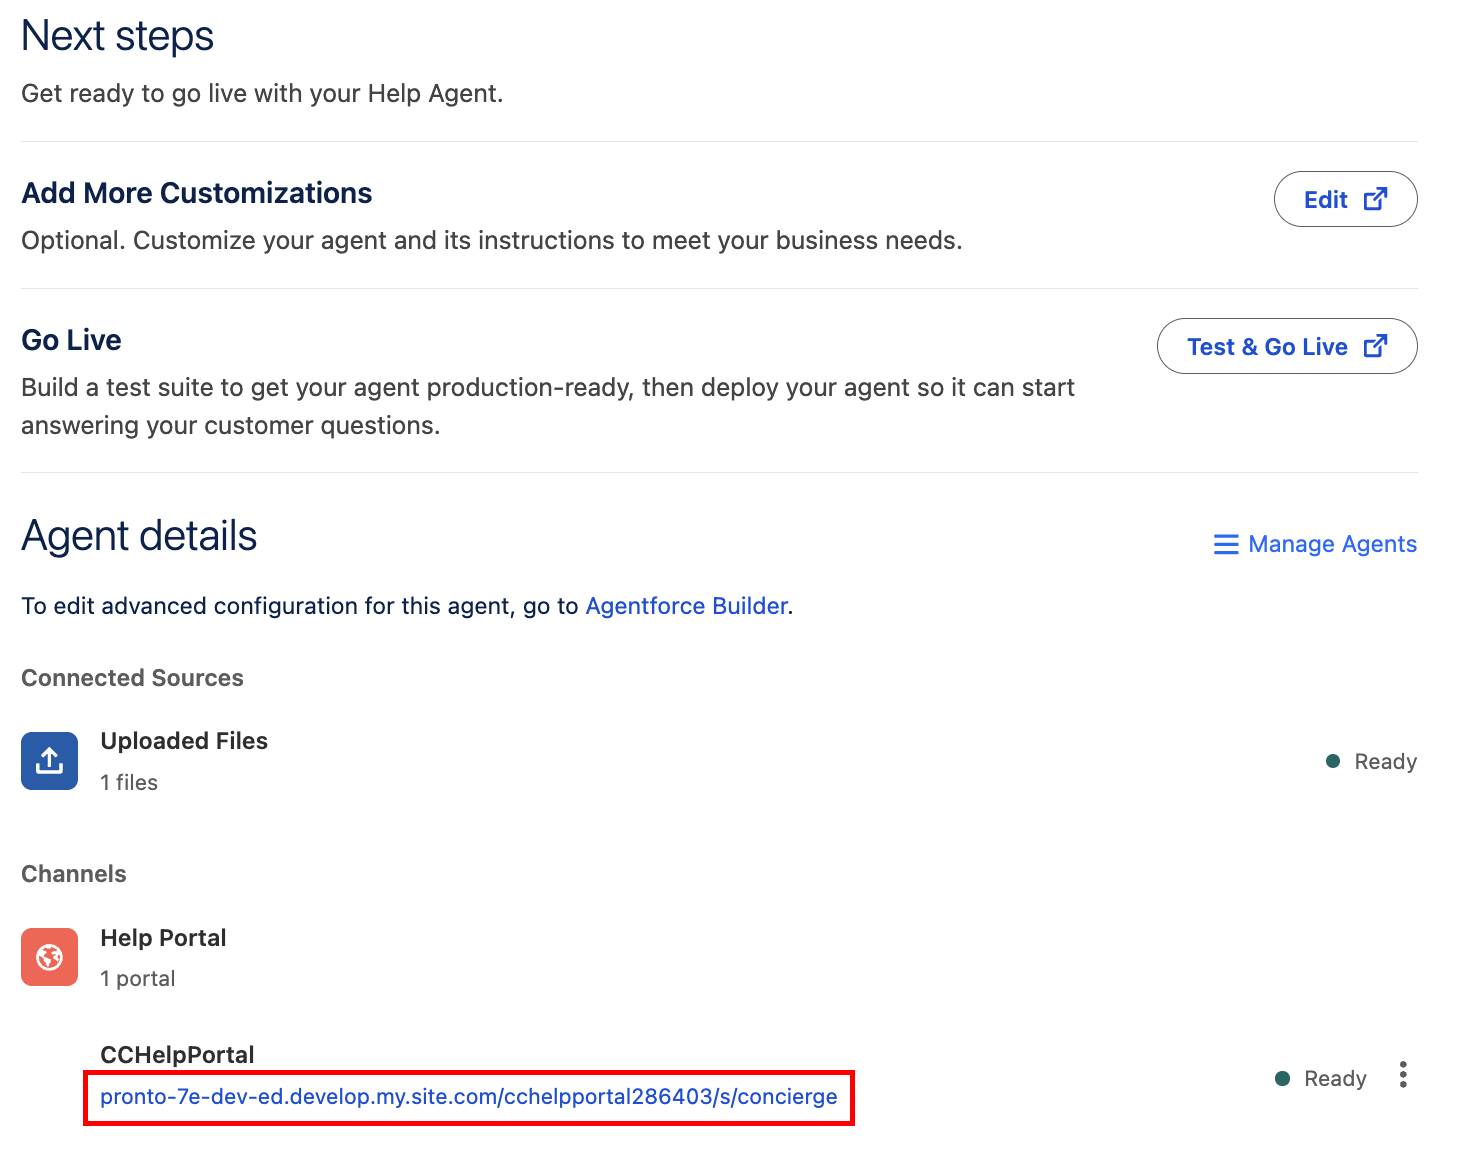
Note: Your Help Portal URL will be different from the example above.
- In the Ask me anything input, pretend to be a customer and ask the agent questions based on the knowledge (in this case, the Coral Cloud Resorts PDF) you grounded it on. For example:
-
When is check-out?
-
Are pets allowed?
How much does it cost to cancel my reservation within 7 days?
-
- Press enter/return after asking each question and wait for the Help Agent to respond. Note: The initial input screen will adjust into conversation mode, no need to re-enter your question when the screen switches to conversation mode.
- Notice that the Help Agent cites its sources by default.
- Click Sources to expand the section below the agent’s answer to view a link to the pdf.
- Test the agent’s boundaries. Ask it a question that isn’t covered in the grounded knowledge. A well-grounded agent should politely decline to answer or offer to route you to a service rep, rather than hallucinating or making up an answer.
- Click
 in the upper left to start a new chat.
- Click + next to New chat and click OK.
- Close the Help Portal browser tab and return to the Agent Configuration browser tab.
Experience Site
Another way to surface the Help Agent is through a Salesforce Experience Site. Coral Cloud Resorts has an existing Experience Site and would like the Help Agent accessible there too. First, publish the Coral Cloud Resorts Experience Site to prepare it for the Help Agent.
- From the Agent Configuration browser tab, click
 and select Setup.
- From the Set Up Quick Find box, search
All Sitesand select it.
- Click Builder next to the coral-cloud site.

- If a popup appears, click OK.
- Click Publish in the upper right corner.

- Click Publish in the confirmation window—this can take a few minutes.
- Click Got It.
- With the site published and ready for editing, click the Components widget
 .
.
- Search for Embedded Messaging and drag and drop the component over the Book an Experience of a Lifetime section. Note: Exact placement is up to you, and it can take a few seconds for the component and component menu to appear.
- Within the component menu that opens on the right, click the Embedded Web Deployment dropdown and select the Help Agent deployment.

- Once again, click Publish in the upper right corner.
- Click Publish in the confirmation window.
- Click Got It.
- Click the Experience Builder menu
 .
.
- Select View coral-cloud to open the published coral cloud site. Note: It can take a few minutes for the site to publish.
- Click the Ask Me Anything button
 in the lower-right corner to start interacting with the new agent. Just like the Help Portal, ask some questions from the PDF.
Congratulations! Your Agentforce Help Agent is live and answering customer questions around the clock in two different channels.
Manage and Extend Your Agents
Need to view all of the Help Agents you’ve created, their version numbers, and their current status (Draft, Active, or Inactive)? Return to the Help Agent tab and click Manage Agents at the bottom of the screen. Use this view to:
- Create additional agents for other parts of your business.
- Manage agent versions. Each time you edit and redeploy an agent, a new version is created so you can track changes over time.
- Navigate to Agent Builder for deeper customization. From the list view, click any agent to open it in the full Agentforce Agent Builder, where you can add custom actions, topics, and integrations beyond what the guided setup provides.
Your Help Agent is an Agentforce Agent. It isn’t isolated—it operates alongside any other agents you build, and you can extend it with the same tools (actions, flows, Apex) available across the Agentforce platform. And much like other Agentforce agents, don’t forget about adding the functionality to escalate to a human service rep. A great place to start is the Understanding Escalations from Help Agent to Service Rep help article.
Recap
In just a few steps, you created an AI agent and grounded it in your own knowledge. You even deployed it to several different channels. From here, you can fine-tune its knowledge, add more channels, or build additional agents for other parts of your business.