Configure Sample Inventory Hierarchy
Learning Objectives
After completing this unit, you’ll be able to:
- Identify the product and inventory setup needed before sample operations begin.
- Describe how the sample inventory hierarchy tracks product, location, quantity, and manufacturing source.
- Explain how Production Batch, Location, Product Item, and Product Batch Item records work together.
- Configure the core records that establish a representative’s starting sample inventory.
Move from Product Setup to Inventory Tracking
In the previous unit, you learned how Sample Management builds on the product management foundation in Agentforce Life Sciences.
Now you begin the setup stage. Before a representative can acknowledge a shipment, transfer stock, or drop a sample during a visit, Salesforce needs a traceable inventory structure.
That structure answers four practical questions.
- What product can be sampled?
- Where is the stock stored?
- Which manufacturing batch supplied it?
- How many units does the representative have?
In this unit, you prepare the sample product context, then build the inventory hierarchy that gives a representative starting stock. You follow Cumulus as it prepares Immunexis 50mg samples for field distribution.
Confirm the Sample Product Foundation
Before you build any inventory records, confirm the product is ready for sampling. Sample inventory sits on top of the commercial product model, where the product's identity, hierarchy, and specifications are already defined. That modeling is the subject of the Product Management for Agentforce Life Sciences badge. Here, you confirm the handful of fields on the Life Science Marketable Product that decide whether a product can move as a physical sample.
A sampling-ready product is Active, carries a Start Date, and uses a Distribution Method such as Drop and Ship. The Is Available For Sampling Allocation checkbox marks it for sample distribution. Two more fields shape replenishment. Min Sample Order Quantity and Max Sample Order Quantity keep product requests within an approved range when representatives reorder stock.
Pay close attention to Parent Product and Parent Brand Product. Populate both. If either one is blank, the product won't appear on the Visit for disbursement, and representatives can't drop it as a sample.
Some other prerequisites sit outside these fields. Sample creation fails unless the product's record type uses a spec type, so confirm the record type before you move on. At the org level, the Location object uses a Location Type value for user inventory, and the sample inventory trigger handlers stay active so ownership and quantity updates run as expected. For the full list of prerequisite steps, check out Set Up Sample Management in Salesforce Help.
For Cumulus, the Immunexis 50mg marketable product is already sampling-ready. It's active, uses Drop and Ship, allows sample order quantities from 1 to 100, and names Immunexis as both the Parent Product and Parent Brand Product.

With the product confirmed sampling-ready, you can build the inventory records around it. First, find out how some core objects fit together.
Understand the Sample Inventory Data Model
Sample inventory uses four connected objects to track custody and quantity.

A Location (1) represents a physical storage place. The Primary User links that location to the representative responsible for the inventory.
A Production Batch (2) represents the manufacturing source. It stores information such as the batch identifier, expiration date, active status, and quantity unit of measure. This record supports recall tracking, expiration visibility, and audit review.
A Product Item (3) connects a product to a location. It tracks the total quantity of that product at that location. As drops, transfers, returns, counts, and adjustments occur, the Quantity On Hand updates.
Product Batch Item (4) connects the Production Batch to the Product Item. It tracks how much of the representative’s inventory came from a specific batch.
Together, these records create the chain from manufacturing source to field inventory. Acknowledgments, transfers, disbursements, returns, counts, and adjustments all flow through this chain and update the relevant balances.
Now you'll build these records one at a time. For each, you'll see where to create it, the key fields that give it meaning, and the cautions that keep the chain connected.
Create the Inventory Location
A Location gives sample stock a physical storage address.
For field inventory, the location usually represents the stock assigned to one representative. The Location Type identifies it as user inventory, and the Primary User identifies who is accountable for the stock held there.
From the App Launcher, open Locations and create a new record. Set the Location Type to the configured user inventory value, such as User Inventory, so the system treats the record as field stock. Assign the Primary User to name the representative accountable for the inventory, then select the Inventory Location checkbox so the record supports sample inventory operations.
In the Cumulus example, the Location represents the field inventory assigned to Evan Casto, a field representative. It uses User Inventory as the Location Type, names Evan as the Primary User, and has Inventory Location selected.
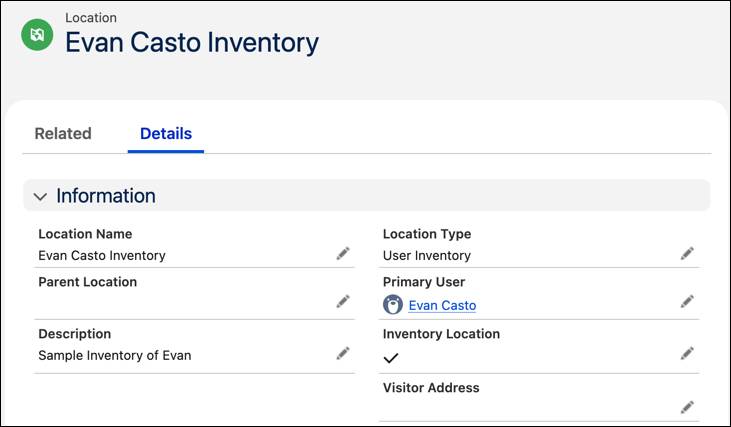
The Location now gives the inventory a place and an owner. The next record identifies the manufacturing source of the sample stock.
Create the Production Batch
A Production Batch records the manufacturing source of the sample units. That link matters when stock expires, a recall happens, or an audit asks which representatives received units from a specific manufacturing run.
Create the Production Batch from the product record. Enter the Expiration Date, Unique Identification Number, Active status, and Quantity Unit of Measure. Match the unit of measure to the downstream inventory records, so quantities calculate consistently.
For Cumulus, the Production Batch ties Immunexis 50mg to a specific manufacturing location. It's active, carries an expiration date, uses Each as the unit of measure, and has a unique identification number.
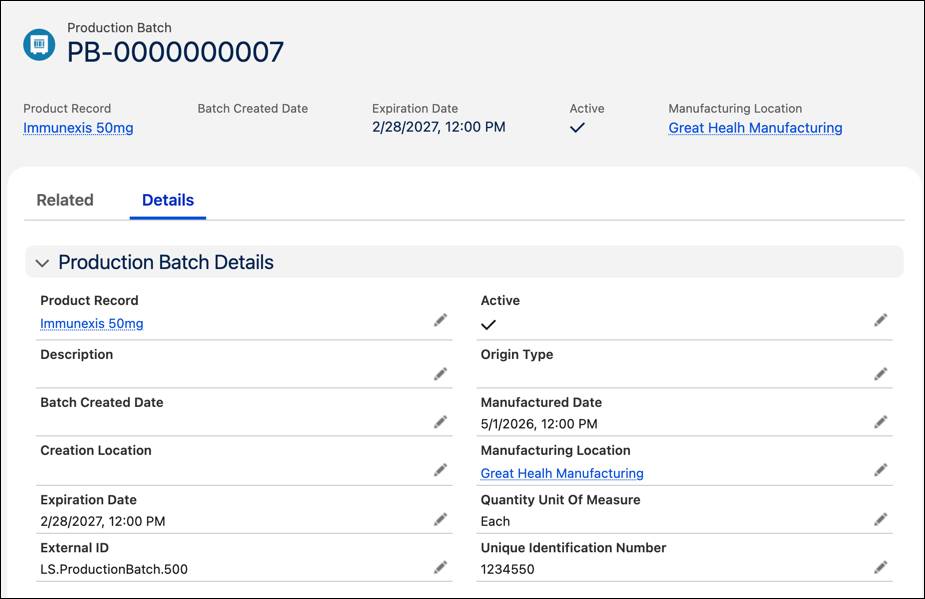
The batch records the manufacturing source. The next record connects the sample product to the field inventory location.
Create the Product Item
A Product Item tracks the total quantity of one product at one location. It's the running balance record, and it answers a practical question: How many units of this product are available at this location right now?
Create a product item from the Product Items related list on the product record. If you don't see that related list, add it to the product's page layout first. Select the inventory location, then set Quantity On Hand to zero, because the starting quantity comes from the Product Batch Item you create next. Match the Quantity Unit of Measure to the value set on the product batch so quantities stay consistent across the records.
Leave the Serial Number field blank. A serial number makes it possible to create more than one product item for the same product and location, and that duplication breaks disbursement. One product at one location maps to a single product item.
In the Cumulus example, the Product Item links Immunexis 50mg to Evan Casto's inventory location. Quantity On Hand starts at zero, the unit of measure is Each, and the Serial Number field stays empty.

The Product Item can now hold the total balance for the product at the location. The final record allocates quantity from a specific batch.
Create the Product Batch Item
A Product Batch Item makes inventory available at the batch level. It connects the production batch to the product item, and it stores the quantity allocated from that batch to that location.
Create a product batch item from the related list on the product batch record. Select the Product Item, enter the Remaining Quantity, and mark the record Active. Saving the record updates the linked Product Item balance, so the quantity you enter here becomes the representative's starting stock.
In the Cumulus example, the product batch item links the Immunexis 50mg product batch to the product item for Evan's inventory location, with a Remaining Quantity of 100.
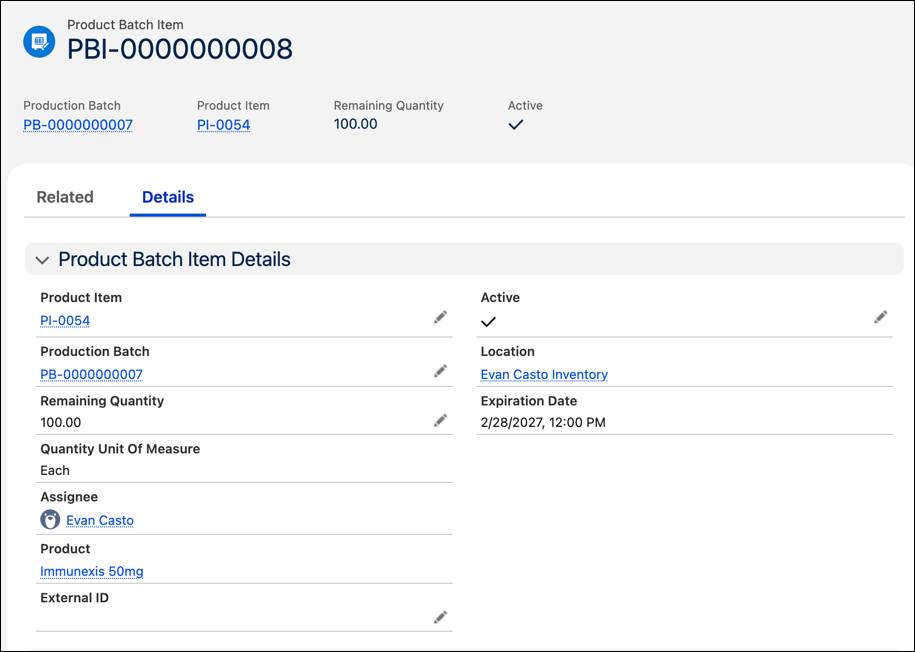
Now the inventory hierarchy is complete. The system knows which product can be sampled, where the stock lives, who's accountable for it, how much is available, and which production batch supplied it. The same pattern supports every field representative and sample product.
What’s Next?
In this unit, you built the inventory hierarchy that gives sample stock a traceable structure. You started with a sampling-ready product foundation. Then you created the Location, Production Batch, Product Item, and Product Batch Item records that establish a representative’s starting inventory.
The hierarchy tracks where stock lives, how much is available, and which batch supplied it. It does not yet define what representatives are allowed to distribute.
In the next unit, you configure the compliance guardrails. You create sample limits that control how much an HCP can receive, and territory quantity allocations that control how much a territory can distribute during a defined period.