Activate the Agent
Learning Objectives
After completing this unit, you’ll be able to:
- Navigate Agentforce Studio to review deployed agents and their underlying subagents.
- Configure a subagent's capabilities by adding and requiring specific actions from the Asset Library.
- Deploy a new agent version to evaluate its conversational capabilities.

Check the New Agent
Now that the new agent is deployed, check what the agent built for you.
Scroll down and click the Launch button. This opens your environment in a new tab.
- Click
 to open App Launcher, and search for and select Agentforce Studio.
- Click bookings_help_agent. Note: Your agent might be named slightly different, but should be similar.
Welcome to your new agent.
- Click New Version.
- Click Subagents to open it and review the different subagents the coding agent added to this agent.
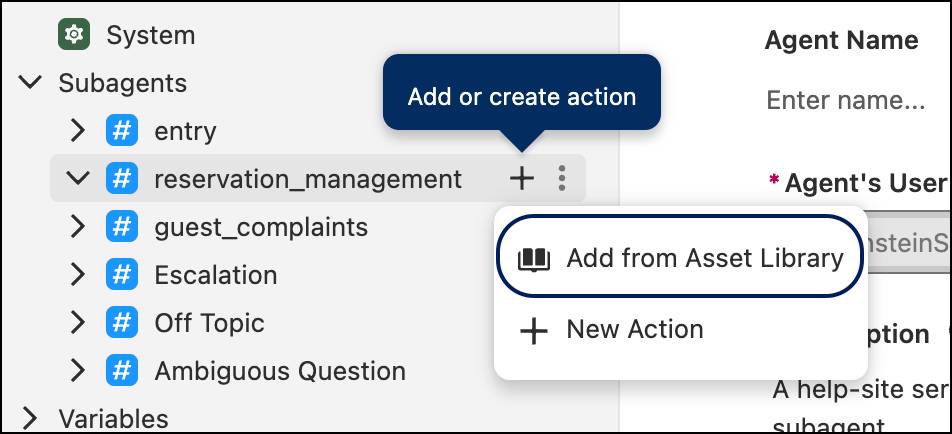
- Click the subagent name reservation_manangement to expand it.
After expanding the subagent, notice that the coding agent didn’t add the actions you need.
Add Actions
- Click the + next to the subagent reservation_management and select Add from Asset Library.
- Enter
reservationin the Search actions box.
- Click select next to two actions:
-
Finalize Reservation
-
Get Reservation Time Slots
-
Finalize Reservation
- Click Add to Agent.
Now the reservation_management subagent can get the reservations for the contact and display the details to them. Complaints resolution is next.
- Click the + next to the subagent guest_complaints and select Add from Asset Library.
- Enter
casein the Search actions box.
- Click Select for Create Case.
- Click Add to Agent.
The subagent can now create a case for the customer. All you need to do is get the agent out for testing.
- Click Save.
- Click Commit Version and click Commit Version again.
- Click Activate and click Activate again.
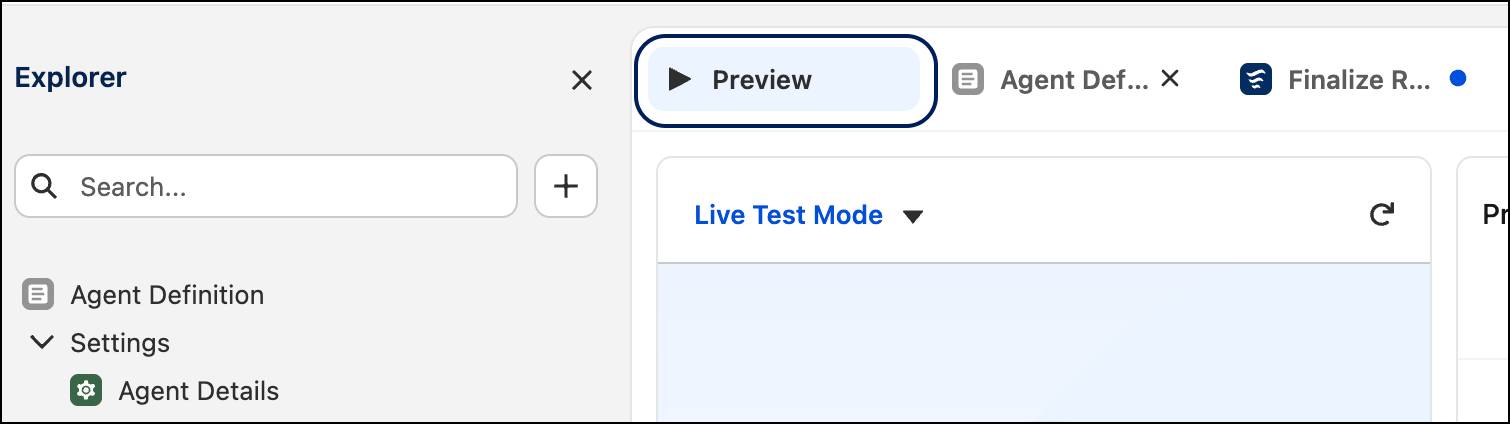
Preview the New Agent
Congrats! You built a Salesforce Agent with natural language, updated it, and deployed it. Now review how it performs.
- In the Builder, click Preview.
- Under Let’s chat!, enter:
What times do you have for the fine dining restaurant tomorrow?
- The agent shows you the available times. Enter:
Will you book the latest one for me?
- The agent asks you for a name, email, or phone number. Enter:
My name is Sofia Rodriguez. My email is sofia@example.com.
- The agent might ask you for the number of guests. Enter
2.
- The agent then gives you the final info and asks you to confirm it. Enter
Yes.
Level Up
Now that you worked with Salesforce Headless 360 to build your first Agentforce agent, where do you take it from here? The same prompts you used for this agent work to build other agents. All you have to do is modify them for the type of agent you want to build. You can also add to current agents using the same prompt tools. Check the resources for more information on working with prompts.