Build Rate Cards and Rate Card Entries
Learning Objectives
After completing this unit, you’ll be able to:
- Create a Base Rate Card with entries.
- Create a Tier Rate Card with tiered pricing.
- Associate rate cards with a pricebook.
The Need for Rate Cards and Overage Pricing
When an InfinitraBytes customer purchases the Cell Phone Plan, they pay a monthly fee of $100 to access its services and the grants. However, the core purpose of Usage Management is to track and bill consumption beyond the included grants. This is where the concept of overage and the use of rate cards become essential.
An overage is the usage that exceeds the free allowance provided by the Product Usage Grants you defined in the last unit. For example, if a customer sends 4,100 text messages, the first 4,000 messages are included in their grant and are free. The remaining 100 messages are the overage, and the customer is billed for them.
While a price book defines the one-time or recurring base price of a product such as the $100 monthly fee for the Cell Phone Plan, a rate card serves a completely different function–it defines the rules to rate the overage usage. Similar to price books, rate cards can contain multiple rate card entries.
In this unit, you get hands-on and define the rates for overages, including flat rates and tiered discounts.
Remember that the Unit Code of the Unit of Measure used in your rates cards must always match the currency code of the Standard Pricebook. For example, if you configure your Pricebook to use EUR, create a Unit of Measure record with the Unit Code EUR.
In your Developer Edition org, the Standard Pricebook uses USD as its currency code, and a matching Unit of Measure record with the Unit Code USD is already created.

You use this Unit of Measure while creating your rate card entries.
Set Up a Base Rate Card
Usage Admin Liam Hoko starts by defining the standard rate for each unit of overage. Join him as he creates a Base Rate Card to establish this standard rate across all three usage resources of the Cell Phone Plan. This table displays the approved base rates for overage usage.
Usage Resources |
Included Usage |
Base Rate |
|---|---|---|
Text Messages |
4000 |
$0.5 |
Data |
2 |
$2 |
Call |
100 |
$1 |
Follow along in your Developer Edition org.
Create a Base Rate Card
- On the Rate Management app, click
 and select Rate Cards.
- Click New.
- Add these details to create a new Base Rate Card.
- Name:
Cell Phone Plan - Base Rate Card - Description:
Cell Phone Plan - Base Rate Card - Rate Card Type: Base
- Effective From: For Date, select Today’s date – 3 days, and for Time select 12:00 PM.
- Save your changes.

With your Base Rate Card now set up, the next step is to define the individual rate card entries for each usage resource.
Create Rate Card Entries
When creating a new rate card entry, make sure to set the Status to Draft. After the record is created, you go back and update the Status to Active.
- On the newly created Rate Card page, navigate to the Rate Card Entries tab.
- Click New.
- Add these details.
- Usage Resource: Text Messages
- Product Selling Model: Term Based - Monthly
- Product: Cell Phone Plan
- Status: Draft
- Rate Unit of Measure: USD
- Rate:
0.5 - Effective From: For Date, select Today’s date – 3 days, and for Time select 12:00 PM.
- Save your work.

- Click New.
- Add these details.
- Usage Resource: Data
- Product Selling Model: Term Based - Monthly
- Product: Cell Phone Plan
- Status: Draft
- Rate Unit of Measure: USD
- Rate:
2 - Effective From: For Date, select Today’s date – 3 days, and for Time select 12:00 PM.
- Save your work.
- Click New.
- Add these details.
- Usage Resource: Call
- Product Selling Model: Term Based - Monthly
- Product: Cell Phone Plan
- Status: Draft
- Rate Unit of Measure: USD
- Rate:
1 - Effective From: For Date, select Today’s date – 3 days, and for Time select 12:00 PM.
- Save your work.

Review the rate card entries for accuracy.
When ready, navigate to the rate card entries you just created and activate them. Make sure to save your changes.
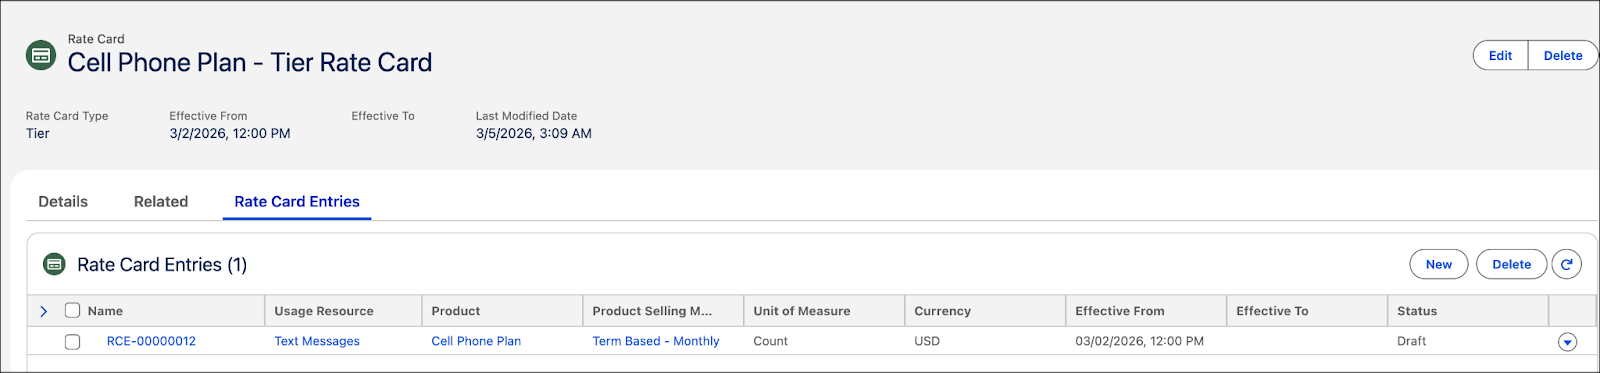
Define a Tier Rate Card
While the Base Rate Card sets a flat price for all overage, the Tier Rate Card adjusts that price based on the quantity consumed. The main goal of a Tier Rate Card is to implement volume-based, tiered discounts or overrides on the base rate.
For Text Messages, Liam wants to implement tiered pricing based on the quantity of the overage used. He wants to give discounts on the base rate to customers whose usage falls into these defined tiers.
Usage Resources |
Lower Bound |
Upper Bound |
Adjustment Type |
Adjustment Value |
|---|---|---|---|---|
Text Messages |
0 |
500 |
Percentage |
1.1 |
Text Messages |
500 |
1000 |
Percentage |
1.2 |
Text Messages |
1000 |
Override |
0.3 |
Follow along in your Developer Edition org.
Create a Tier Rate Card
- On the Rate Management app, click
 and select Rate Cards.
- Click New.
- Add these details to create a new Tier Rate Card.
- Name:
Cell Phone Plan - Tier Rate Card - Description:
Cell Phone Plan - Tier Rate Card - Rate Card Type: Tier
- Effective From: For Date, select Today’s date – 3 days, and for Time select 12:00 PM.
- Save your work.

With your Tier Rate Card in place, the next step is to define tier rate entries for each usage limit of Text Messages.
Create Tier Rate Entries
- From your newly created Tier Rate Card, navigate to the Rate Card Entries tab.
- Click New.
- Add these details.
- Usage Resource: Text Messages
- Product Selling Model: Term Based - Monthly
- Product: Cell Phone Plan
- Status: Draft
- Rate Unit of Measure: USD
- Effective From: For Date, select Today’s date – 3 days, and for Time select 12:00 PM.
- Click Next.
- Add these details for the tier.
- Lower Bound:
0 - Upper Bound:
500 - Adjustment Type: Percentage
- Adjustment Value:
1.1
- Click Add Tier.
- Add these details for next tier.
- Lower Bound:
500 - Upper Bound:
1000 - Adjustment Type: Percentage
- Adjustment Value:
1.2
- Click Add Tier.
- Add these details for the last tier.
- Lower Bound:
1000 - Adjustment Type: Override
- Adjustment Value:
0.3

- Save your work.
Review the rate card entry for accuracy.
When ready, navigate to the rate card entry you just created and activate it. Make sure to save your changes.
Congratulations! You have successfully defined the tier rate entries for each usage limit of Text Messages.
Assign Rate Cards to a Pricebook
Next, Liam links both the Base and Tier Rate Cards to the Standard Price Book. This step connects the newly created rates to the price book used in quotes, ensuring that overage pricing is available for quoting and sales.
- On the Rate Management app, click
 and select Price Book Rate Cards.
- Click New.
- Add these details.
- Price Book: Standard Price Book
- Rate Card: Cell Phone Plan - Base Rate Card
- Click Save & New.
- Add these details.
- Price Book: Standard Price Book
- Rate Card: Cell Phone Plan - Tier Rate Card
- Save your work.

You have successfully linked the Base and Tier Rate Cards with the Standard Price Book.
Refresh Decision Tables
Finally, follow these steps to ensure that the latest pricing data is available in the relevant decision tables.
- From Setup, in the Quick Find box, find and select Decision Tables.
- From the available decision tables list, select Price Book Entries V2.
- Click Refresh.

- Similarly, refresh all these five decision tables.
-
Pricebook Rate Card Entries
-
Rate Adjustment by Tier Entries 2
-
Rate Adjustment by Tier Resolution Entries
-
Rate Card Entries 2
-
Rate Card Entry Resolution Entries 2
Confirm the refresh was successful when the Last Refreshed Date updates to your current date and time.
Next Up
In this unit, you set up and linked both the Base and Tier Rate Cards to the Standard Price Book, establishing overage pricing and tiered discounts for usage resources.
In the next and final unit, you put all these components of Usage Management to test. You focus on Usage Selling and Assetization by generating a quote, validating the usage pricing, and activating an order to see the resulting usage assets created on the customer's account.