Explore Data with Agentforce Grid
Learning Objectives
After completing this unit, you’ll be able to:
- Add data to an Agentforce Grid.
- Apply Prompt Templates to transform and analyze Agentforce Grid data.
- Configure Agentforce Grid settings to perform bulk record updates.
Get Into Agentforce Grid
In this unit, you’ll create a new grid, import your data, and use AI to automate record updates. Explore Agentforce Grid’s interface to transform raw data into actionable insights.
- Open the App Launcher
 .
.
- Search for and select Agentforce Grid.
- Click Create Grid.
- For Grid Name, enter
Account Summary.
- For Description, enter
Generate account summaries and populate the Account Description with the information. - Click Create.
Agentforce Grid opens in a new tab with Worksheet1 waiting for your first instructions.

Ten rows are ready to display data and the first column is ready for whatever you want to add to it. Start with some Salesforce account data.
- Click Add Column.
There is a lot there to choose from. You’ll use a couple of them as you follow along.
- Select Import Salesforce.

There are several options here as well.
- The first item you can change is the title. Highlight Salesforce and change it to
Account.

- Open the One Result Per Row popup window and enter
10in the Max Results field. Close the popup window.
- Leave Query Mode as Object.
- For Object Type, click Select an object, and select Account.
- Click Fields to review a list of Available Fields and Selected Fields. It starts with all fields in the Selected Fields box.
- The Filters area automatically opened to allow you to filter the accounts pulled into the list.
- Click Save and Run.

- Click inside the first account column without clicking the account link (if there is one). This opens the right pane with the accounts field information.
- Navigate to the Id field to select + Column.

- The Id field gets added to the Account Summary Grid.
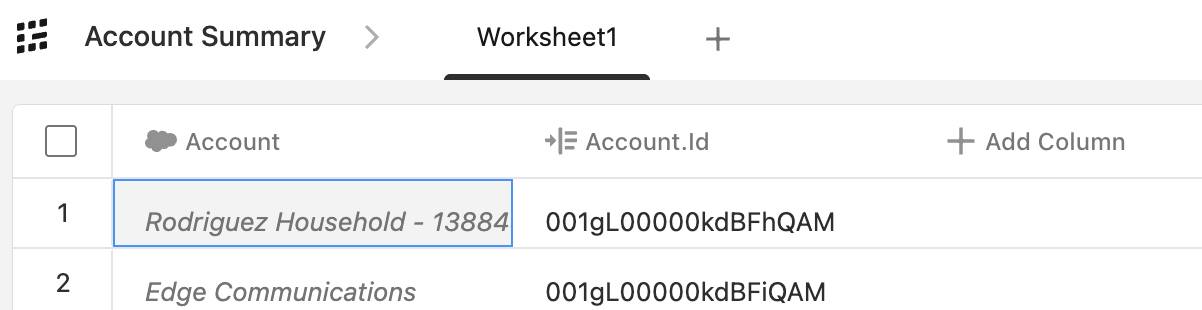
This is one way to isolate a field from a separate column.
OK, you have the first two columns narrowing down the data. Now, use a Prompt Template to generate an account summary based on the Account column.
- Click Add Column and select Prompt Template.
- Update the title to
Summary.

Notice Run For Each Row under the title. This designates this template to run for each row.
- For Prompt Template, select Account Summary.
Once a template is chosen, the Template Variables are updated to the variable the template calls for.
- Under Template Variables, for objectToSummarize, select Account.
- Click Save and Run.
- When it finishes compiling, click the new Summary field in the first row.
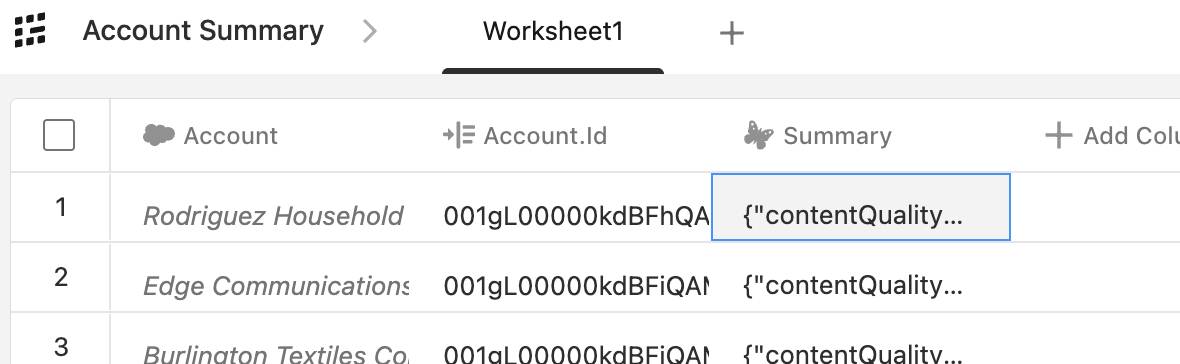
- The right pane displays the results of the prompt template. It opens in the Output Preview. Click the JSON tab to display the actual output from the template.
- Click + Column for the text field.
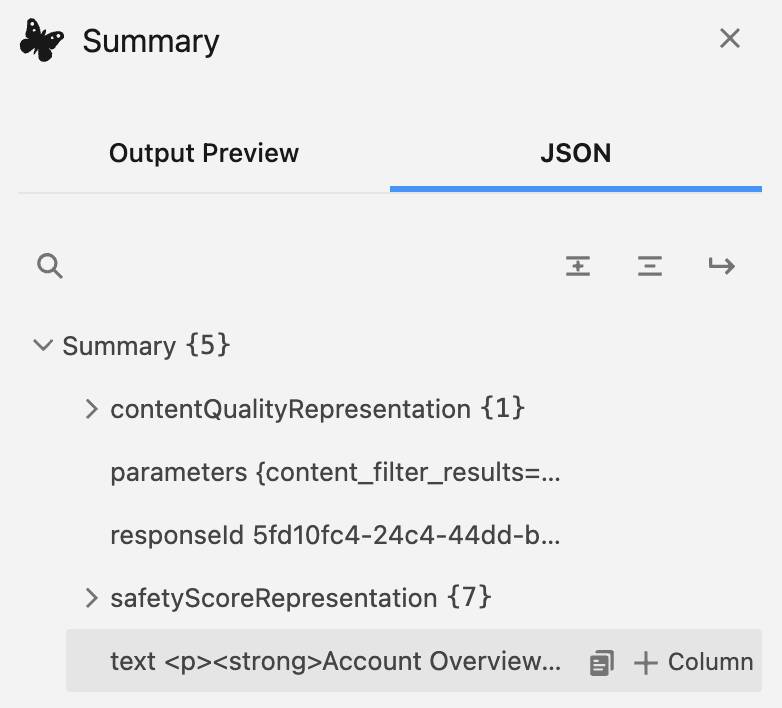
This adds the summary text to Agentforce Grid.

The text field that you just isolated is actually in HTML. If you navigate to one of the text fields, Agentforce Grid displays a preview of the HTML. You can use AI to convert it to Markdown so it can be saved to the Account Description field in Salesforce.
- Click Add Column and select Use AI.
- Update the Title to
Markup.
- For Model, select GPT 5.
- For LLM Instructions, enter the following prompt.
Given an html string convert it to mark down.
Here is the html string:
- Select the space after string: and enter
@.
This brings up the Search columns.
- Click into Search columns and select Summary.text.
- Open Response Format and verify that Plain Text is selected.
- Click Save and Run.
Nice. You now have the account summary in a clean markdown formatted text. Now, add that summary back into the account record so it displays in the Description field.
- Click Add Column and select Update Record.
- Update the Title to
Update Description.
- For Object Type, select Account.
- For Object Field, select Account Description.
- For Enter a value, select Markup.
- Click Save and Run.

Open one of the accounts so you can review the updated Description.
- From the App Launcher, search for and select Sales.
- Click the Accounts tab.
- Click an account.
- Click the Details tab. Notice the Description field includes the summary from Agentforce Grid.
You’ve transformed raw data into polished record updates, isolated certain parts of the data, ran a prompt template using the data, and modified text with AI. Your records are now updated, your workflow is automated, and you’re ready to scale these skills across your org—all that in just a few minutes!