Create an Object and Flow
Learning Objectives
After completing this unit, you’ll be able to:
- Chat with the Setup agent to get information on a task.
- Create a custom object using Setup with Agentforce.
- Create a flow with the help of the Setup agent.
Streamline the Equipment Rental Process
At Coral Cloud Resorts, guests love to make the most of the bay’s crystal-clear waters. Whether it’s snorkeling through vibrant reefs, kayaking into hidden coves, or catching the perfect wave on a surfboard, the resort offers an aquatic adventure for everyone. To get guests into the water faster, Coral Cloud provides equipment rentals right on the sandy shore.
Currently, the beach staff is managing these rentals with pen and paper. As the Salesforce admin, you’ve been tasked with bringing this process into the digital age. You know a custom object is the perfect way to track equipment rentals. And you also want to set up a flow that sends a thank you email to guests after they return their equipment.
The only catch? You haven’t built a custom object or a flow recently. But don’t worry! The Setup agent is standing by, ready to get you up to speed and guide you through the configuration process.

Ask the Setup Agent for Help
Learn how to create a custom object directly in your flow of work in Setup. There’s no need to exit the app to review documentation, as the Setup agent finds the relevant information for you.
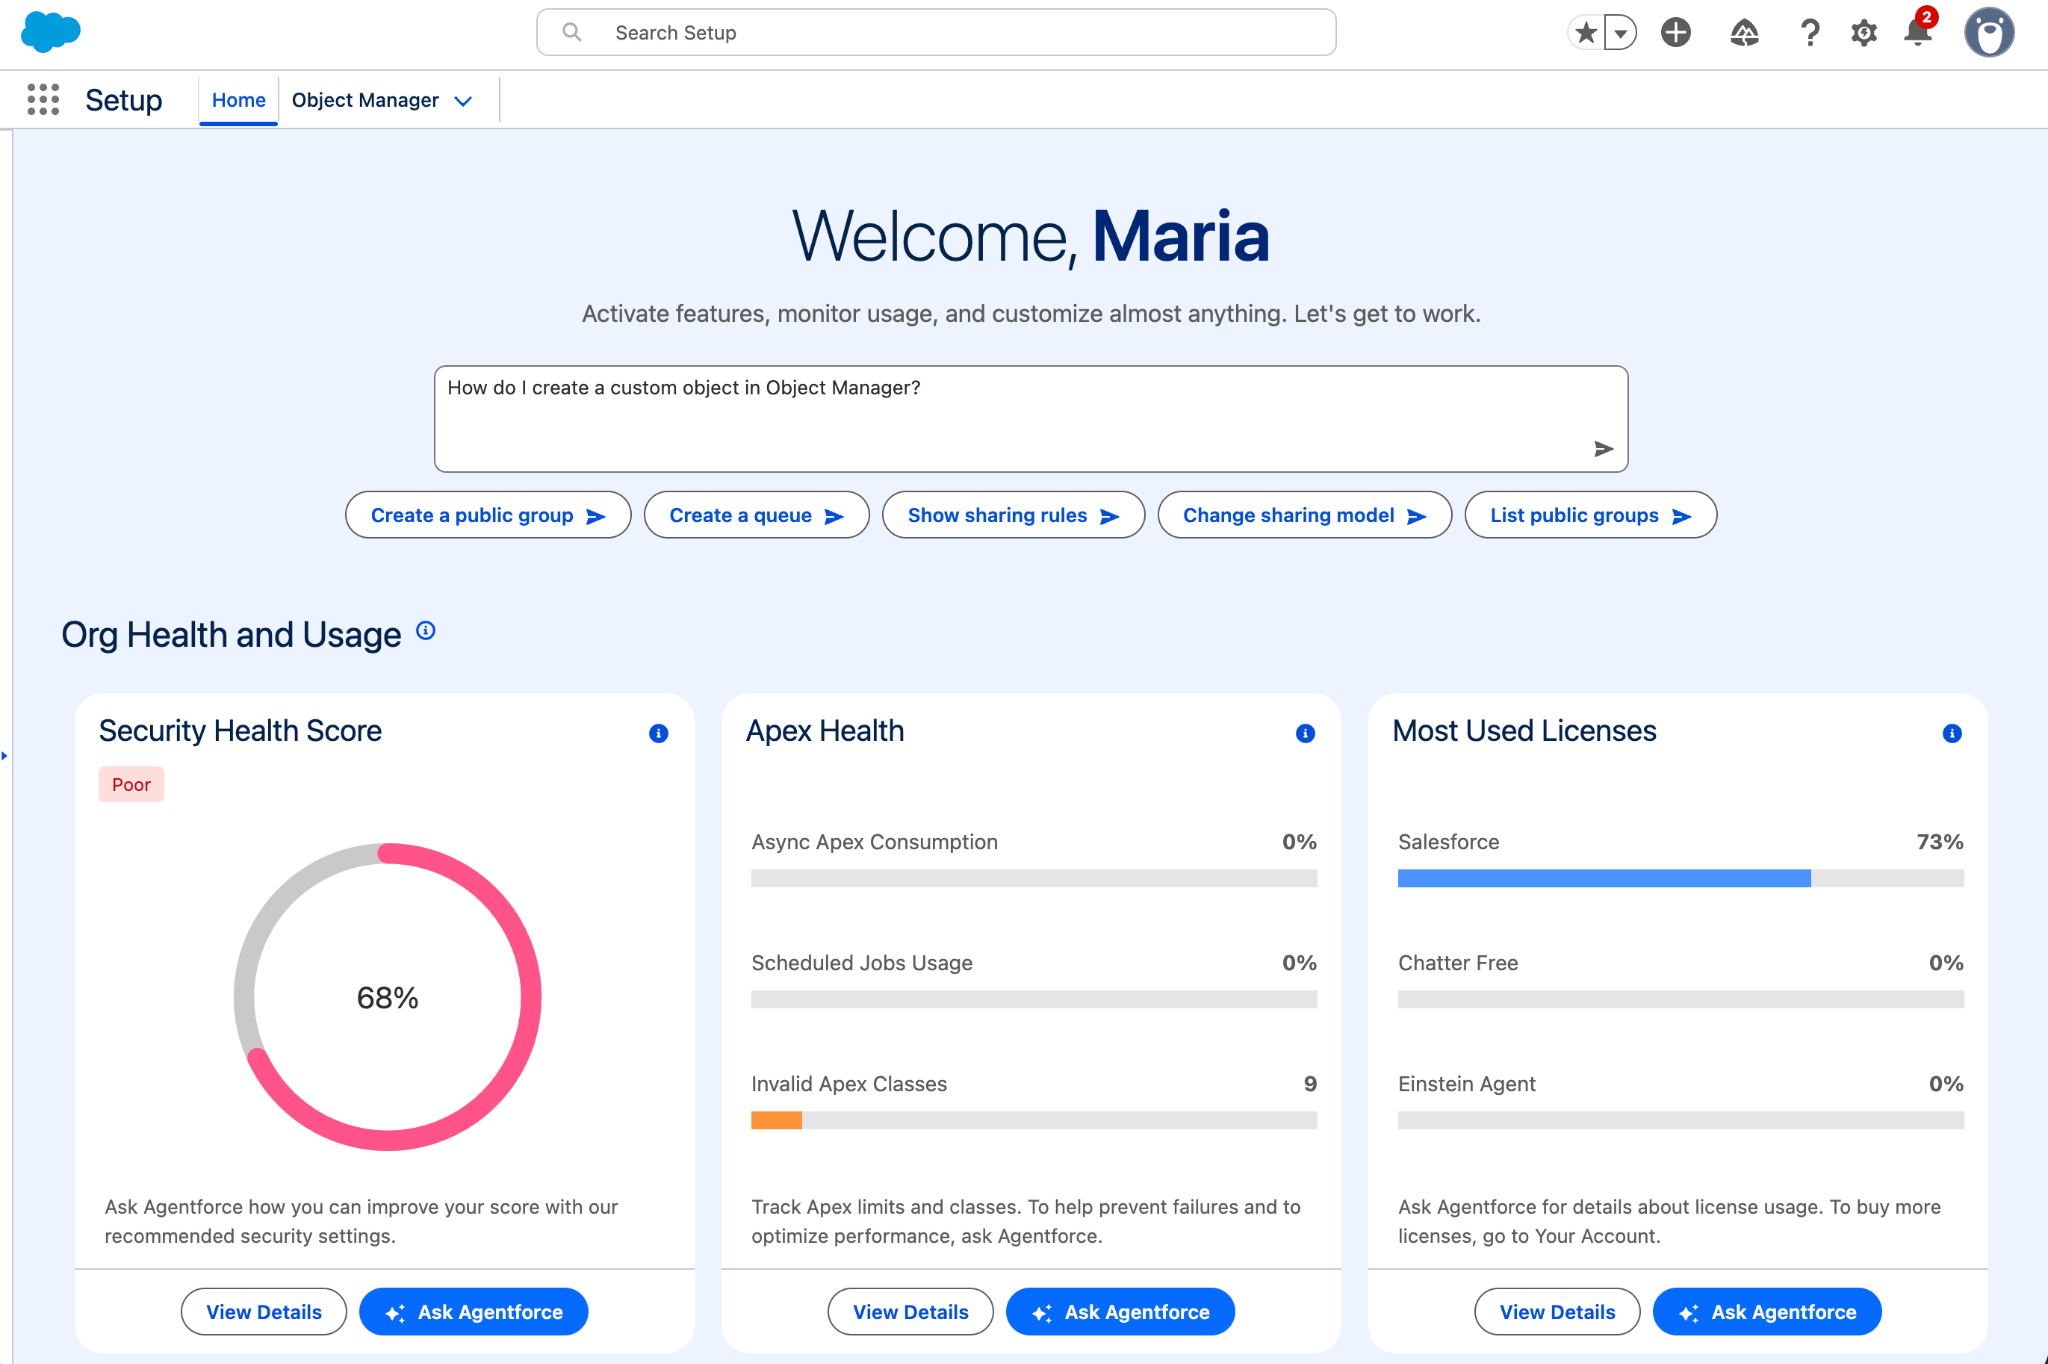
- If you’re not already there, go to Setup. From the gear icon at the top of the screen (
 ), click Setup.
- On Setup Home, type your question or task in the prompt bar. (If you don’t see the prompt bar, refresh your browser again.) Because you want to learn the basics of creating objects, copy and paste:
How do I create a custom object in Object Manager?
- The agent provides information and resources on creating a custom object. Depending on what you ask the agent, you can also see records, list views, and other components. To see an expanded view of the information, click View Details.
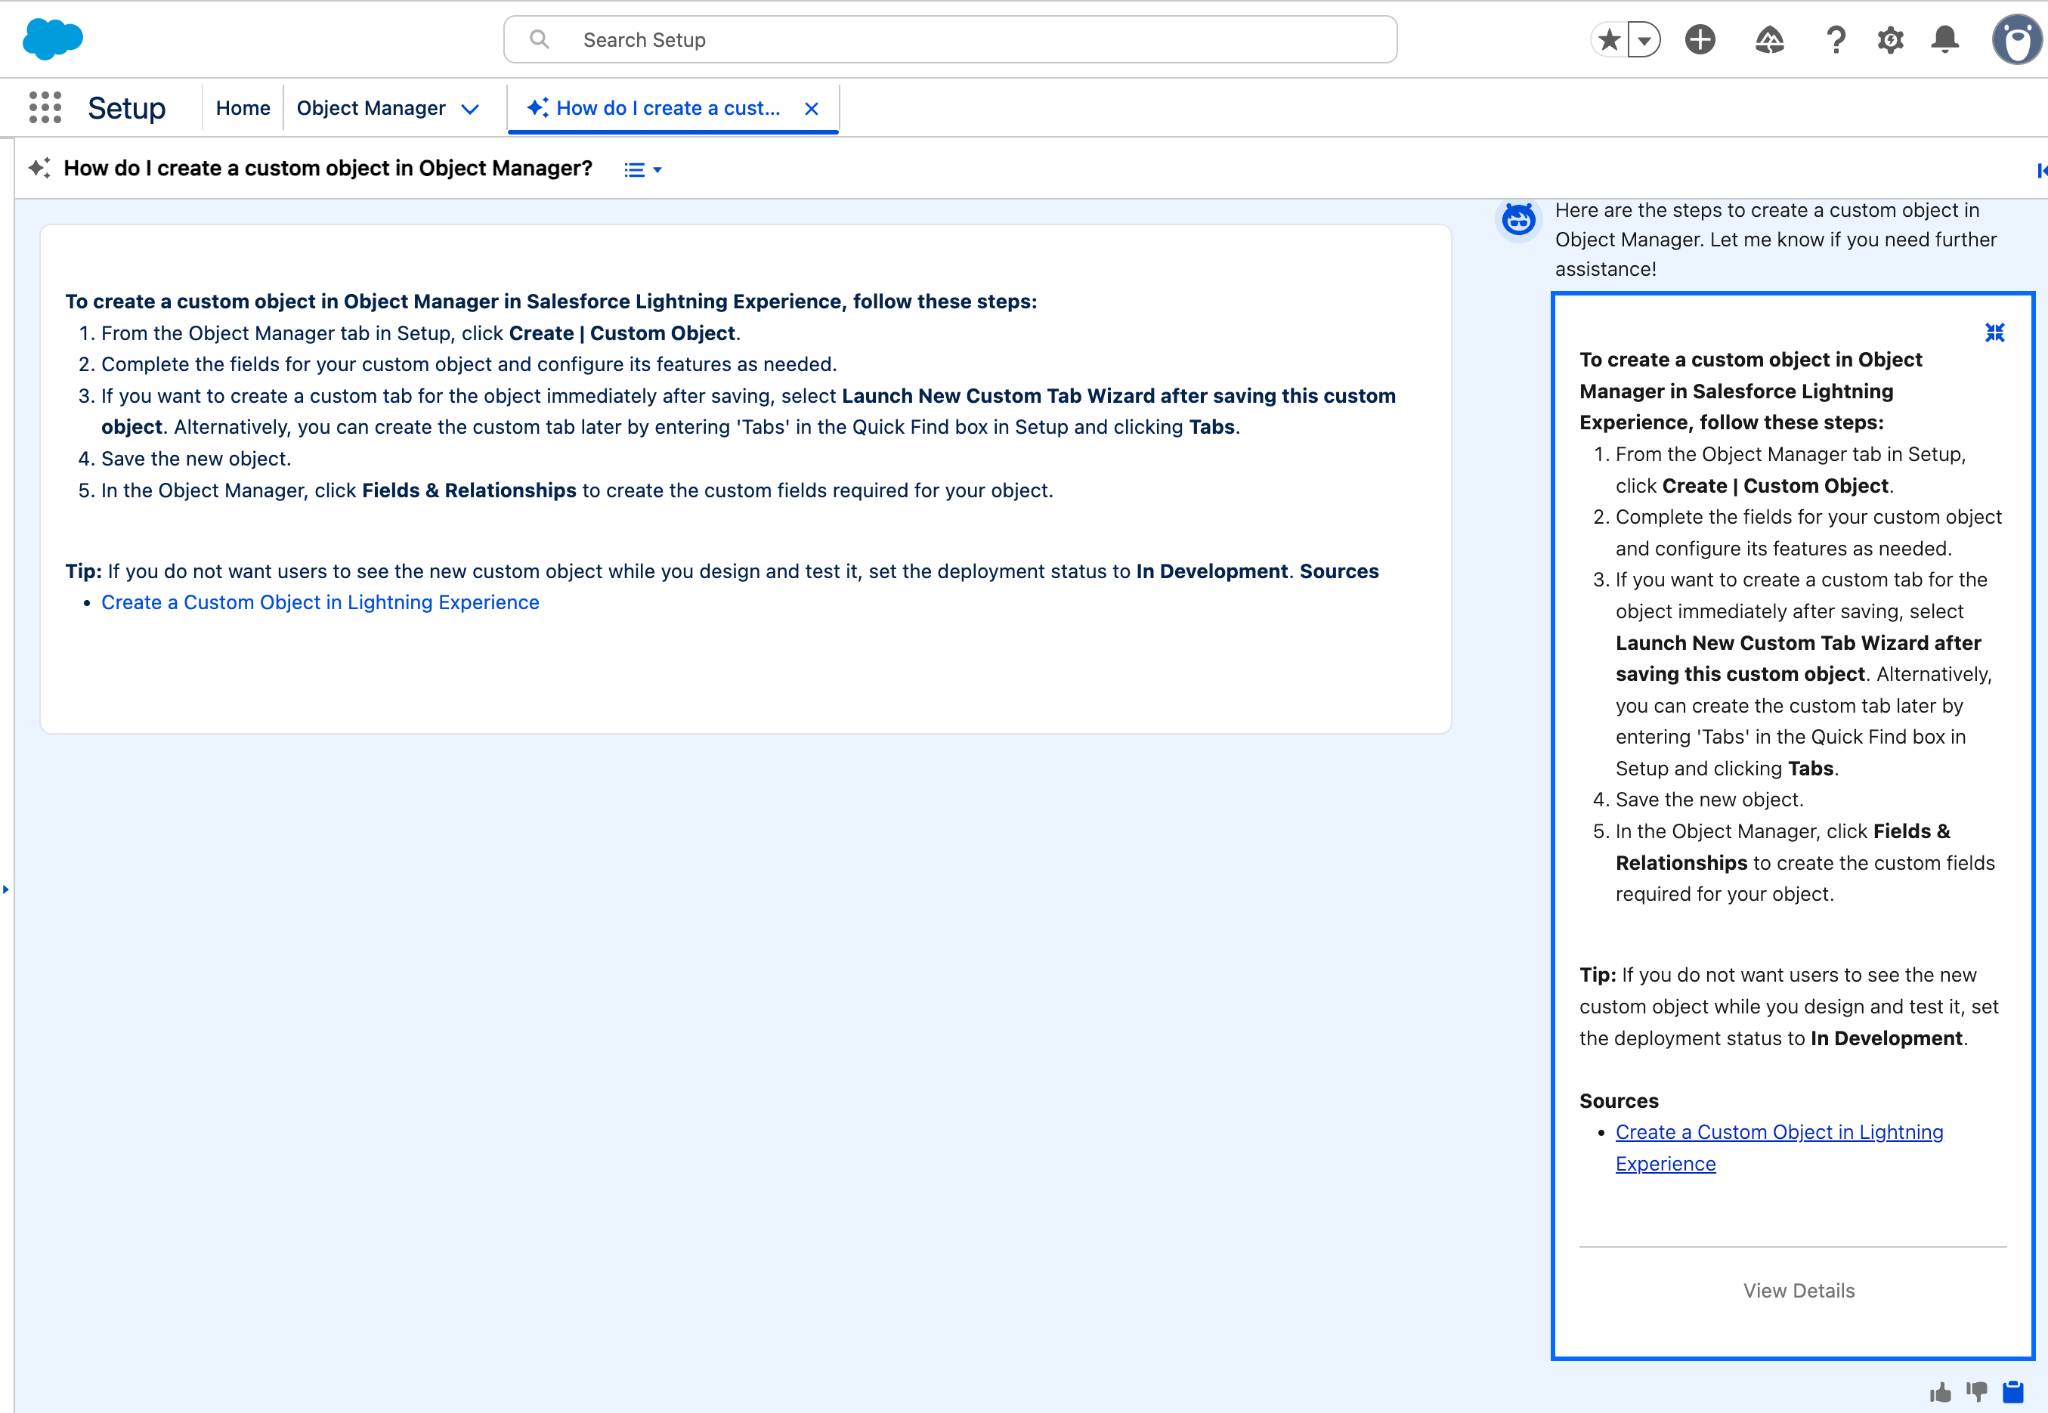
After reviewing the information, you have a good handle on how to create a custom object. You think you can do it yourself but you don’t need to do it alone. The Setup agent can help!
Create a Custom Object
Let’s see how you can create a custom object with several fields through a simple conversation with the Setup agent.
- Spend some time thinking through what you want your custom object to do and what fields it should have. After some planning, you come up with this plan:
- Custom object: Beach Rental
- Custom fields:
- Equipment ID (text)
- Guest (lookup to Contact)
- Type (picklist with values Snorkel, Paddleboard, Surfboard, and Kayak
- Equipment ID (text)
- Custom object: Beach Rental
- Continuing your previous conversation with the agent, copy and paste the following:
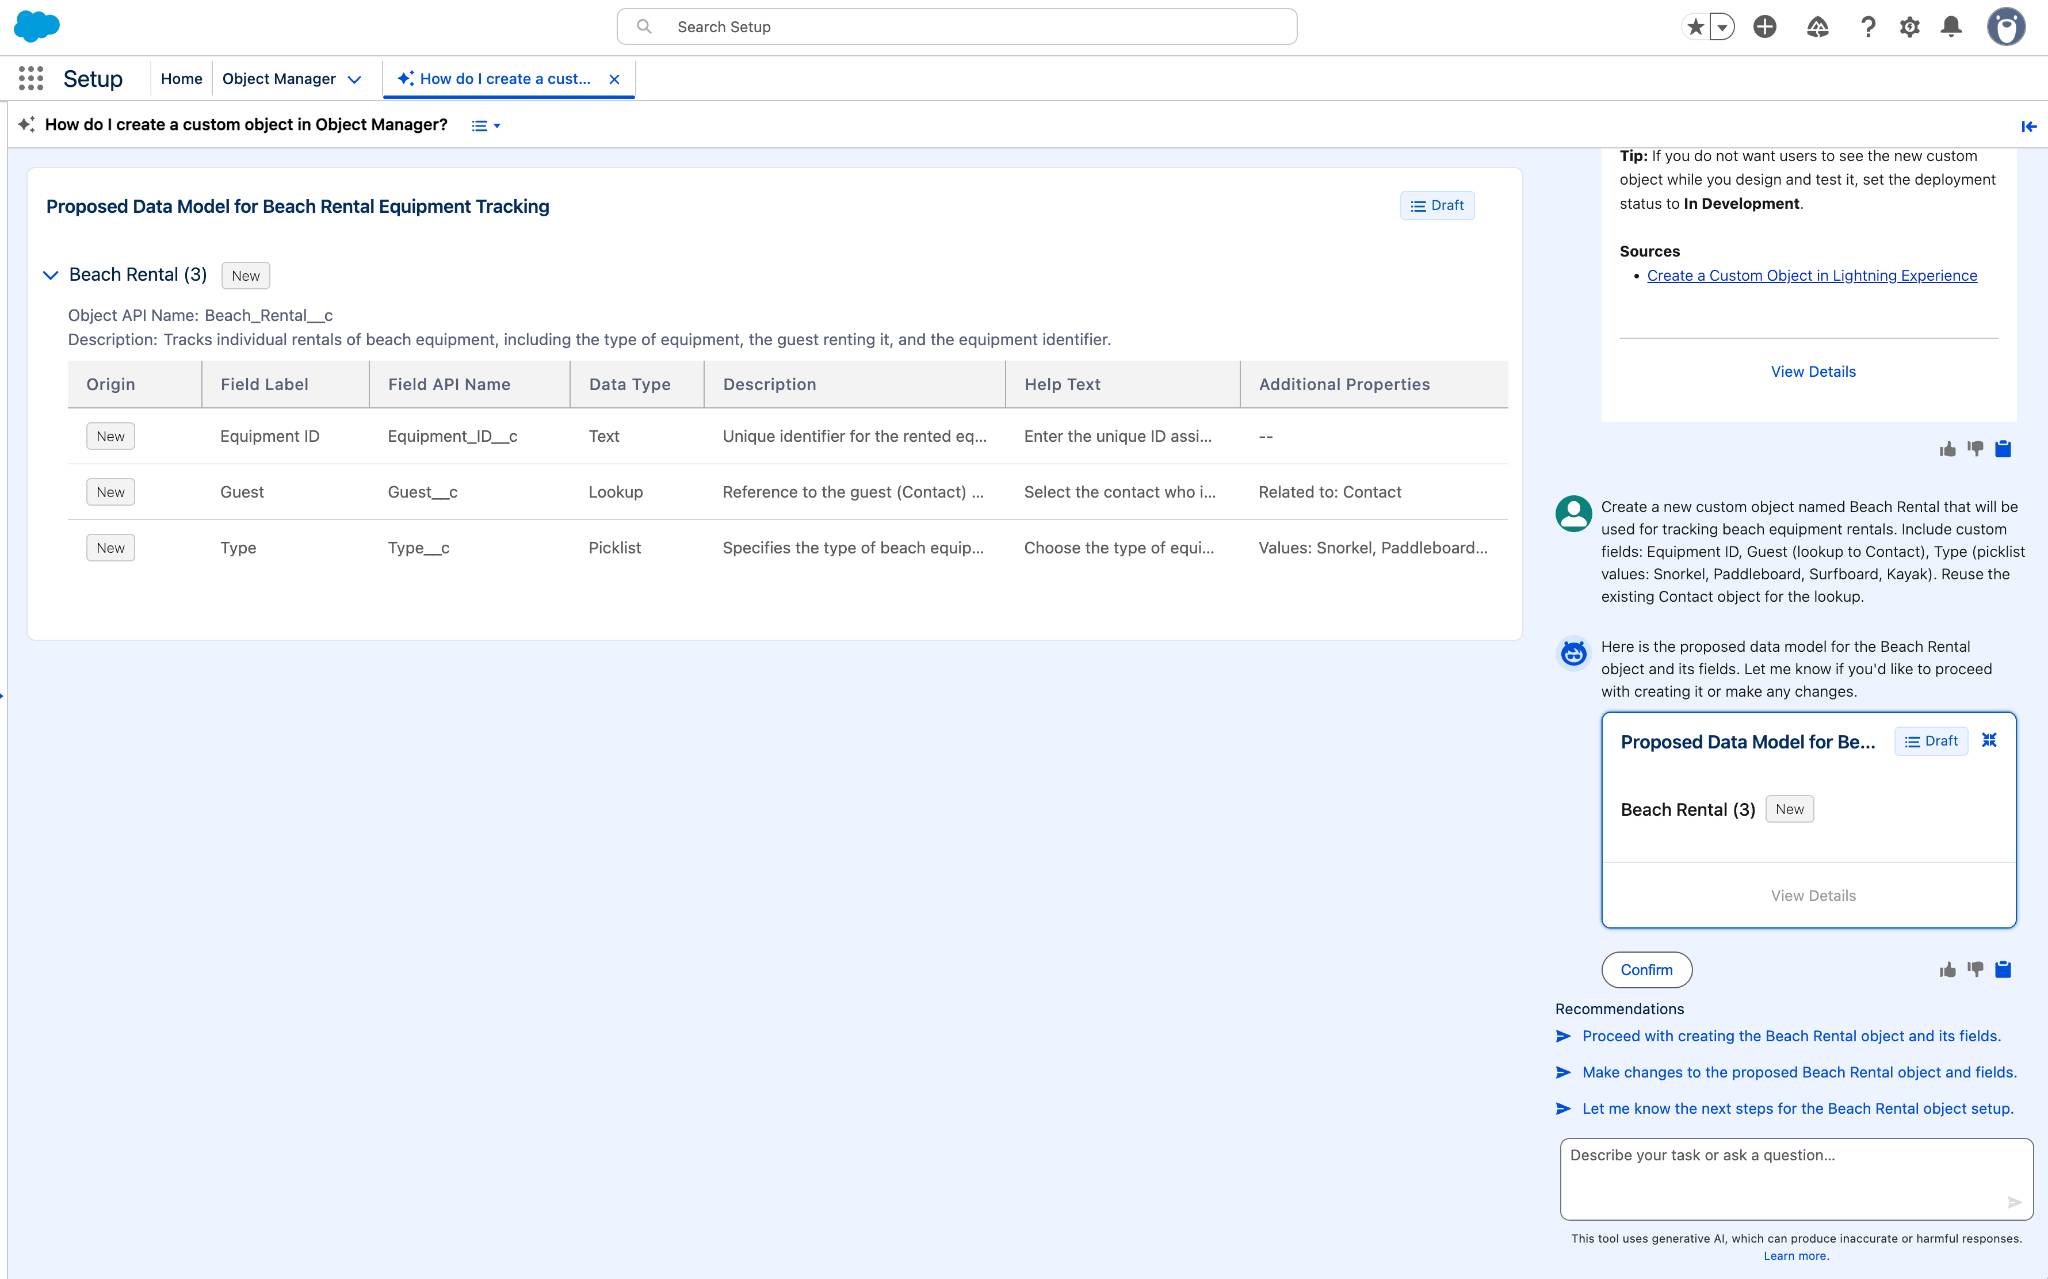
Create a new custom object named Beach Rental that will be used for tracking beach equipment rentals. Include custom fields: Equipment ID, Guest (lookup to Contact), Type (picklist values: Snorkel, Paddleboard, Surfboard, Kayak). Reuse the existing Contact object for the lookup.
- The agent suggests a proposed data model.
- While reviewing, you realize it would also be helpful to have a field that tracked whether the equipment was in use or in the shop. To modify the custom object, copy and paste the following:
Add a custom field called Status (picklist values: Rented, Returned, Damaged).
- Now the custom object fits all the business requirements. Click Confirm to create the object.

Nice work! If you did this task manually, it would have required dozens of clicks to create the custom object and all its fields. Thanks to Setup with Agentforce, you were able to create the custom object with a fraction of the effort.
Create a Flow
To finish off this task, you create a flow that thanks the guest after they return the rental equipment.
- Start off a new conversation with the agent from Setup Home.
- Copy and paste the following:
Create a flow named “Thank You Email on Beach Rentals Return” that starts when a Beach Rentals record has Status changed to Returned. It should send a thank you email to the contact in the Guest field.
- The Setup agent confirms the specifications of the flow it plans to create. The flow looks good, so click Confirm.
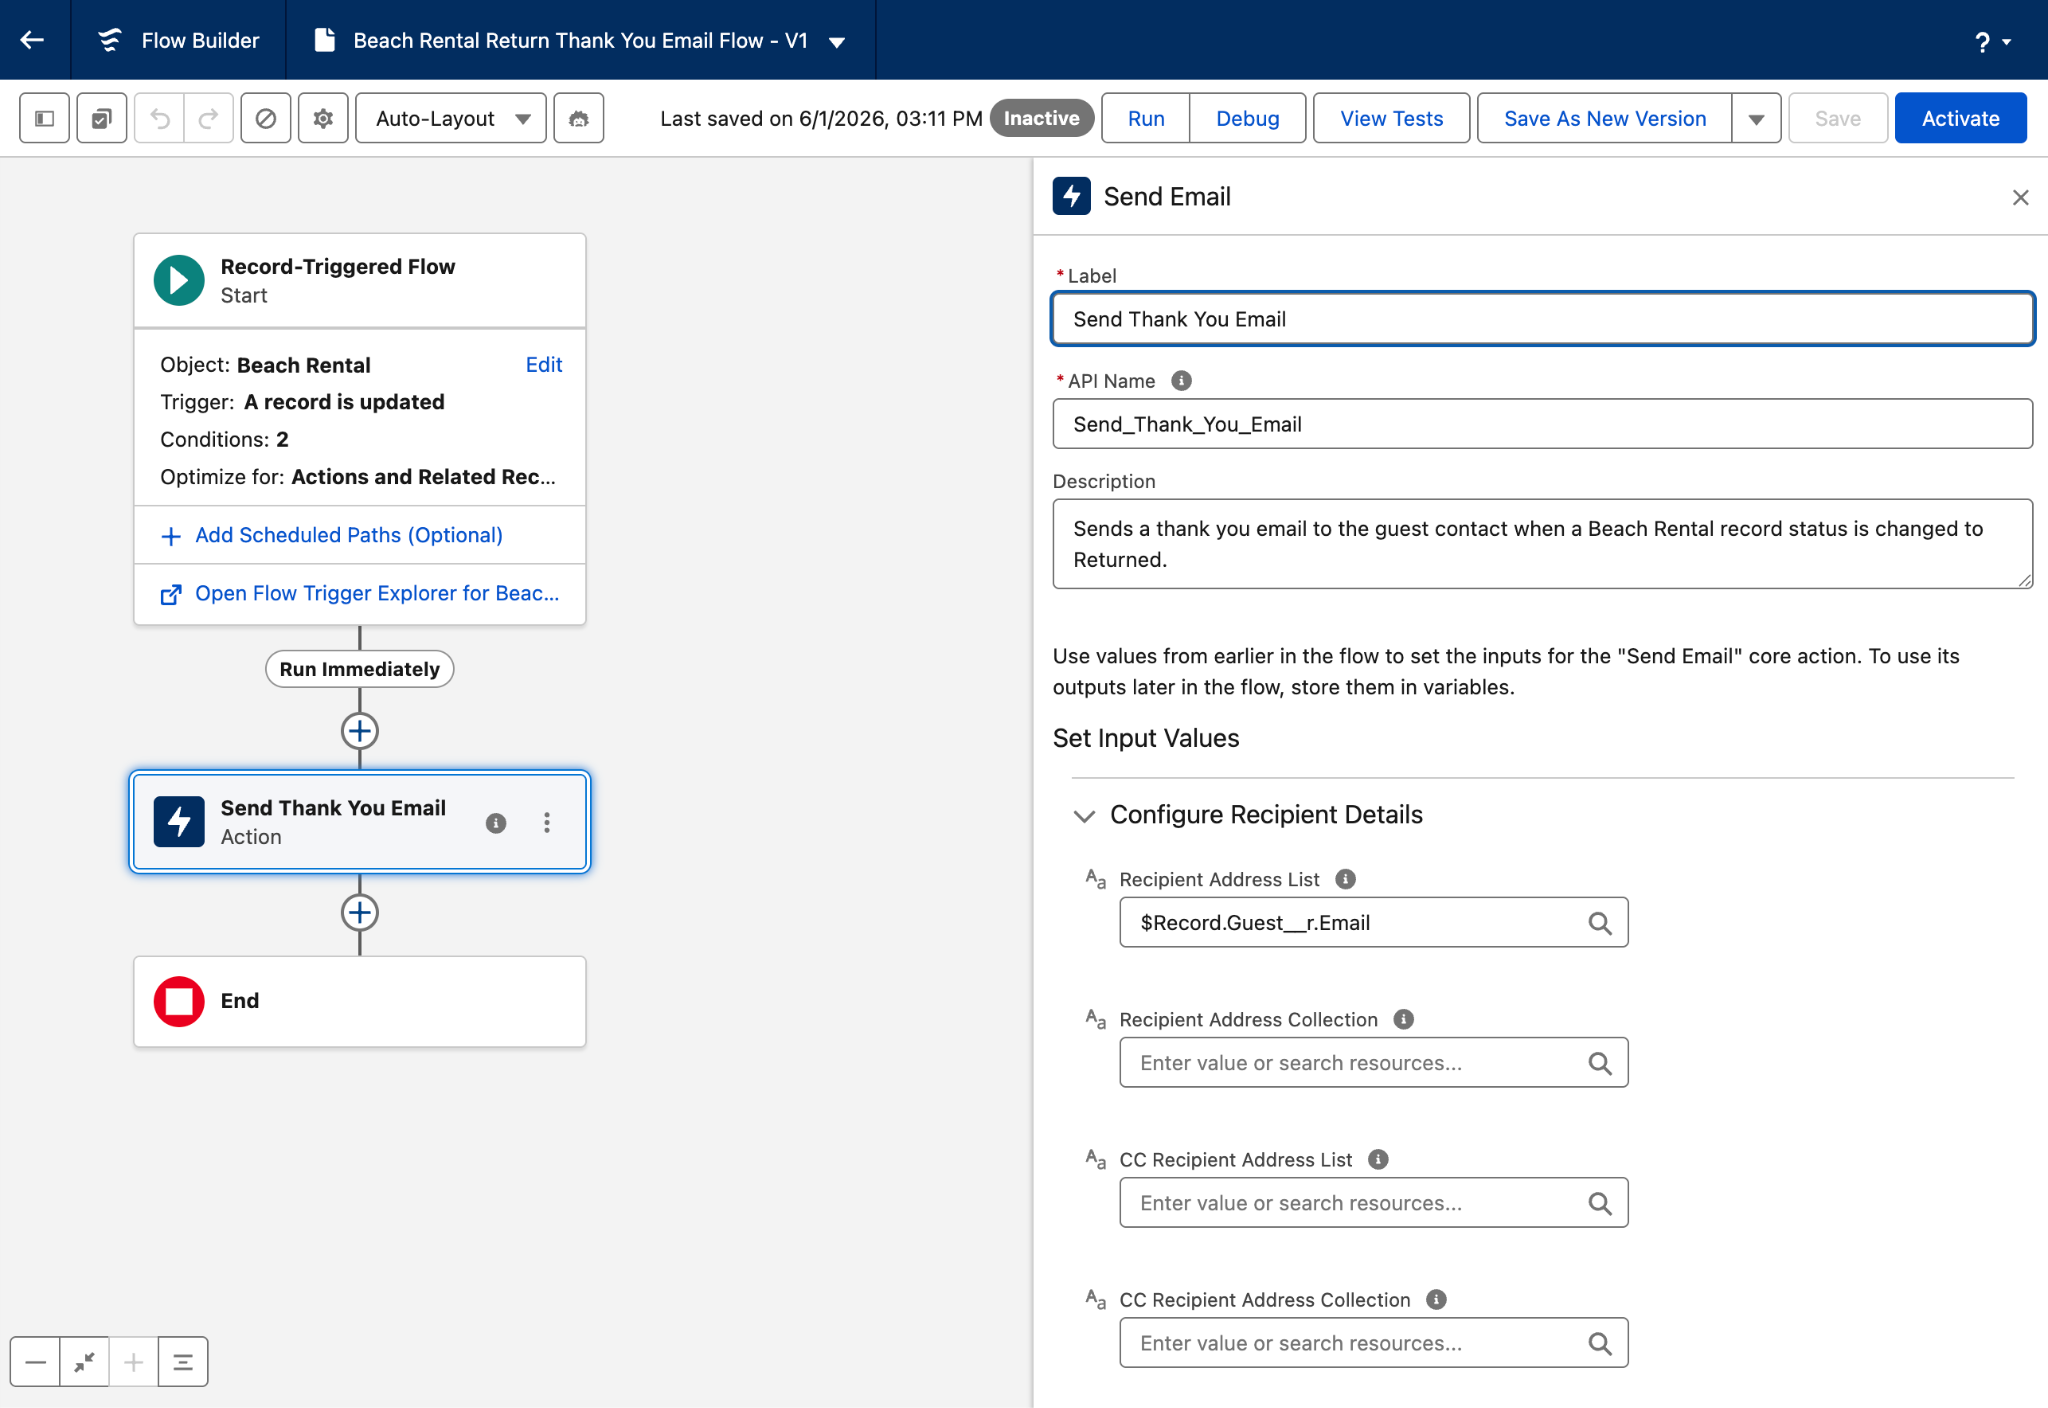
- The agent creates and deploys the flow. Click the provided link to navigate to Flow Builder.

- From Flow Builder, you complete a final review of the flow. If there are any errors, you can ignore them (we won’t check for them in this badge).
Great work! In just a few conversations with the Setup agent, you learned how to complete a task without ever leaving Setup. And you customized your org with a custom object and flow. Next, you learn how Setup with Agentforce can help with user management.