Set Up Partner Cloud
Learning Objectives
After completing this unit, you’ll be able to:
- Turn on Partner Cloud initial setup in Salesforce Go.
- Set up the channel manager experience.
- Set up the partner experience.
- Publish and activate your partner site.
Get Ready to Build
You now know the three stages of the Partner Cloud initial setup. In this unit, you work through each stage in Salesforce Go, from turning on the basics to opening the partner site’s doors. Here’s the good news—you don’t have to search Setup to find each setting. Salesforce Go keeps the whole Partner Cloud setup in one place and checks off each step as you finish it, so you always know what’s done and what’s next.
You start with the first stage, which also happens to be the quickest. With one action, Salesforce Go takes care of the foundational settings that would otherwise take you several trips through Setup. Let’s turn it on.
Turn On Partner Cloud Initial Setup
Your first job is to turn on Partner Cloud initial setup. Think of it as pouring the foundation before you build the house. Every step that follows from assigning channel managers roles to activating the site, depends on these settings. Here’s how to do it.
- Click
 and select Salesforce Go.
- Close any open popup windows, wait until the feature status and progress sync successfully, and refresh the page.
- In the Search features in your org… field, enter and search for
Partner Cloud Initial Setup.
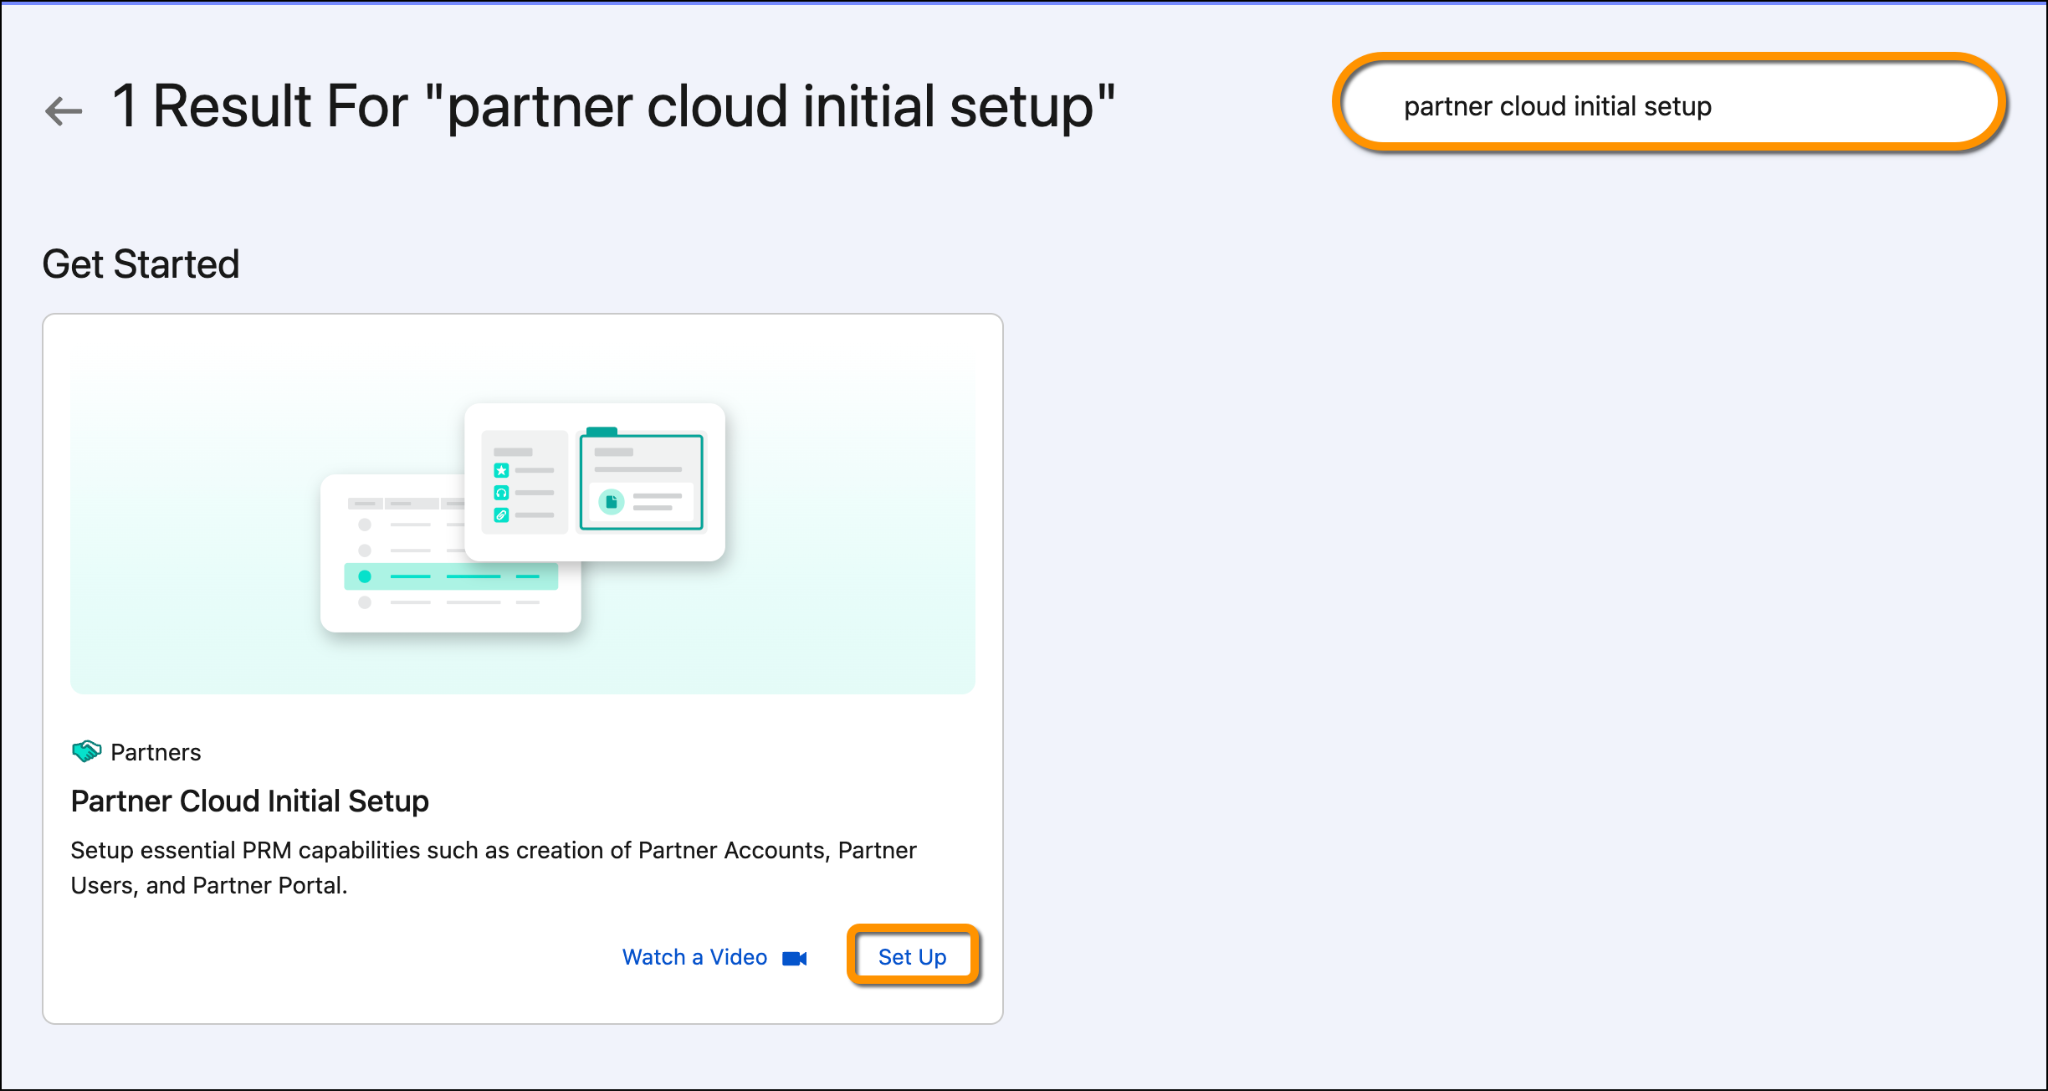
- On the Partner Cloud Initial Setup page, click Set Up.
- Click Get Started.
- In the Turn on Partner Cloud Initial Setup card, click Turn On.
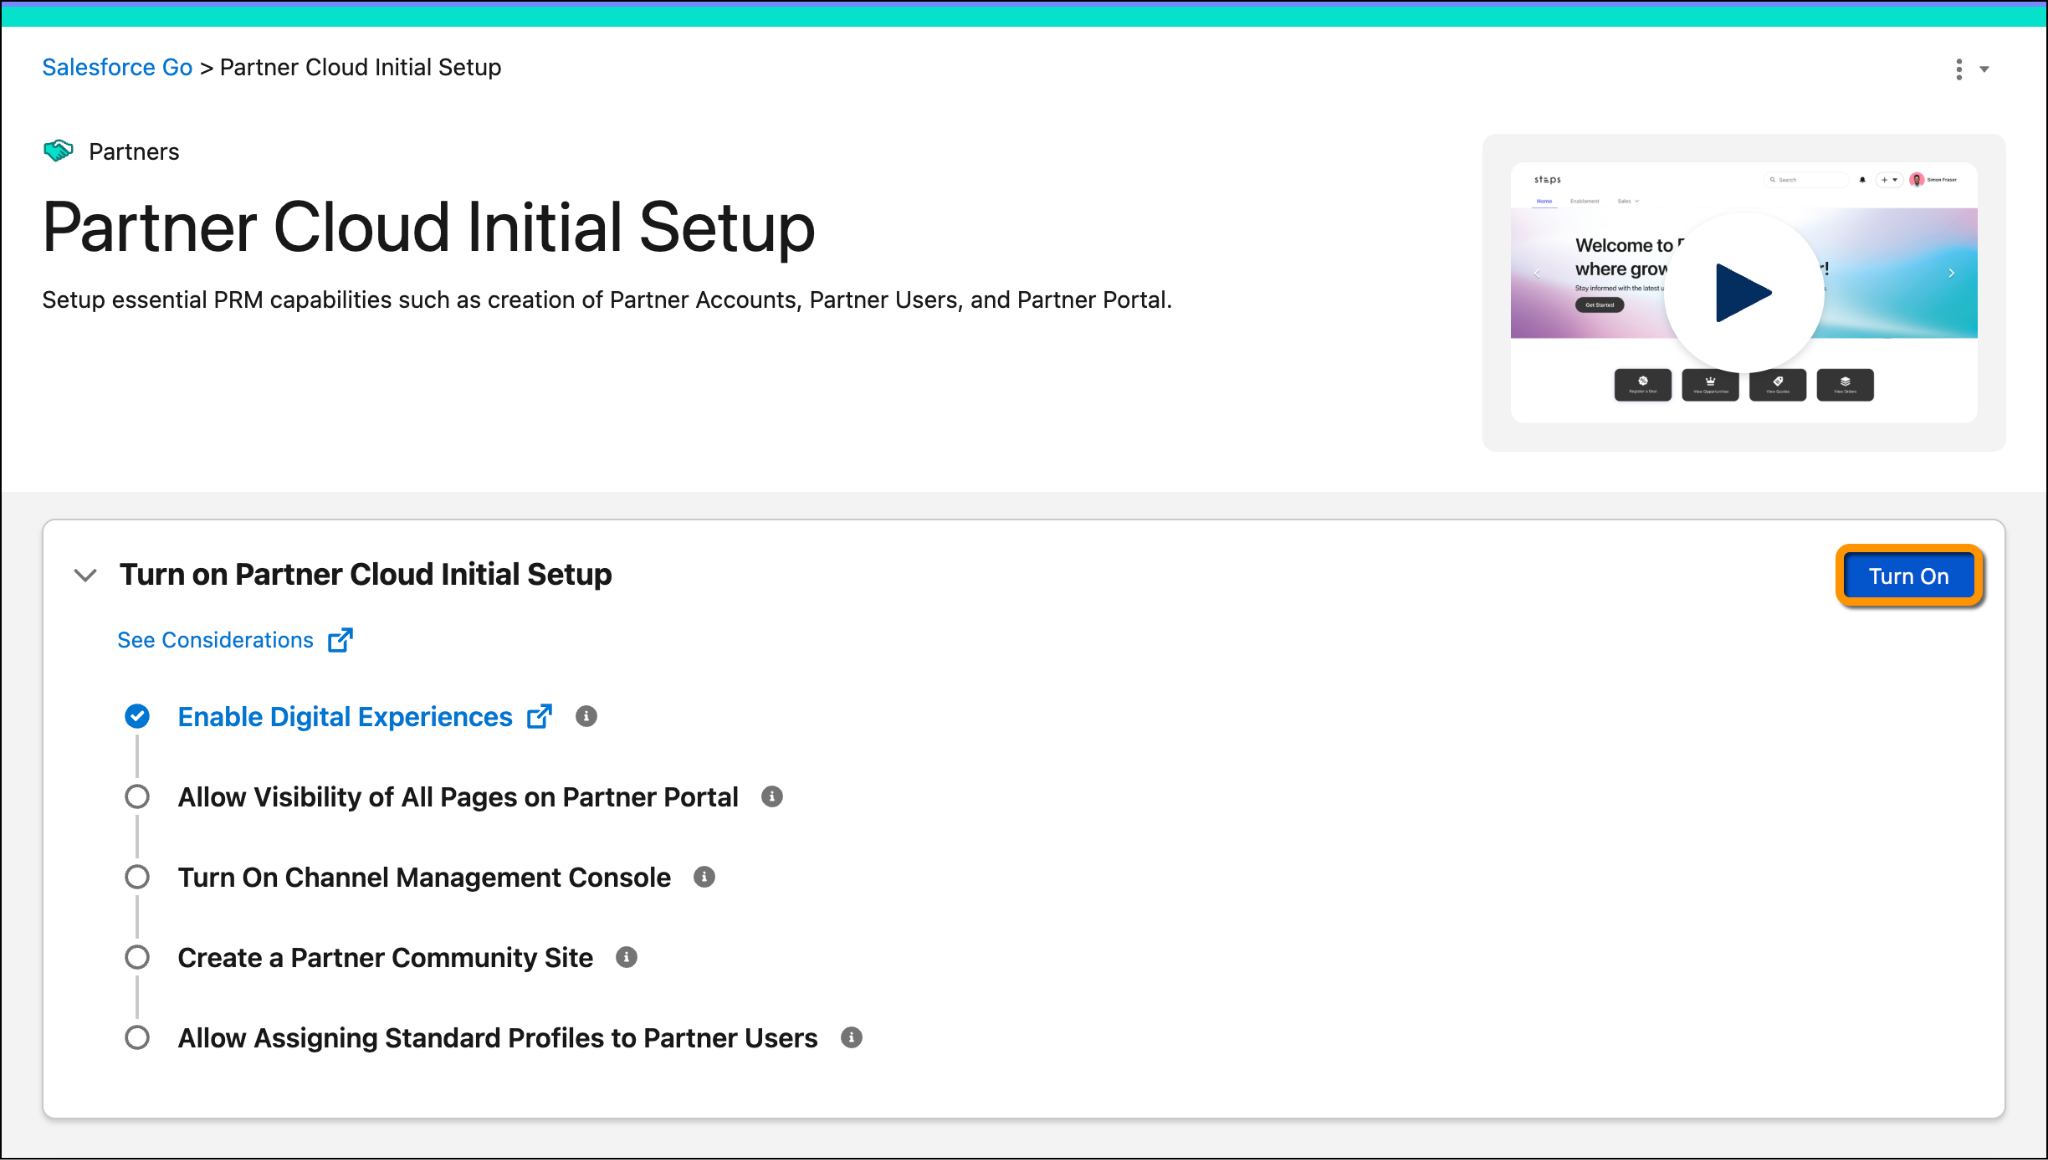
- In the confirmation window, click Turn On again. (This can take a minute or two.)
Once you activate Partner Cloud Initial Setup, Salesforce Go enables Digital Experiences, creates your partner community site, and turns on the Channel Management Console. Your partners can see the pages you give them access to, and you can assign standard profiles to partner users. With the foundation in place, your partner site exists. But right now, it’s an empty house with nobody managing it. Next, you bring in the people who will: your channel managers.
Set Up the Channel Manager Experience
In this step, you create a role for your channel managers and assign it to the people at your company who do that job. Partner users then roll up to channel managers in the role hierarchy, so channel managers can see and manage their partners’ accounts, deals, and activity.

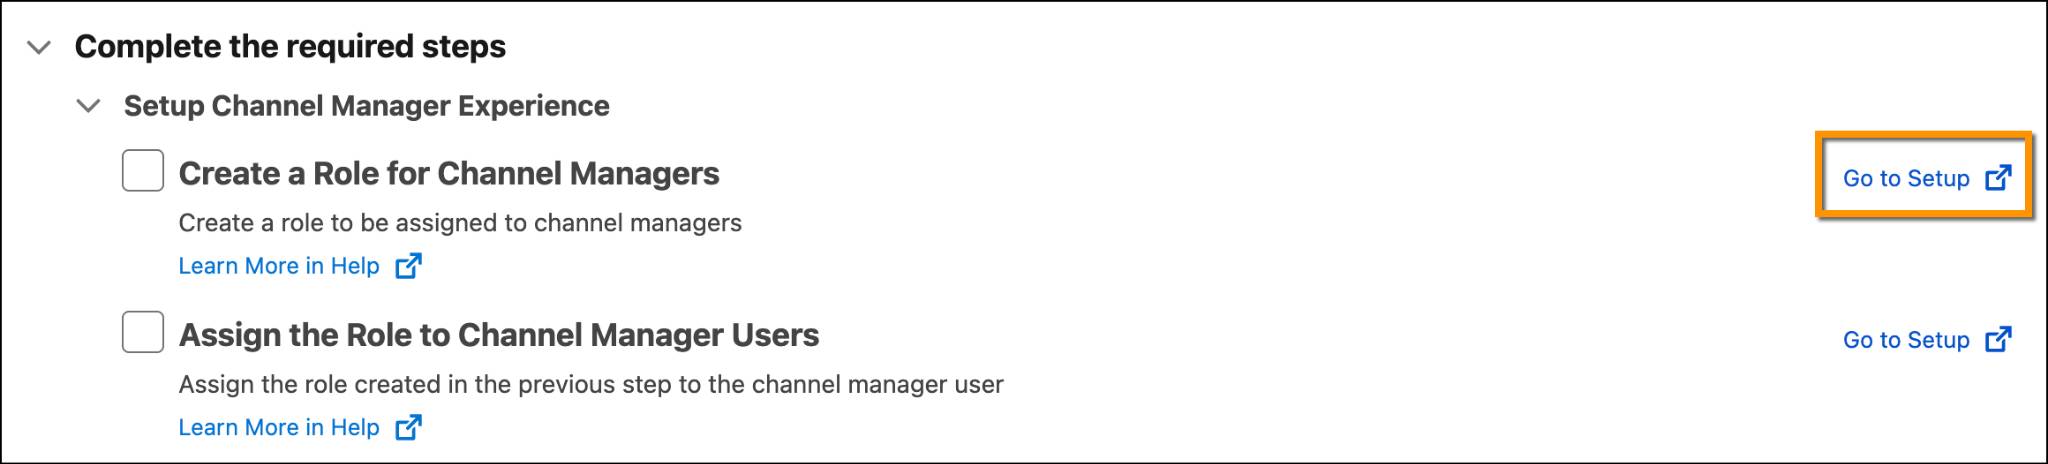
- Under Setup Channel Manager Experience, click Go to Setup next to Create a Role for Channel Managers.
- On the Roles setup page, leave the sample role hierarchy as is and click Set Up Roles.
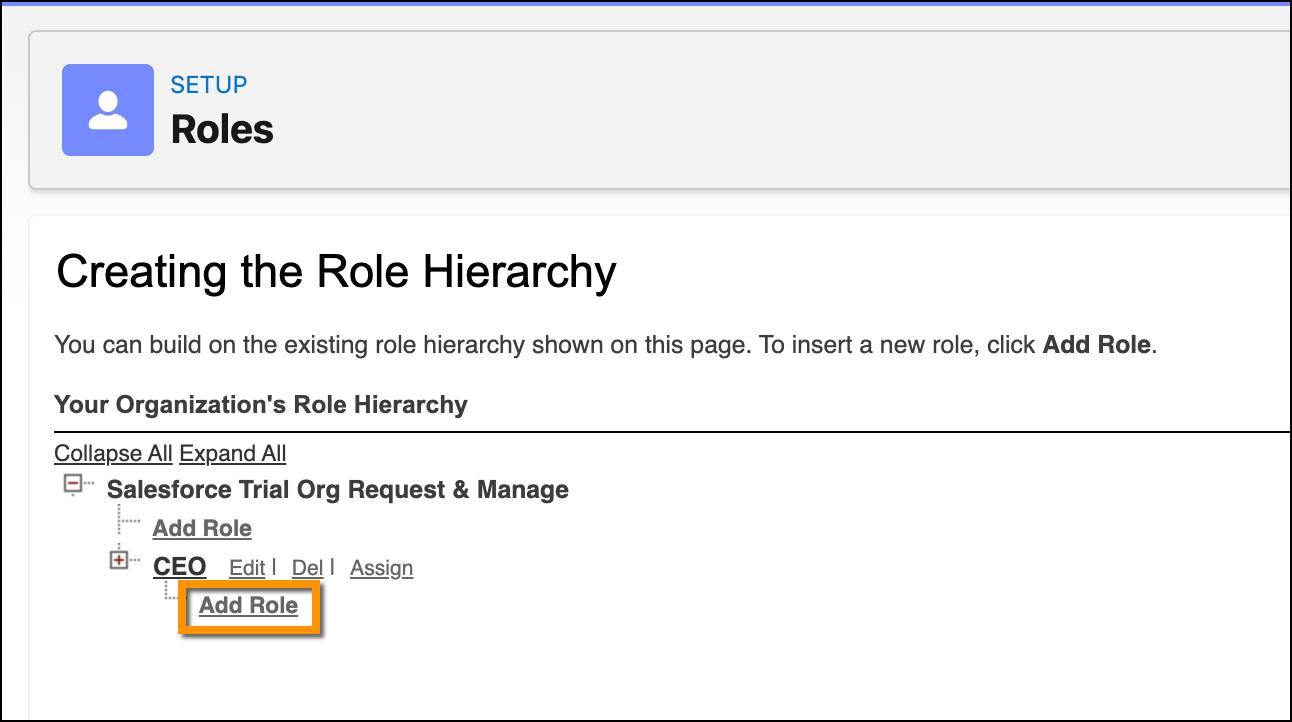
- Under CEO, click Add Role.
- In the New Role form, enter these details.
- Label:
Channel Manager - Role Name:
Channel_Manager(this fills in automatically)
- This role reports to: Keep the default, CEO
- Label:
- Click Save.
- On the Channel Manager role page, click Assign Users to Role. Now that the role exists, you give it to the person who manages partners at your company.
- Under Available Users, set the Search field to All Users.
- Select your own name (or OrgFarm EPIC), and click Add to move it to the Selected Users for Channel Manager column.
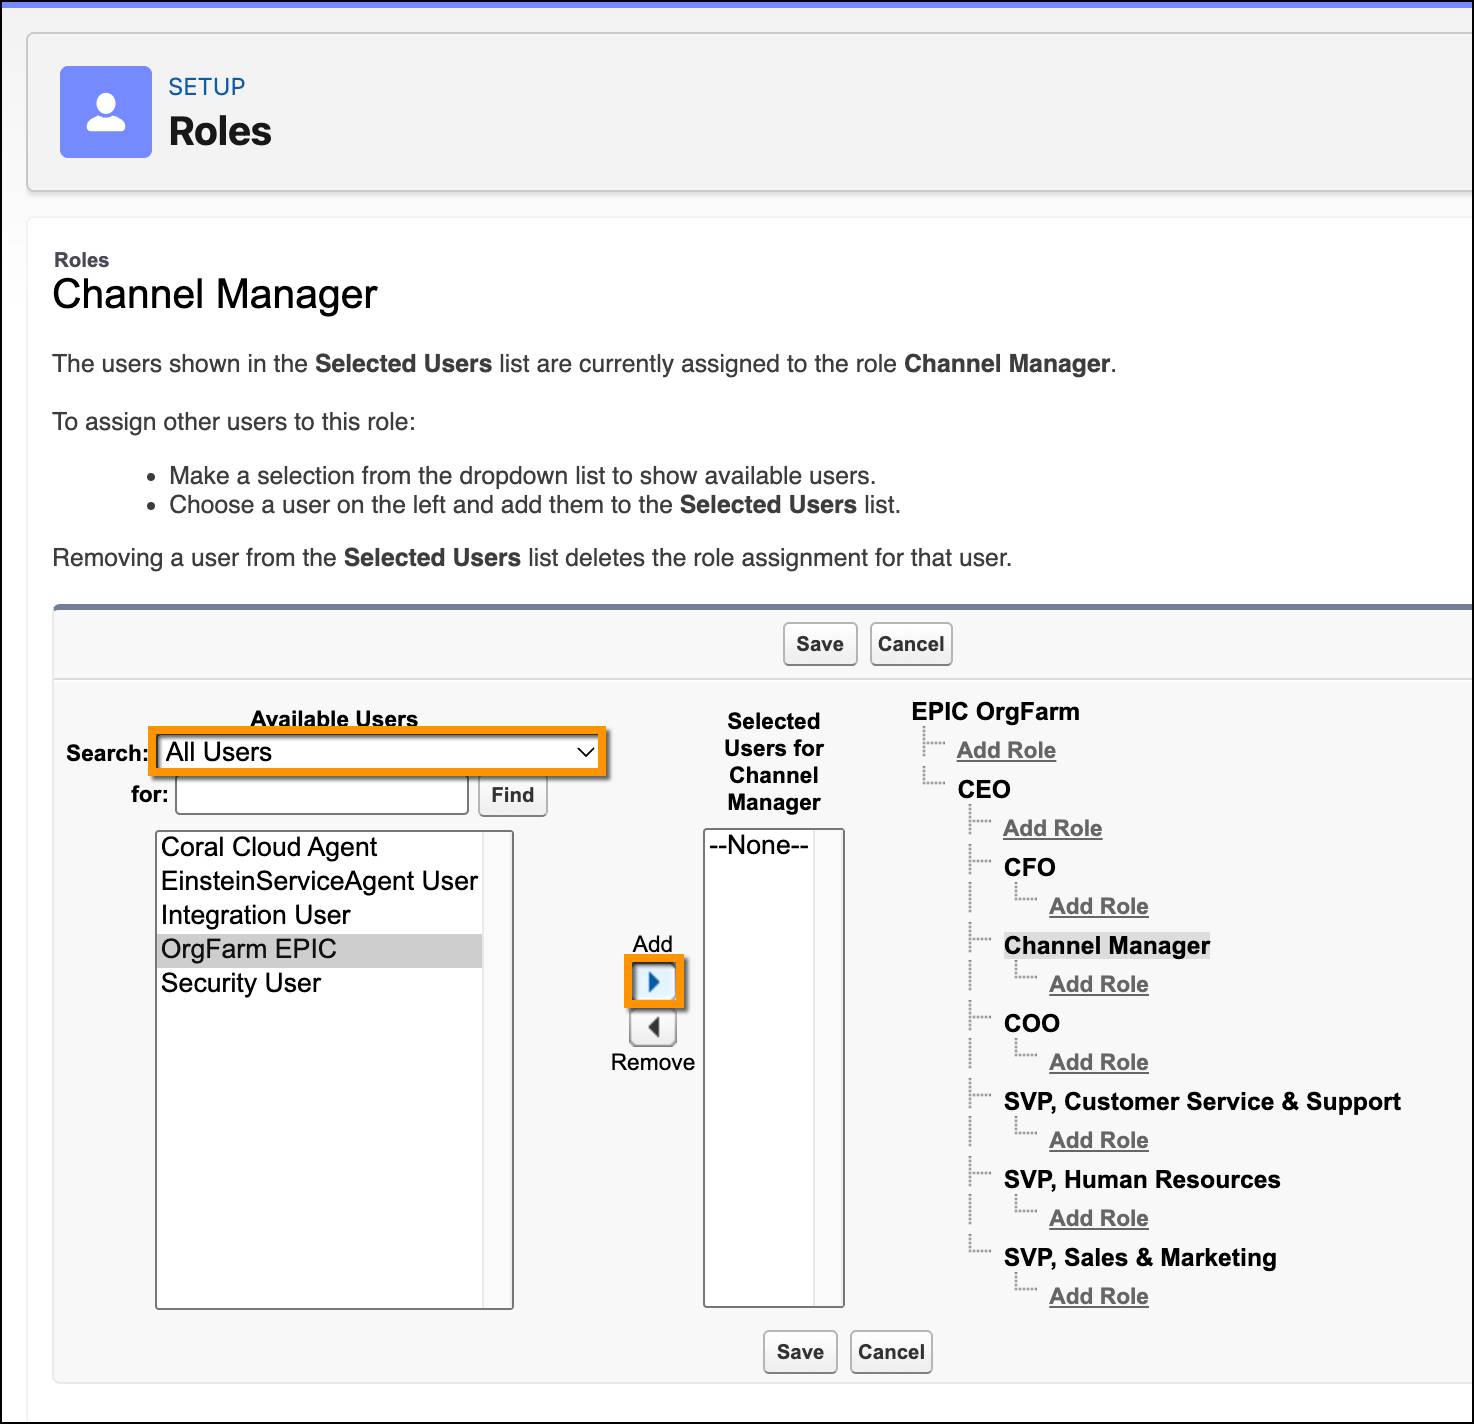
- Click Save.
- Close the Roles browser window, and go back to Salesforce Go. Select the Create a Role for Channel Managers and Assign the Role to Channel Manager Users checkboxes.
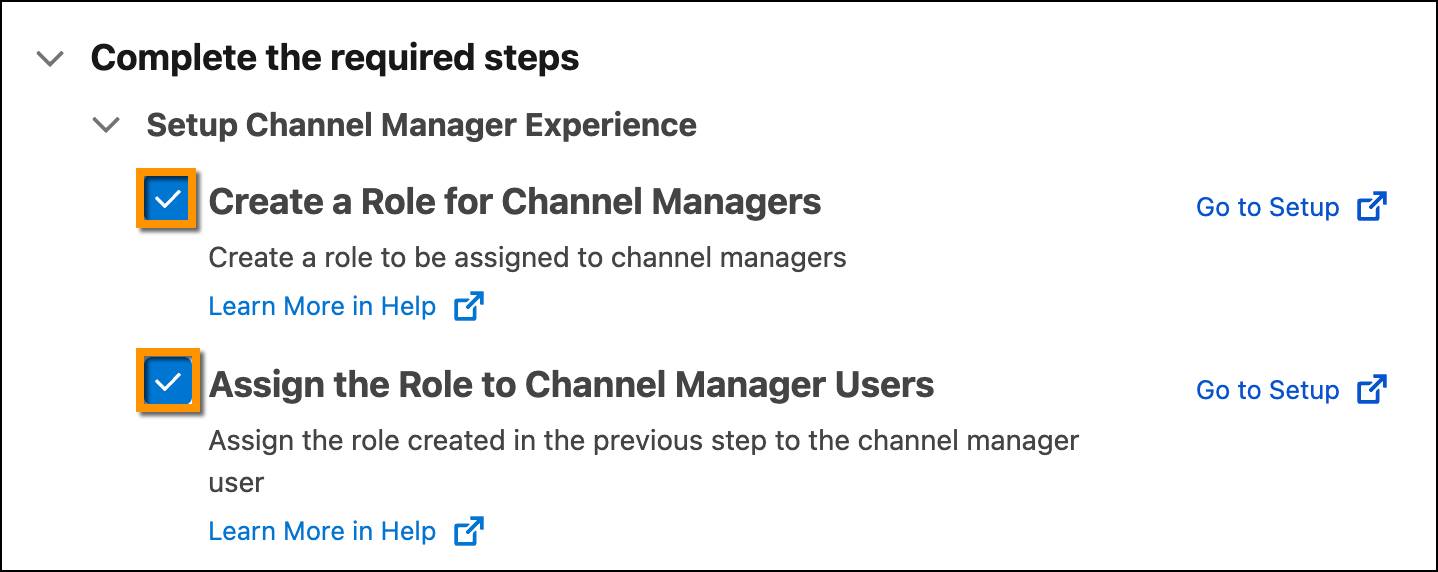
Your house now has someone holding the keys. Channel managers have their place in the hierarchy, ready to support the partners who move in. Next, you get the house ready for those partners.
Set Up the Partner Experience
In this step, you get the partner site ready for the partners who use it. You set up what partners can see and do, and then decide who gets in. After you confirm everything is set up correctly, you activate the site and open the doors.
Review Sharing Settings
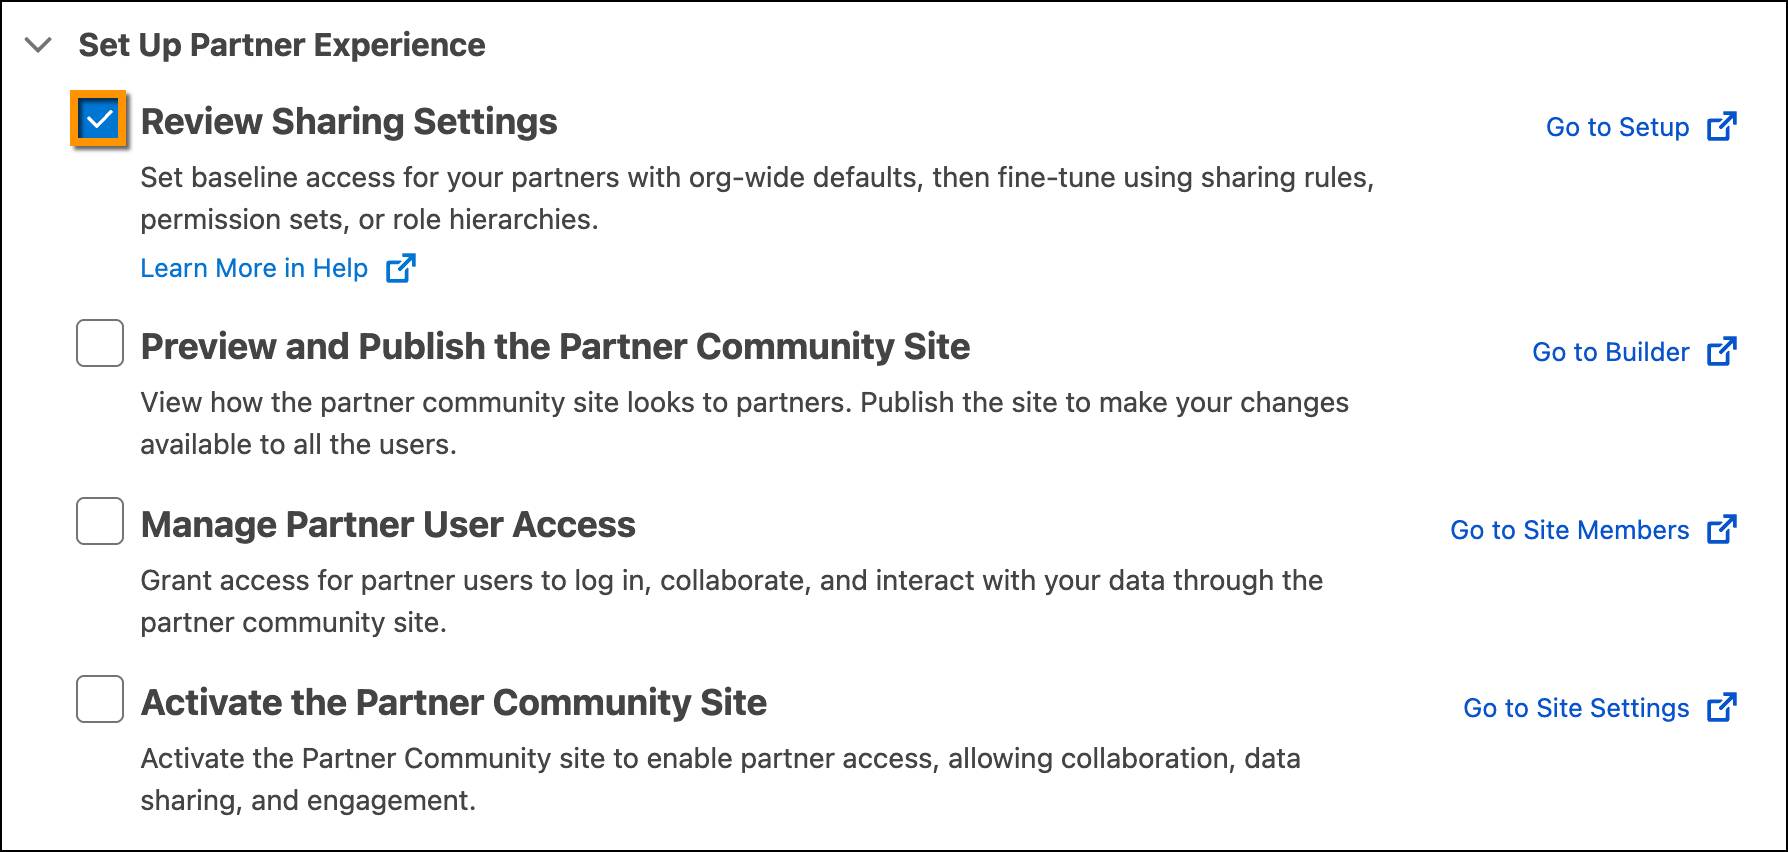
The first step is to review sharing settings. This is where you set the baseline record access for your partners with org-wide defaults. Salesforce lets you set separate defaults for internal users, your employees, and external users, like your partners. The external default can match the internal one or be more restrictive, but never more open. For example, you might give employees Public Read-Only access to opportunities while keeping external access Private, so partners don’t see each other’s deals. What you choose depends on your partner strategy. From there, you can fine-tune access with sharing rules, permission sets, or the role hierarchy. To learn more, check the Resources section.
For this example, leave the settings as they are and select the Review Sharing Settings checkbox.
Preview and Publish the Partner Community Site
With the baseline access in place, let’s keep going and get the rest of the partner experience ready. Follow these steps.
- Next to Preview and Publish the Partner Community Site, click Go to Builder. This opens Experience Builder, where you build and customize your partner site.
- Close any popup windows and review the site. Initial setup already created this site for you, and it comes with the pages and features most partner sites need. Use it as a starting point that you can customize later.
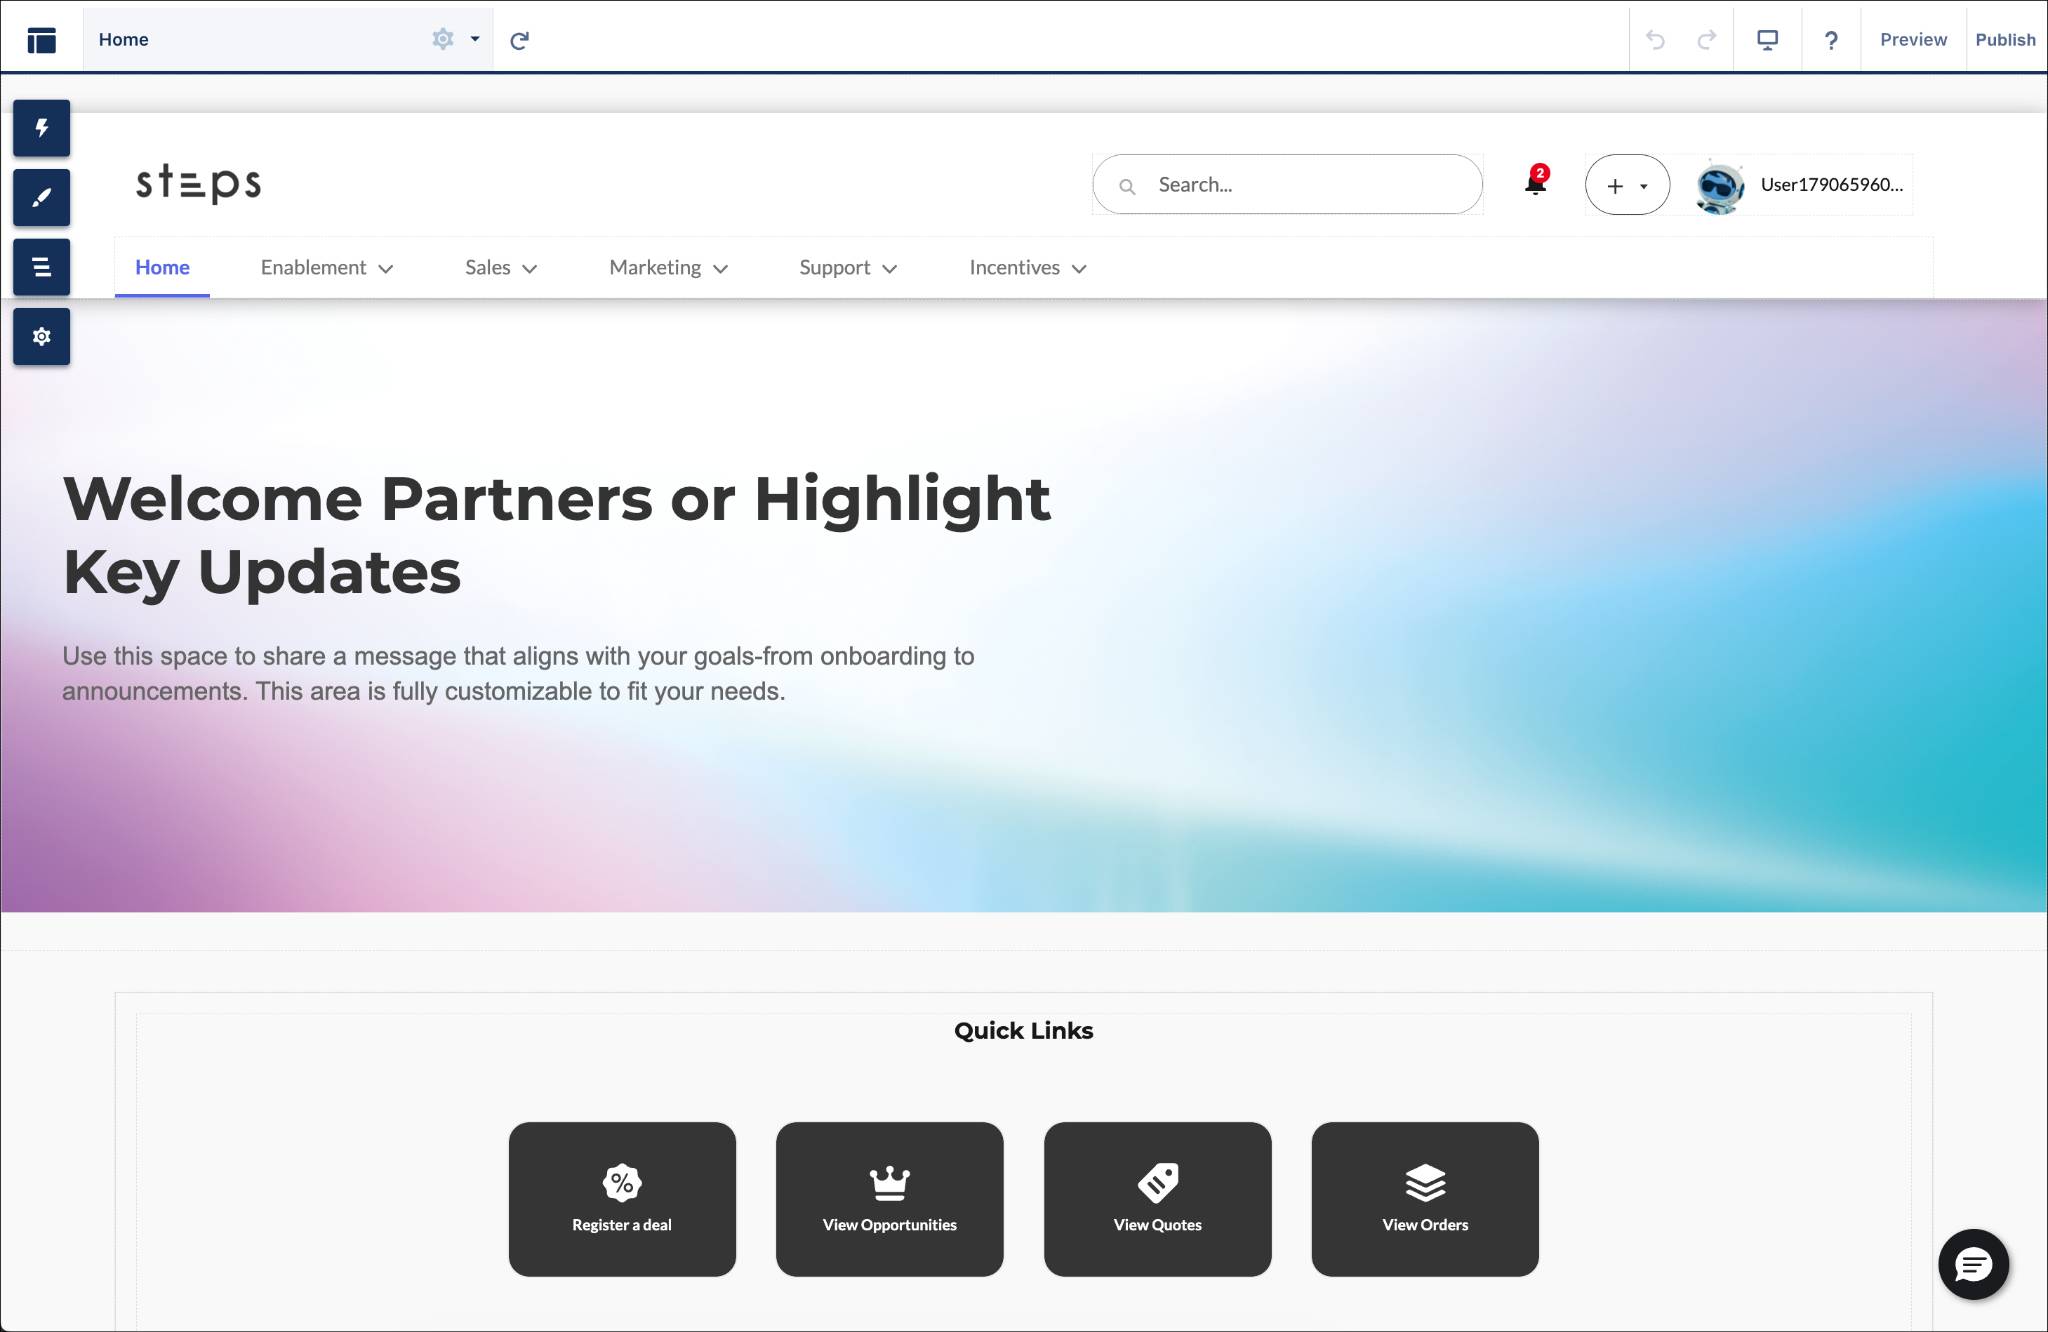
- For this example, leave the site as is and click Publish.
- In the confirmation window, click Publish again. This may take a minute or two.
- Click Got It in the Publishing popup window, and close the Experience Builder browser tab to return to the initial setup page.
- Select the Preview and Publish the Partner Community Site checkbox.
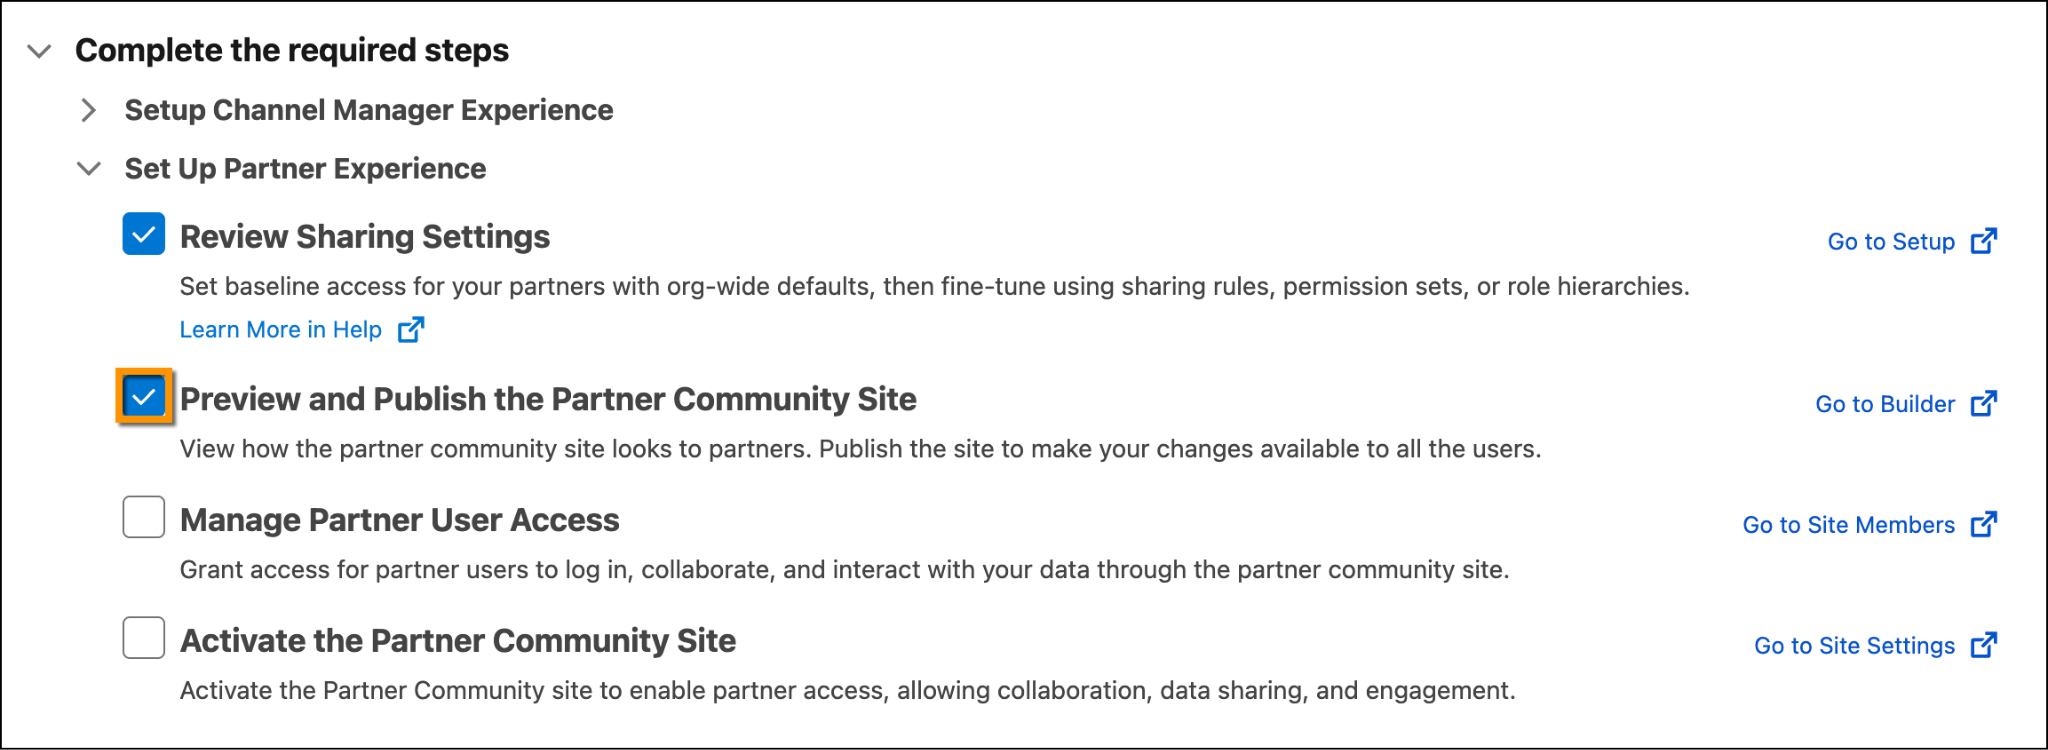
Your partner site is published and ready, so now it’s time to decide which partners get keys.
Manage Partner User Access
Your site’s now live, but that doesn’t mean partners can access it yet. Only users whose profile or permission set is a member of the site can log in, so your next job is to add the partner profile as a site member. That way, every partner user with that profile can access the site.
- Next to Manage Partner User Access, click Go to Site Members. This opens the Members page in your partner site’s settings.
- Under Select Profiles, set Search to Partner.
- Under Available Profiles, select Partner Community User, and then click Add to move it to Selected Profiles.
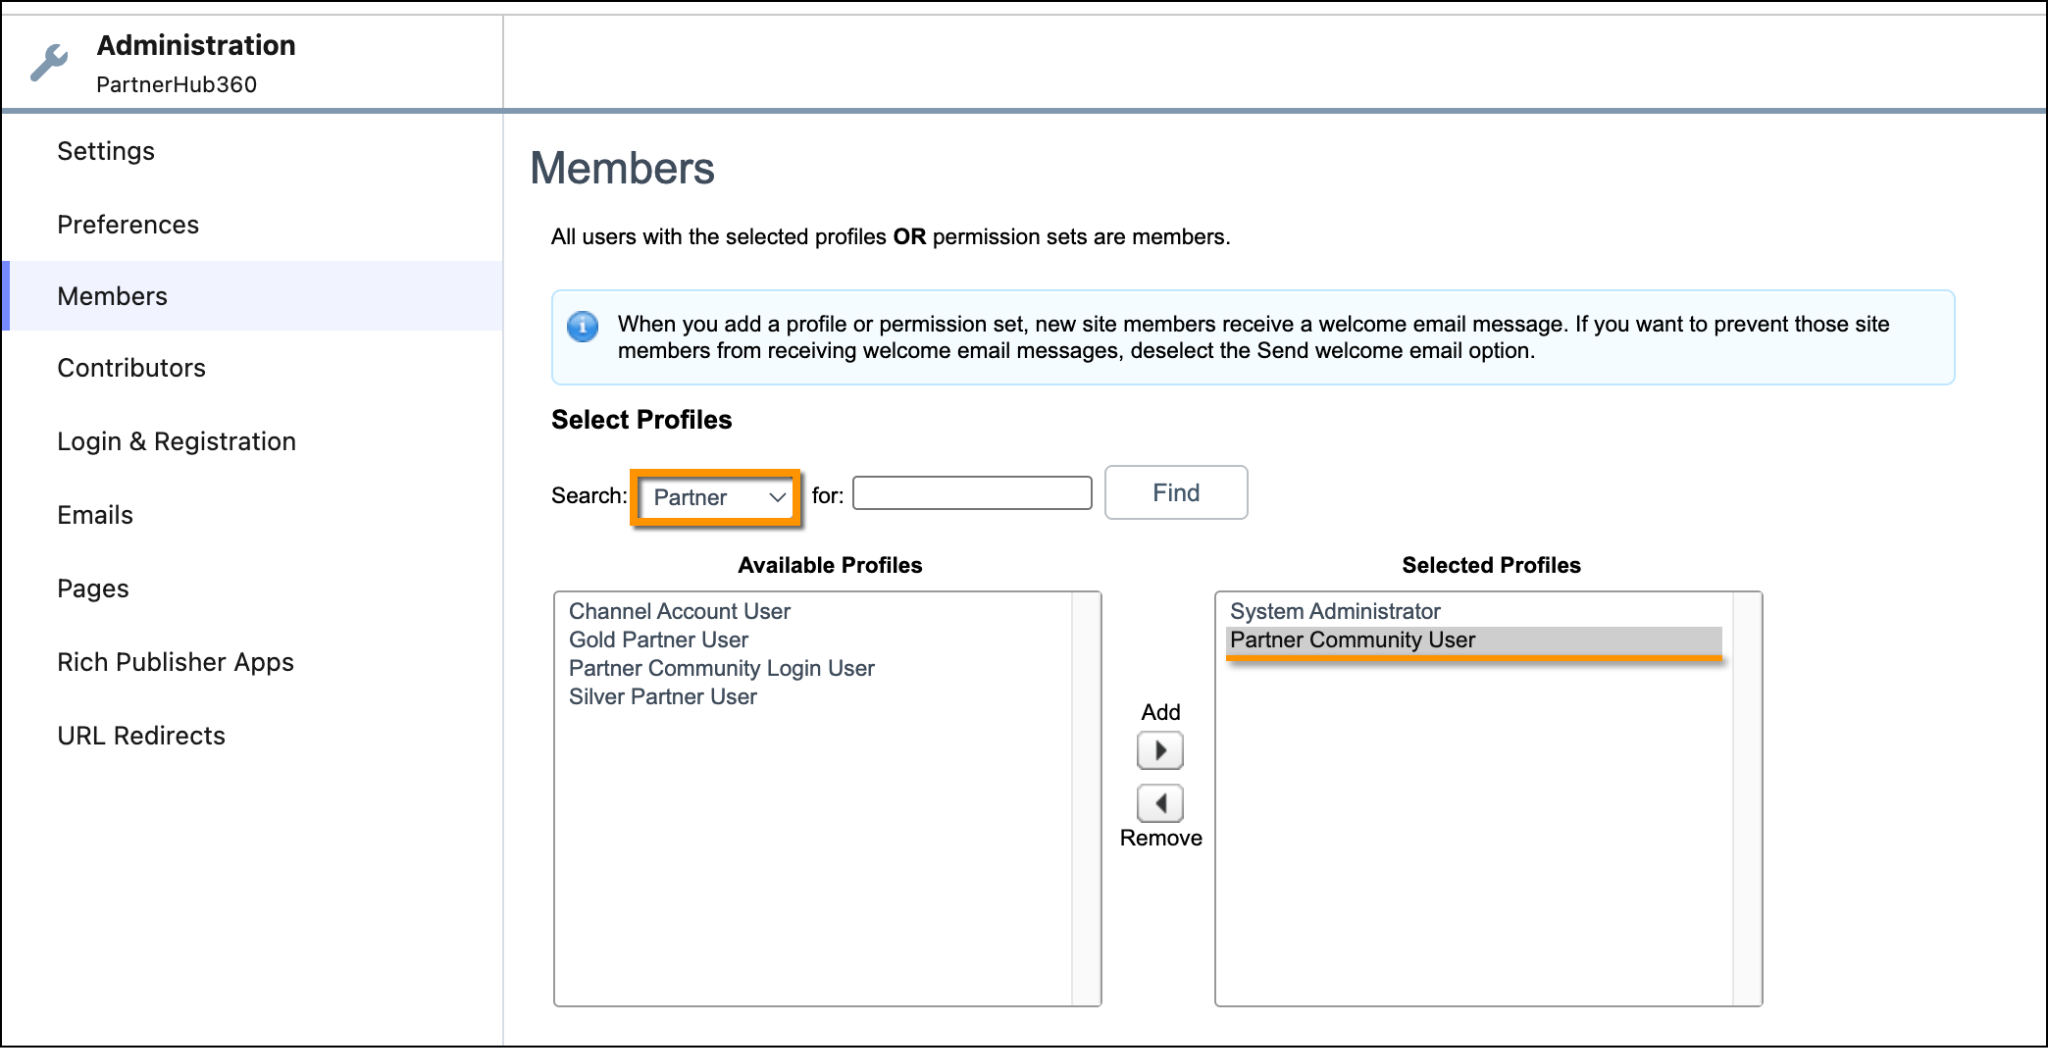
- Scroll down and click Save.
- Close the browser tab to return to the initial setup page in Salesforce Go.
- Click the Manage Partner User Access checkbox.
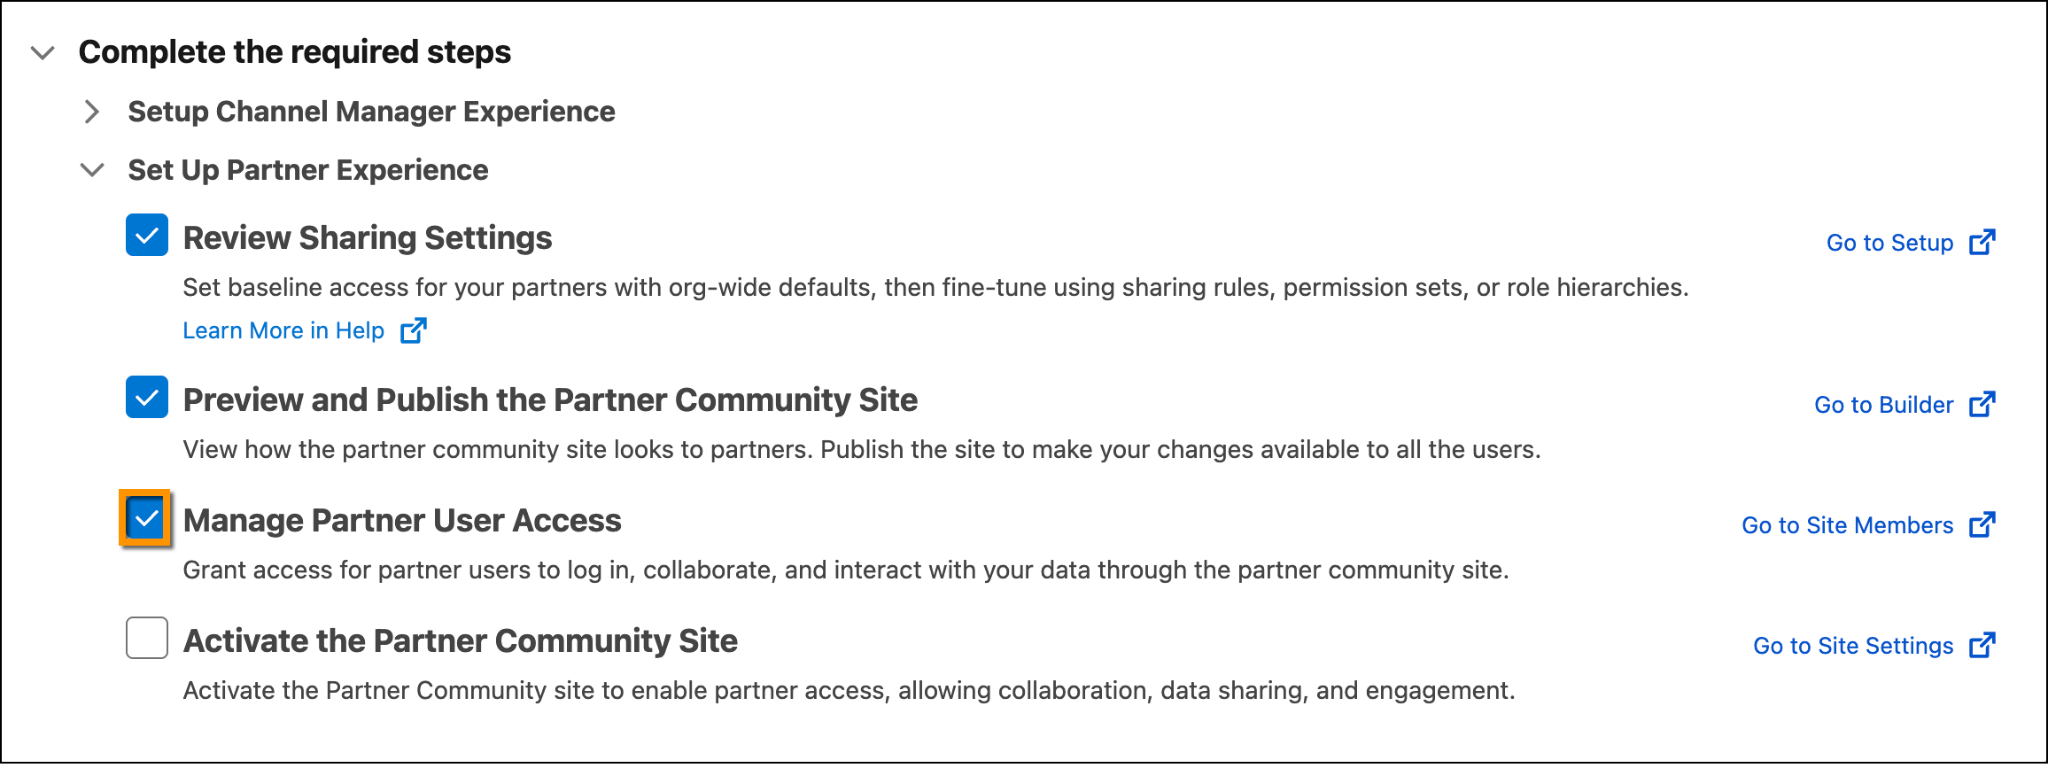
Activate the Partner Community Site
Your site is published and your partners have their keys, but the front door is still locked. When you activate the site, your partners can log in and start working with your team.
- Next to Activate the Partner Community Site, click Go to Site Settings. This opens the Settings page in your partner site’s settings.
- Click Activate.
- Click OK. You might need to click it again. Wait until the status shows Active.
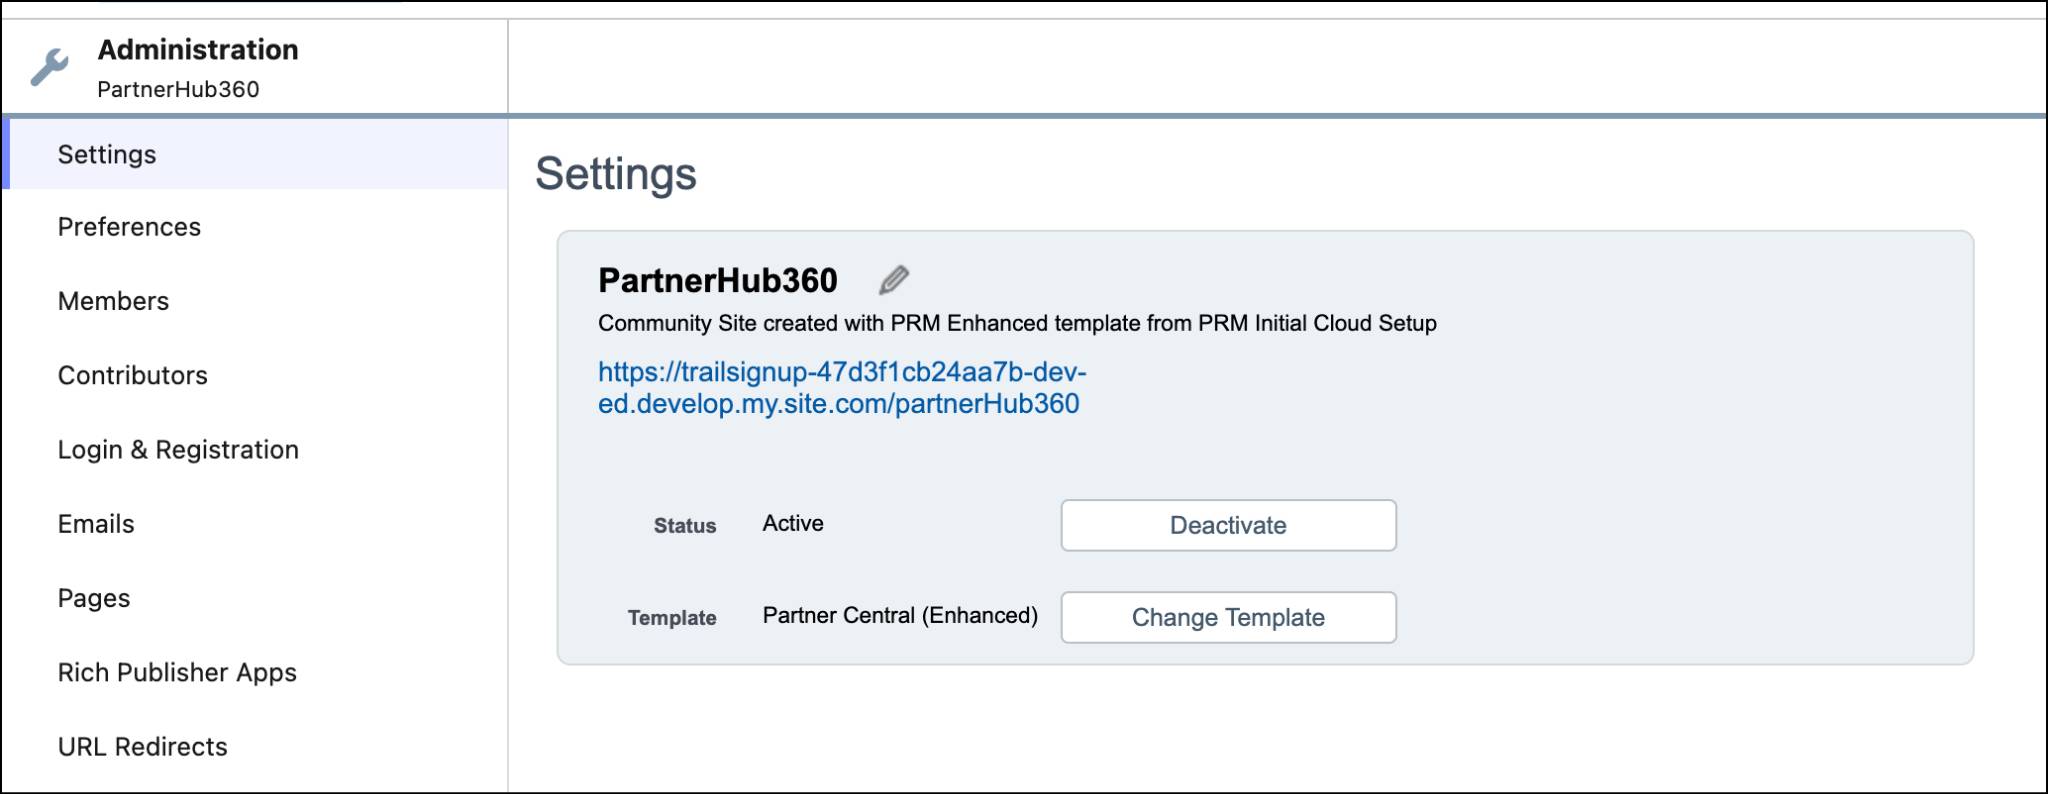
- Close the browser tab to return to Salesforce Go.
- Select the Activate the Partner Community Site checkbox.
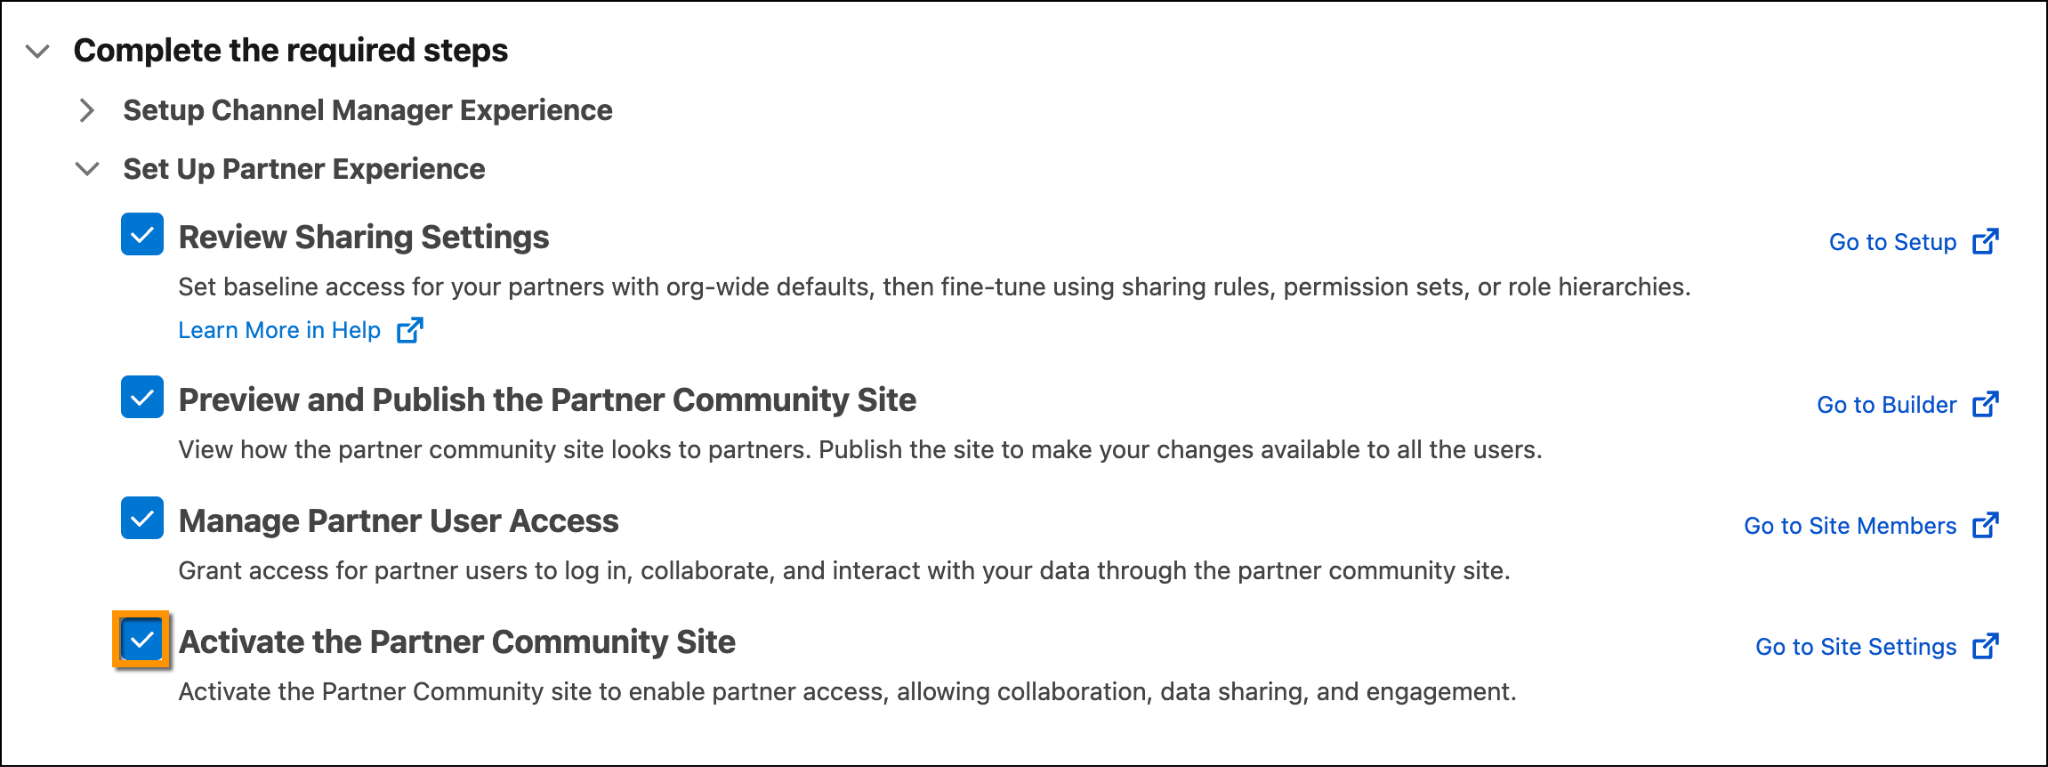
You started with an empty foundation, and now you have a house! Your partners can move in and get to work.
Wrap It Up
You’ve completed Partner Cloud initial setup in Salesforce Go, and every step is checked off.
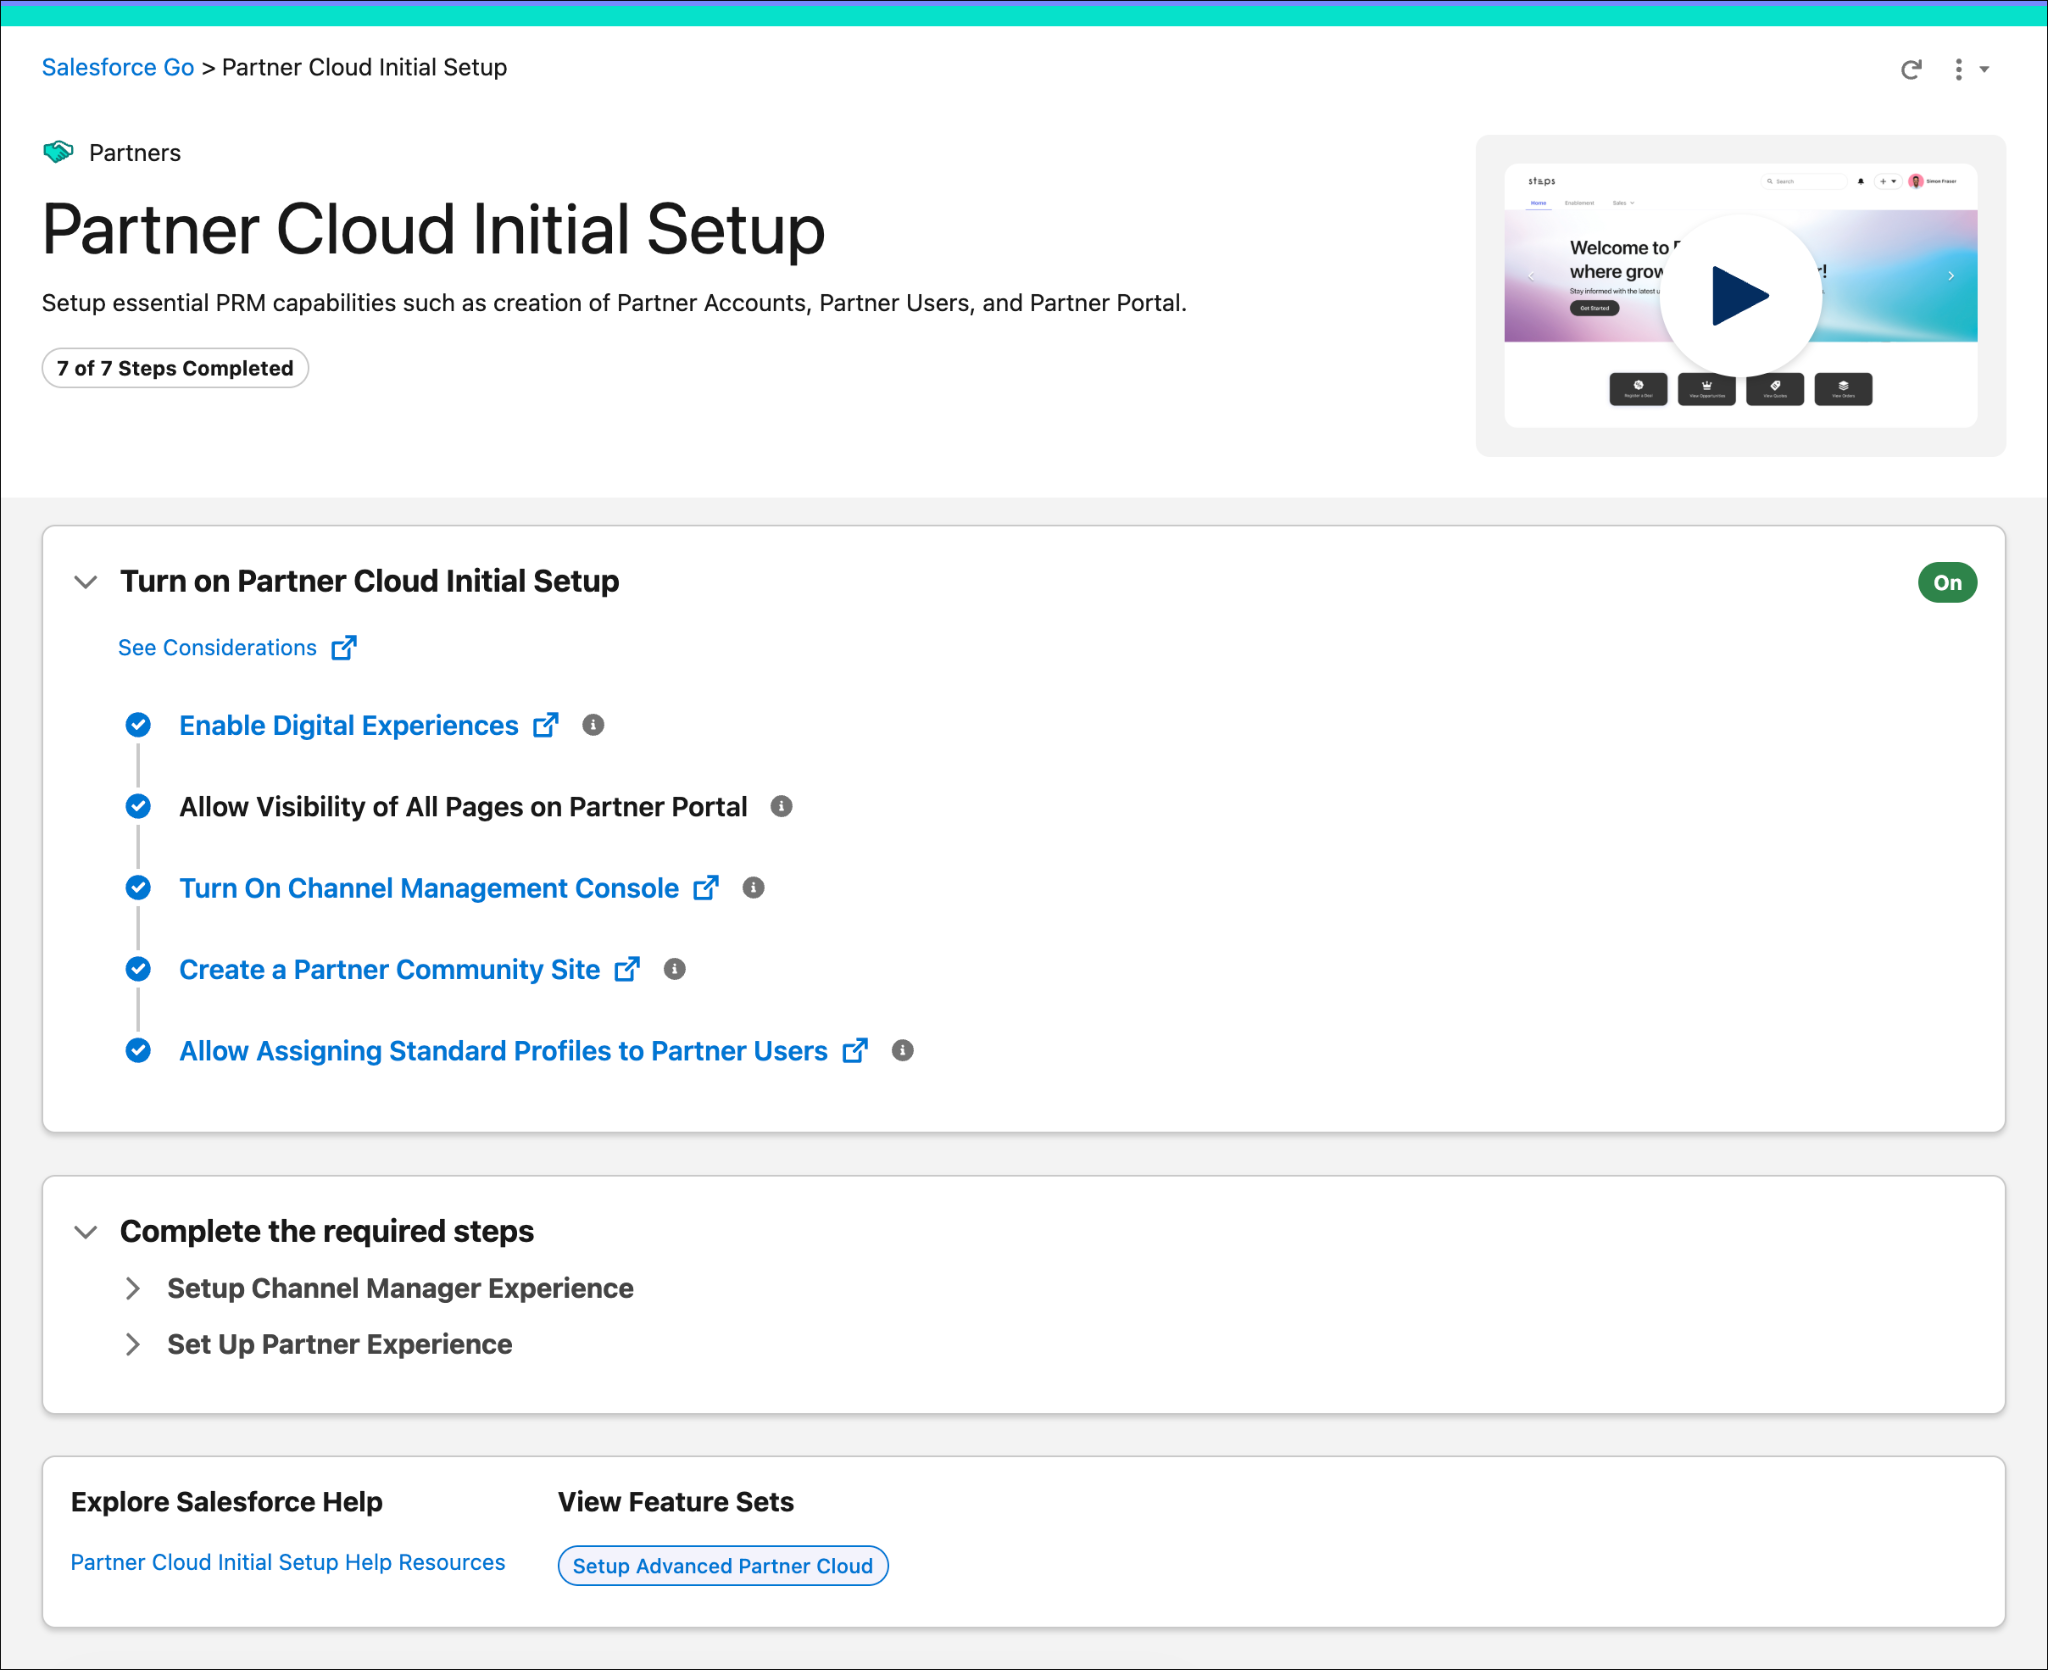
Your partner site is live, and it sits on a solid foundation. Channel managers have their place in the role hierarchy, so they can see what their partners are working on without asking for updates. Partners can log in and work with the data you’ve chosen to share with them, and nothing more. And what used to mean switching between Setup pages and hoping you hadn’t missed anything is now a few guided steps in Salesforce Go.