Use Agentforce Vibes to Get to Know an Agent
Learning Objectives
After completing this unit, you’ll be able to:
- Explain the agent development lifecycle.
- Use Agentforce Vibes to explore an agent’s functionality and structure using natural language.
- Test the agent using programmatic preview conversations.
- Review agent behavior using the Agentforce DX trace and history panels.
What Is the Agent Development Lifecycle?
Your Coral Cloud Resorts dev coworkers often talk about the agent development lifecycle (ADLC). Here’s a brief overview of what they mean.
Building agents is fundamentally different from traditional software development. When you write a Salesforce app, the code follows a fixed, deterministic path. An agent reasons. It interprets instructions, selects tools, and adapts its behavior in context. That probabilistic nature means the way you plan, build, and validate an agent has to change too.
The ADLC is the Salesforce framework for building agents that are reliable, effective, and ready for production. It covers the end-to-end journey: Design → Build → Test and Evaluate → Deploy → Observe → Improve. It’s a continuous loop designed to help you ship agents faster and keep improving them over time.
The Build–Test Inner Loop
This badge focuses on the ADLC’s inner loop—the tight, iterative build-and-test cycle at the heart of agent development—which is where the Coral Cloud Resorts dev team does most of their work. It’s where most of the hands-on development work happens and where Agentforce Vibes shines as your coding companion.
In the inner loop, you:
-
Build: Author or modify your agent’s behavior using Agent Script in your local development environment.
-
Validate: Check your script file for syntax and structural correctness.
-
Test/Preview: Converse with the agent, either interactively or programmatically, to verify it responds as expected. Your conversations act as ad-hoc tests of how well the agent works.
-
Iterate: Keep building, validating, and previewing until you’re satisfied with the updates you made to your agent.
-
Publish: Deploy the agent to your development org so other developers can test it and you can create end-to-end test suites.
This fast, iterative cycle lets you move from idea to working agent quickly without waiting for full deployment pipelines.
Agent Script: A Brief Overview
Agent Script is the foundation of the next generation of agents. It’s a language that combines the flexibility of using natural language to vibe code, with the reliability of programmatic expressions for handling business rules. Agent Script gives you all the advantages of access to a large language model (LLM), while also providing ways to add more deterministic behaviors to your agent.
As with most things in Salesforce, an agent’s Agent Script file is part of an AiAuthoringBundle metadata component, also known as an authoring bundle. You can generate an authoring bundle from scratch in your DX project by vibe coding, or directly using CLI or Agentforce Vibes IDE commands. Or you can first create an agent in your org using Agentforce Builder and then retrieve the authoring bundle to your DX project. The authoring bundle includes a file with the .agent extension; this is the Agent Script file which serves as the agent’s blueprint.
In this badge, you start with an existing authoring bundle and Agent Script file in the repo that you cloned in the previous unit. Then you practice vibe coding the agent using Agentforce Vibes.
Use Agentforce Vibes to Understand How Your Agent Works
Let’s get down to business and do some vibing! We won’t check these steps in this unit, but they help you to complete the challenge in the next unit.

First use a natural language prompt to get to know the Local Info Agent.
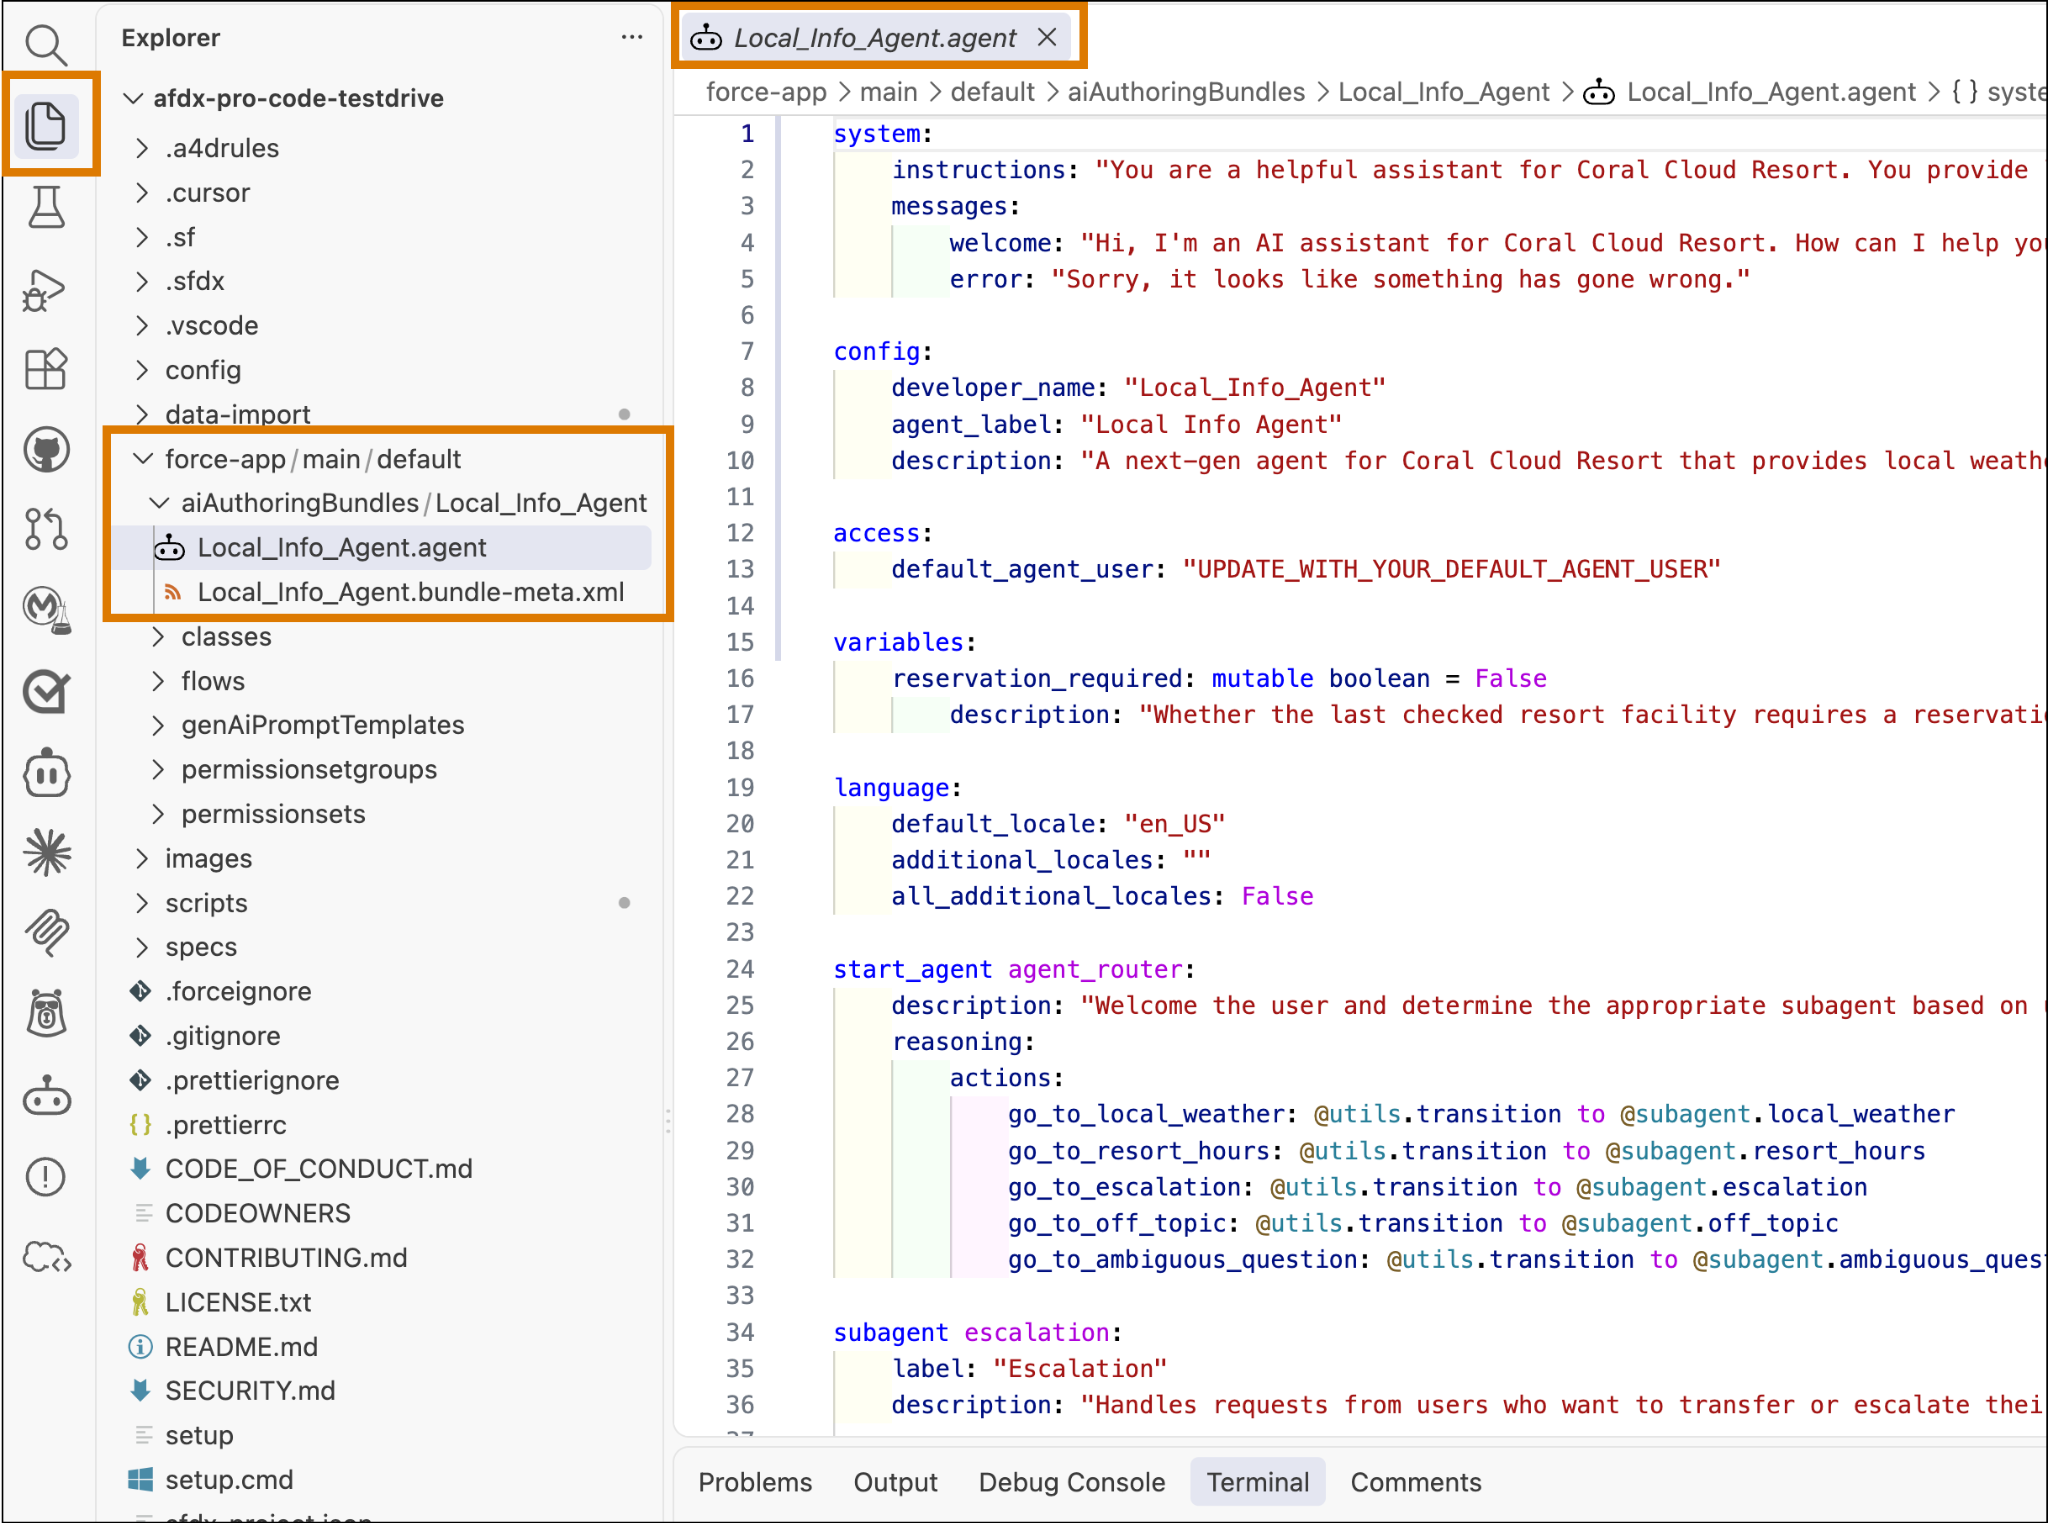
- In Agentforce Vibes IDE, open the Local_Info_Agent.agent Agent Script file, which is located in the force-app/main/default/aiAuthoringBundles/Local_Info_Agent folder of the DX project you cloned in the previous unit.
- In the Activity Bar, click the Agentforce Vibes icon
 to open the Agentforce Vibes panel. If the Agentforce Vibes icon isn’t visible, select
 first.
- Select I agree to the terms, and then select Enable Agentforce. If you already completed this step in the previous unit, the Agentforce Vibes side panel opens directly to the chat interface.

- In the Agentforce Vibes chat interface, run this prompt to give it some directed guidance about the skills and commands it should use. Agentforce Vibes activates skills on demand when they’re relevant to your request, so this prompt isn’t strictly necessary. But Agentforce Vibes might use some tokens to determine the correct skill to use, so this prompt gives it a helpful nudge in the interest of conserving your limited tokens.
Make sure you load the "agentforce-generate" skill.
- Run this prompt to learn about the Local Info Agent.
Tell me about the agent that’s open in the editor. What does it do?
If Agentforce Vibes requests permission to execute commands, select Run.
After a minute, Agentforce Vibes displays an overview of the agent along with a few details, such as its subagents and design details. Because the output is nondeterministic, the layout differs from session to session, though the content is the same. As Agentforce Vibes analyzes the Local Info Agent, it might occasionally show an error when it takes a wrong path in its analysis. Don’t worry; Agentforce Vibes can self-correct, and you’ll eventually see the overview.
Here are more examples of informational prompts you can run to learn about an agent. But don’t actually run them yet; you want to make sure you have enough tokens for later tasks.
- Walk me through what happens from the moment a guest sends a message to when they get a reply.
- How does the agent decide what to say after it gets the weather data back?
- Does this agent remember anything between turns? If so, what?
- What stops a guest from asking this agent to do something it shouldn’t?
- Are there any inconsistencies or problems in this agent?
Ask the Agent to Test Itself Using Programmatic Preview
As you build an agent, it’s helpful to periodically converse with it. You can check how it responds as you make changes and updates in real-time. These conversation previews serve as ad-hoc tests to make sure the agent behaves as expected.
You can interactively converse with your agent, as described in Build an Agent Using Agentforce DX. Here, you kick off programmatic preview sessions using a natural language prompt. These programmatic sessions use Live Mode, which means they use the actual Apex classes, flows, and prompt templates in your development org to provide the most accurate view of your agent’s behavior. Live mode requires a default agent user in the Agent Script file; currently, there’s just a placeholder (If you’re interested, the placeholder is around line 11 of the open Agent Script file.)
- In the Agentforce Vibes chat interface, run this prompt to add a default agent user to the Agent Script file first. In the prompt below, replace <generated-username> with the actual generated username that was created by the setup script in Unit 1.
Add the <generated-username> username as the default user agent to the open Agent script file.
When it completes, the open Agent Script file should have something like this in the access section: default_agent_user: "afdx-agent@testdrive.org515fake1b-8115-4ebf-8adc-8a8fake2516"
- Run this prompt to start programmatic conversation previews that test all the subagents:
Validate the current behavior of the Local Info Agent. Make sure you test all the subagents using programmatic preview sessions.
- If Agentforce Vibes requests permission to execute any commands, select Run.
Because your request is complex, Agentforce Vibes may spend a few minutes working through the tests. When it completes, you see a table with the utterances that Agentforce Vibes sent to the Local Info Agent using the programmatic preview commands, and whether they returned appropriate answers and called the appropriate Apex class or Flow. Remember that vibe coding is nondeterministic, so you might see slightly different information or a different format.

View Trace Sessions and Conversation History in Agentforce DX Panels
The programmatic preview conversations you just ran probably passed and your table has a pretty column of mostly green checkmarks. But let’s say a validation failed and you want to dig deeper into the back and forth conversation, also called turns. This time you use the Agentforce DX panel to perform some sleuthing. These panels are different from the Agentforce Vibes panel.
- In Agentforce Vibes IDE, open the Local_Info_Agent.agent file.
- Press Ctrl+Shift+P (Windows) or ⌘+Shift+P (macOS) to open the Command Palette.
- Enter
AFDXand select AFDX: Preview This Agent.
The Agentforce DX panel opens on the left.
- In the Select agent… drop-down at the top, confirm that Local_Info_Agent is selected.
- Click the History tab.
The History tab currently lists at least one preview session—the one you ran with the natural prompt.

- Select one of the preview sessions in the History tab. The Agent Preview tab launches and shows that preview session’s entire conversation. To continue this conversation, first select Resume Live Test. Then enter your request in the chat. When you’re finished with the conversation, select Stop Live Test.
- Select the Agent Tracer tab to see the list of all turns for the conversation you have open in the Agent Preview panel.
- Select a turn to see its details, such as the session and plan ID, the timestamp, and a step-by-step trace of the turn. The types of traces include the initial user input, the variables that were updated, reasoning, and the subagents and actions that were involved. Select each trace step to see more JSON details at the bottom of the panel.

Great job using both Agentforce Vibes and Agentforce DX to understand how the Local Info Agent works. Read on to do some actual coding.