Manage Cases Using Articles
Follow Along with Trail Together
Want to follow along with an expert as you work through this step? Take a look at this video, part of the Trail Together series.
(This clip starts at the 52:55 minute mark, in case you want to rewind and watch the beginning of the step again.)
Introduction
Here’s where all your work pays off. You laid the foundation to allow Ada and her team to use Knowledge articles efficiently when resolving cases. Open a case that can be closed using the Knowledge article you created in the previous step of this project to be sure the process works smoothly for the support team.
Create a Case
Next, create an inquiry case for Edge Communications.
- In the Service App, click the Cases tab.
- Click New.
- If asked to select a Record Type, select Inquiry. (This is only applicable if you have completed the Set Up Case Escalation and Entitlements project.) If you do select inquiry, you’ll need to add the Articles related list to Inquiry Case Layout.
- In Setup click Object Manager and select Case
- In Case Page Layouts, if there is an Inquiry Page Layout, click edit.
- Add the Articles related list to the page layout.
- Click Save and Yes.
- In Setup click Object Manager and select Case
- Fill in the case information.
- Contact Name: Rose Gonzalez
- Account Name: Edge Communications
- Case Origin: Phone
- Subject:
Solar Panels - Description:
Solar Panels need maintenance work. How do I maintain my Solar Panels?
- Click Save.
Add the Knowledge Component to the Case Record
This will allow you to see Knowledge article information while still viewing the case information. You will see suggested articles based on the case information. After reviewing, attach the article to the relevant open case.
- While in the case record, click the Setup gear
 and select Edit Page.
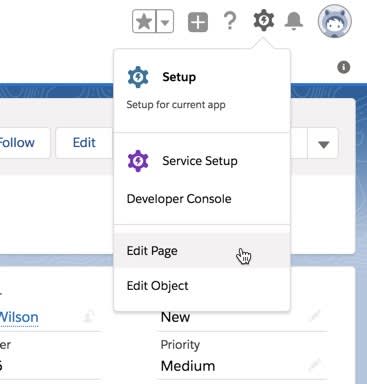
- Click the Tabs component (the left side of the record page where it says Feed and Related). In the panel on the right, click the Add Tab button to add the Details tab.

- Remove the original Details component by hovering over the component and clicking the delete button (trash can icon).

- Click your new Details tab and set it as the default tab, which can be done in the upper right.

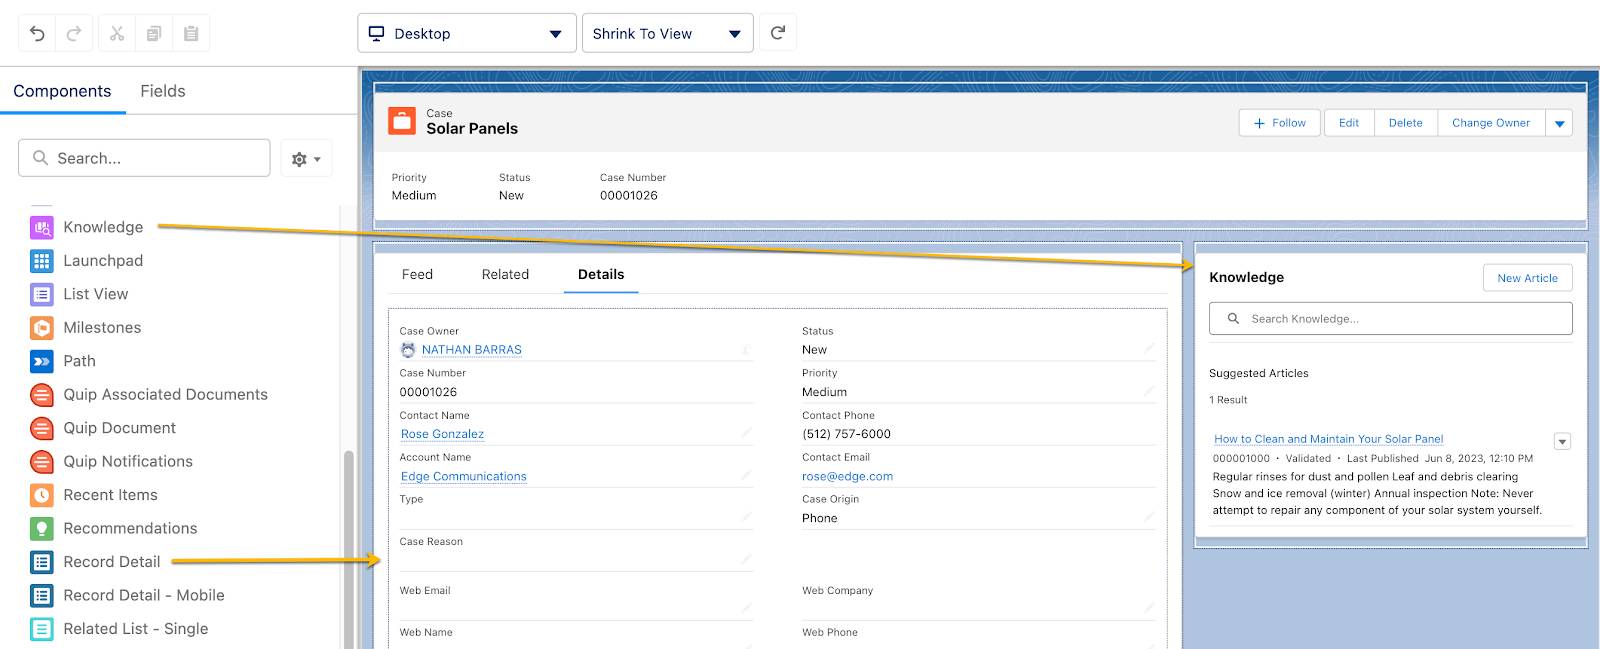
- From the Components section on the left grab Record Detail and drop it underneath Details where it says Add Component(s) Here.
- From the Components section on the left grab Knowledge and drop it in the Add Component(s) Here to the Right of the Tabs area. It will look like the image below:
- Click Save.
- Click Activate.
- Click Assign as Org Default. (This might already be activated.)
- Select Desktop and phone on the Assign form factor page.
- Click Next.
- Click Save, then Save again.
- Click the back arrow
 in the upper left to return to the case record.
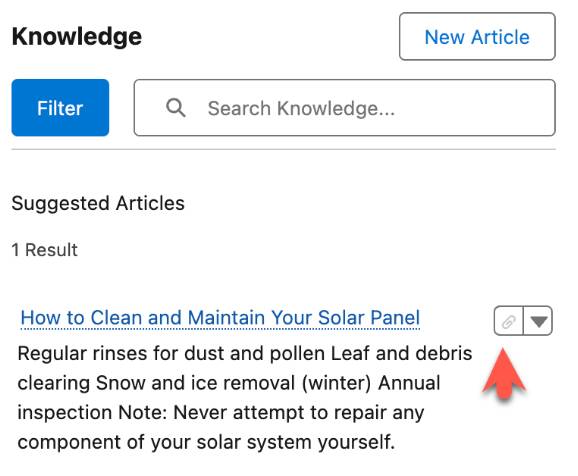
- In the Knowledge component, suggested articles are visible. Click the paperclip icon next to the How to Clean and Maintain Your Solar Panel article, and select Attach Article.
- Click the Related tab and check that the article has been added to the Articles related list.
Enable Communication Channel Mappings
Ada wants to not only attach articles to cases—she’d like to email articles as well. Emailing articles is an easy way to guarantee that customers see the information they need without having to access a community, for example.
To accomplish this, add the email communication channel and set it up so that the title of the article and the summary of the article show directly in the email once the article is inserted.
- Click the Setup gear
 and select Service Setup.
- Click the Object Manager tab and select Knowledge.
- Click Communication Channel Mappings.
- Click New.
- For Label, enter
How To - Choose the How To Record Type.
- Under Select Communication Channels, from the Available Channels list select Email and click Add to move it to the Selected Channels list.
- Under Select Communication Channel Layout Fields, from the Available Fields list select Title and Summary and click Add to move them to the Selected Fields list.
- Click Save.
Enable Email to Case
Now enable email-to-case so you can access email through cases.
- Click the Home tab.
- Enter
Email-to-Casein the Quick Find box and select Email-to-Case.
- If prompted, click Continue.
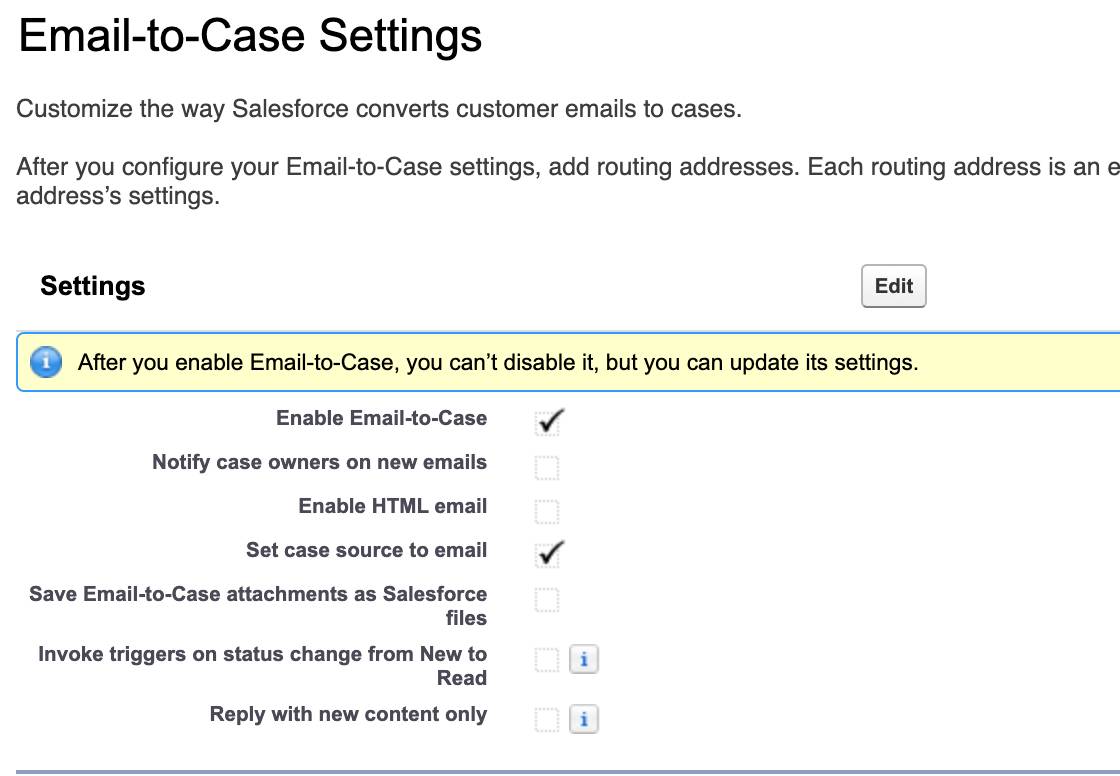
- Click Edit and select the Enable Email-to-Case checkbox.
- Click Save.
Customize the Case Page Layout
Now that you set up access to email from cases, make sure the email channel displays on the case page. Add the Email action to the case page layout.
- Click the Object Manager tab and click Case.
- Click Case Page Layouts.
- Click the dropdown next to Case Layout and select Edit.
- Hover over the Salesforce Mobile and Lightning Experience Actions section and click the wrench icon
 that appears in the lower right-hand corner.
- From the palette, select Mobile & Lightning Actions.
- Drag Email (the one that is draggable) to the Salesforce Mobile and Lightning Experience Actions section.
- Click Save.
Finally, you’ll want to update your settings to show closed statuses in the Case Status Field.
- Click the Home tab.
- Enter
Support Settingsin the Quick Find box and select Support Settings.
- Click Edit.
- Select the Show Closed Statuses in Case Status Field checkbox.
- Click Save.
Test It!
Now that you have everything set up for managing cases using Salesforce Knowledge, test the process.
- Click the App Launcher
 and select Service.
- Click the Cases tab.
- From the Cases tab, click the case number for the case with the subject Solar Panels.
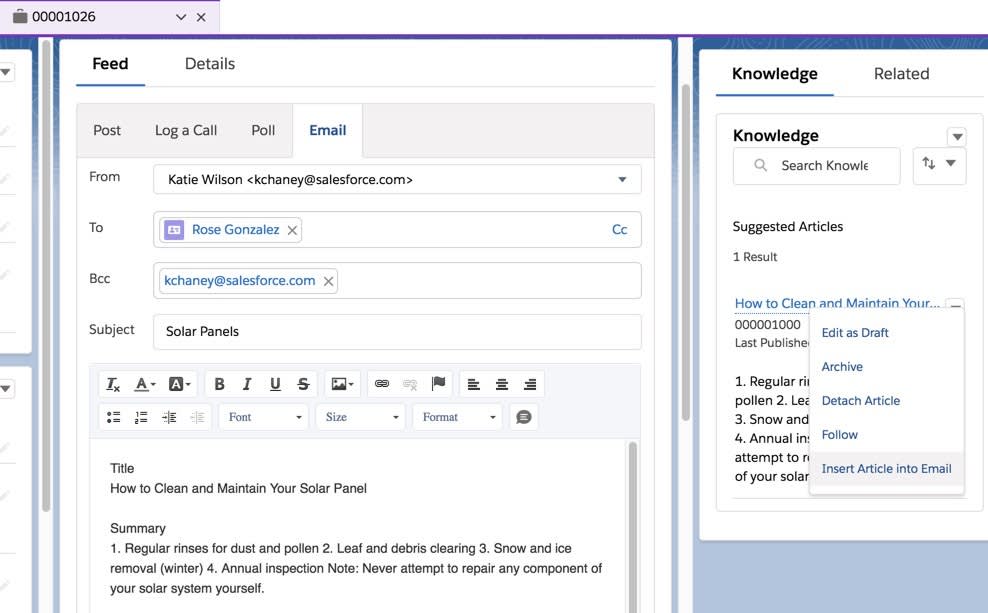
- On the case record page, click the Feed tab next to the Related tab, then the Email tab in the Chatter tab options. (If you don’t see the Email tab, click more.)
- From the Article, click the dropdown, and select Insert Article into Email. Notice that the Email tab is selected in the middle work area, and all of the case information and Knowledge article information is filled in.
- Click Send to send the email.
- Click Edit to edit the case (you may have to click the down arrow in the upper right to see the Edit option), and click the Status field.
- Change the Status to Closed.
- Click Save.
Congratulations! Because you set up channel mapping, email-to-case, and inline article attachments, Ursa Major Solar can now use Salesforce Knowledge to resolve cases. That allows Ada and her team to take care of customers more quickly and more efficiently. Ada and her support team can handle a larger volume of cases with better case management capabilities from the get-go.
Resources
