Configure the Dashboard and Verify the Results
Add Flexcards to the Custom Order Record Page Layout
Great job so far! You’ve configured all the Omnistudio components for this scenario.
Now, it’s time to add the Flexcards to the custom order record page and complete the customer service rep dashboard.
- Close the Flexcard Designer browser tab and return to your org.
- Click
 and select Setup.
- In the Quick Find box, enter
Lightning App Builder, and then select Lightning App Builder.
- Click Edit in the row for Customer Information Dashboard. This opens the order record page in Lightning App Builder.
- Drag a Flexcard component from the Components panel and drop it in the blank slot labeled Add Component(s) Here.

- In the Page > Flexcard panel, for Flexcard Name, find and select CustomerOrderInformation.
- Drag another Flexcard component and drop it after the CustomerOrderInformation Flexcard.
- In the Page > Flexcard panel, for Flexcard Name, find and select CustomerCountryDetails.
- Click Save.
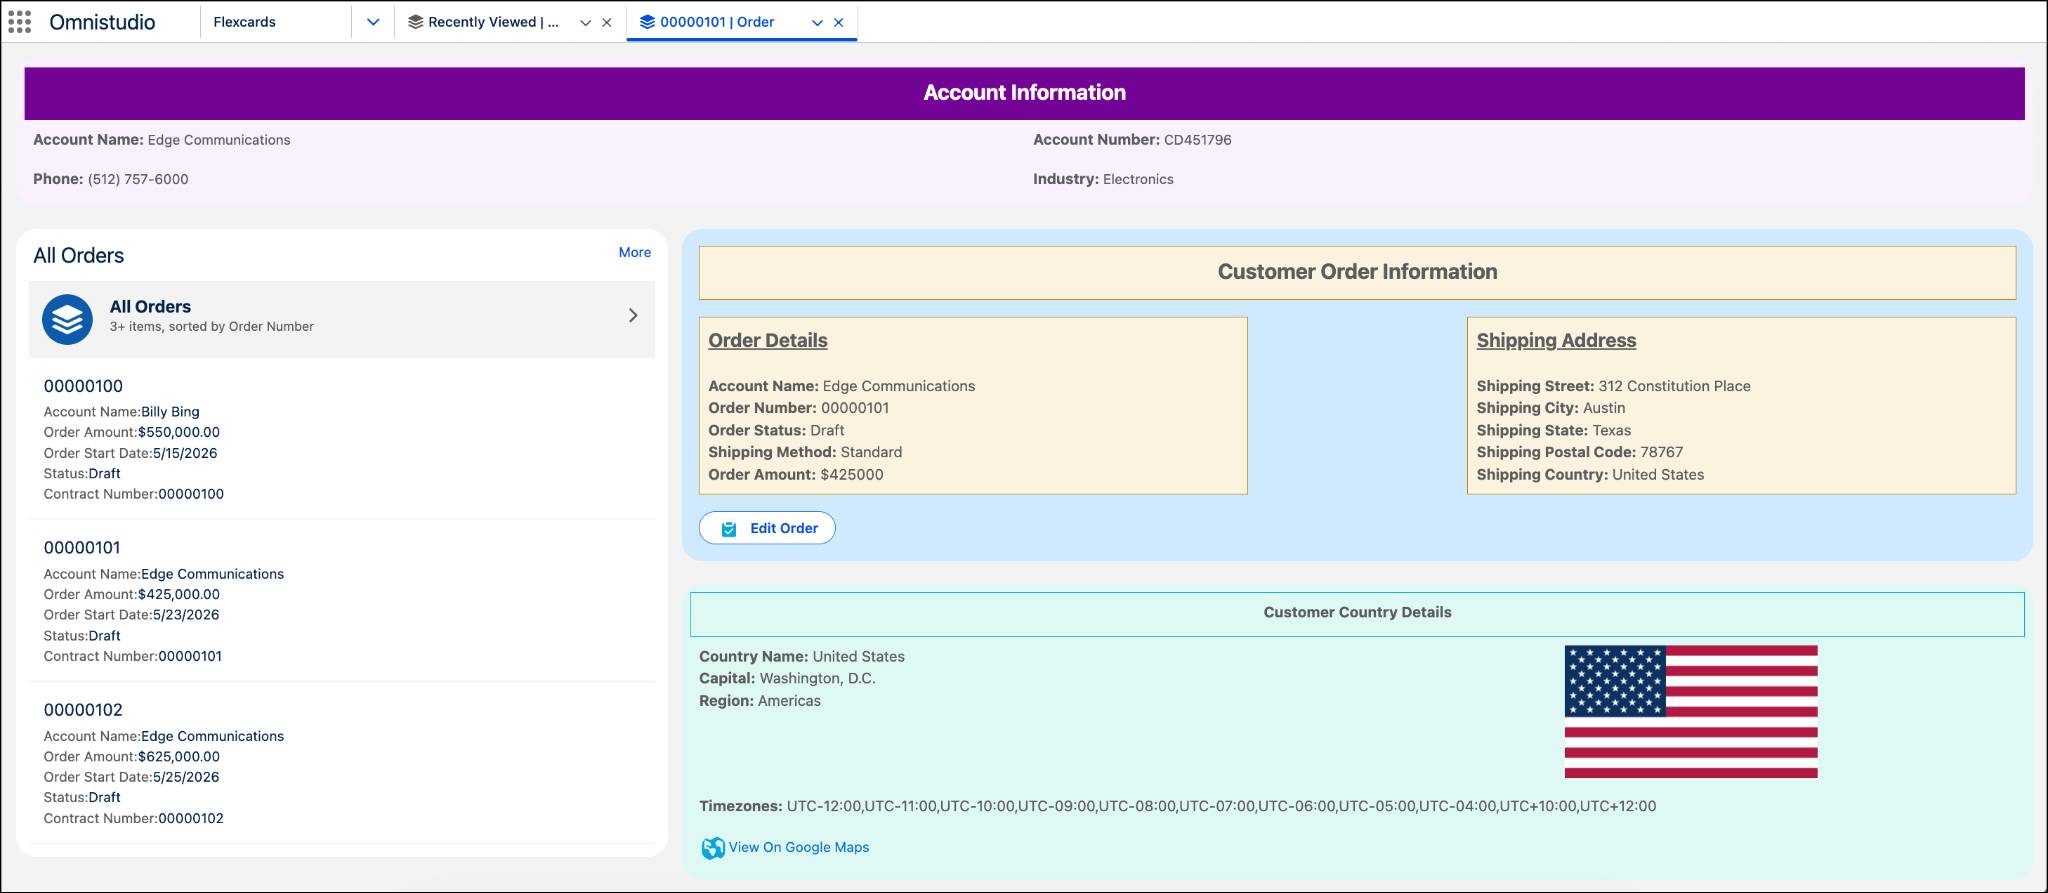
That’s it! The Customer Information Dashboard page layout for the Order object is ready and includes account information, a list of all the customer’s orders, specific customer order information, and customer country details. The customer service rep now has a 360-degree view of the customer from an order record.
Experience the Omnistudio Components in Action
Now, the customer service rep can update the shipping details from the dashboard as per the customer’s request. Try it out! Open the order with order number 00000101 and update its shipping details.
- Click
 to close the Lightning App Builder page.
- Click
 , then find and select Omnistudio.
- Click
 , then find and select Orders.
- From the Orders list view, click
 and select All Orders.
- Click on the 00000101 order number. The order opens in the customer service rep dashboard. If the Recently Viewed pane appears as a split view mode, click
 to close it. If the Flexcards are not appearing in the customer service rep dashboard, refresh the page a few times.
- In the Customer Order Information Flexcard, click the Edit Order button. Notice that the existing shipping data is populated for all the fields on the View Current Order Details page.
- Click Next. The existing shipping data is populated for all the fields on the Edit Order page as well.
- In the Edit Order page, enter the new shipping details.
New Order Status |
Activated |
|---|---|
New Shipping Method |
Expedited |
New Shipping Street |
1234 Main Street |
New Shipping City |
Toronto |
New Shipping State |
Ontario |
New Shipping Postal Code |
M4L |
New Shipping Country |
Canada |
- Click Next. The Confirmation page shows that the shipping details are successfully updated. It also shows the details of the new country.

- Click Next to go back to the order record.

The Customer Order Information Flexcard is now updated with the latest shipping details of the customer. The Customer Country Details Flexcard is also updated with the new country information.
That’s awesome, right?
Wrap Up
Congratulations! You completed all the badges of this Omnistudio badge series. Let’s quickly recap what you did.
- You created Data Mappers to fetch and update Salesforce data.
- You created Integration Procedures to execute the data operations. Integration Procedures used the data mappers to fetch and transform Salesforce data. They also used an HTTP action to fetch external data.
- You created an Omniscript to update order object data with new information. The Omniscript uses an Integration Procedure with Data Mapper Load to update the order data. It also uses an Integration Procedure to get the new country details.
- You created Flexcards to show order and country information in the customer service rep dashboard. Those Flexcards get data from your Integration Procedures, and launch your Omniscript.
Now you have a complete picture of how all of the Omnistudio components work together to create an end-to-end digital experience. You explored how Omnistudio can fetch data from within Salesforce and external sources, then put it to work in guided processes, and designed UI elements.
There are many ways you can build unique digital apps and processes for your business with Omnistudio. What will you build first?