Build a Segment and Report
Learning Objectives
In this step, you’ll:
- Create a segment.
- Create an activation target.
- Create an activation.
- Publish a segment to a DMO.
- Build a report.
About Segmentation
When you're surrounded by a wealth of data, sometimes you want to narrow your focus to a specific group. You do this by creating a segment filter within Data 360, enabling you to comprehend, target, and engage your customer base with precision. To learn more about segmentation before you start, check out Segmentation in Data 360.
Create a Segment
Segments can be used for multiple purposes. In this step, you create a segment based on the formula field and the calculated insights created previously. You segment based on if a unified profile has a support case or if they are US–based.
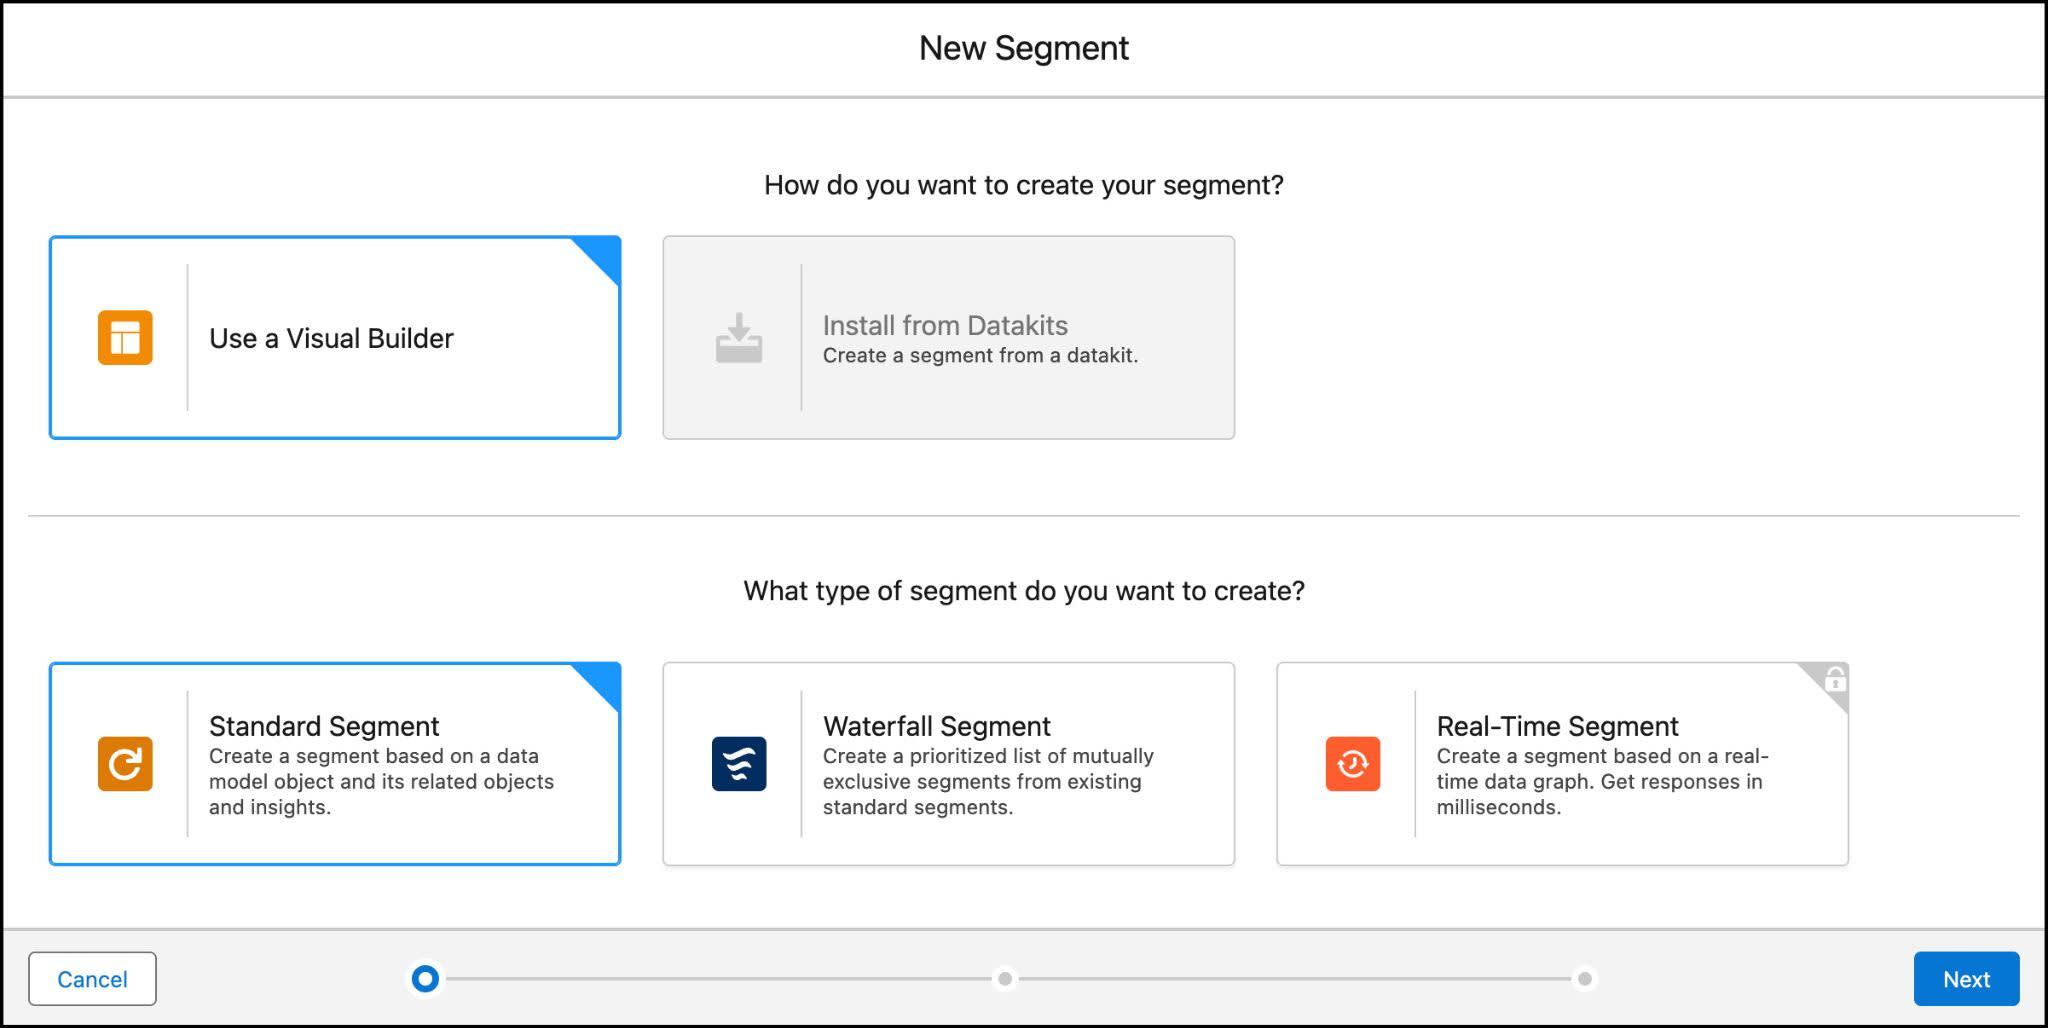
- From Data Cloud, go to the Segments tab under the More menu and click New.
- Leave Use a Visual Builder and Standard Segment selected and click Next.
- The default Data Space should be auto-selected. From the Segment On dropdown, select Unified Individual.
- Next, name your segment,
Lead Info. Add an optional description to describe your segment.
- Click Next.

- Leave Standard Publish selected.
- Leave Do Not Schedule selected from the Publish Schedule.
- Click Save.
Now you’re ready to select attributes and define a filter for your new segment.

Add Filters
The goal of this segment is to narrow down the list of US–based leads or leads that have at least one case. Follow these steps to add filters to obtain this result.
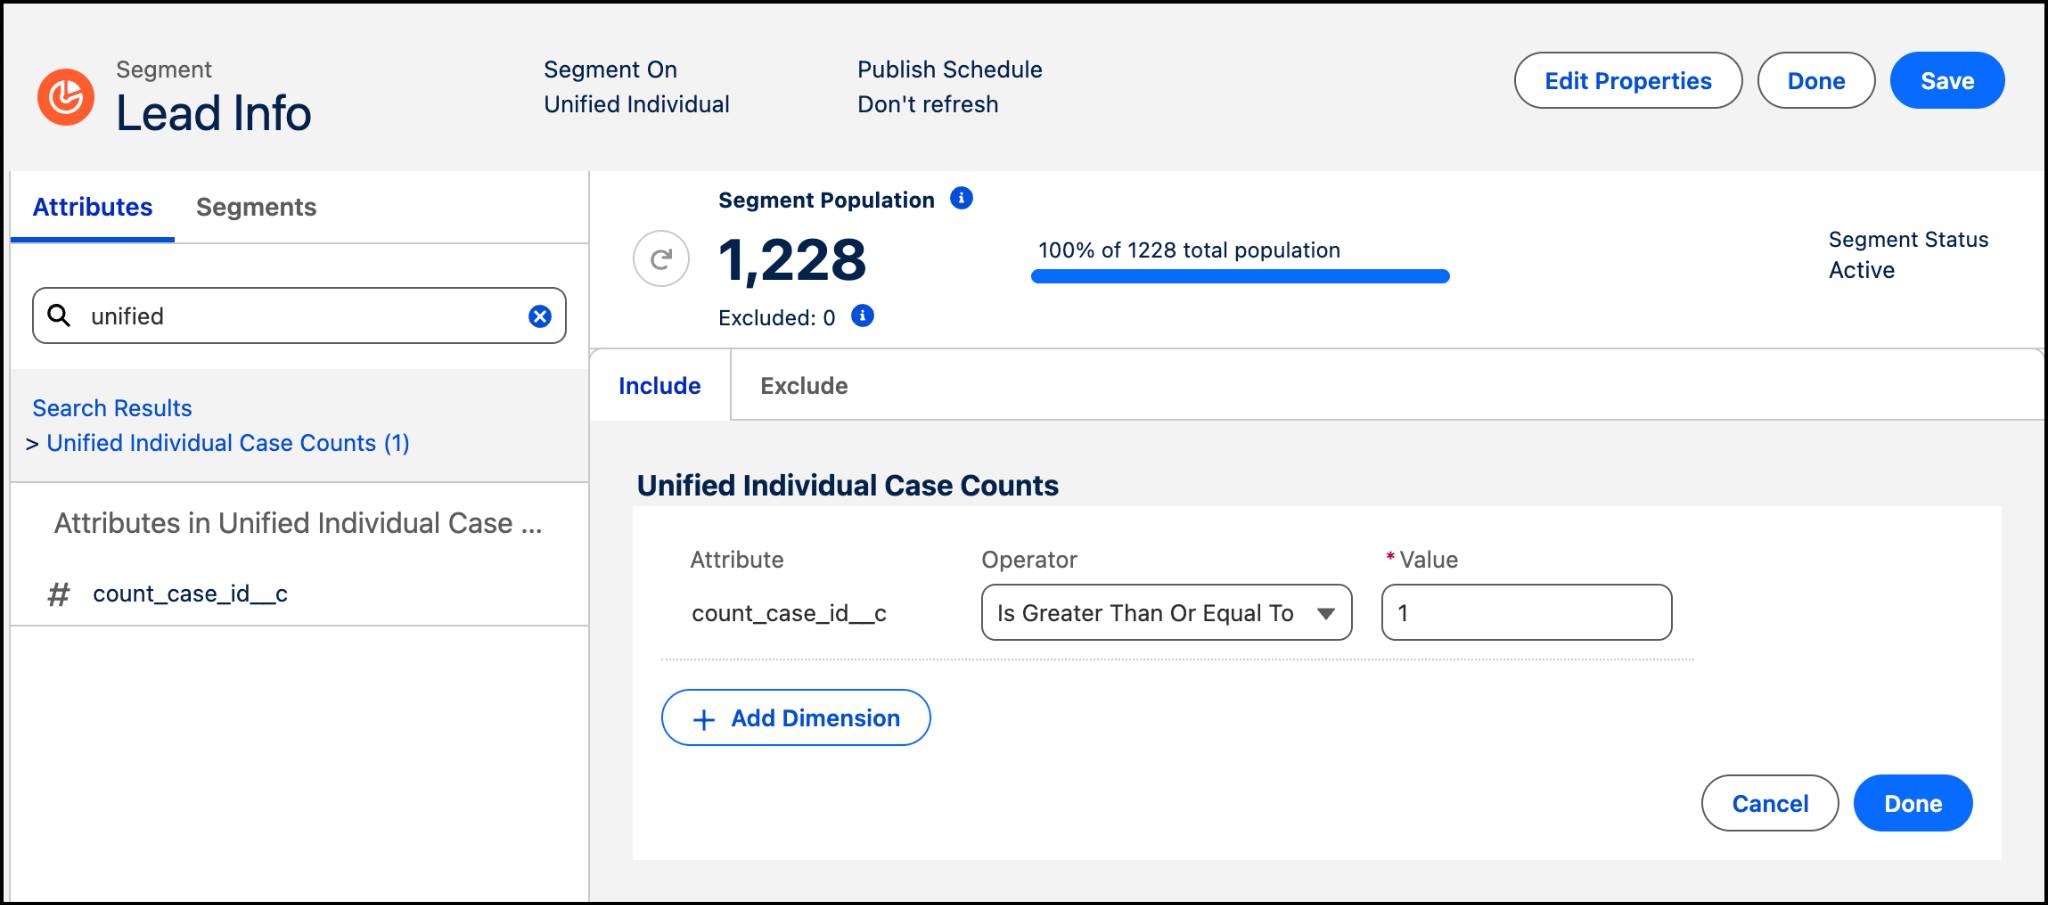
- With the Attributes pane selected, expand Related Attributes.
- Search for
Unified Individual Case Counts, under the Calculated Insights category.
- Drag the # count_case_id_c to the canvas.
- From the Operator dropdown, select Is Greater Than Or Equal To.
- For the Value, type
1.
- Click Done.
- Next, search for
Is US Basedunder the Lead category.
- Select and then drag the Is US Based attribute to the canvas.
- Within the Lead container:
- Under Container Path select Lead.Party > Party.Individual > Unified Individual.Unified Individual Id.
- For Measurement, select Count.
- For the Operator, select At Least.
- For Value, enter
1.
- From the next Operator dropdown, select Is Equal To.
- For the Value, type
TRUEand select True.
- Click Done.
- Change the operator to the right of your selections in the canvas to Or and click Save.
- Once the number has updated, click Done.
Great! You’ve created a filtered segment for a group of unified profile leads who have a case or are US–based.
Activate a Segment
After you create a segment in Data 360, you publish a segment to an activation associated with an activation target. An activation target is used to store authentication and authorization information for a given activation platform. Targets include Marketing Cloud, Data 360, B2C Commerce, Amazon Ads, and Google Audience Insights to name a few.
Create a New Activation Target
First you need to create an activation target to store that data back in Data 360. This is useful if you don’t have a target system with which to activate Data 360 segments, but you still want to use the activated data.
- Go to the Activation Targets tab under the More menu option.
- Click New.
- Select Data Cloud, not Data Cloud (Loyalty), and click Next.

- Name your Activation Target
Data Cloud Segments. Add an optional description.
- Select default for your Data Space.
- Click Save.
Activate Your Segment
Now that you have a target established (the where), you can activate your segment (the what). In this case, you want to save the data from your segment into a Data 360 object. To see the content of your segment in Data 360, you need to activate it to the target selected. You can do this from the segment page or in the Activations tab.
- Go to the Activations tab under the More menu option.
- Click New.
- Select Segment and click Continue.
- Keep the default data space, select the newly created Lead Info segment.
- Select Data Cloud Segments as your Activation Target.
- For Activation Membership, select Unified Individual.
- Click Continue.
- Next to Email, click + Select and then Next.

- Click Add Attributes.
- Under Direct Attributes, expand Unified Individual.
- Drag First Name and Last Name next to the existing Unified Individual Id on the canvas.
- From Related Attributes, expand Case and drag Case Status to the canvas below the Unified Individual section.
- Click Save.
- Under Case, select Case Status from the Sort By dropdown and Descending.
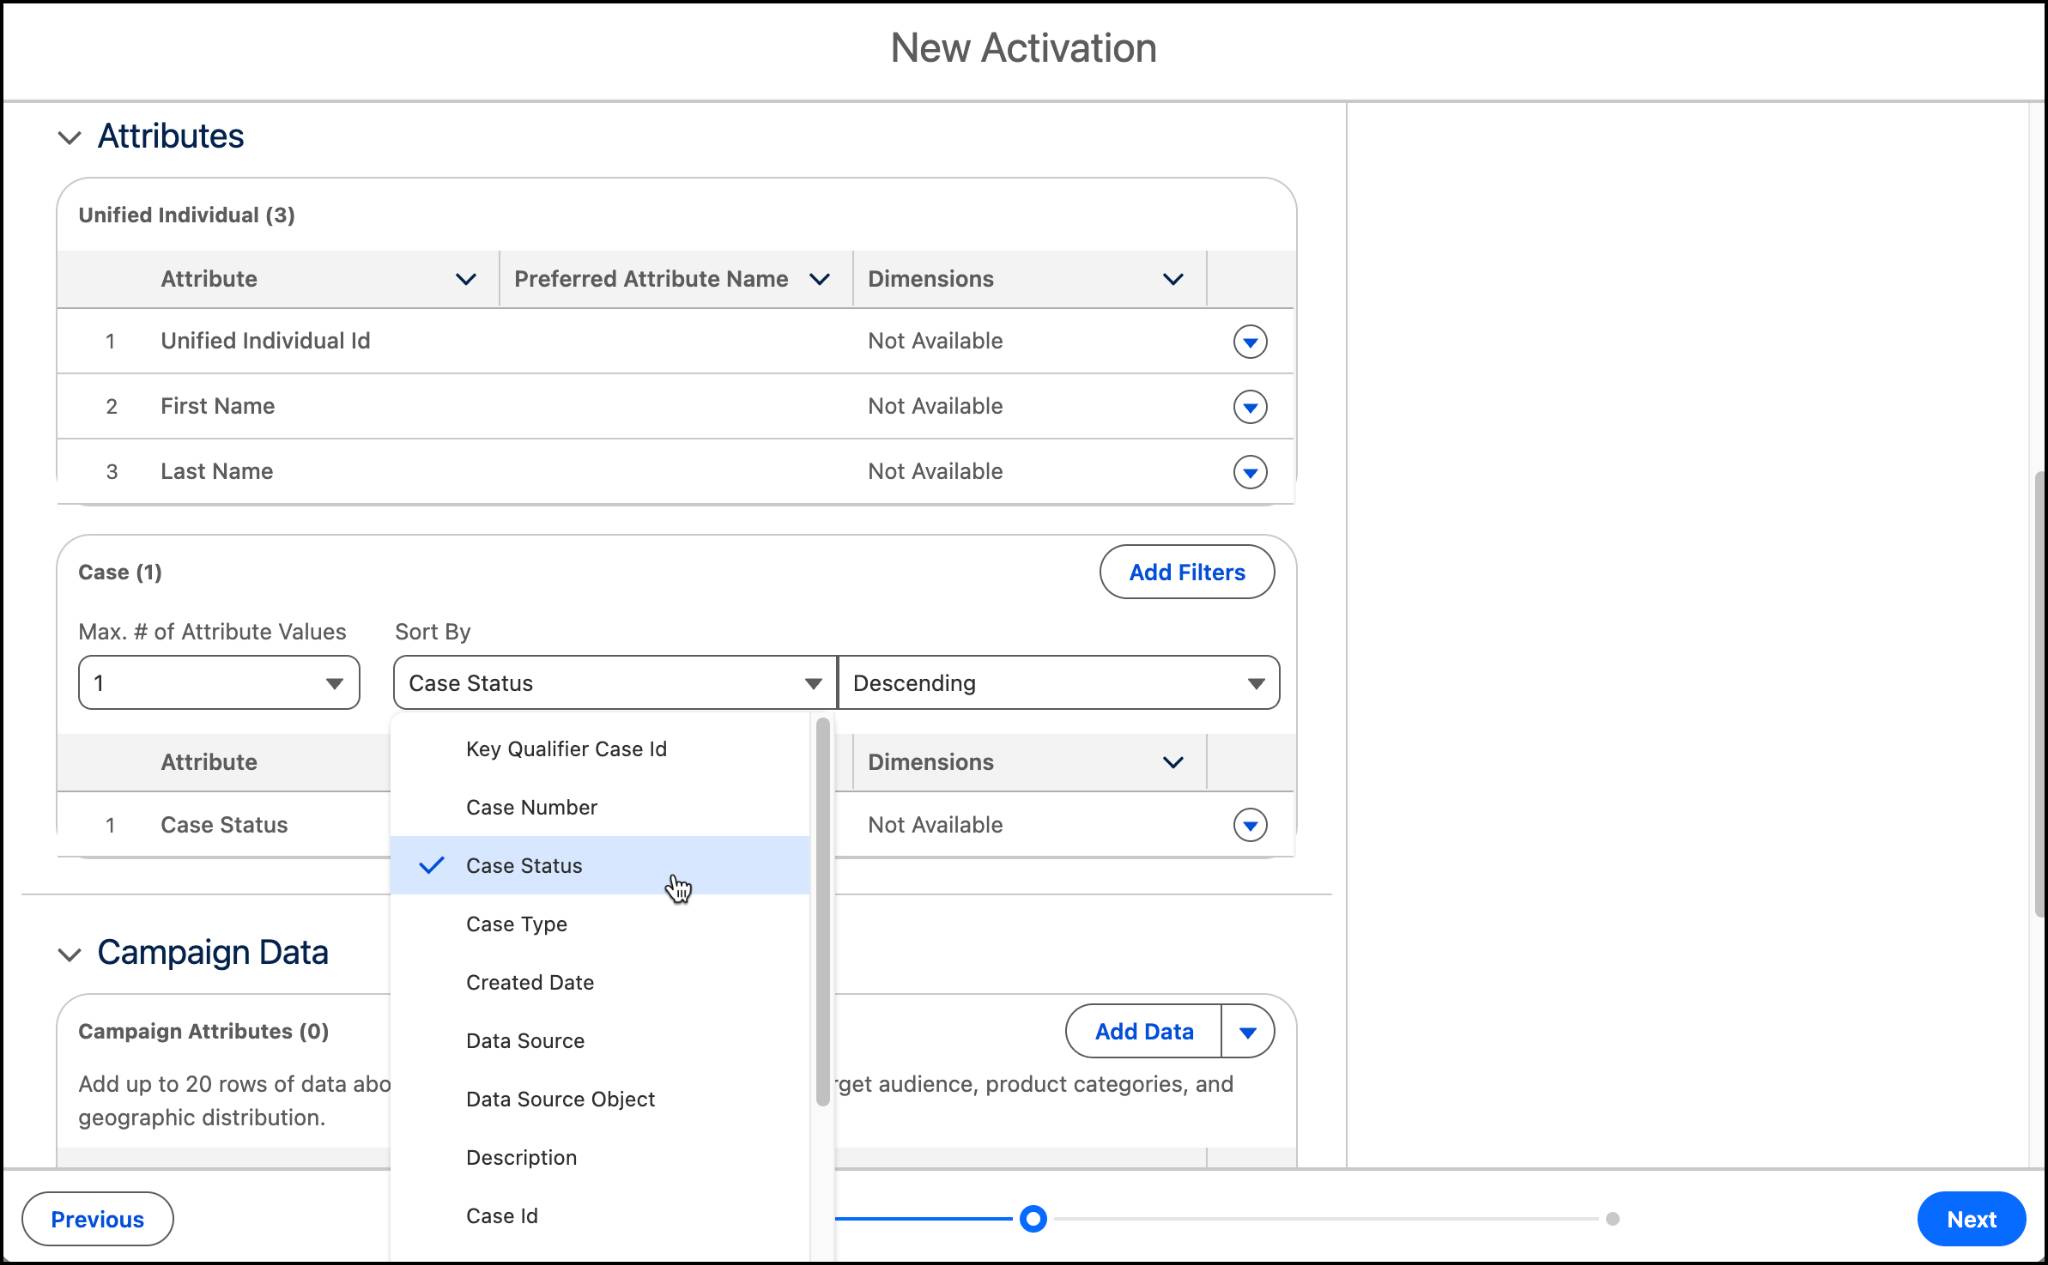
- Click Next.
- Name the activation
Cases.
- Confirm the Incremental Refresh is selected and then click Save.
Publish Your Segment
Now that you have your segment, activation target, and activation, you need to publish your Segment.
- Navigate back to Segments.
- Select your Lead Info segment.
- From the segment page, from the dropdown click Publish Now.

Once the segment is published to the activation target, an Audience DMO is created with the activated records. While it can take some time to process, to view these records, go to the Data Explorer tab and select the corresponding Audience DMO. It’s also good to know that segments activated to Data 360 can be retrieved using Query API.
Create a Report
You can create reports based on insights and other objects. You can do this from the Reports tab and from the list view in Calculated Insights.
- Navigate to Calculated Insights.
- From the list view, find the dropdown at the end of the row for the Unified Individual Case Counts insight.
- Select Create Report.
- View the Groups and Columns and adjust the order, if desired.
- Click Save & Run.
- Name your report,
Lead Cases.
- Click Select Folder, select Public Reports and then click Select Folder again.
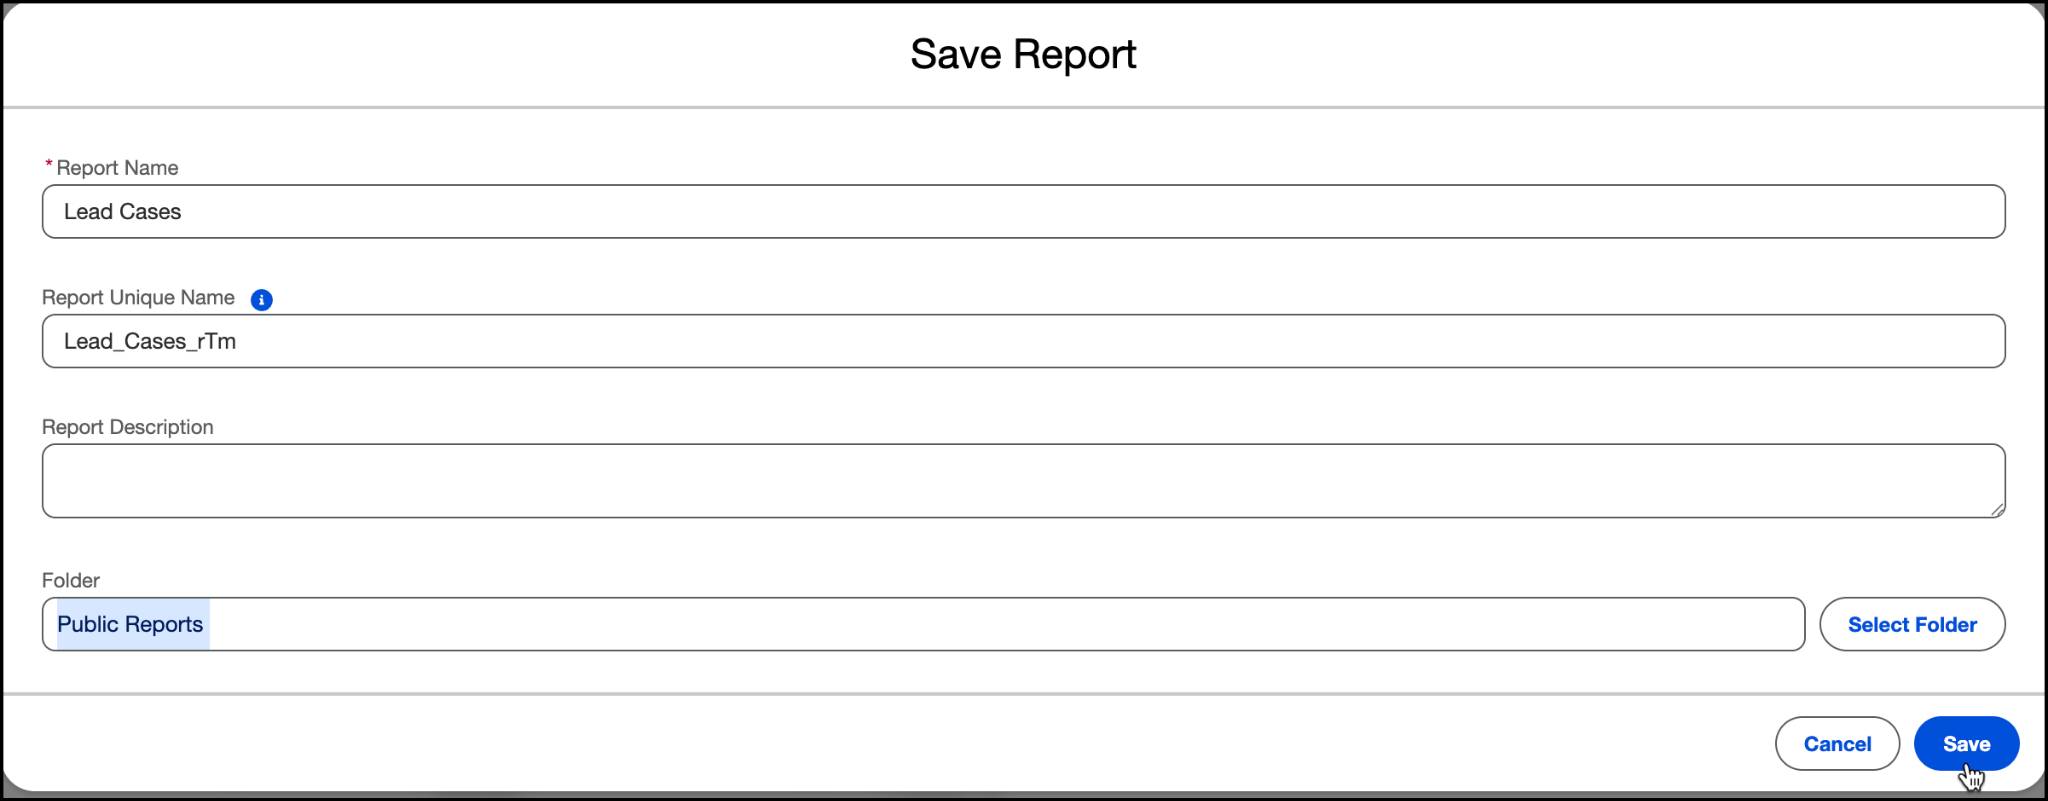
- Click Save.
Verify Your Work
Now that you have your segment created, check your work and click Verify Step. For this exercise, we’re just checking that the segment and activation were set up correctly–you don’t have to wait for the activation to verify your work.
Hands-on Journey
Congrats on finishing this hands-on journey about Data 360! In this project, you learned how to create data streams and formula fields, and how to map data to Data 360. You also learned how to query using insight builder, how to segment, create activation targets, and activate and publish your segment. And, you explored how to create a report from your calculated insight.
These skills enable you to get started using and connecting your data to Data 360. Once you have data in Data 360, you can effectively manage and use your unified data to achieve a deeper understanding of your customers and make more impactful business decisions.
Resources
- Trailhead: Segmentation in Data 360
- Salesforce Help: Create a Standard Segment in Data 360
- Salesforce Help: Segment On
- Salesforce Help: Segmentation Operators in Data 360
- Salesforce Help: Segment Types and Statuses
- Salesforce Help: Create a Data 360 Activation Target
- Salesforce Help: Create an Activation for a Data 360 Target