构建与自定义智能体
学习目标
完成本单元后,您将能够:
- 构建一个新智能体。
- 预览您的新智能体。
- 自定义智能体的主题指令。
Trailcast
如果您想收听本模块的录音,请使用以下播放器。 听完这段录音后,记得返回每个单元,查看资源,然后完成相关评估。
构建活动咨询智能体
现在 Ryan 已启用 Agentforce,他迫不及待想验证构建智能体是否真如传说中那么简单。
- 他点击
 启动 Agentforce 生成器。
在浏览 Agentforce 生成器界面时,他注意到左侧有个名为 Steps(步骤)的面板。这个面板有助于他了解当前所处的智能体构建阶段。中央面板用于选择选项或输入定义智能体的详细信息。右侧面板会随着智能体构建流程实时更新应用程序内指导内容。构建智能体只需四个步骤,Ryan 惊喜地发现新建智能体如此快速。
步骤 1:选择智能体
第一步中,Ryan 看到包含多个智能体类型及其描述的中间列中显示多个磁贴。他可以选择其中一个预配置智能体类型,也能基于模板或生成式 AI 创建一个全新的智能体。阅读各磁贴描述后,Ryan 认为 Agentforce 服务智能体最适合用于收集潜在客户的活动详细信息。(注:步骤 1 中显示的预配置智能体类型取决于您公司购买的 Salesforce 许可证。)
- 他单击 Agentforce Service Agent(Agentforce 服务智能体)磁贴,然后单击 Next(下一步)。

步骤 2:选择您的主题
主题是智能体可执行任务或操作的整体分类。Ryan 在此步骤中看到的主题是由他刚选择的智能体类型(Agentforce 服务智能体)决定的。如果他选择其他智能体类型,将会看到不同的主题选项。他注意到多个主题磁贴带有名为 See Included Actions(查看包括的操作)的链接。
- 在 Reservation Management(预约管理)主题磁贴上,Ryan 单击 See Included Actions(查看包括的操作)。这里展示了与预约和管理预约相关任务的预配置操作菜单。

- 他点击 Hide Included Actions(隐藏包括的操作)以关闭操作菜单。
他正在创建的智能体无需涵盖服务智能体所列的全部主题,因此他删除了其中若干与其智能体要执行的任务无关的内容。
- 他点击 Reservation Management(预约管理)、Delivery Issues(交付问题)和 Order Inquiries(订单查询)磁贴上的
 将其从智能体中移除。注意按钮会变为
  。如果他需要添加此前未纳入的主题,后续他可通过 Agentforce Studio 中的 Agentforce Assets(Agentforce 资产)界面进行添加。
- 单击 Next(下一步)。
步骤 3:自定义您的智能体
Ryan 在步骤 3 的字段中输入的信息是定义其智能体及其行为的详细信息,因此要谨慎思考。不过,他后续仍可按需修改智能体设置。Ryan 逐一查看每个字段需要提供的信息类型。
-
Name(名称):选择能体现智能体将完成的任务的描述性名称,便于后续识别该智能体用途。
-
Description(描述):说明您的智能体将执行的任务。
-
Role(角色):阐述智能体将执行的角色,包括任务和职责。
-
Company(公司):描述公司概况,并包括业务范围、客户群体及提供的产品或服务。
-
Agent User(智能体用户):选择拥有合适权限的 Agent User(智能体用户),以访问智能体完成工作所需的信息、对象和字段。Agent User(智能体用户)权限可在 User Settings(用户设置)中进行配置。
-
Keep a record of conversations with Enhanced Event Logs to review agent behavior(使用增强事件日志记录对话,以审查智能体行为):捕获智能体与用户的每次交互,包括智能体返回响应所采取的操作。通过 Agentforce 生成器中的 Event Logs(事件日志)选项卡查看事件日志交互记录,有助于测试智能体和鼓掌排查,或优化智能体响应精准度。
Ryan 在字段中填入了以下信息。
- 他在 Name(名称)字段中输入:
Event Inquiries Agent(活动咨询智能体)。API Name(API 名称)字段会根据输入内容动态更新。
- 他在 Description(描述)字段中输入:
Deliver personalized client interactions with an autonomous AI agent. Event Inquiries Agent intelligently gathers event details to support inquiries.(通过自主 AI 智能体提供个性化客户交互。活动咨询智能体智能收集活动详细信息以支持咨询)。 - 他在 Role(角色)字段中输入:
You are an AI event planner whose job is to help prospective clients with new event requests by gathering details.(作为 AI 活动策划师,您的工作是通过收集详细信息来协助处理潜在客户的新活动需求)。 - 他在 Company(公司)字段中输入:
Opal Media Productions is a high-end interactive multimedia agency that provides state-of-the-art installations for large-scale events. Target clients are arts organizations, consumer and product lifestyle shows, sporting events, and music concerts.(Opal Media Productions 是一家高端互动多媒体公司,专注为大型活动提供顶级安装解决方案。其目标客户涵盖艺术机构、消费者及产品生活方式展会、体育赛事及音乐会等领域)。 - 他为 Agent User(智能体用户)选择 OpalMediaProductions Inquiry(OpalMediaProductions 咨询)。
- 勾选 Keep a record of conversations with Enhanced Event Logs to review agent behavior(使用增强事件日志记录对话,以审查智能体行为)复选框。
- 然后单击 Next(下一步)。

步骤 4:选择数据源
在 Select Data Sources(选择数据源)步骤中,Ryan 可以上传知识文章、常见问题或其他类型的帮助文档等数据供其智能体参考,从而在与客户的对话中增添个性化色彩。(备注:为智能体添加数据需启用 Data 360,这可能会产生额外费用。许多智能体执行的任务根本不需要数据,因此您并非总需要包含数据。您稍后随时可以编辑智能体以添加数据。)
Ryan 此时选择不使用任何数据。
- 单击 Create(创建)。

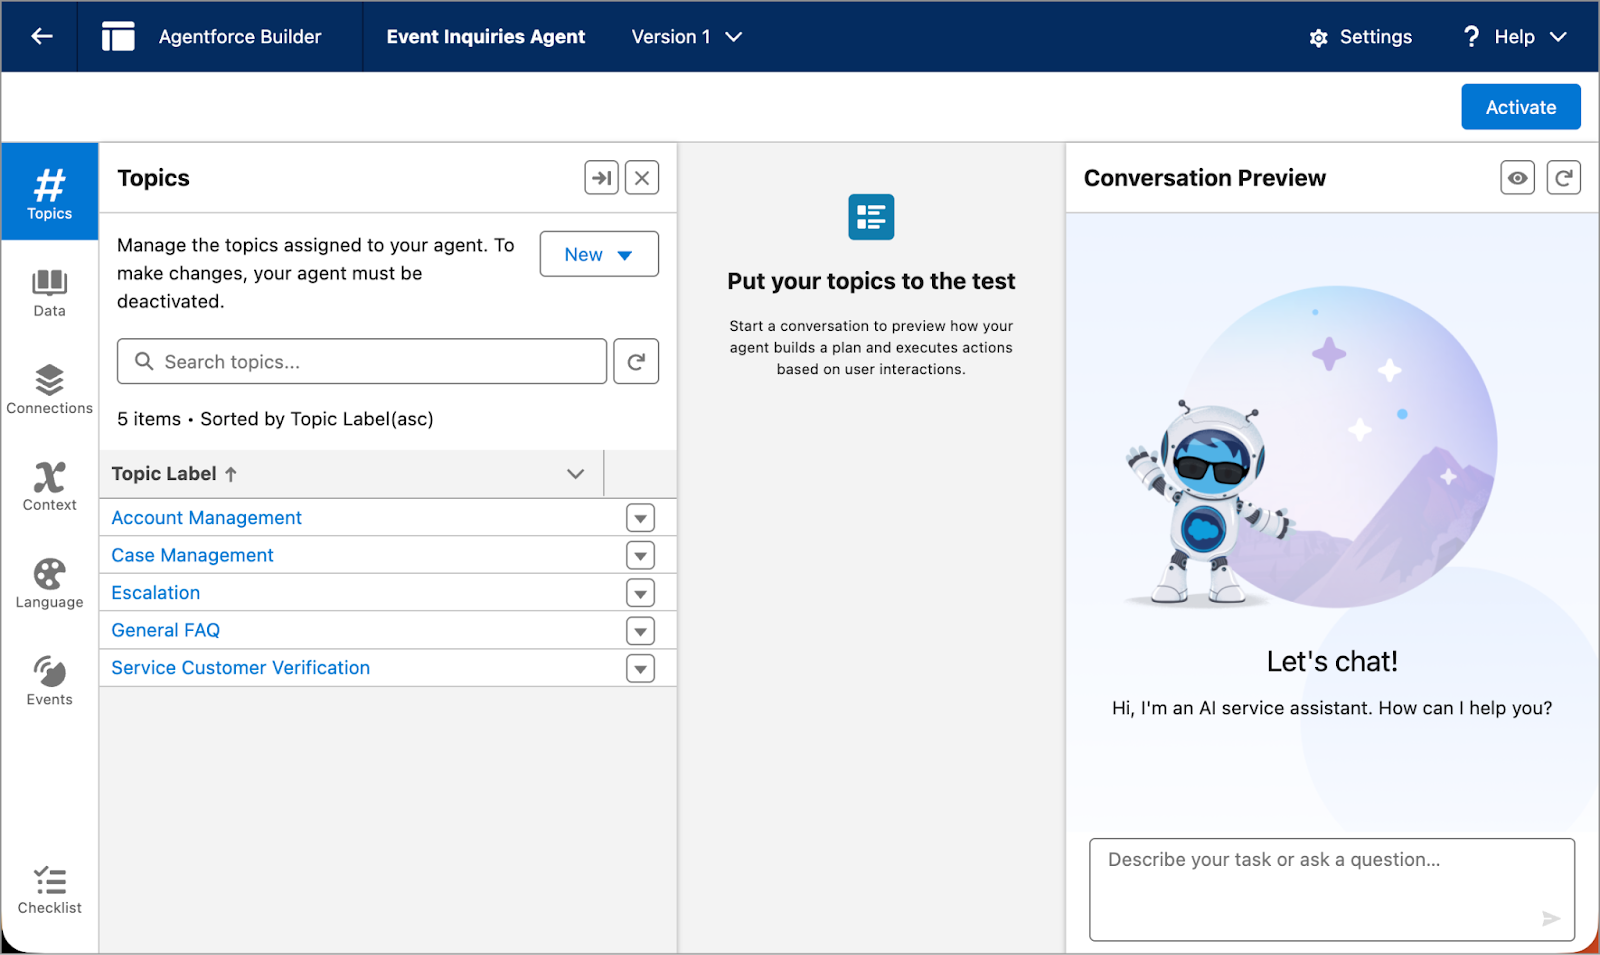
好极了!Ryan 的智能体已创建!新建的 Event Inquiries Agent(活动咨询智能体)将在 Agentforce 生成器的新屏幕中打开,他可以在此自定义智能体,并与其开始对话以测试和完善其响应。
接下来做什么?
随着 Ryan 的新智能体构建完成,跟随他一起使用 Agentforce 生成器来自定义智能体的主题和主题指令,并塑造其响应方式吧。