Preview, Test, and Send Your Email
Learning Objectives
After completing this unit, you’ll be able to:
- Preview an email.
- Send a test email.
- Send an email.
Preview and Test the Welcome Email
Now that you’ve built out the Welcome email, it is time to test it and send it off.
- Launch the Trailhead Simulator.
- Click Begin.
- Click Next.
- In the Subscriber Preview and Attributes section, click
 .
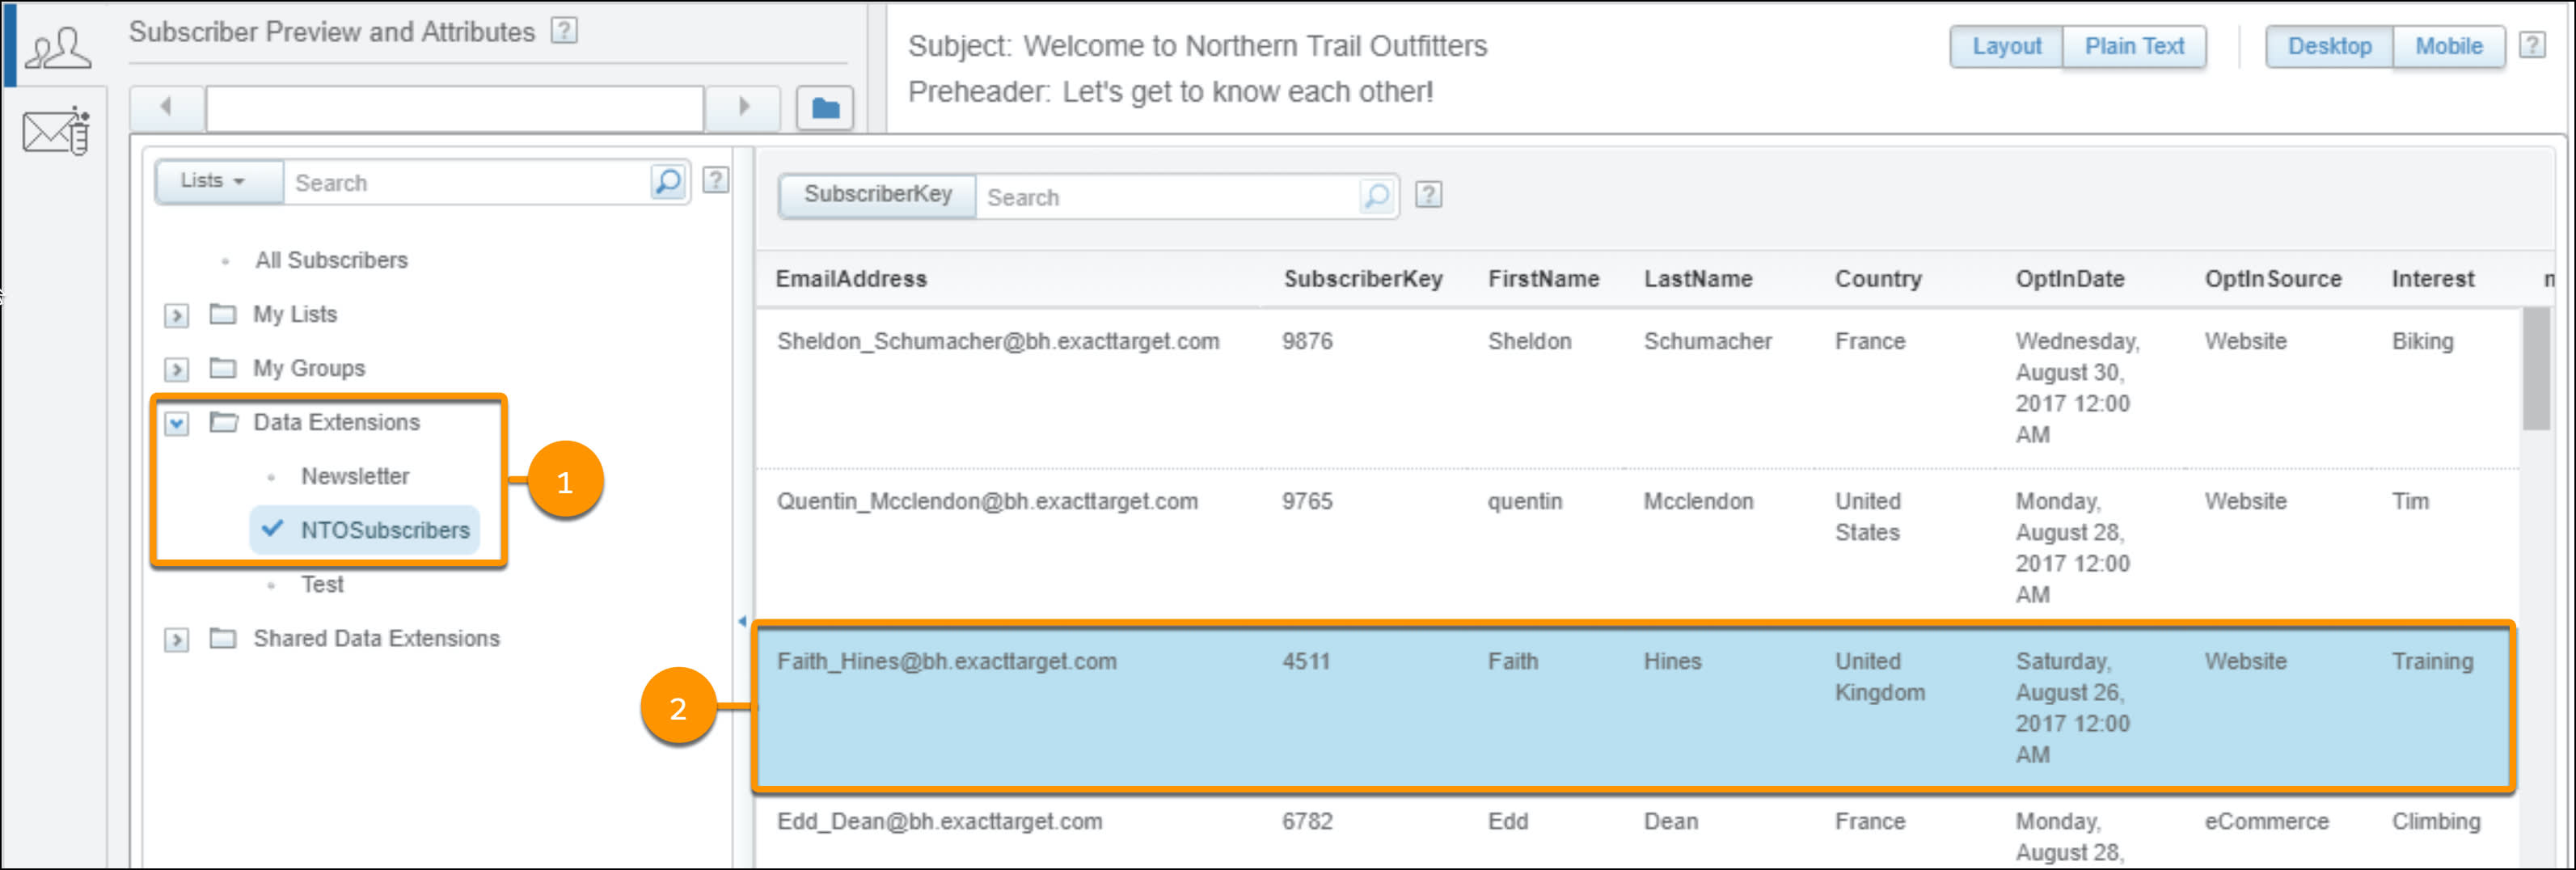
. - Click Data Extensions and then click NTOSubscribers (1), select Faith Hines (2), and click Select.

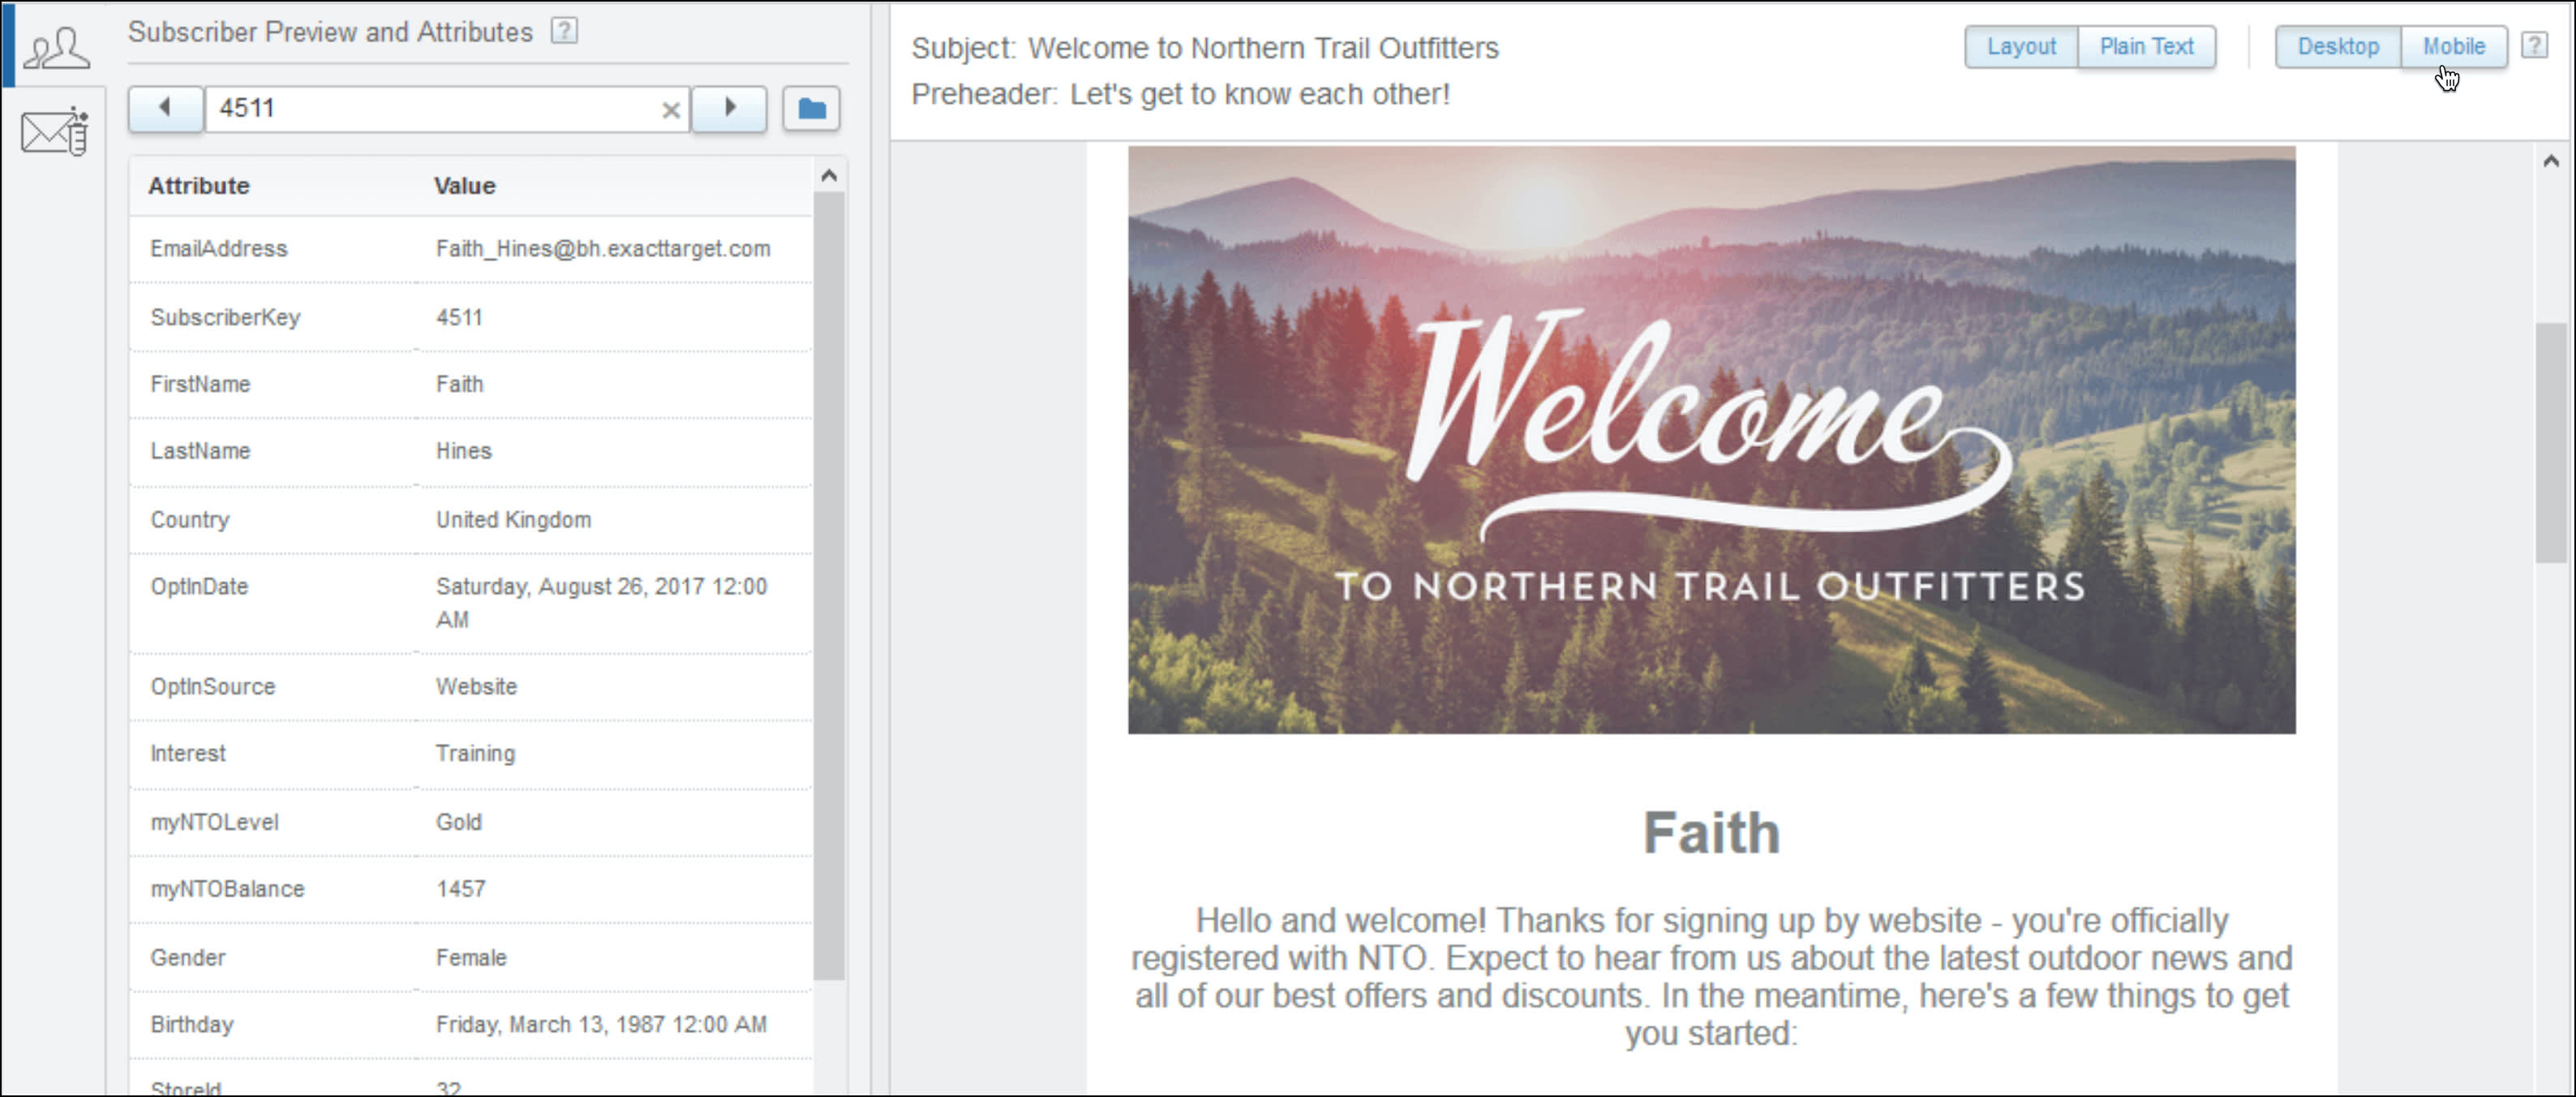
- The Subscriber Preview and Attributes panel shows Faith’s information, and the email panel shows a preview of her email. Notice that Faith’s first name replaced the variable in the email. Click Mobile. This shrinks the width of the preview window so you can see how the email looks on a mobile device.

- Click
 . In this module, leave everything defaulted. However, when doing this in your Marketing Cloud Engagement instance, add the email addresses that you want to send your test email to.
 - Click Send Test.
- On the Test Send Summary screen, click Confirm and Send.
Notice the success message.
The simulator shows how the test email appears in your email inbox.
| Email Portion | Description |
|---|---|
| (1) Preheader |
You defined the preheader as Let’s get to know each other! in the previous unit. |
| (2) Subject Line Qualifier |
Prior to sending the test email, you can define this value. The default for this value is [Test]:. You can use the subject line qualifier to mark the email as a test. |
| (3) Subject Line |
You defined the subject line as Welcome to Northern Trail Outfitters in the previous unit. |
- Click the Welcome to Northern Trail Outfitters email. A web version of the email you created opens in another window.
- View the web version of the test email to make sure everything looks the way you want. This is a live version, so you can click the links to make sure they work. In the future, if you want to make corrections or changes to your email, you can easily go back and make them, and then send a new test email. In this case, let’s assume everything looks great and you are good to send it out.
- Close the email window and go back to the Trailhead Simulator window.
Send the Email
Now that you’ve previewed the email and sent a test, it’s time to send the welcome email to our NTO subscribers.
- Click Content Builder.
- Click Email Studio and select Email.
- From the recent items list, click Welcome Email.
- Click Send, then click Next.
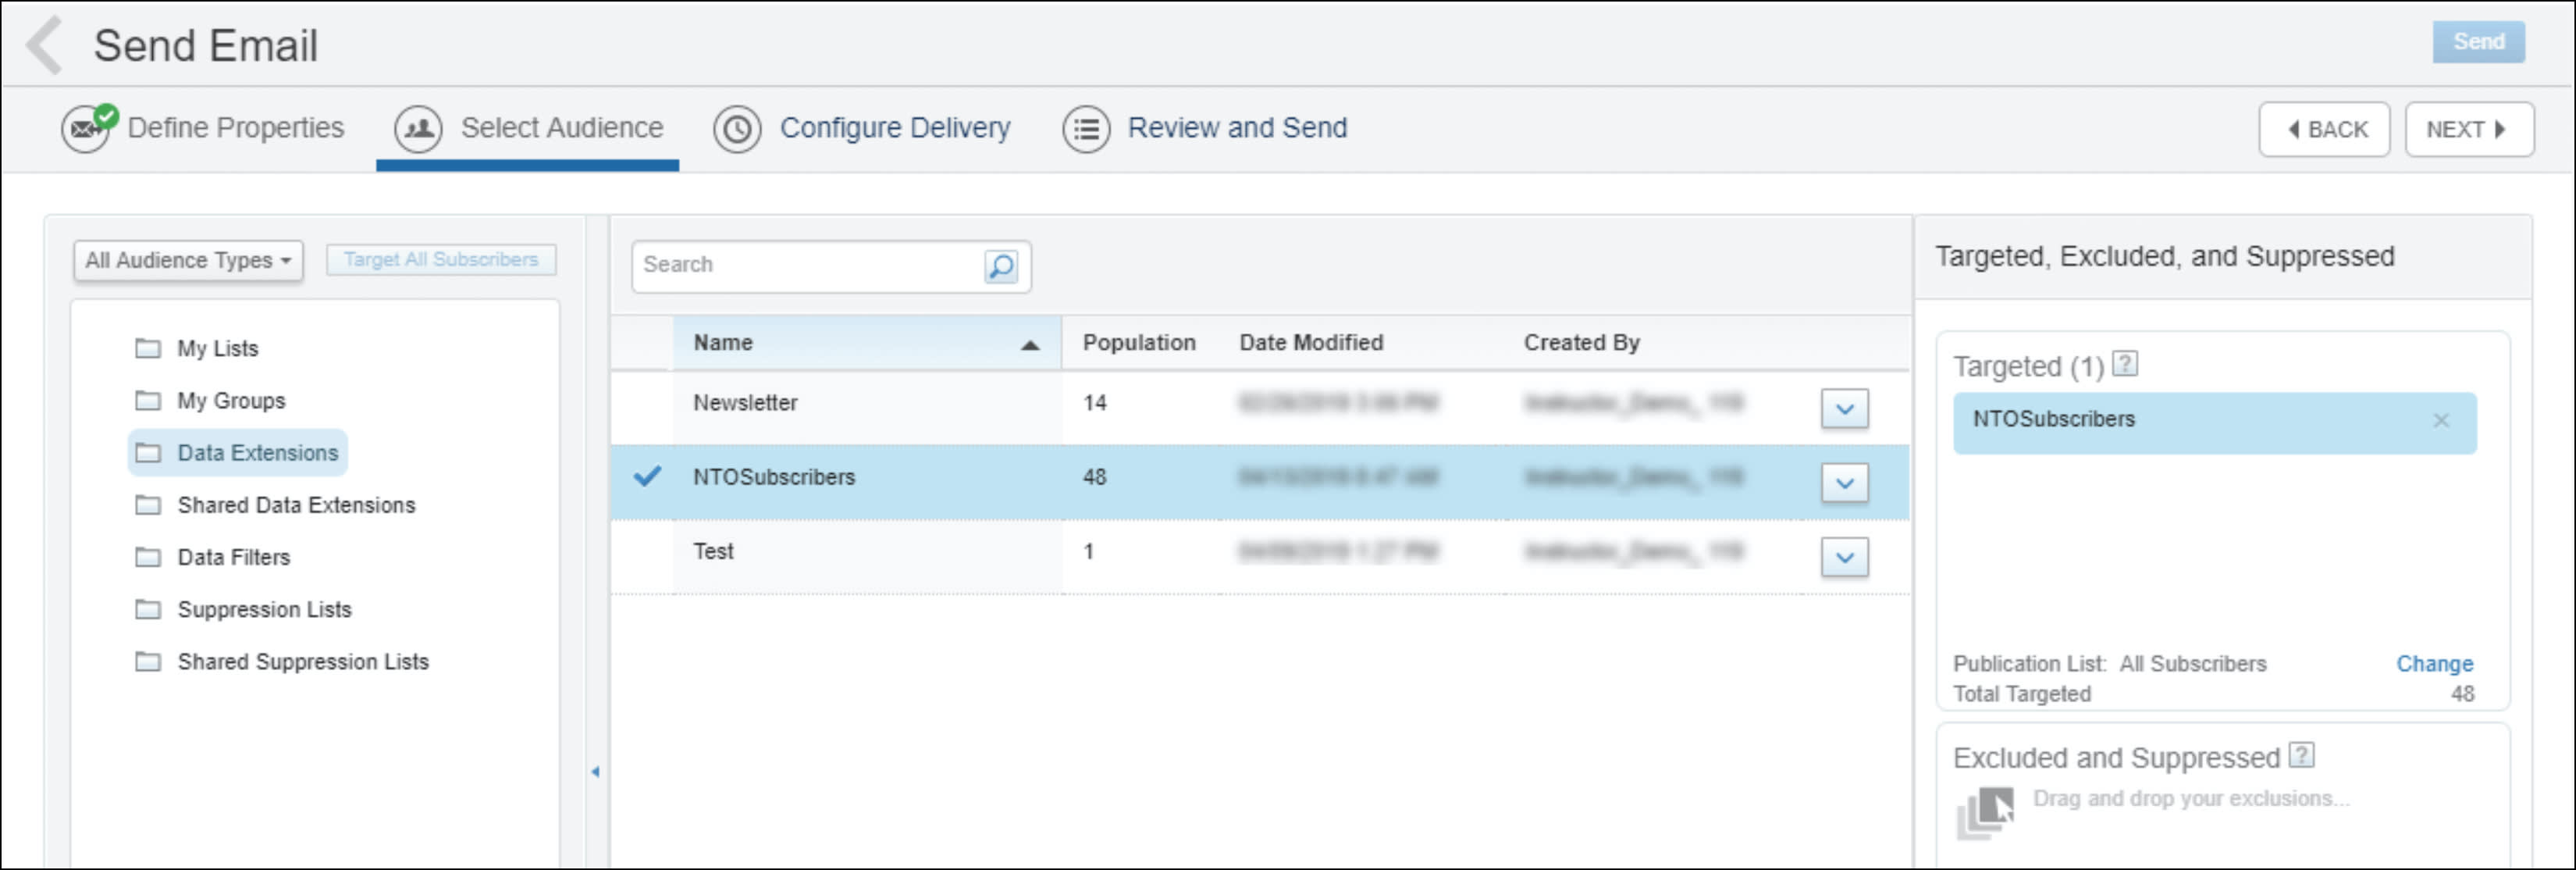
- Click Data Extensions.
- Drag NTOSubscribers to the Targeted box.
This action pulls in the list of subscribers so Marketing Cloud Engagement knows where to send the email. This data extension was predefined for you, but in your live instance, you can create your own data extensions. To learn more about data extensions and how to create them, check out the Resources section.
- In the Select Publication List window, leave All Subscribers selected and click Select.

- Click Next.
- For Send Timing, keep the default of Send Immediately, then click Next.
- Select This information is correct and this email is ready to send.
- Click Send.
- Click Continue and Exit.
Great, you sent the welcome email for Northern Trail Outfitters!
In this module you learned how to create a reusable email template, how to build an email using that template, how to preview and test an email, and how to send it. Remember, you just scratched the surface of what you can do with Marketing Cloud Engagement. Continue your learning journey with some of our recommended Trailhead content in the resources section below.