Build a Customer Lifecycle Map
Learning Objectives
After completing this unit, you’ll be able to:
- Create a customer lifecycle map.
- Add stages for customer acquisition, onboarding, claims management, and policy renewal.

Tough Times at Cumulus Insurance
Cumulus Insurance is a customer-focused insurance company that delivers great experiences and has earned a loyal customer base. Its secret sauce of success is simple: listen to the customer and create real value for them. The leadership team knows that it’s their customers’ approval (or disapproval) of the services that determines the fate of the company. The team’s focus on customer experience has resulted in a positive brand image, a high customer retention rate, and consistent growth.
However, the last quarter saw a significant dip in revenue and below-average customer ratings. Reports show a drop in customer satisfaction for onboarding, claims, and renewals.
Enter Customer Lifecycle Maps
To find out the cause of the downward trend, the leadership team has decided to use Customer Lifecycle Maps to measure CSAT (Customer Satisfaction Score) and NPS (Net Promoter Score) across the different stages of the customer lifecycle. A customer lifecycle map can be configured to automatically send out surveys to customers at each key stage of their journey. Cumulus can then review the feedback to spot existing gaps in customer service and fix them. In this module, we’ll follow along as Cumulus sets up and uses Customer Lifecycle Maps to improve the customer experience.
Matt, the super admin at Cumulus, takes up the task of setting up the feature. You need a Salesforce Feedback Management license and the right permission set to use Customer Lifecycle Maps. Cumulus Insurance already has the license, so Matt creates the permission set and assigns it to himself. To find out how you can do this, see Get Started with Salesforce Feedback Management.
Ready to Get Hands-on with Customer Lifecycle Maps?
Launch your Trailhead Playground now to follow along and try out the steps in this module. To open your Trailhead Playground, scroll down to the hands-on challenge and click Launch. You also use the playground when it's time to complete the hands-on challenges.
Prework
Before setting up a new customer lifecycle map, you must complete the following tasks. Matt has already enabled Surveys and set up permissions for the Salesforce Feedback Management license. Here’s how he enables Customer Lifecycle Maps.
- Click
 and select Setup.
- Enter
Survey Settingsin the Quick Find box, and select Survey Settings.
- Enable Surveys if you haven’t already.
- Enable Customer Lifecycle Maps.
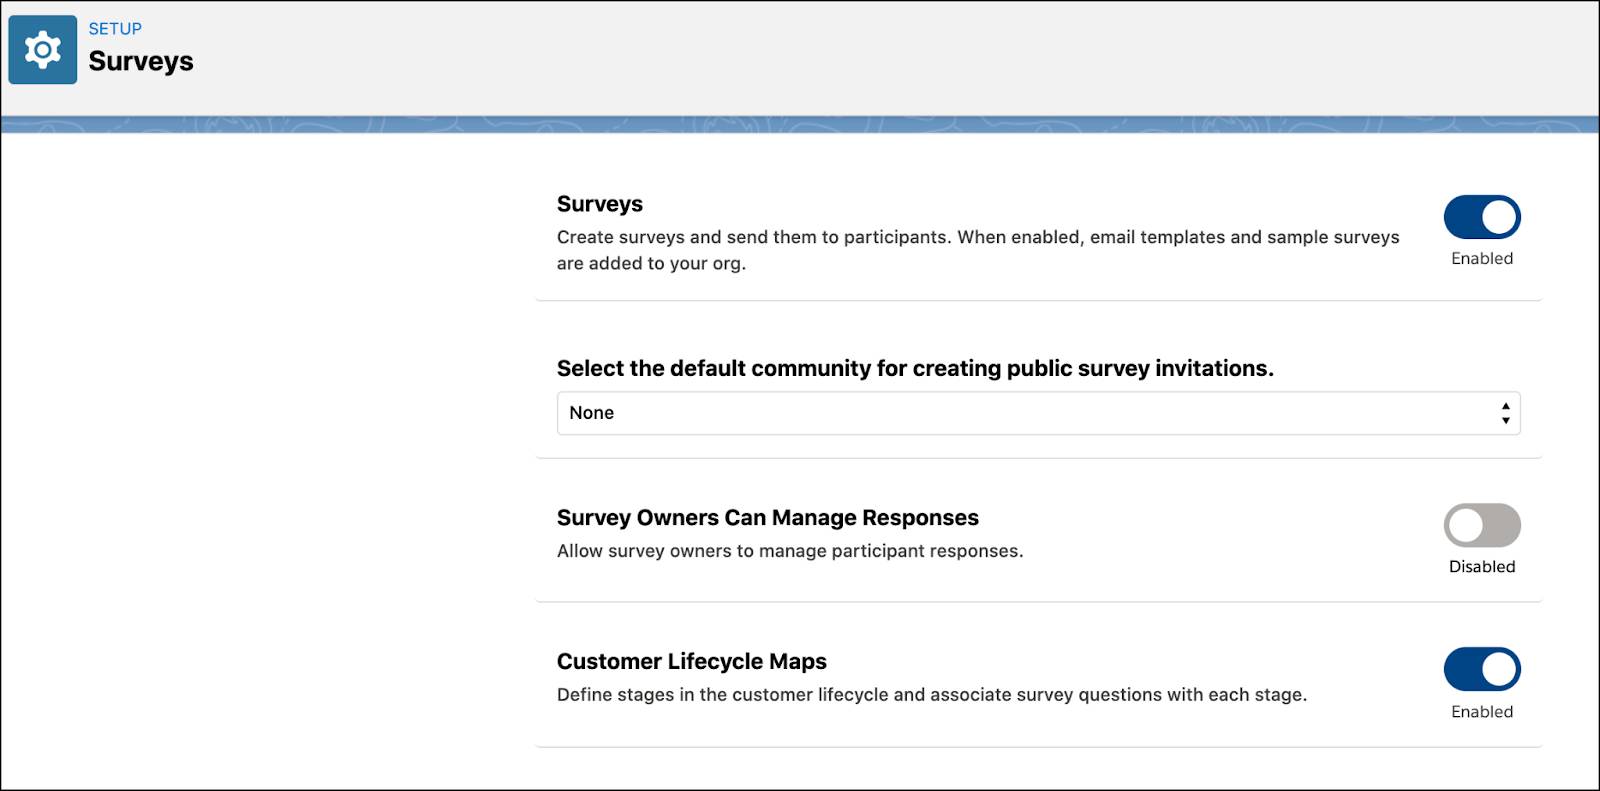
If you don’t see the option to enable Customer Lifecycle Maps, make sure you have enabled Surveys and set up permissions for the Salesforce Feedback Management license.
Next, Matt confirms email template settings.
- From the App Launcher, find and select Email Templates.
- Click the dropdown menu next to Embed_a_Survey_Link and select Edit.
- Click Save.
- Do the same for the email template Embed_a_Survey_Question.
Set Up a New Map
Before creating a map, you must create a survey for each stage of the map, configure its default settings, and activate the survey. Matt has already created NPS surveys for each stage of the customer lifecycle map.
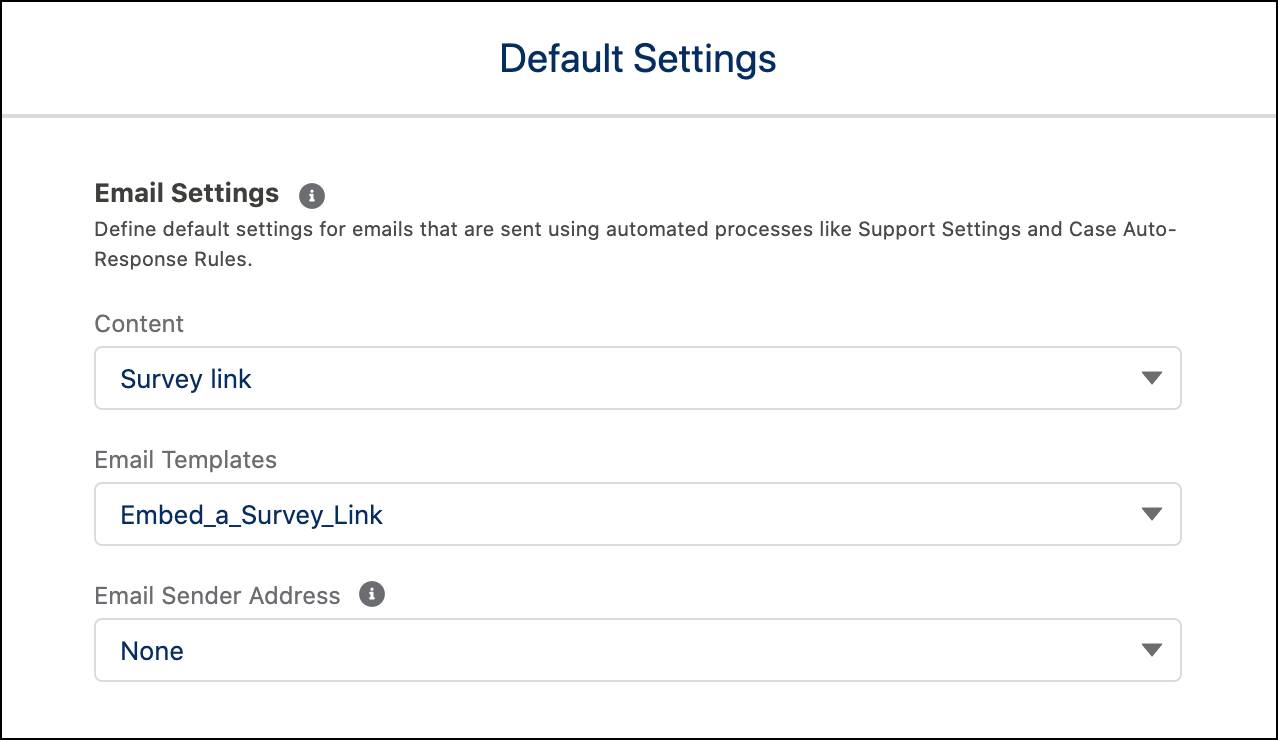
Here’s how he configures the default settings and activates the surveys.
- Click
 to open the App Launcher, enter
 Surveysin the search box, and select Surveys.
- Click the dropdown arrow on the right for the survey you want to configure.
- Select Open Latest Version.
- On the Survey Builder page, click
 and select Default Settings.
- Click Email Templates and select Embed_a_Survey_Link.
- Click Save.
- Click Activate.
- Click Got It to confirm.
By activating the survey, you’re ensuring that questions from the survey get tied to the desired stage of the lifecycle map.
To build a customer lifecycle map, Matt must create a new map and define its various stages: customer acquisition, onboarding, claims management, and policy renewal. Here’s how Matt creates the map and adds the customer acquisition stage.
- Click
 and select Setup.
- In the Quick Find box, enter
Mapsand select Customer Lifecycle Maps under Survey.
- Click New Map.
- Enter
Cumulus Insurance NPSin the Name field. The Developer Name field gets automatically filled in.
- In the description box, enter
Measuring the NPS scores of customers throughout their journey. - For Customer Satisfaction Metric, select NPS.
- Click Save.
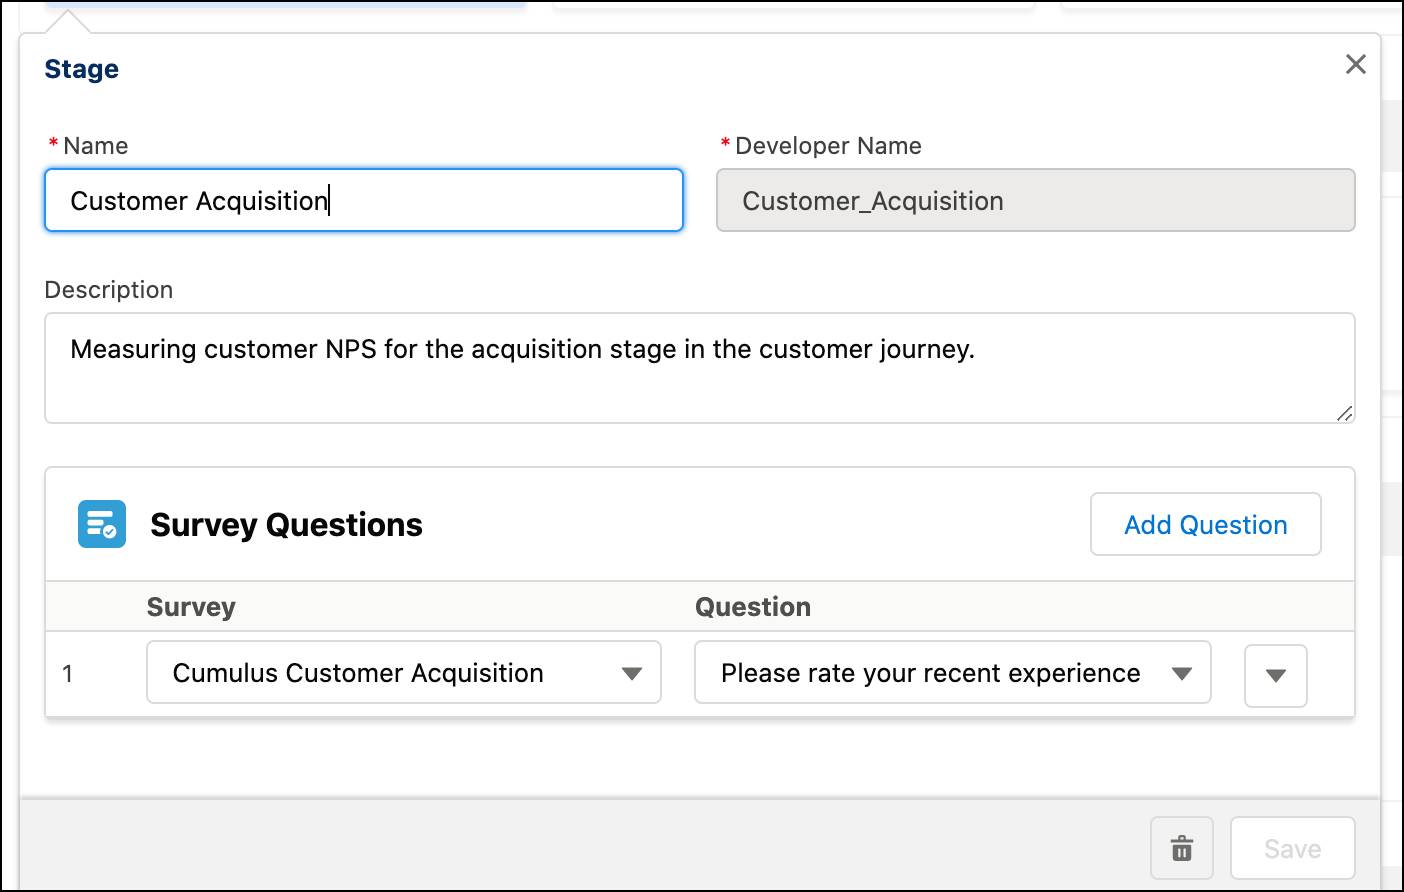
- Locate the map Cumulus Insurance NPS and click +New Stage.
- Enter
Customer Acquisitionas the stage name. The developer name is automatically filled in.
- In the description box, enter
Measuring customer NPS for the acquisition stage in the customer journey.
- In Survey Questions, select the survey Cumulus Customer Acquisition.
- Click the Question dropdown and select the question Please rate your recent experience with us.
- Click Save.
Next, Matt adds the customer onboarding stage.
- Click +New Stage.
- Enter
Customer Onboardingas the stage name. The developer name is automatically filled in.
- In the description box, enter
Measuring customer NPS for the onboarding stage in the customer journey.
- In Survey Questions, select the survey Cumulus Customer Onboarding.
- Click the Question dropdown and select the question Please rate your experience with us.
- Click Save.
Likewise, Matt creates the stages of claims management and policy renewal with the following details.
|
Stage Name
|
Description
|
Survey |
Question
|
|---|---|---|---|
Claims Management |
Measuring customer NPS for the claims stage in the customer journey. |
Cumulus Claims Management |
Please rate your recent experience with us. |
Policy Renewal |
Measuring customer NPS for the policy renewal stage in the customer journey. |
Cumulus Policy Renewal |
Please rate your recent experience with us. |
That’s a Quick First Win
Matt has set up a customer lifecycle map with stages and linked each stage with the right NPS survey. You can add as many stages as you want as long as those correspond with the customer lifecycle that you wish to track. In the next unit, we follow along as Matt sets up survey triggers, which specify the conditions to send survey invitations.
Resources
- Salesforce Help: How Do Customer Lifecycle Maps Work?
- Trailhead: Survey Basics
- Trailhead: Salesforce Surveys for Admins