Build the future with Agentforce at TDX in San Francisco or on Salesforce+ on March 5–6. Register now.

Create Code with Apex

Learning Objectives

After completing this unit, you’ll be able to:

  • Create basic code applications using Apex.

Create a Basic Apex Application

Now that you have the terminology down, let’s develop a simple application using Apex. In this example, you’ll do three things.

  1. Create a conditional statement.
  2. Create a loop.
  3. Construct syntax for a trigger.

There’s a lot more you can do with Apex, but these conditionals, loops, and triggers are the basic building blocks that you’ll use on virtually every project. Once you understand these steps, you can tackle more complex badges like Apex Basics for Admins or Use Apex to Automate Business Processes.

Conditional Statements

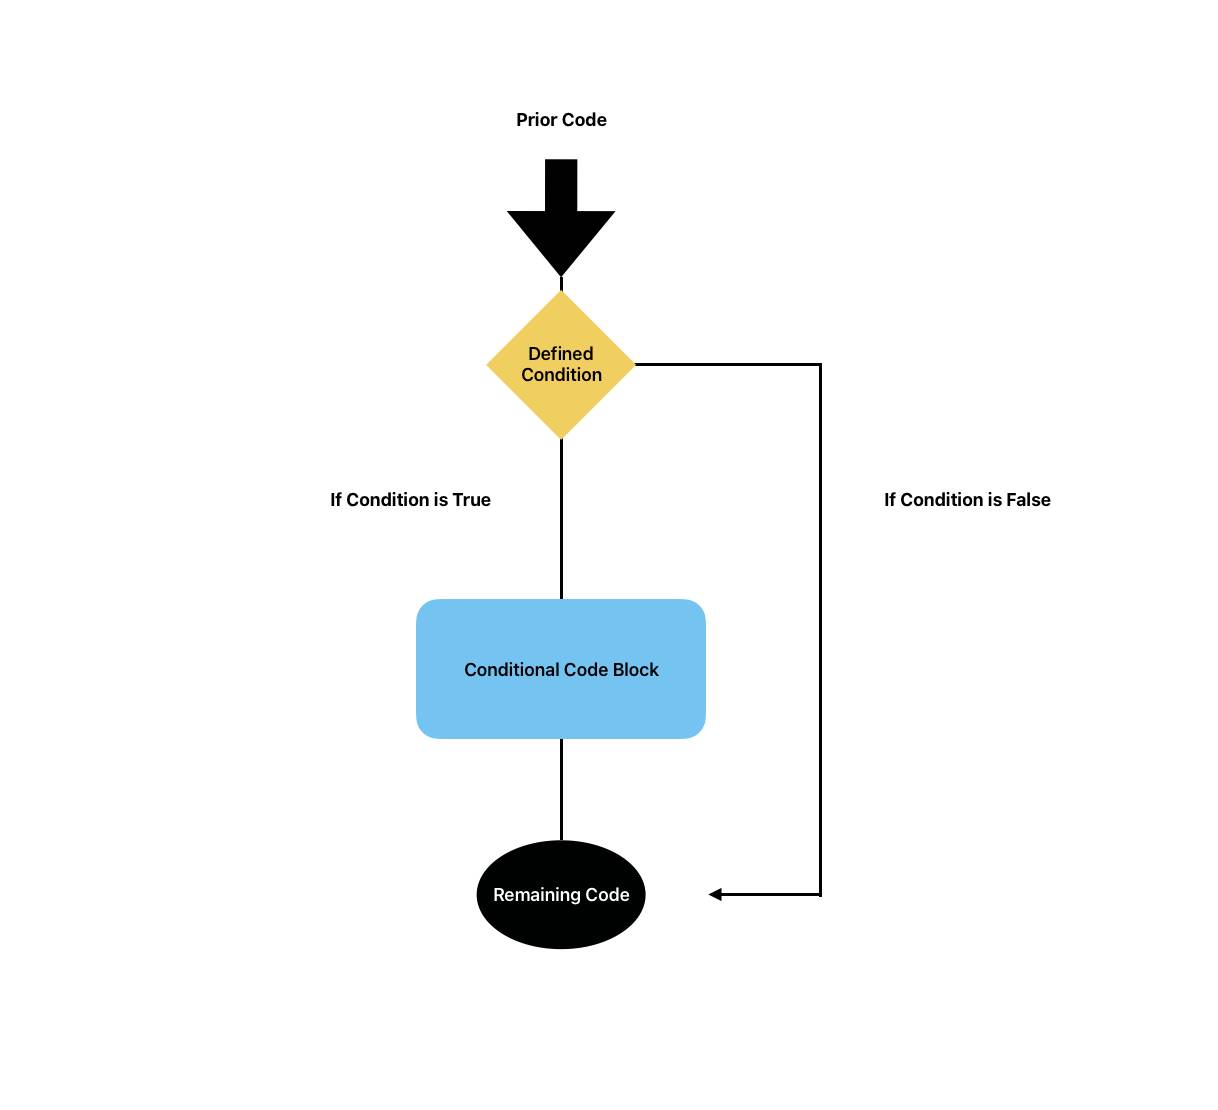
Conditional statements, or conditionals, are just what the name implies: code that establishes particular responses based on whether or not a defined condition is true. You can think of them sort of like a flow chart that tells a program when to run specific code.

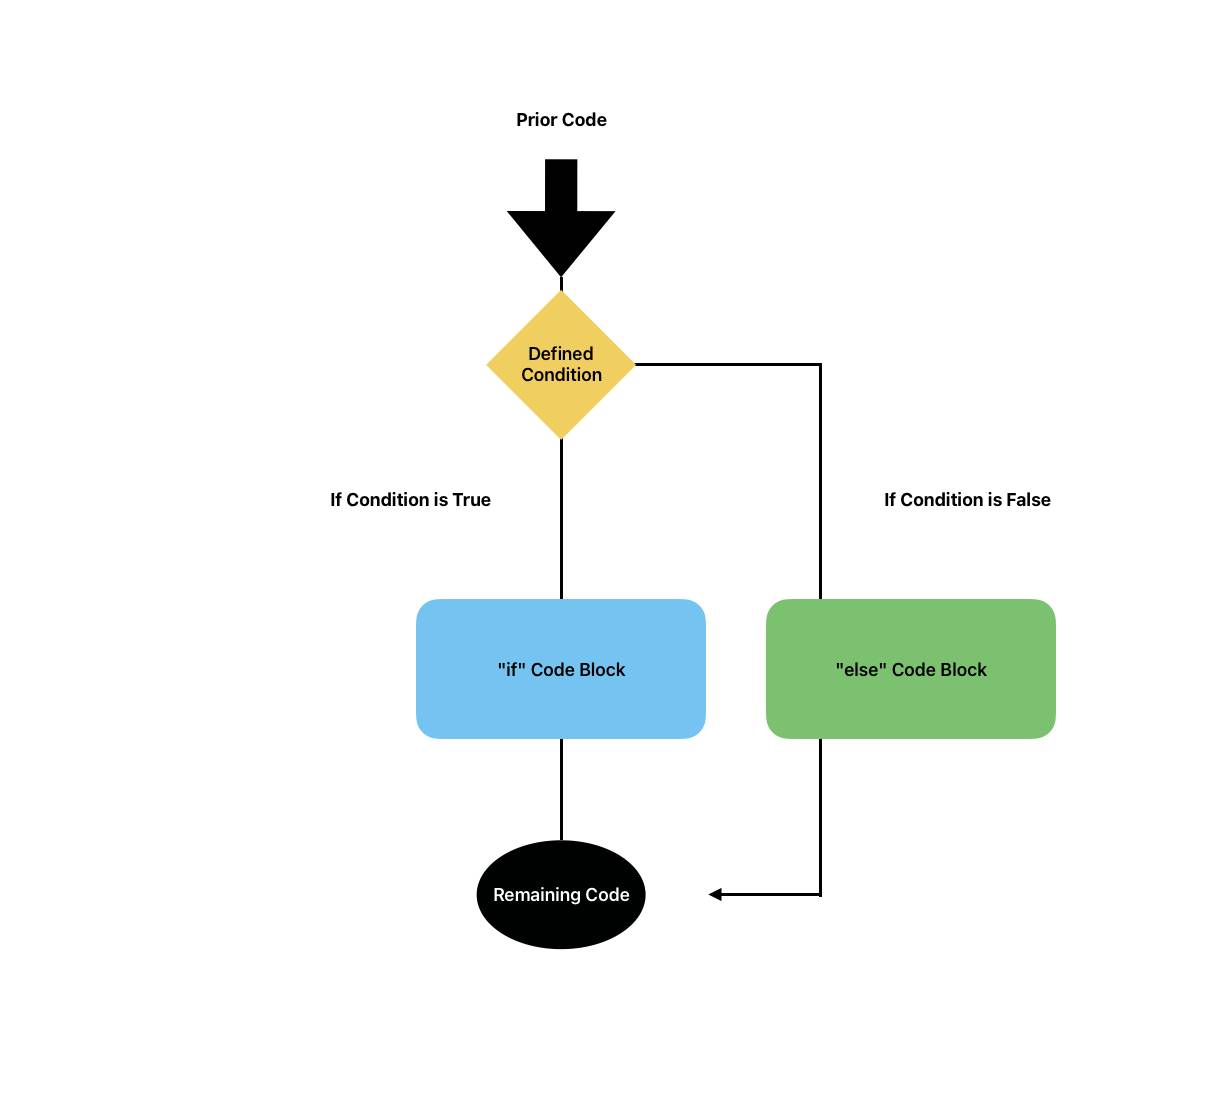
Conditionals can be formatted as both if and else statements.

Flowchart-style graphic demonstrating the logic path of a conditional statement where a false result for a condition executes the remaining code.Flowchart-style graphic demonstrating the logic path of a conditional statement where a false result runs a specific alternative code block.

All conditional statements require at least the if condition, but the else condition is optional. An else statement will always associate itself with the nearest if statement.

To write a conditional statement, you’ll use syntax that looks like the following.

if ([Boolean_condition]){
    } // Statement 1 {
else
    // Statement 2
}

In practice, conditionals let you define exactly what actions a program takes based on variables you define. For example, using an if statement might allow you to run a specific piece of code only when a contact’s company has 10,000 or more employees. Adding an else statement could then let you run a different block of code for contacts in smaller companies. By chaining multiple conditional statements together, you can build programs that react to and account for a wide range of variables—from simple integers to more complex Boolean variables.

Looping Statements

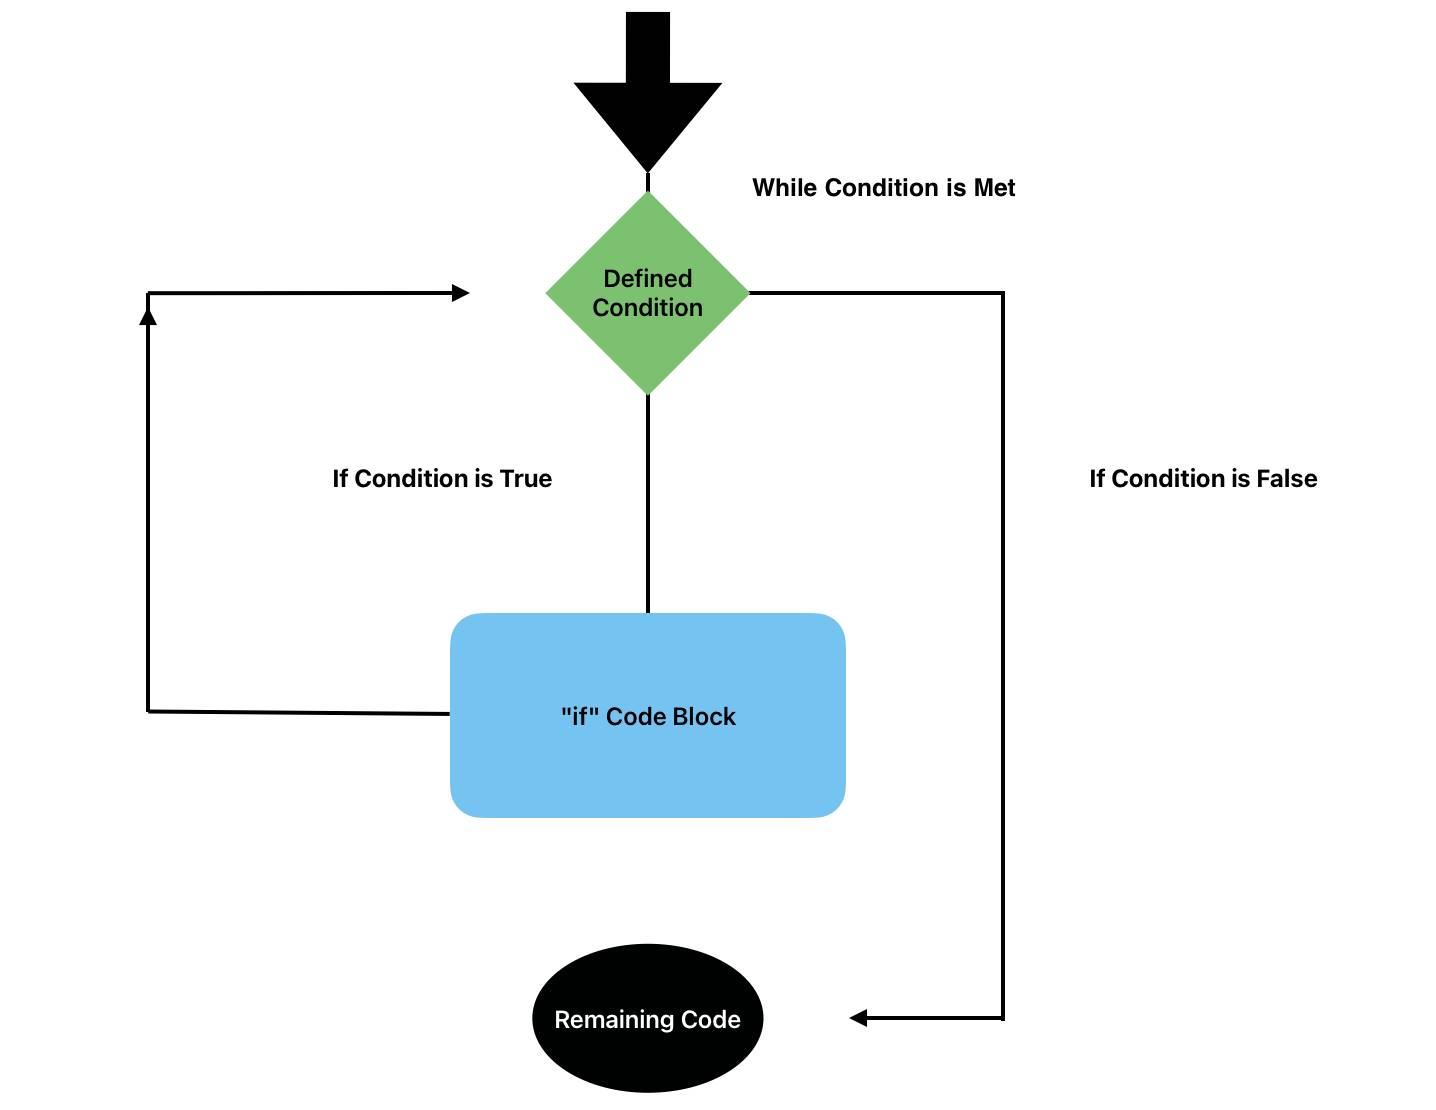
Like conditionals, looping statements let you continually execute the set code block, repeating it until or as long as the condition is met. For example, you could create a looping statement that applies a discount code automatically as long as a particular value, such as a loyalty status, remains true.

Flowchart-style graphic demonstrating a looping statement. In this loop, a false condition ends the loop, while a true condition restarts the loop.

Looping statements are useful in more complex coding, especially when a condition may change frequently or when you need to efficiently control when a particular piece of code is executed.

To write a loop, you can use a few different pieces of syntax. Most commonly, a while loop will execute the defined code block as long as the condition is met. Using do-while syntax is very similar, but it guarantees that the code will run at least one time. Finally, you can use a for statement to run code a specific number of times when a condition is met, instead of continually. Here’s how those statements look in coding syntax.

while

while (condition) {
    code_block
}

do-while


do {
   code_block
} while (condition);

for

for (init_stmt; exit_condition; increment_stmt) {
    code_block
}

Trigger Syntax

Trigger syntax, like conditionals, lets you run code when a specific thing happens. In the case of a trigger, though, the “condition” is a change to any Salesforce record. You could run code when a record is created, for example, or when one is updated, converted, or deleted.

Trigger statements are great for when you want to make sure related records are automatically updated, or to restrict and allow further changes to the record. To write a trigger, all you need is the trigger keyword, the name of the trigger you want to use, the Salesforce object associated with the trigger, and the event you want to activate the trigger. Here’s how that looks in a code block.

trigger TriggerName on ObjectName (trigger_events) {
                     code_block
                     }

Try It Out

Ready to give coding in Apex a try? Let’s test your knowledge with some real code! In order to access Apex, you can use Code Builder. For this exercise, you put your knowledge together to write a simple looping statement using the developer console directly, but Code Builder makes it easier to quickly code and collaborate as you branch out into real developer challenges.

For this example, you’ll write a looping statement to count down from 10.

  1. Click Setup [icon] in your Trailhead Playground.
  2. Click Developer Console to launch your developer environment.
  3. Click Debug | Open Execute Anonymous Window to open the Enter Apex Code window.
  4. In the Enter Apex Code Window, create a simple count of integers with the following code line. This integer count tells the code where you’re starting from, which is the number 10. This number could be any integer, though – what matters is that the code has a starting number to perform an operation, like subtraction, on.
Integer count = 10;
  1. Next, define what you want the looping code to do. To count down from 10, we’ll have our code write values to the debug log starting with 10. We use the “do” operation to tell the code we’re asking it to take an action, and the “count--” operation to define that action as counting down. You can use a range of operations on integers by replacing the “count--” part of the code with another command.
do {
    System.debug('Count: ' + count);
    count--;
}
  1. You also need to define the condition that “closes” the loop using the “while” condition. To stop executing the loop once each integer has been recorded to the debug log, code your loop to count as long as the counted integer is greater than 0.
while (count > 0);
  1. Click Execute to run your code. You can also run only the highlighted portion of a code block, but in this case, you’ll want to run the entire thing. If you’ve coded correctly, this block should count down from 10 to 1, recording each number once in the debug log.

Your final code should look something like this.

Integer count = 10;
do {
    System.debug('Count: ' + count);
    count--;
}
while (count > 0);

And that’s it! While Apex coding gets much more complex, basic operations like looping statements are the foundation of writing functional applications. Now you’ve learned about what Apex is, explored the traits that make it unique, and seen how writing code works in the developer console. You’re ready to tackle your first coding projects! But first, let’s review with a quick challenge.

Resources

Salesforce ヘルプで Trailhead のフィードバックを共有してください。

Trailhead についての感想をお聞かせください。[Salesforce ヘルプ] サイトから新しいフィードバックフォームにいつでもアクセスできるようになりました。

詳細はこちら フィードバックの共有に進む