Customize Order Management Flows
Learning Objectives
After completing this unit, you’ll be able to:
- Explain what a flow is.
- Describe the two types of flows.
- List and describe the Order Management flow templates.
- List ways you can customize or configure flows.
- Explain how to make Service flows available on the Order Summary Record page.
Set Up Flows for Order Management
Order Management works with Flow Builder, a tool that lets you create manual and automated functions in your org. Flows collect data and perform actions in your Salesforce org or an external system. There are two types of flows.
-
Screen: Automate a business process that collects data from people, such as a guided tutorial or wizard with screens.
-
Autolaunched: Launch a flow internally when a record changes or when a user clicks a button.

Take a look at the Flow Builder section in Automate Your Business Processes within Salesforce Help to familiarize yourself with this tool.
Order Management Flows
Order Management comes with a set of flow templates. Linda Rosenberg, the admin, can’t use them directly. Instead, she must copy them, customize them, and configure her system to use the copies. She can launch some of them manually, while the system automatically launches others.
Flow |
Flow Type |
Launch type |
|---|---|---|
Cancel Item |
Screen |
Manual |
Create Order Summary |
Autolaunched |
System |
Create Process Exception |
Autolaunched |
System |
Discount |
Screen |
Manual |
Even Exchange Flow (requires a Salesforce Order Management Growth license) |
Screen |
Manual |
Order On Behalf Of (OOBO) |
Screen |
Manual |
Reship Order (requires a Salesforce Order Management Growth license) |
Screen |
Manual |
Return Item |
Screen |
Manual |
Return Merchandise Authorizations (RMA) Create Credit Memo and Ensure Refunds Flow |
Autolaunched |
System |
RMA Return Items |
Screen |
Manual |
The system launches autolaunched flows under these circumstances.
-
Create Order Summary: When an Order record is created or updated, and its StatusCode is Activated.
-
Create Process Exception: When a Process Exception Event platform event is created.
-
RMA Create Credit Memo and Ensure Refunds: When a Return Order record with lifecycle type Managed is updated and its StatusCategory is Closed.
Flow Considerations
Flows can’t use localized labels. If Linda wants to include localized screen or message text in a flow, she must create a copy of the flow with hard-coded text in the desired language.
If Linda adds a custom field to an object that’s used in a flow, she must also customize the flow to handle it.
A change order is an Order record. If you add a required custom field to the Order object, make sure you update the service flows to set that field when the user creates a change order. If a flow tries to create an order and doesn’t set that field, it fails.
Customize and Configure Flow Templates
Once Linda copies a flow template, she can customize it. Here’s how to create a flow from a template.
- Click the App Launcher (
 ).
).
- In the Search apps and items box, enter
autoand then select Automation.
- In the Flows panel, click New.
- Choose a flow type from the recommended templates to customize.
Linda can now customize the flow such as in these examples.
- Use a different
allocatedItemsChangeOrderTypevalue with the Discount Item flow.
- Use Salesforce Onnichannel inventory.
- Configure reasons for a Cancel, Discount, Return, or Even Exchange.
- Configure return merchandise authorization (RMA).
Customize the Discount Item Flow
By default, the Discount Item flow calls the Adjust Order Item Summary action with an allocatedItemsChangeOrderType value of InFulfillment. This process creates a separate change order for order items that are being fulfilled. Linda wants to use a different process, and is glad to know that it’s as easy as setting a different value.
If you plan to use unmanaged order summaries, customize the Create Order Summary flow logic to assign the order lifecycle type. The default flow always creates managed order summaries. See Order Management Lifecycle.
Use Salesforce Omnichannel Inventory
If you use Salesforce Omnichannel Inventory, you need to customize.
- In the Even Exchange flow, set the applyOCI and useLocationGroups variables to true. The default value of these variables is false.
- In the Reship Order flow, set the applyOCI variable to true. The default value of this variable is false.
Configure Reasons
The Cancel Item, Discount, Return Item, and Even Exchange flows require the user to select a reason for the action from a dropdown list. Reasons can include Wrong Item and Customer Changed Mind, for example. Here’s how to define a list of reasons, and add them to the picklist values for the Reason field on the Order Product Summary Change object.
- From Setup, in the Quick Find box, enter
Object Manager, and then select Object Manager.
- Select the Order Product Summary Change object.
- Click Fields & Relationships.
- Select the reason.
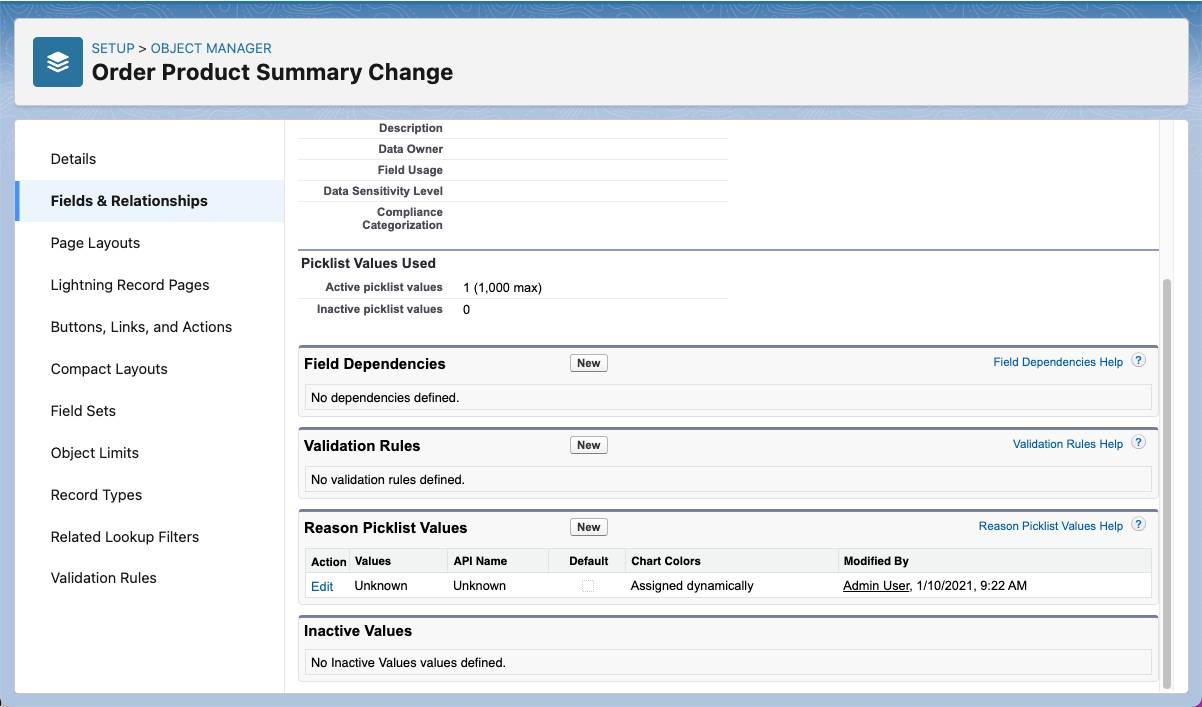
- Add your reasons to the Reason Picklist Values.
- Select a default value.
Configure Return Merchandise Authorization (RMA)
Here’s how to specify a default user and return reasons for return merchandise authorizations. All reasons for return values on the Return Order Line Item must have matching reason values on the Order Product Summary change.
- Specify a Default Workflow user. Certain actions in the RMA flow run as this user.
- From Setup, in the Quick Find box, enter
Process Automation Settings, and select Process Automation Settings.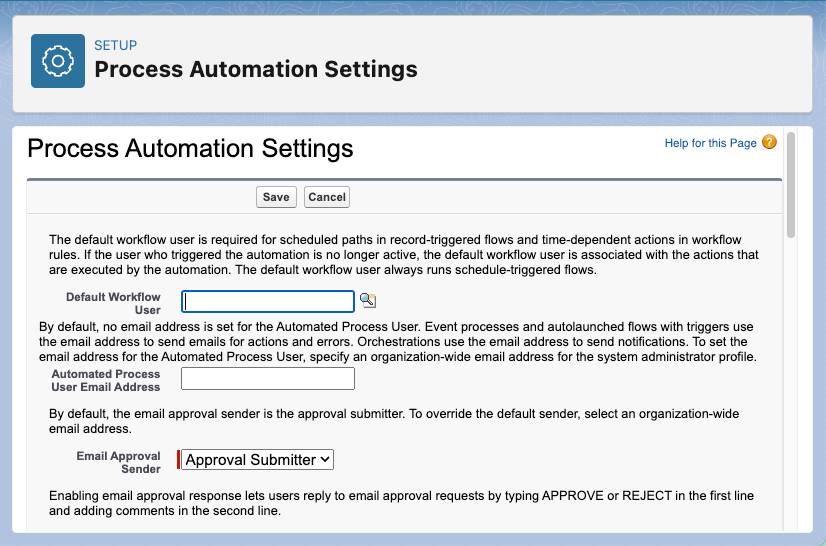
- In the Default Workflow User field, enter the name of a user with the System Administrator profile. You can click the search icon to open a user search window.
- Add your return reasons to the Return Order Line Item object.
- From Setup, in the Quick Find box, enter
Object Manager, and select Object Manager.
- Select Return Order Line Item.
- Select Fields & Relationships.
- Select the Reason for Return.
- Add your return reasons to the Reason for Return Picklist Values.
- Select a default value.
- Verify that all of these entries are also in the Reason picklist on the Order Product Summary change.
Make Service Flows Available on the Order Summary Record Page
Linda gives users access to her flows by adding them to the Actions & Recommendations component on the order summary FlexiPage. Here’s how she does it.
- From Setup, in the Quick Find box, enter
Actions & Recommendations, and select Actions & Recommendations.
- Click New Deployment, then click Next.
- After you name the deployment, select Flows and quick actions.
- Deselect Recommendations and click Next.

- In the Available Objects list, find Order Summary, move it to the Selected Objects list, and click Next.
- Select the Default tab.
- In the All Actions list, find your cloned flows and drag them to the Top Pinned section.
- Select your flows and click Unmark Removable.
- Click Next and then Save.
Add Service Flows to the Order Summary Record Page
Linda must have an order summary record in her org if she wants to edit the default record page. Because order summaries require several related records, don’t try to manually create one. Simply create and activate an order, which triggers the Create Order Summary flow. Here’s how to add the service flows to the default layout.
- Open an order summary record page.
- From the Setup menu, select Edit Page.
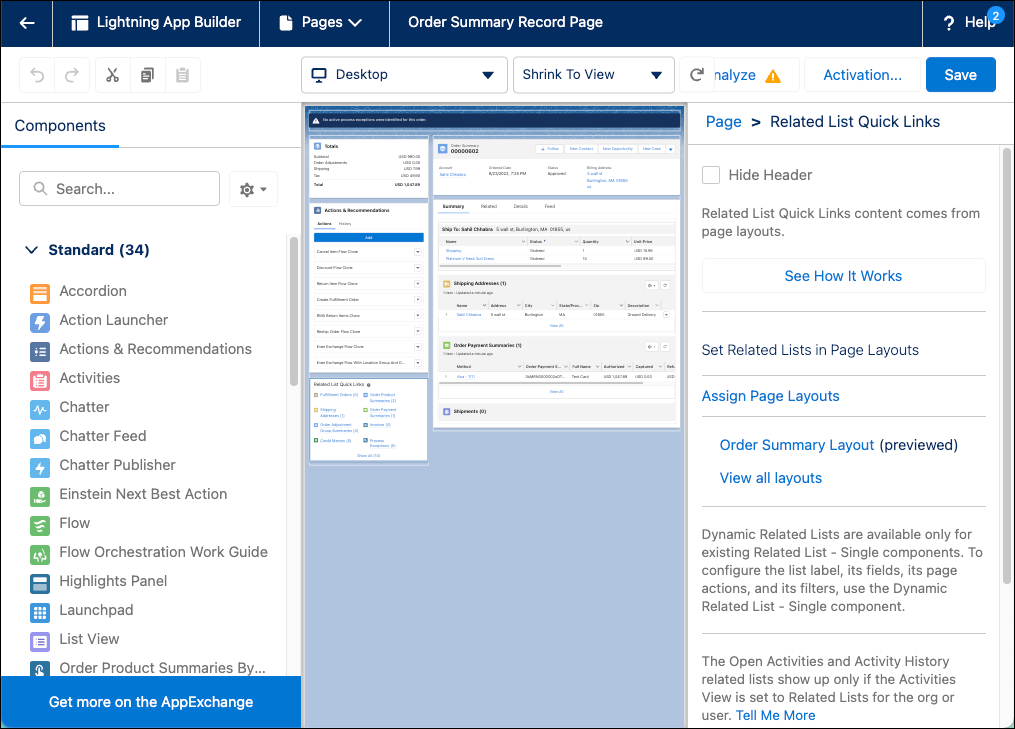
- Select the Actions & Recommendations component in the preview layout.
- In the Actions & Recommendations Deployment field, select the deployment you created, and click Save.
- In the dialog that appears, click Activate, and then Save.
- Click Activation.
- Save the page layout as the org default.
Next Steps
In this unit, you explored Flow Builder, the flow templates available with Order Management, and how you can customize your flows. Next, learn how to configure certain checkout features.
Resources
- Salesforce Help: Flow Core Action for Order Management: Adjust Order Item Summaries Submit
- Salesforce Help: Order Management Lifecycle
- Salesforce Developers: Salesforce Flow for Service