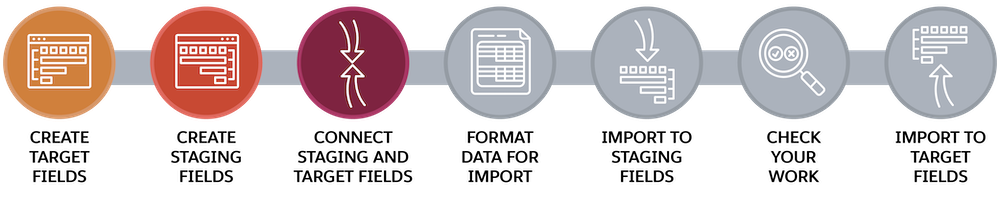
Map Standard and Custom Fields on a Standard Object
Prepare to Import Standard and Custom Fields
Start with the fields that No More Homelessness (NMH) wants to import to contact records: email opt-out and preferred language.
Email opt-out is a standard Salesforce field but isn't included by default in the NPSP Data Import object. Preferred language isn't a standard Salesforce or NPSP field, so add this custom field to the Contact object and map it to the NPSP Data Import object in your Trailhead playground.
Remember the process: Create the custom fields, create the corresponding staging field on the NPSP Data Import object, then connect the two. That’s what you do in this step.
Create the Custom Field on the Contact Object
First, create the new custom preferred-language field. But before you dive into creating the new field itself, create a new global picklist value set. You use the same picklist values for three custom fields, so creating a global picklist value set will save us time and assure that the fields are uniformly updated if you need to add values in the future.
- From Setup, in the Quick Find box, enter
picklist, and then select Picklist Value Sets.
- Next to the Global Value Sets header, click New.
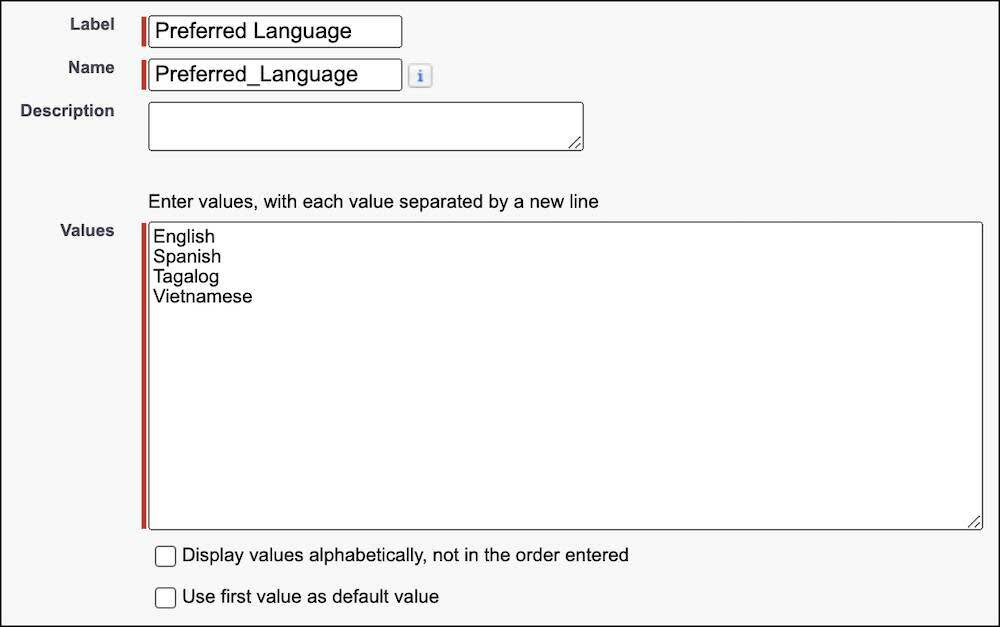
- In the Label field, enter
Preferred Language.
- In the Name field, enter
Preferred_Language(This should populate automatically.)
- Enter these values, one per line:
English
Spanish
Tagalog
Vietnamese
- Save your work.
With that picklist value set created, create the new field.
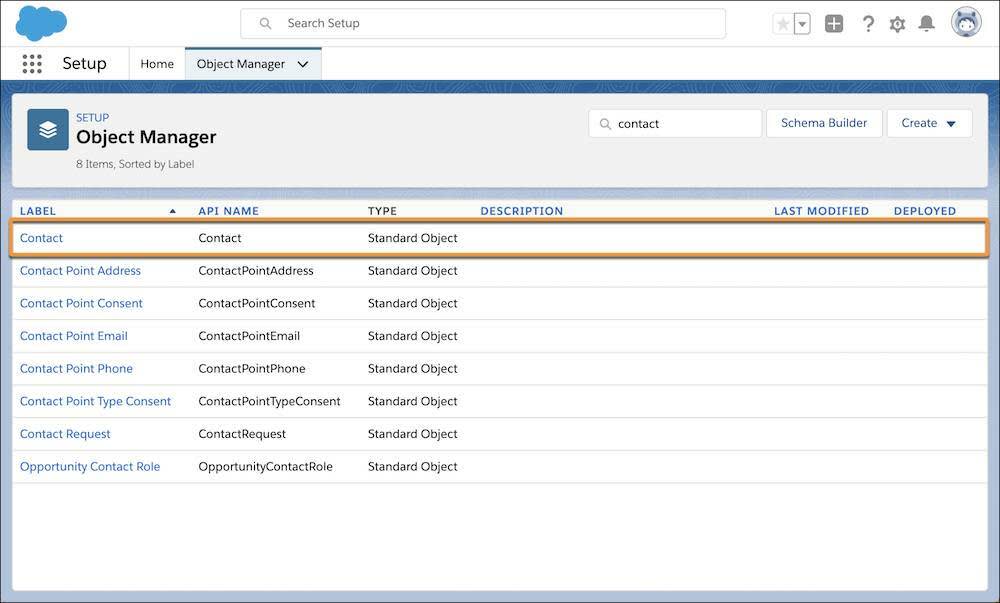
- Click Object Manager in the Setup navigation bar.
- Find and select Contact.
- Click Fields & Relationships.
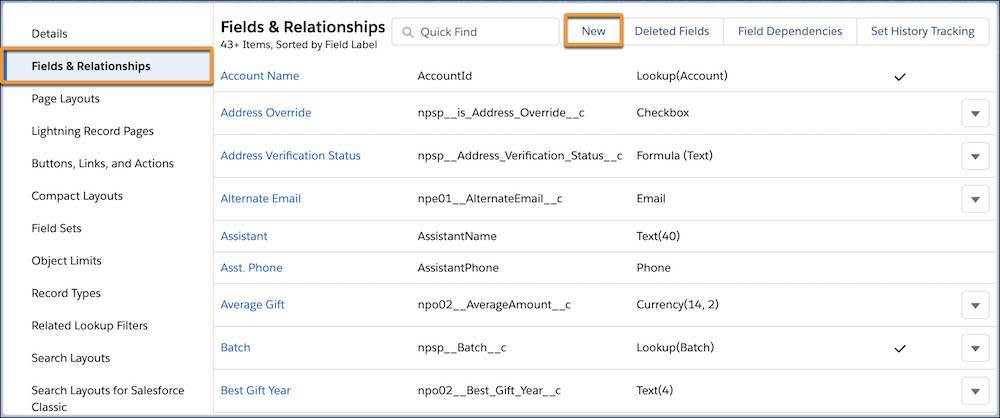
- Click New.
- Select Picklist, and click Next.
- Specify these values:
- Field Label:
Preferred Language
- Values: Select Use global picklist value set, then select Preferred Language from the picklist.
- Field Name:
Preferred_Language(This should populate automatically.)
- Click Next.
- Click Next.
- Save your work.

To verify that the contact record was updated correctly, find and select Contacts from the App Launcher ( ), then select a contact to view the field. The field should appear on the Details tab in the Contact Details section.
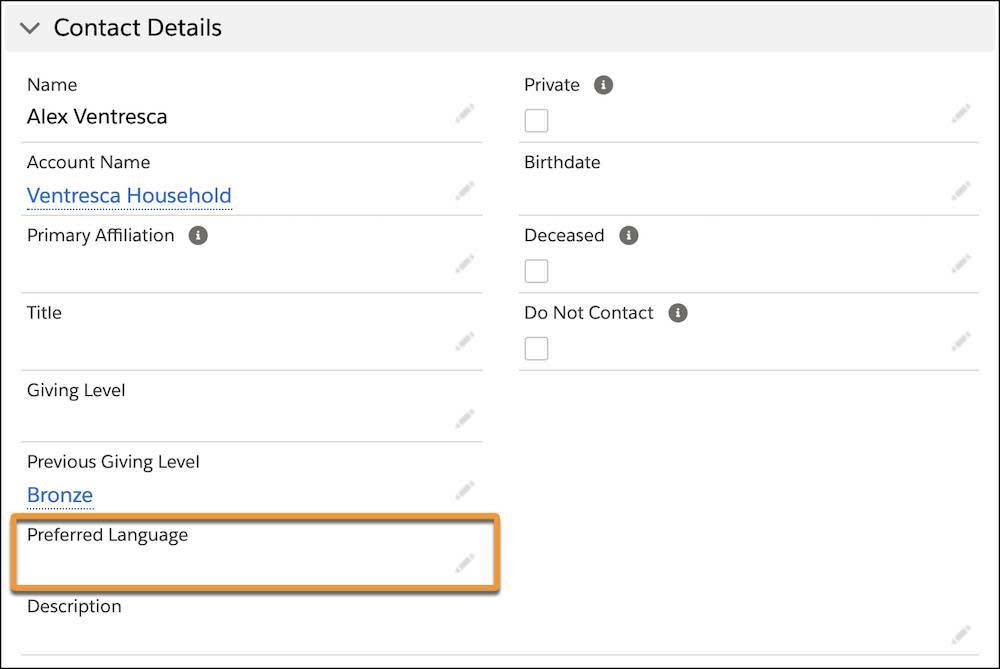
While you’re here on the contact record, you can see the standard email opt-out field in the Contact Information section, as well.
Create Corresponding Fields on the NPSP Data Import Object
Now that both the preferred language and email opt-out fields exist on the contact object, you need to create corresponding fields (your staging fields) on the NPSP Data Import object. You’ll have to create these fields for both the NPSP Data Import object’s Contact 1 and Contact 2 if you want to import these fields for both members of a household.
First, create the NPSP Data Import field for preferred language.
- In Setup, click Object Manager.
- Find and select NPSP Data Import.
- Click Fields & Relationships.
- Click New.
- Select Picklist, and click Next. The NPSP Data Import field should be the same type as the target field—though you bend that rule in a moment.
- Specify these values:
- Field Label:
Contact1 Preferred Language
- Values: Select Use global picklist value set, then select Preferred Language from the picklist.
- Field Name:
Contact1_Preferred_Language(This should populate automatically.)
- Click Next.
- Click Next.
- Click Save & New.
- Repeat the same step but create the same field for
Contact2 Preferred Language, then click Save at the end of the process before moving on.
Now, create the NPSP Data Import object field for email opt-outs. And here’s the exception to the rule you just learned: If your target field is a checkbox, select a picklist with True and False values to give yourself more flexibility. In your data for import, True would mean selected, False would mean unselected, and a blank value would leave the box unchanged if you were updating records.
- On the NPSP Data Import record in the Object Manager, click Fields & Relationships.
- Click New.
- Select Picklist, and then click Next.
- Specify these values:
- Field Label:
Contact1 Email Opt Out
- Values: Select Enter values, with each value separated by a new line and in the box, enter these values:
True
False
- Field Name:
Contact1_Email_Opt_Out(This should populate automatically.)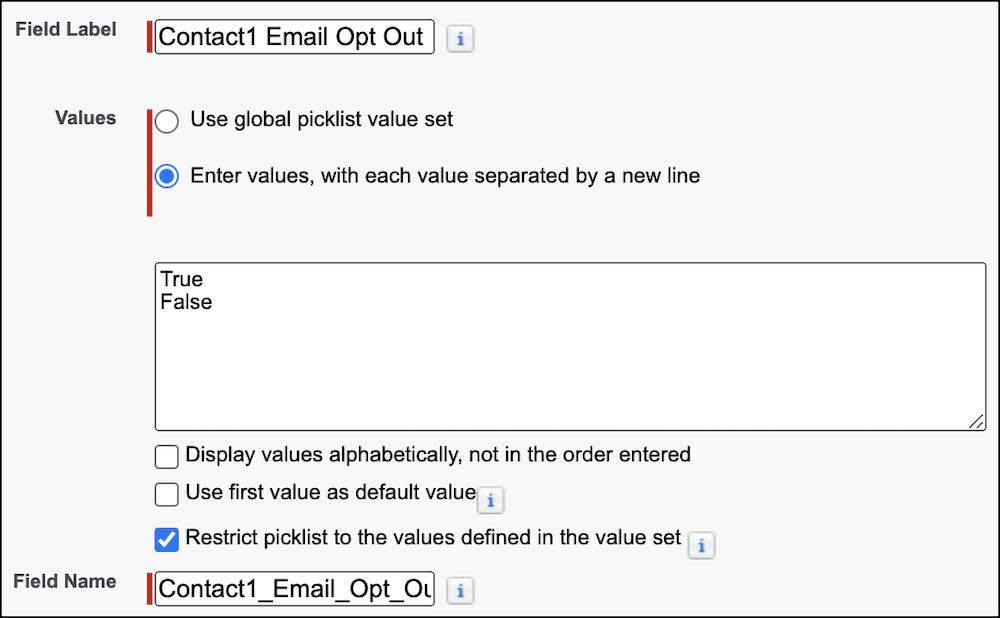
- Click Next.
- Click Next.
- Click Save & New.
- Repeat the same steps to create a field for
Contact2 Email Opt Out, then click Save at the end of the process.
You’ve created all of the staging fields you need on the NPSP Data Import object. Now, place them on the page layout.
- On the NPSP Data Import record in the Object Manager, click Page Layouts.
- Click Data Import Layout.
- Scroll down to the Information area and see that the new fields were added here by default.

- Click and drag Contact1 Preferred Language under Contact1 Title in the Contact1 Information area.
- Click and drag Contact1 Email Opt Out above Contact1 Personal Email in the Contact1 Information area.

- Move the Contact2 Preferred Language and the Contact2 Email Opt Out fields to the corresponding locations in the Contact2 Information area.
- Save your work.
Now, you’re ready to map the staging fields in the NPSP Data Import object to the target fields in the contact object.
Turn on Advanced Mapping
Start by making sure that Advanced Mapping is enabled.
- From the App Launcher (
 ), find and select NPSP Settings. It may take some time to load.
- Click System Tools then Advanced Mapping for Data Import & Gift Entry.

- Turn on Advanced Mapping.
The page will load with a message saying, “Deployment in progress. You can leave this page. The page will reload when deployment is finished.” It may take a minute or two, so take the opportunity to practice some deep breathing.
Once the page reloads, click Configure Advanced Mapping.
Map the New Fields
After clicking Configure Advanced Mapping, you’ll see a list of Object Groups, which are collections of field mappings that tell NPSP Data Importer what objects—such as contacts, accounts, and so on—to create or update. There are already object groups for Contact 1 and Contact 2.
First, add the preferred language field mapping.
- Find the Contact 1 row, click on the menu button (
 ) and then click View Field Mappings.
- You're now on the Contact 1 Group Field Mappings page. Click Create New Field Mapping.
- In the Source (NPSP Data Import Object) Field Label search field, find and select Contact1 Preferred Language (Contact1_Preferred_Language__c).
- In the Target (Contact 1 Object) Field Label search field, find and select Preferred Language (Preferred_Language__c).

- Save your work then refresh the page.
After the page reloads you’re back on the Object Groups list. Next, create a new field mapping for email opt-outs for Contact 1.
- Look for the Contact 1 row and click View Field Mappings under the menu button (
 ) again.
- On the Contact 1 Group Field Mappings page, click Create New Field Mapping.

- In the Source (NPSP Data Import Object) Field Label search field, find and select Contact1 Email Opt Out (Contact1_Email_Opt_Out__c).
- In the Target (Contact 1 Object) Field Label search field, find and select Email Opt Out (HasOptedOutOfEmail).

- Save your work.
You will receive a message that the update was successful. That maps your fields for Contact 1.
Now click Back to Object Group to go to the list of Object Groups. Find the Contact 2 row, click on the menu button ( ) and then click View Field Mappings, and repeat the steps above to map Contact2 Email Opt Out (Contact2_Email_Opt_Out__c) and Contact2 Preferred Language (Contact2_Preferred_Language__c) to the corresponding target field on the contact record.
Get Ready to Prepare the Data
With the target and staging fields set up and mappings in place, you have everything you need in Salesforce to start importing your data.
In the next step, you modify the import template and run a test import to check your work.
But before you move on, if you’ve followed along with the steps above, select the Trailhead Playground you are using for this project and click Verify.
Resources
- Salesforce Help: Configure NPSP Data Importer
- Salesforce Help: Connect a New Object in Advanced Mapping
- Salesforce Help: Create a Global Picklist Value Set
- Trailhead: Custom Fields: Quick Look