Customize the Travel Approval Object Page Layout
A page layout determines the fields, sections, related lists, and buttons that appear when users view or edit a record. You can modify an object’s default page layout or create a custom page layout.
You may have noticed from trying out the app, that all of the fields on your Travel Approval or Expense Item record are aligned in a single column and are slotted in the order in which they were created. This is the default behavior of the new field wizard, but it’s not practical for how your users will want to use the system. So management asked you to group fields together logically to make it easier for users to enter data.
Customize a Page Layout
To adjust the Travel Approval user interface to meet management’s requirements, start by creating a page layout.
- In the Travel App app, click the Travel Approvals tab and open TA-00001.
- Click
 and then select Edit Page.
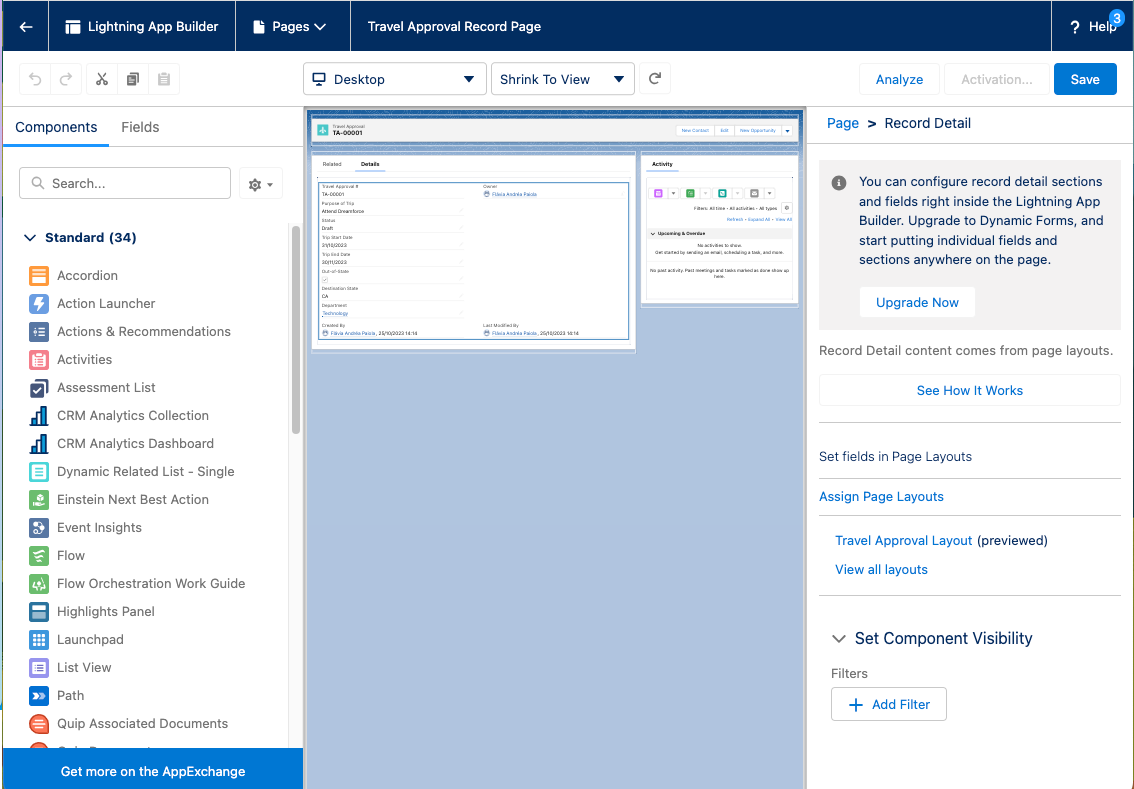
- Left-click once in the middle of the form to select it. You should see a light blue border around the form. On the right-hand side, click Travel Approval Layout (previewed).

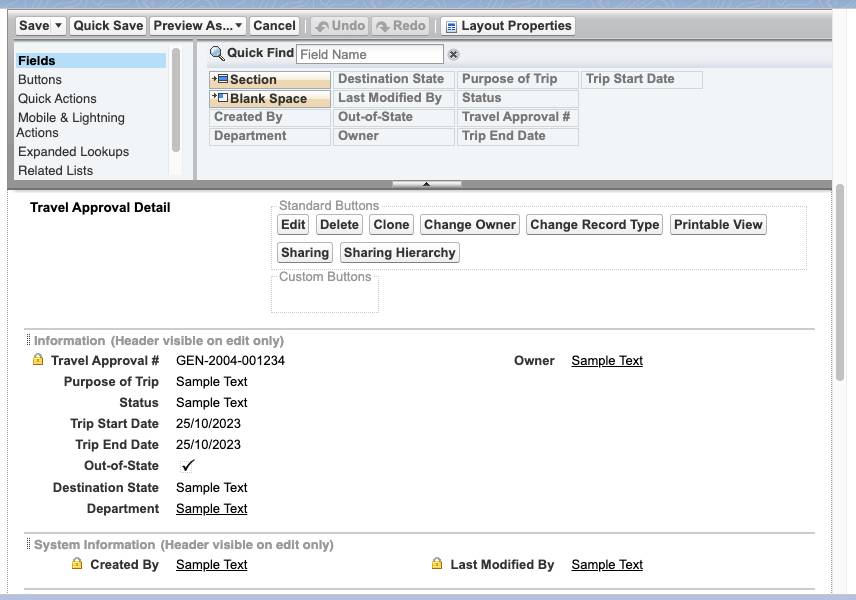
- Scroll down to the Travel Approval Detail section. Here’s where you can change the order and position of fields and create a new section to group the trip detail fields.

- Drag Section from the top pane to the lower pane directly below the Information section. When dragging over the page, you get a visual indicator of where you can drop the new section.

- Name the section
Trip Infoand leave the rest of the settings at their default values, then click OK. - Drag Purpose of Trip, Trip Start Date, and Trip End Date from the Information section to the left-hand column of the Trip Info section.
- Drag Out-of-State and Destination State from the Information section to the right-hand column of the Trip Info section.
- Drag the Department field from the left-hand column of the Information section to the right-hand column.

- Click Save.
With a customized Travel Approval page layout, managers have easy access to important information, which helps streamline the approval process. Move on to the next step where you create a related list to show more details of travel expense items.