Track Service Deliveries
Learning Objectives
After completing this unit, you’ll be able to:
- Record single service deliveries.
- Use Bulk Service Deliveries to record several service deliveries at the same time.
Service Deliveries: Where Your Work Is Tracked
Service delivery records in Program Management Module (PMM) track how much of a service is given to a client and when it was given. You’ll likely create many service delivery records for each program engagement.
There are three ways to do this.
- Create a single service delivery.
- Use Bulk Service Deliveries to create many service deliveries at one time, either for one contact or a group.
- Plan with service schedules, service participants, and service sessions, and then track attendance.
In this unit, we complete the first two step-by-step, then tackle service schedules in the next unit. Let’s start by following NMH Program Manager Gia as she creates a single service delivery.
Create Single Service Deliveries
At the NMH food pantry, Gia needs to record a visit for client Alexandra (Alex). This is a simple service delivery, and she just needs to create one record.
We could do this in a few ways. Gia could click the Service Delivery tab in the navigation bar, then click New. But she opts to start on Alex’s program engagement record.
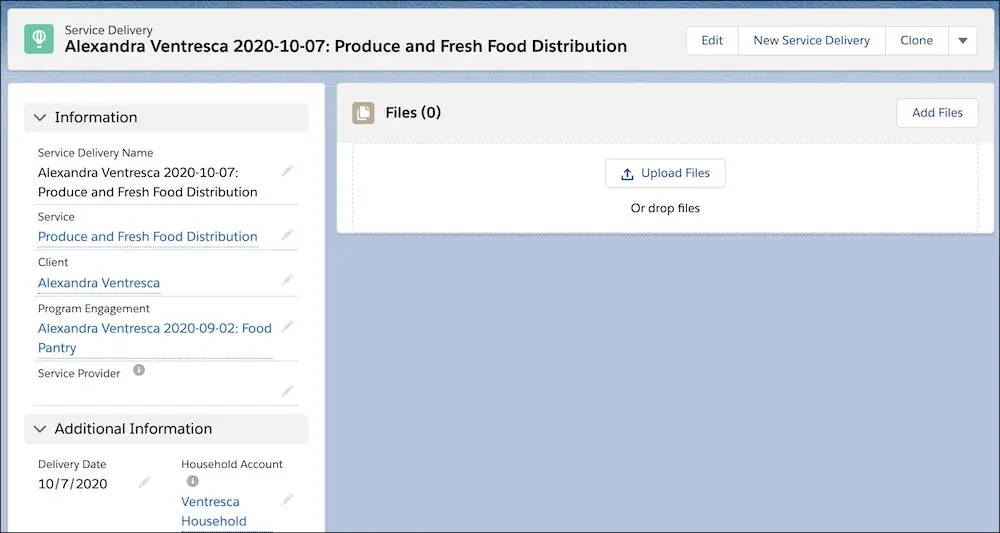
- On the program engagement record, click Create New Service Delivery. This way, the record is automatically named and related to Alex’s program engagement record.
- Search for and select a service. Gia selects Produce and Fresh Food Distribution.
- Record a service quantity. For food pantry visits, the quantity is measured by the number of food items distributed, so Gia enters
3.00. - Set a delivery date. It will default to today’s date.
- Enter a service provider, if needed. Gia will leave this blank for now, but you could use this field to record the name of a volunteer, case manager, or another provider.
- Click Save.

The new service delivery is related to Alex’s program engagement and contact records. Gia can also later add files and additional information on the service delivery record.
Create Several Service Deliveries with Bulk Service Deliveries
What if you want to enter several service deliveries at once?
On another visit, Alex gets vegetables, some boxed and canned foods, and some personal care items. That’s three different services by NMH’s standards. Fortunately, Gia can use Bulk Service Deliveries, a PMM feature that allows you to add several service delivery records at once.
- Click the Bulk Service Deliveries tab in navigation.
- Select if you want to create service deliveries for a group or for an individual. In this case, we click Create by Individual.
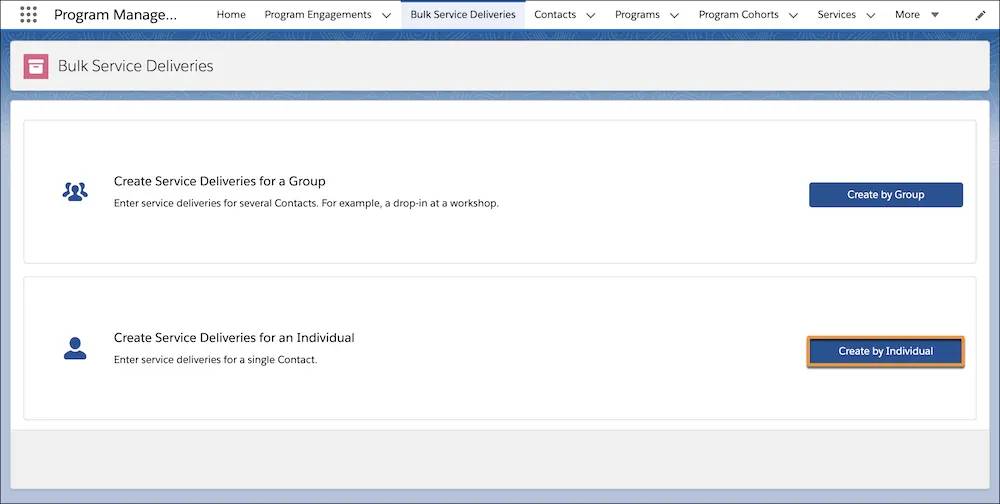
- Search for and select a client record. Gia finds and selects Alexandra Ventresca.
- Select a program engagement. Because Gia selected Alex as the client, she has a list of Alex’s engagements in the program engagements field. She picks the food pantry program engagement. (She could also click +New Program Engagement if this is a client's first time using a program.)
- Select the service. Gia selects Produce and Fresh Food Distribution to record the vegetables
- Set a delivery date, which defaults to today.
- Enter a service quantity. Gia enters
3.00.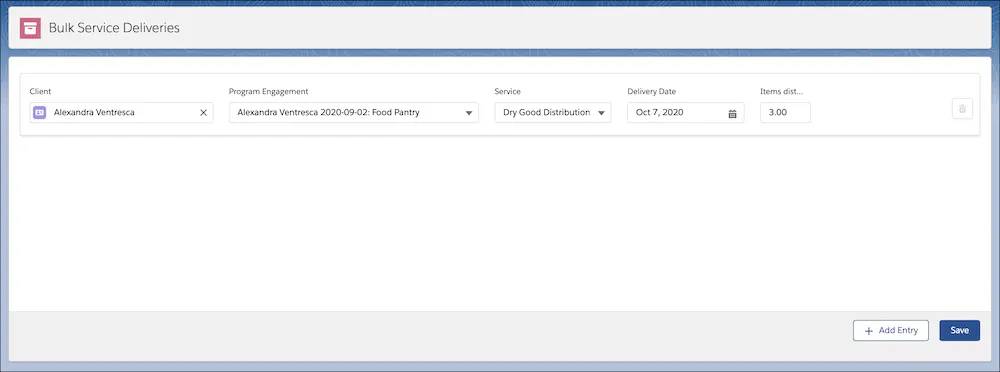
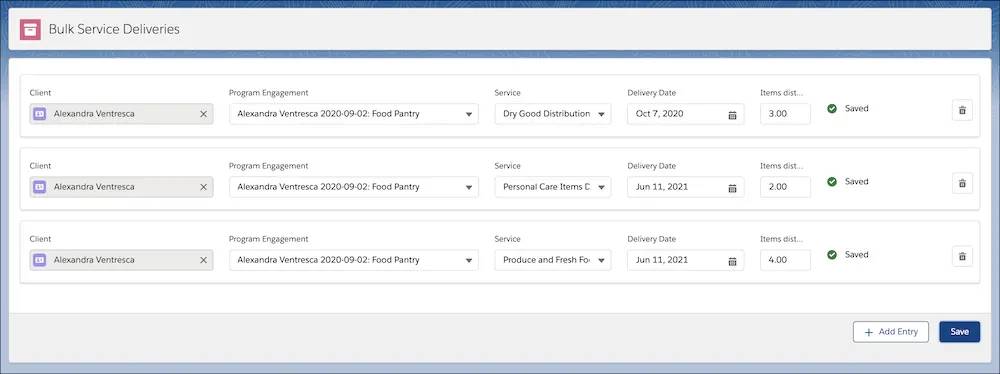
- To start another service delivery record, click + Add Entry and repeat the process. Gia does this for Alex’s boxed and canned foods, then again for her personal care items.
- Click Save. A confirmation message will appear in each row when the new records are created. You can leave the page when you are done.
But let’s say that Gia wants to add a service for a group, such as everyone in a particular program, cohort, or class. For example, food pantry participants are invited to drop-in to monthly information sessions about NMH’s other services. Gia can use Bulk Service Deliveries to record those service deliveries for the whole group.
- Click the Bulk Service Deliveries tab in navigation.
- Click Create by Group.
- Specify the Default Service Delivery Values by selecting a service, delivery date, and quantity. Gia selects her information session service and enters the duration,
1.00hour.
- Click Next.
- Now select from contacts who share a program engagement with the service you selected on the previous screen. Filter by program cohort if needed, then click Add next to every contact for whom you’d like to create a service delivery. Gia adds Alex and a few other participants who attended. (She could also click New to create a service delivery for an existing or new contact that doesn't already have a program engagement record for this program.)
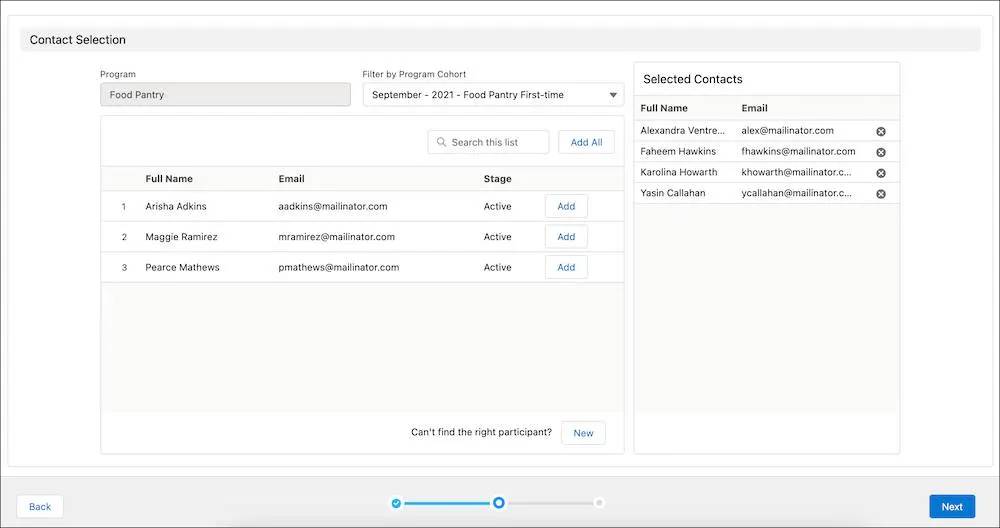
- Click Next.
- On the next page you see a series of rows for each of your contacts with the default values for service, delivery date, and quantity you selected earlier. You can change each row as you need. Gia makes a few edits here.
- When you’ve set all the values you need, click Save. A confirmation message appears in each row.

But what if these sessions are recurring on a schedule, like a class that meets weekly for a few months? In the next unit, you learn about service schedule records and how they can help make service delivery creation even faster.