Configure Your Flexcard
Learning Objectives
After completing this unit, you’ll be able to:
- Explain the Setup panel options in the Flexcard Designer.
- Describe the Properties panel options in the Flexcard Designer.
Set Up and Style Your Flexcard
Previously, you explored the Element panel and the various elements available in the Flexcard Designer. In this unit, learn how to configure and style your Flexcard. Use the Setup and Properties panels to format, style, and add data sources to your Flexcard. Learn more about these panels and the options under them.
Setup Panel
Configure your Flexcard’s details and behavior with the setup options. The Setup panel is where you define the foundational aspects of how your card functions. Once you create a Flexcard, it’s not possible to change the Name and Author fields.
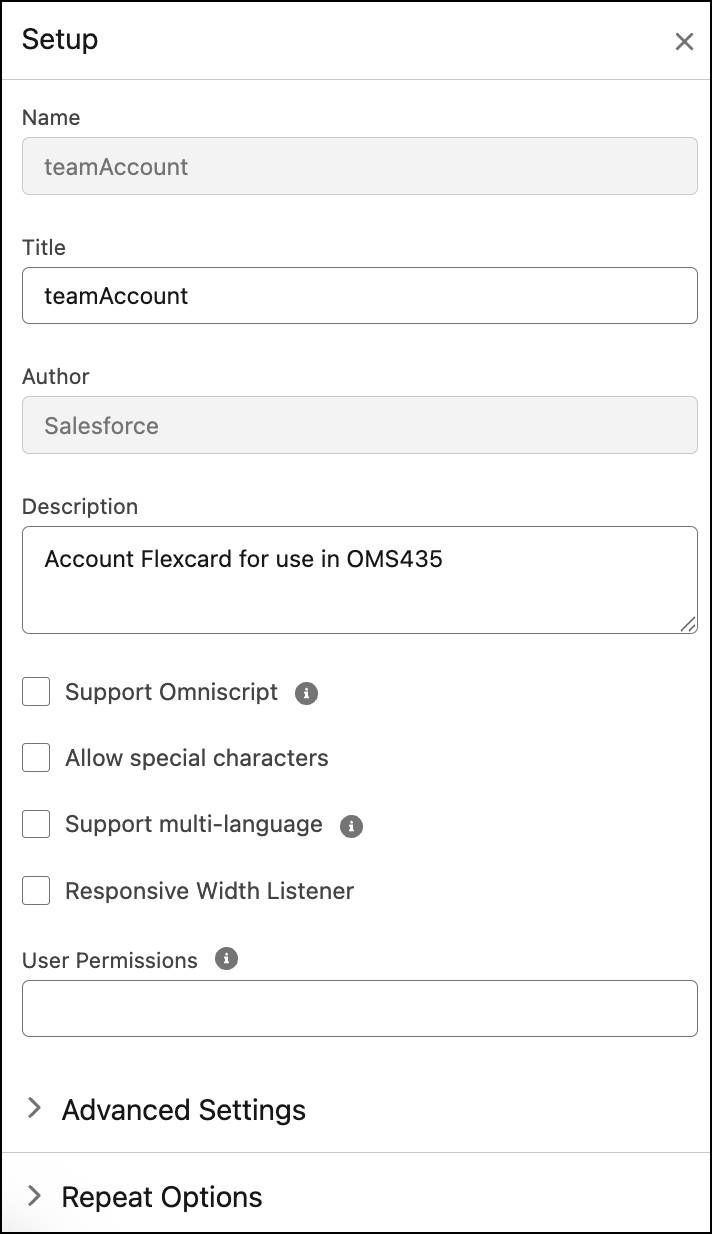
In the Setup panel you can use these options to update your Flexcard settings:
Setting |
Function |
|---|---|
Advanced Settings |
Disable child Flexcard preview. |
Repeat Options |
Display content that doesn’t need repeating, such as charts or data tables. |
Styling Options |
Add custom Lightning stylesheet. |
Event Listener |
Add event listeners to your Flexcard. An Event Listener is a function that ‘listens’ or waits for an event to occur and acts in response. |
Session Variables |
Add session variables. A Session Variable is a special type of variable that stores values from data sources or external systems so that you can access them globally on a Flexcard. |
Public Attribute |
Add public APIs to your Flexcard. |
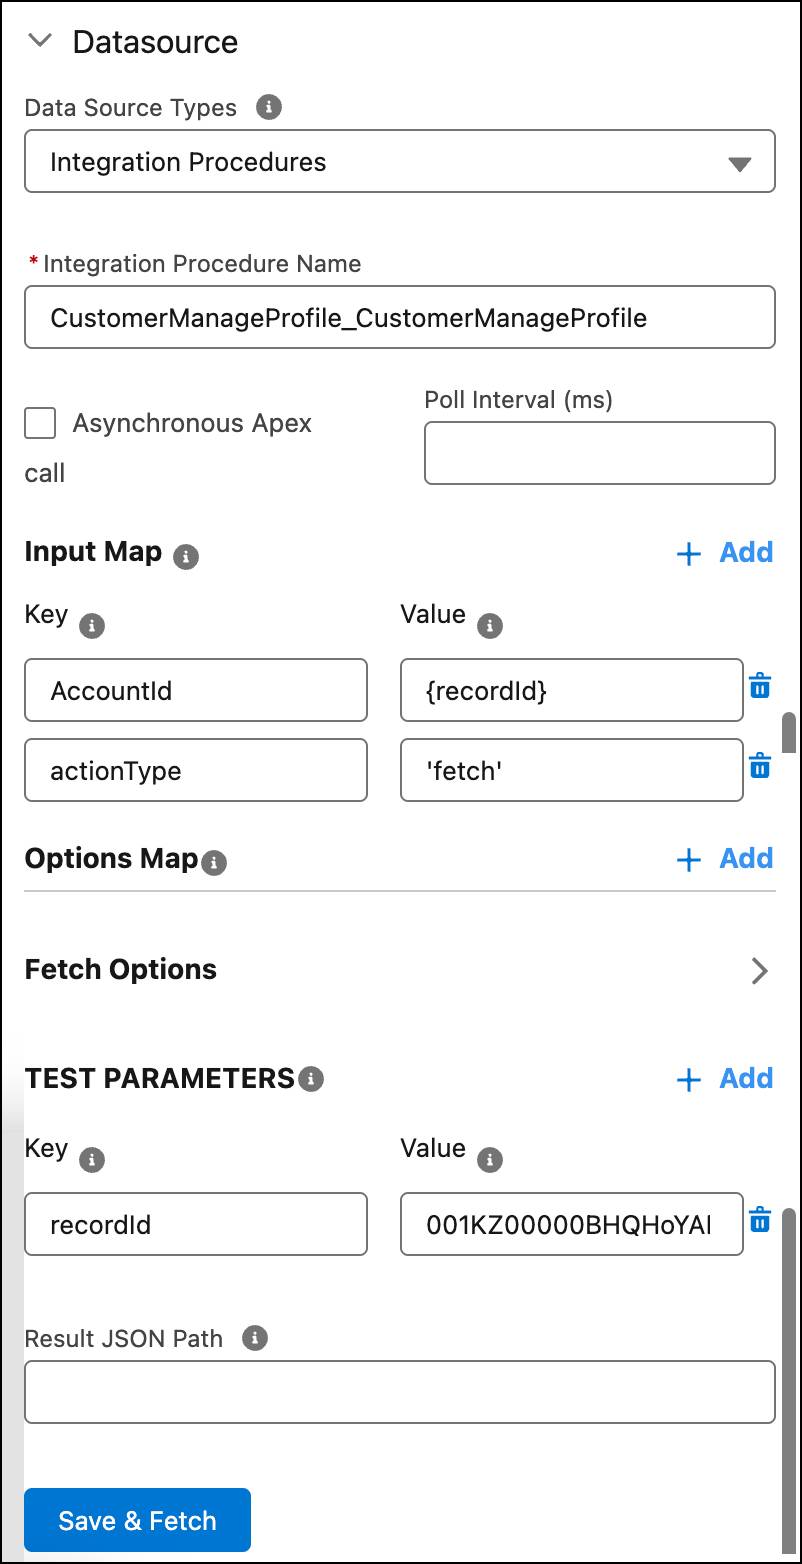
Add a Data Source
In the Datasource section under the Setup panel, add a data source to your Flexcard. Choose a data source type from the options available and edit the details. Flexcards can retrieve data from multiple data source options. Here are the data sources available for a Flexcard.
Omnistudio data sources:
-
Data Mapper is a declarative tool you can use to extract, transform, and load Salesforce data.
-
Integration Procedures is a declarative tool that executes a series of actions on a single server call. An Integration Procedure can call a Data Mapper, make REST API calls, or run Apex. It’s a great way to get data from many sources in one transaction.
Salesforce data sources:
-
SOQL Query uses the Salesforce Object Query Language (SOQL) to query records from a single Salesforce object. It's a simple and fast way to retrieve data when you don't need the transformation capabilities of a Data Mapper.
-
SOSL Search uses the Salesforce Object Search Language (SOSL) to perform text-based searches across multiple Salesforce objects at once. It's ideal for a search-and-display use case, such as finding a customer by name, phone number, or email across different objects.
-
APEX Remote invokes an Apex class and method to get data. This is useful for retrieving complex data that needs custom server-side logic. The Apex method can do calculations or call other services before returning the data to the Flexcard.
-
APEX Rest calls a REST endpoint of an Apex class to retrieve data. It's similar to Apex Remote but uses a RESTful architecture, which is a good option when building a public-facing API.
External and other data sources:
-
REST retrieves data from an external REST API. This is the primary way to integrate data from third-party systems. You can use a Named Credential for secure authentication.
- A Streaming API subscribes to the Salesforce Streaming API to receive real-time, event-based data updates using push technology. This is perfect for displaying live notifications or updates without constantly refreshing the page.
You can also configure additional settings for a data source depending on the type of data source you select. For example, if you select Integration Procedures as the data source, you can configure these parameters.
-
Input Map passes variables from the Flexcard to the data source using the Key and Value options.
-
Options Map sends additional key-value pair information to the Input Map passed to the remote method.
-
Test Parameters enable you to preview a Flexcard using real data by adding test variables that the query can use to return live data.
The image shows the data source options.
Now that you’re familiar with the Setup panel, learn about the Properties panel next.
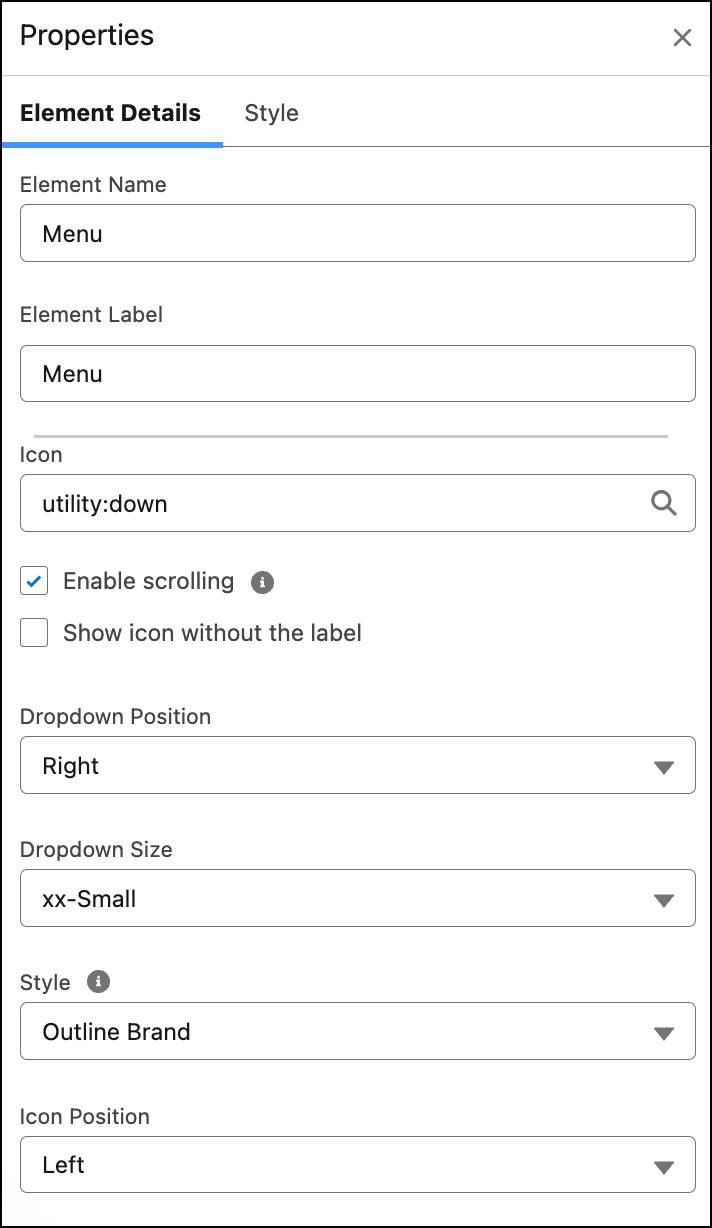
Properties Panel
When you select an element on the canvas, you can change the element’s properties in the Properties panel to specify how it behaves. For example, when you select a Menu element, you can update the name, label, icon options, dropdown options, size, and other details.
Use the Style tab to style your Flexcard elements and update their appearance in real time.
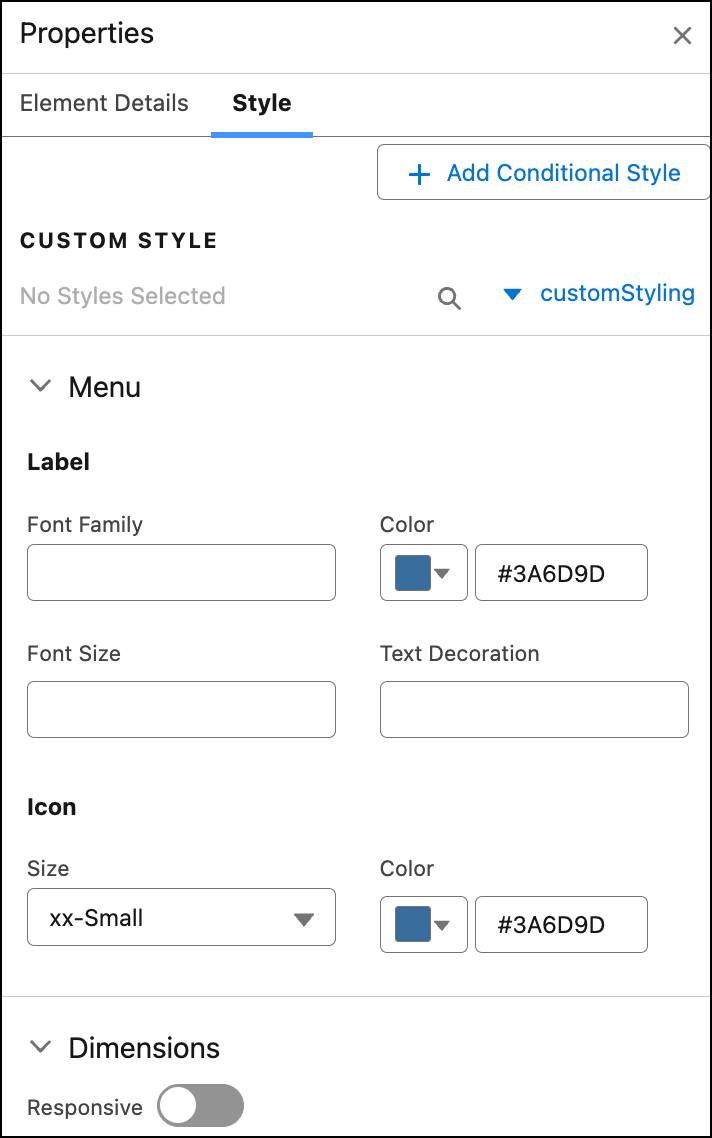
This panel has settings for configuring backgrounds, sizes, borders, padding, margins, height, fonts, and responsiveness. When you create a style for an element, save it for use on multiple elements on the Flexcard. For custom designs, create and apply custom CSS.
Now that you’re familiar with the Flexcard designer, take a look at some best practices for using Flexcards.
What’s Next
In this unit, you explored the Setup and Properties panel. You learned how to configure and style your Flexcard. In the next unit, learn how to test and activate your Flexcards. Also, learn about some of the best practices on how to use Flexcards.