Set Up Multi-Person Appointments
Learning Objectives
After completing this unit, you’ll be able to:
- Define multi-resource scheduling.
- Enable multi-resource scheduling.
When Two Brains Are Better Than One
Since Fola may need two or more expert advisors to join the customer for an appointment, Matt turns on multi-resource scheduling. That’s just a fancy term for the ability to book multiple resources for an appointment. Your resources can include your employees and also the meeting rooms that you have at a branch.
It’s pretty simple to do.
- From Setup, enter
Salesforce Schedulerin the Quick Find box, and then select Salesforce Scheduler Settings.
- Enable Multi-Resource Scheduling.
- Click Save.

Make It Visible
Although Matt has turned on multi-resource scheduling, his team cannot use it until he’s made the option visible on their pages.
- Click
 and select Setup.
- Click Object Manager.
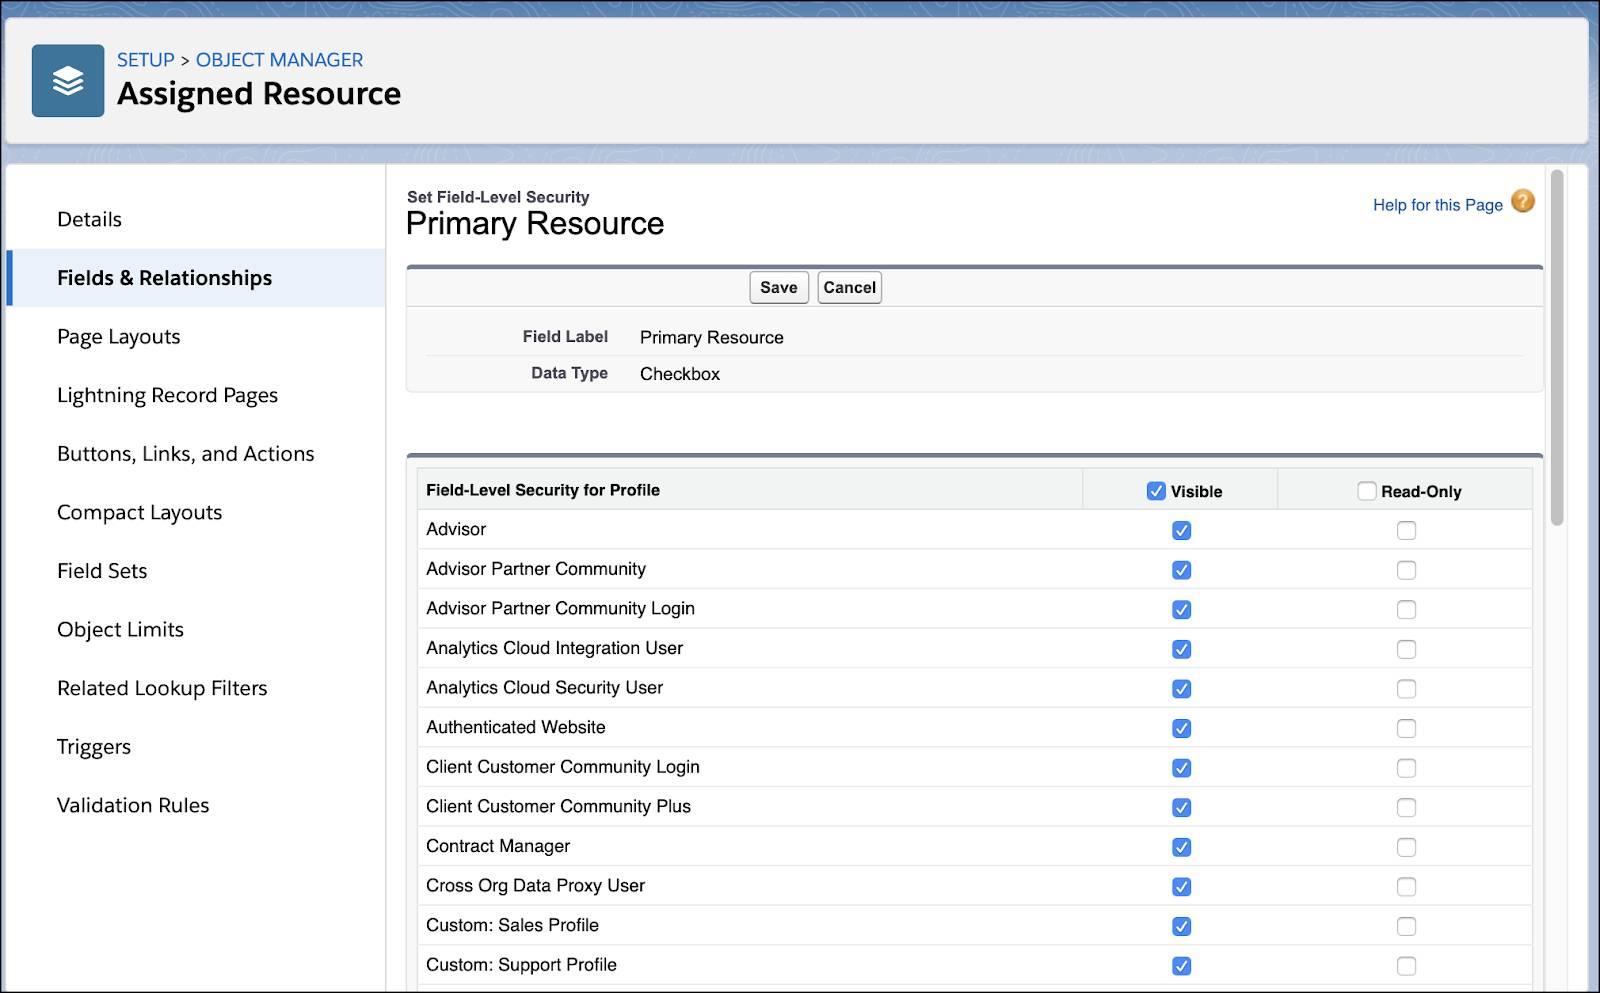
- Select Assigned Resource.
- Select Fields & Relationships.
- Select Primary Resource.
- Click Set Field-Level Security.
- Select the Visible checkbox for all profiles that need access to multi-resource scheduling in Salesforce Scheduler, including the System Administrator.
- Click Save.

Time for a New Appointment
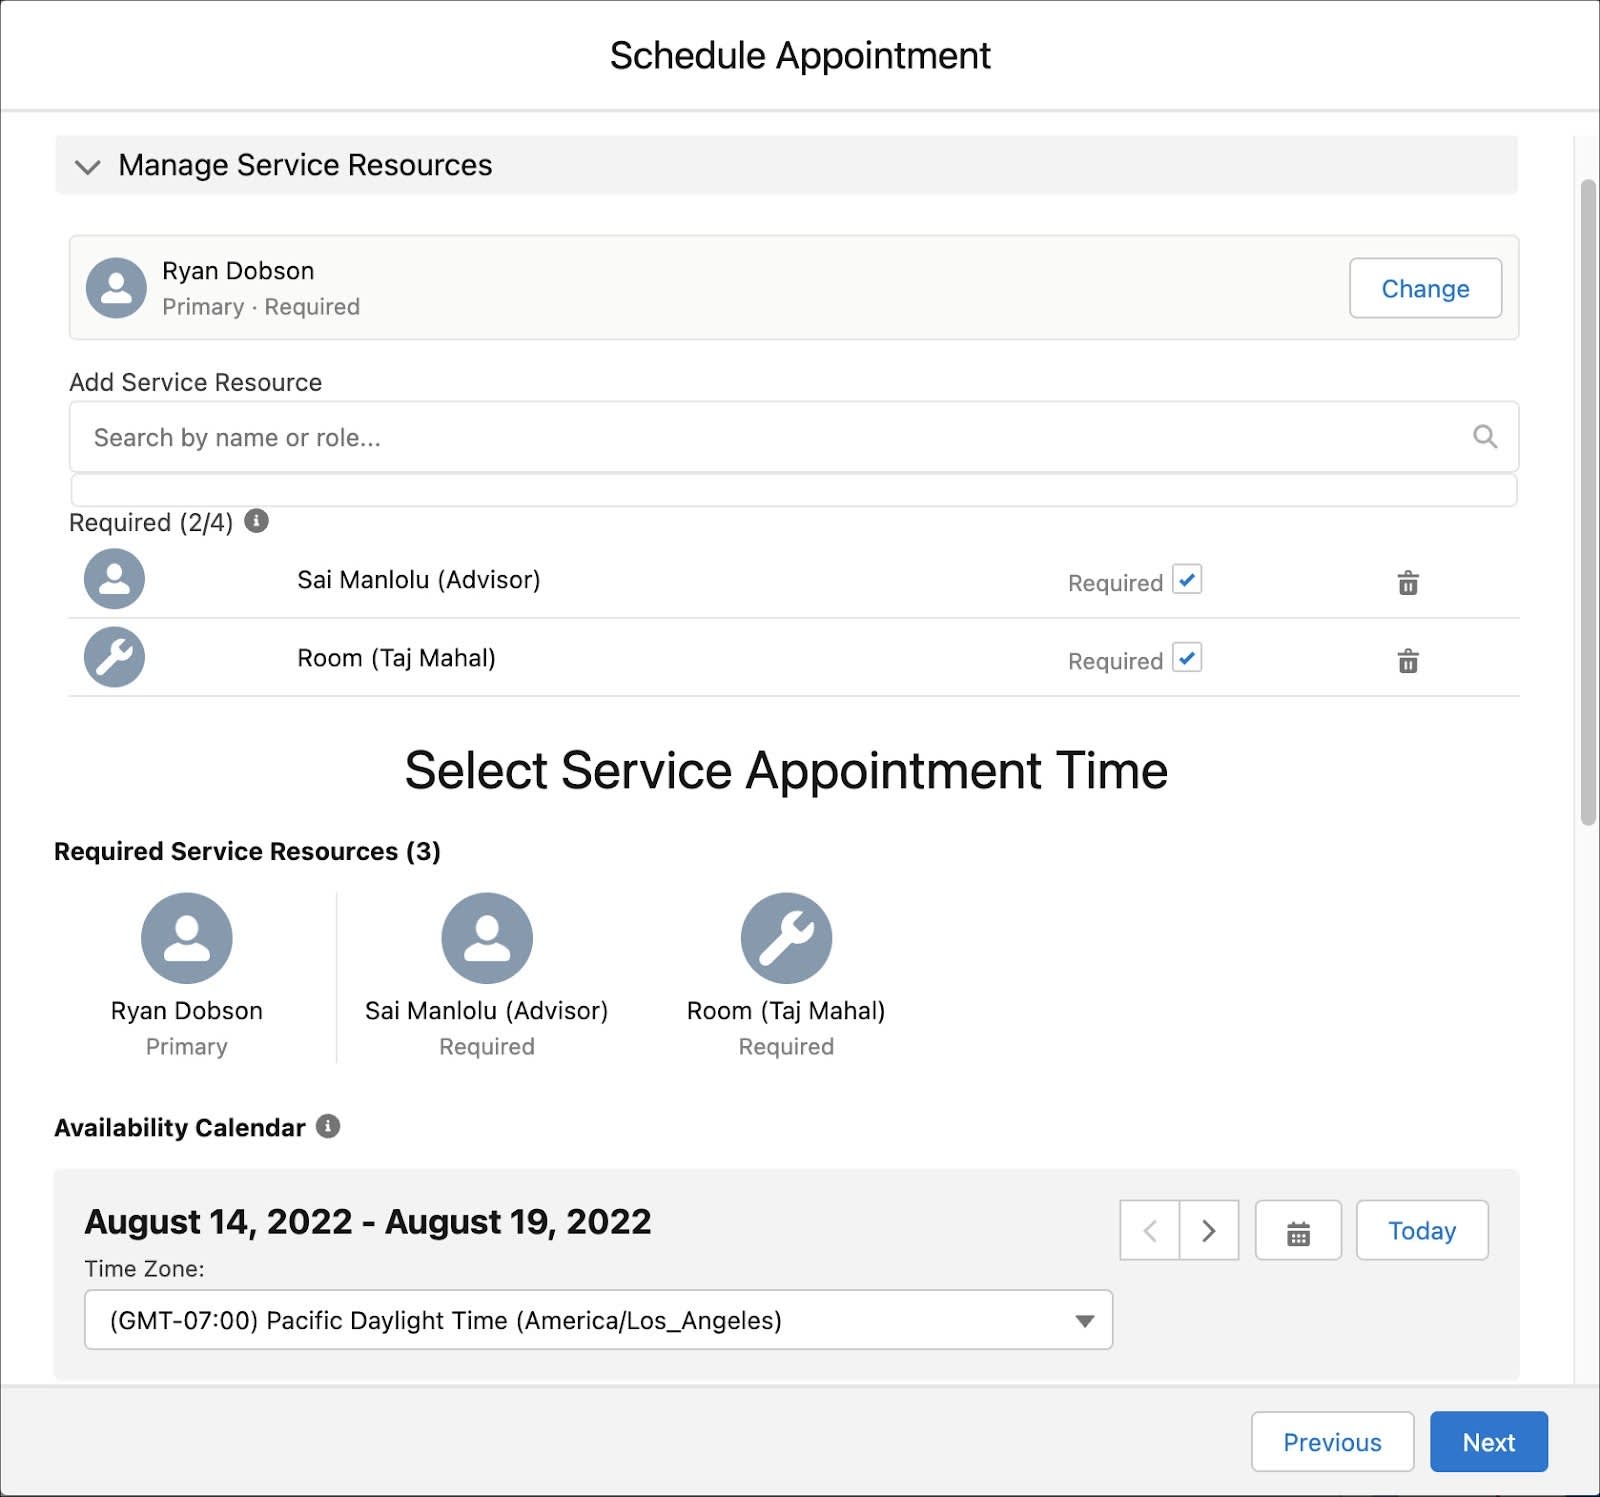
With the Taj Mahal conference room added and multi-resource scheduling turned on, Fola can quickly book multiple financial advisors along with the conference room for appointments.

For the next customer appointment, she selects Sai Manlolu to accompany Ryan (who’s the primary resource), and adds the Taj Mahal room. All she needs to do is choose an auspicious date and time from the availability calendar on the Schedule Appointment window.
In the next unit, Matt gets started with inbound scheduling.
Resources
