Craft Reward Plans
Learning Objectives
After completing this unit, you’ll be able to:
- Explain how to set up a voucher definition and issue vouchers.
- Outline how to create promotions and send them to a specific audience.
- Describe how to reward members using badges and games.
Create Voucher Definitions
Vouchers are an effective way to encourage members to keep purchasing more. You can reward members with a voucher after they’ve made a purchase, as part of a promotion, during a lean period, or when the member is about to reach a new tier.
Loyalty Management helps you reward members with three types of vouchers.
- With Fixed Value vouchers, members get a specific discount amount on a product or service.
- With Discount Percentage vouchers, members get a specific discount percentage on a product or service.
- With Product or Service vouchers, members get to purchase a specific product or service.
If you want to target members during a specific season, you can define the time frame that members can use the vouchers.
Loyalty Program Manager Mary Levy is impressed. She decides to create two vouchers. The first voucher offers members a 10% discount until the end of the year. The other voucher provides a $50 discount on Cloud Kicks’s cross-training shoes and must be used within 2 months.
The same voucher can be issued to multiple members, so Mary first creates a voucher definition. She can then use the voucher definition to issue unique vouchers to each target member. Mary creates two voucher definitions through the Launchpad, the initial window that appears after setting up a loyalty program. She specifies the voucher type and expiration details.

Now that the voucher definitions are ready and active, Mary can issue a voucher to members through a promotion.
Spread the Word with Promotions
Promotions are a great way to increase customer activity and provide unique perks to your loyalty program members. Based on a customer’s profile, you can plan a promotion that caters to their needs. You can also create promotions that are focused on season-specific products.
You can create three types of promotions in Loyalty Management.
-
Standard promotions reward members immediately after they complete an activity.
-
Cumulative promotions reward members after they complete multiple purchases that add up to a certain amount during a specific time period.
-
Joint promotions involve one or more partners who jointly contribute, offsetting liability because partners commit to a percentage of the promotion they want to fund. This helps capture liability at the promotion level.
Brands can use promotions to instantly gratify members by crediting points, or they can encourage increased customer engagement with vouchers.
Whether you're looking to quickly set up a promotion or manage complex, cross-industry campaigns, having the proper tools can make all the difference. You have multiple options to choose from to make the process of creating promotions easier.
Global Promotions Management
Global Promotions Management is a declarative platform for creating and managing end-to-end promotion capabilities. You can use the platform’s guided flow to quickly create promotions. The platform also offers out-of-the-box templates that ease the creation of promotions: Define the audience, products, channels, triggers, rewards, and more. And you get a promotion calendar so you can plan and schedule the promotions. Best of all, it’s a cross-industry platform, meaning you can create independent promotions that aren’t tied to a loyalty program. With Global Promotions Management, you can create promotions that target nonmembers specifically or a combination of members and nonmembers.
The Promotion Console app is a one-stop solution to run promotions for the company or the company’s loyalty program.
Mary creates a promotion for members and nonmembers called Spend $100 and Get $30 Off using the Spend X, Get Discount on Y + Rewards template. Anyone who makes any purchase above $100 during the promotional period gets a $30 discount on the latest Cloud Kicks sneakers.
Want to learn how to create promotions using promotion templates? Head over to Global Promotions Management in Loyalty.
Quick Promotions
With the Quick Promotions wizard, you can get a promotion up and running within a few minutes by following simple steps. You can define the promotion eligibility, rewards, and other details all within the wizard. For example, Mary wants to create a week-long promotion for Thanksgiving and offer members a $20 voucher on all purchases over $100. She uses the Accrual Events template to reward members for purchases and engagement.
To learn how to set up quick promotions, check out Quick Promotion Wizard Steps and Set Up a Loyalty Program.
Promotion Using Record Page
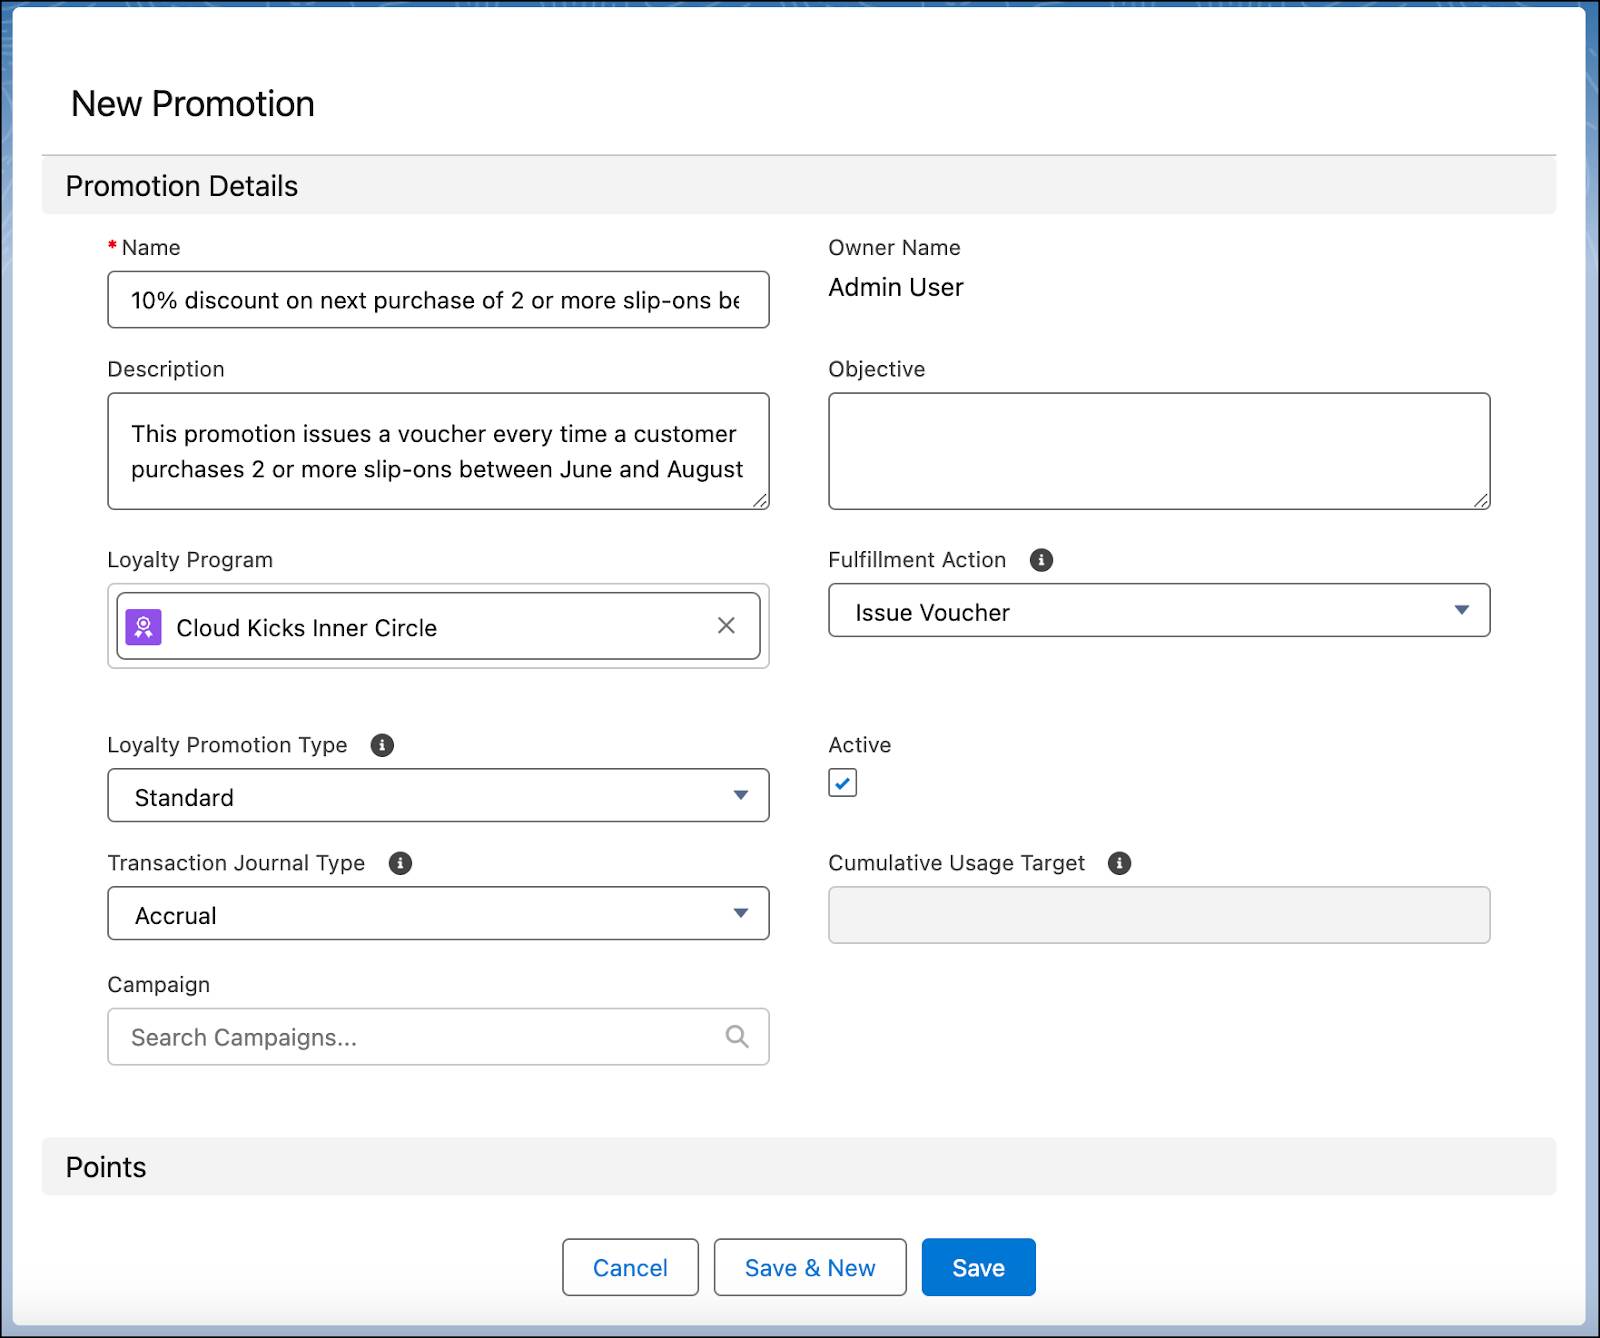
Summer is here. To promote the sale of Cloud Kicks slip-on shoes, Mary plans a standard promotion for members based in the southern states. If members purchase two or more slip-on shoes, they get a voucher for a 10% discount on their next purchase.
Here’s what her promotion looks like.

Send Promotions to a Target Audience
Mary has a specific target audience in mind for this promotion, but she doesn’t know how to filter for the audience among all the loyalty program members. She turns to Linda, the awesome admin, for guidance.
Linda automates the process of filtering the target audience by segmenting the loyalty program members using Data 360. She creates a segment that targets members from southern states and links it to the promotion that Mary created.
That didn’t take much time. Next, Linda creates a campaign in Marketing Cloud Engagement to email the promotion to the target audience.
By segmenting members and creating customized campaigns, Mary can reach members on different engagement platforms, with customized content based on their engagement with the brand.
Reward Member Milestones with Badges
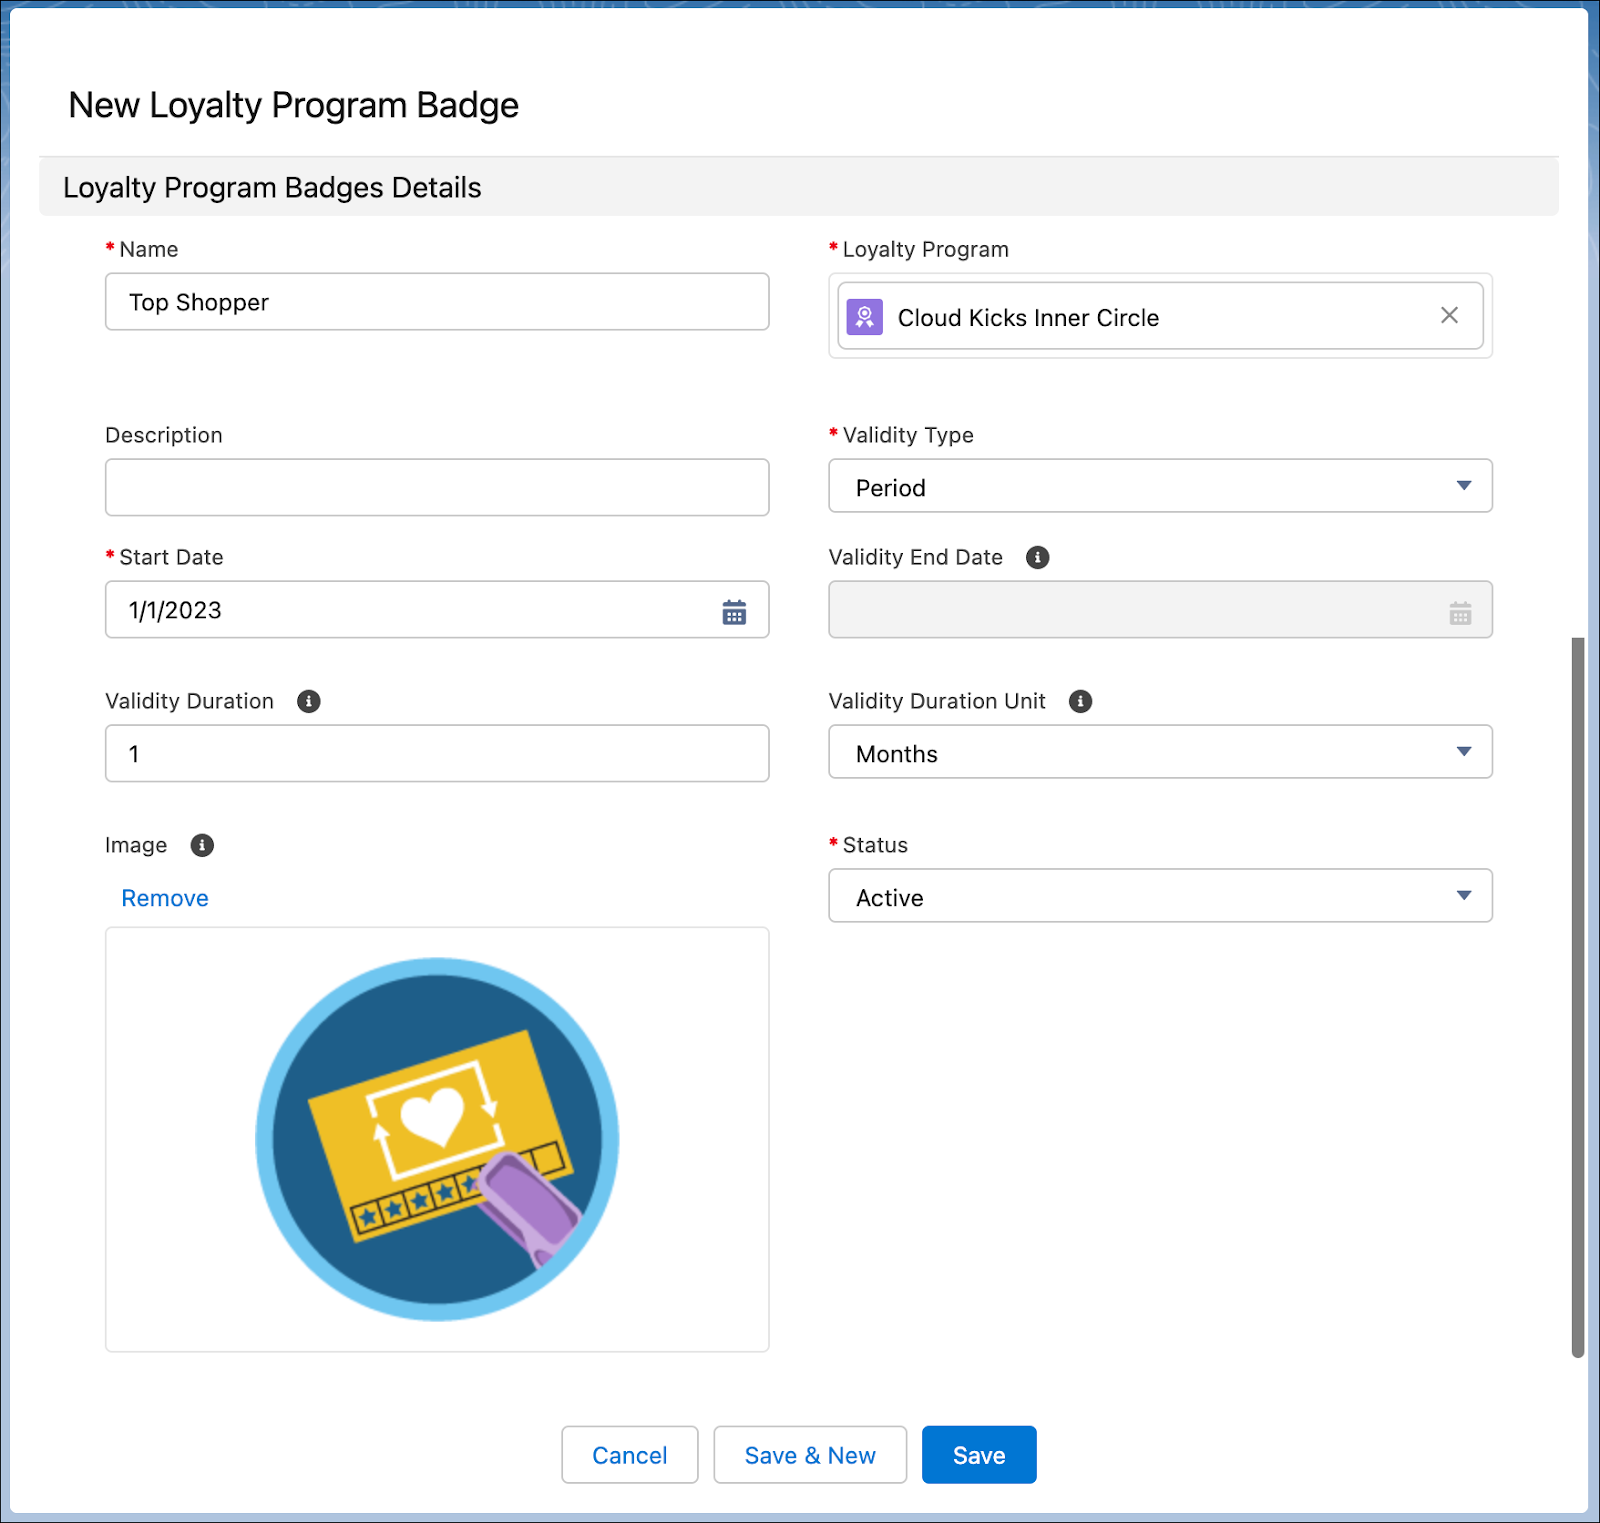
Another way to boost member engagement is to offer special recognition in the form of badges based on the member’s interaction with the loyalty program. For example, members receive an Evangelist badge after 10 social media mentions or a Frequent Customer badge after five transactions. Each badge comes with its own special icon.
Mary decides to create badges for members with the highest monthly transactions. Badges are valid until a specific date, irrespective of when they were assigned to the member, or for a specified duration after the assignment. Because the badge is related to monthly transactions, she sets the validity of the badge to one month.

The badge is ready, but how does the program know whom to assign the badge to, and when? The program assigns badges using rules, which define the conditions for eligibility and action associated with assigning the badge. Learn more about the rules in the next unit.
Offer Games to Members
Brands can keep their loyalty program members engaged by offering them fun and interactive games as rewards. Use these games to reward both purchase-specific activities, like placing an order, and nonpurchase activities, such as completing a survey.
These flashcards cover the game types available in Loyalty Management. Use these interactive flashcards to brush up on some key topics.
Read the information on each card, then click or tap the card to reveal related information. Click the right-facing arrow to move to the next card, and the left-facing arrow to return to the previous card.
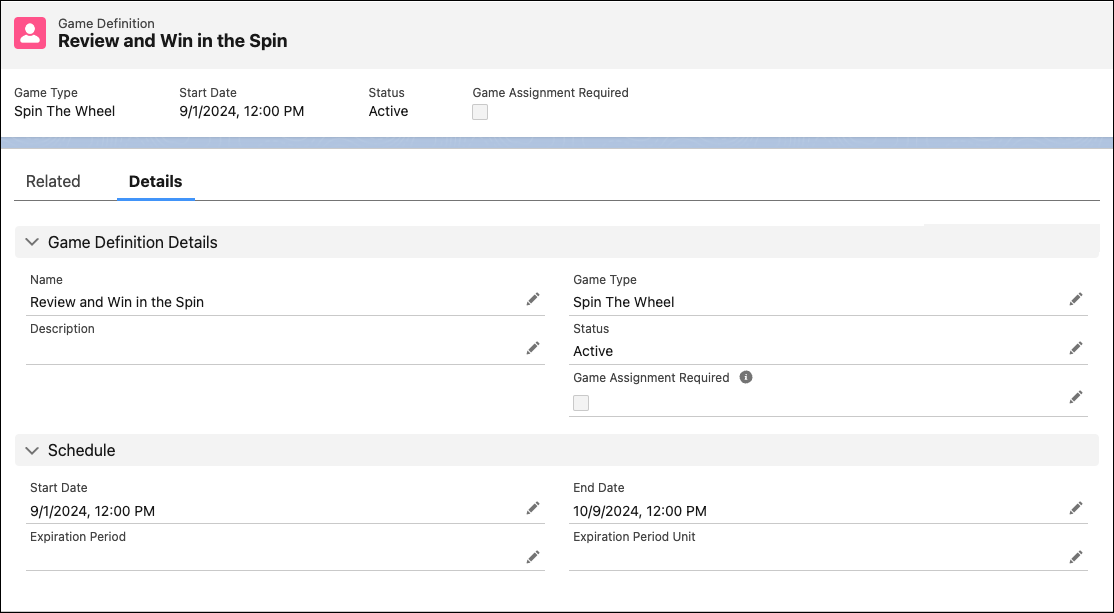
Mary decides to set up a Spin the Wheel game named Review and Win in the Spin. When a member reviews an order, they get to spin the wheel.

She includes various rewards for the game, such as discount vouchers and a free pair of socks.

Finally, Mary adds game assignment rules by using promotion setup processes or flows.
For a deeper understanding, check out this example video regarding how you can offer games.
In this unit, you learned how to set up loyalty program rewards. Next, you explore how to add partners and members to the loyalty program and manage the program effectively on a daily basis.
