Set Up APIs
Learning Objectives
After completing this unit, you’ll be able to:
- Explain how to set up connected apps.
- Describe how to configure process templates.
- Explain how to execute APIs.
Define the Requirement
To boost enrollment, Mary wants to run an email marketing campaign using a third-party marketing platform. However, Mary notices that only 20% of members have provided their email IDs. She decides to reward members 50 points if they update their profile with their email IDs. This option isn’t directly available in the POS kit, and there’s no available static API. However, Eugene can set it up using a configurable API. Here are the key steps.
- Set up connected apps.
- Configure process templates.
- Test and deploy APIs.
Let’s explore each step in detail.
Set Up Connected Apps
For third-party integrations to work, the data between the platforms must be synchronized with Loyalty Management. Here’s how Eugene does this.
As a first step, Eugene identifies the fields and objects in Loyalty Management that must be synchronized with the external systems. He then configures an integration platform that connects both systems to Loyalty Management.
Eugene uses a connected app to bring together the external systems and Loyalty Management. The app acts as a bridge that allows external systems to interact with Loyalty Management and exchange data in a controlled and secure manner. Linking both platforms gives the external platforms access to specific APIs, including those for member data retrieval.
Eugene creates the connected app in the Cloud Kicks org and enables the OAuth settings, which gives him the security keys for authentication. He specifies the access and permissions that the external application or service has to Salesforce data and functionalities. He then saves the authentication information in Custom Settings and configures the remote sites.
Next, let’s follow Eugene as he sets up the email update process that the API executes.
Configure Process Templates
When a member updates their email ID, the loyalty program must update the details in their Loyalty Program Member record and the related Contact record. Eugene uses the Update Member Details process template to configure this.

In this module, we assume you are a loyalty program manager or admin with the proper permissions to set up loyalty program processes in Loyalty Management. If you’re not a loyalty program manager or admin for Loyalty Management, that’s OK. Read along to learn how the manager would take the steps in a production org. Don't try to follow these steps in your Trailhead Playground. Loyalty Management isn't available in the Trailhead Playground.
Here’s how Eugene sets up the process to update member details.
- Click
 , and select Loyalty Management.
- Ensure that the All Loyalty Programs list view is displayed.
- In the Program Name column, click the Cloud Kicks Inner Circle loyalty program.
- Click the Loyalty Processes tab.
- In the Loyalty Program Processes related list, click New.
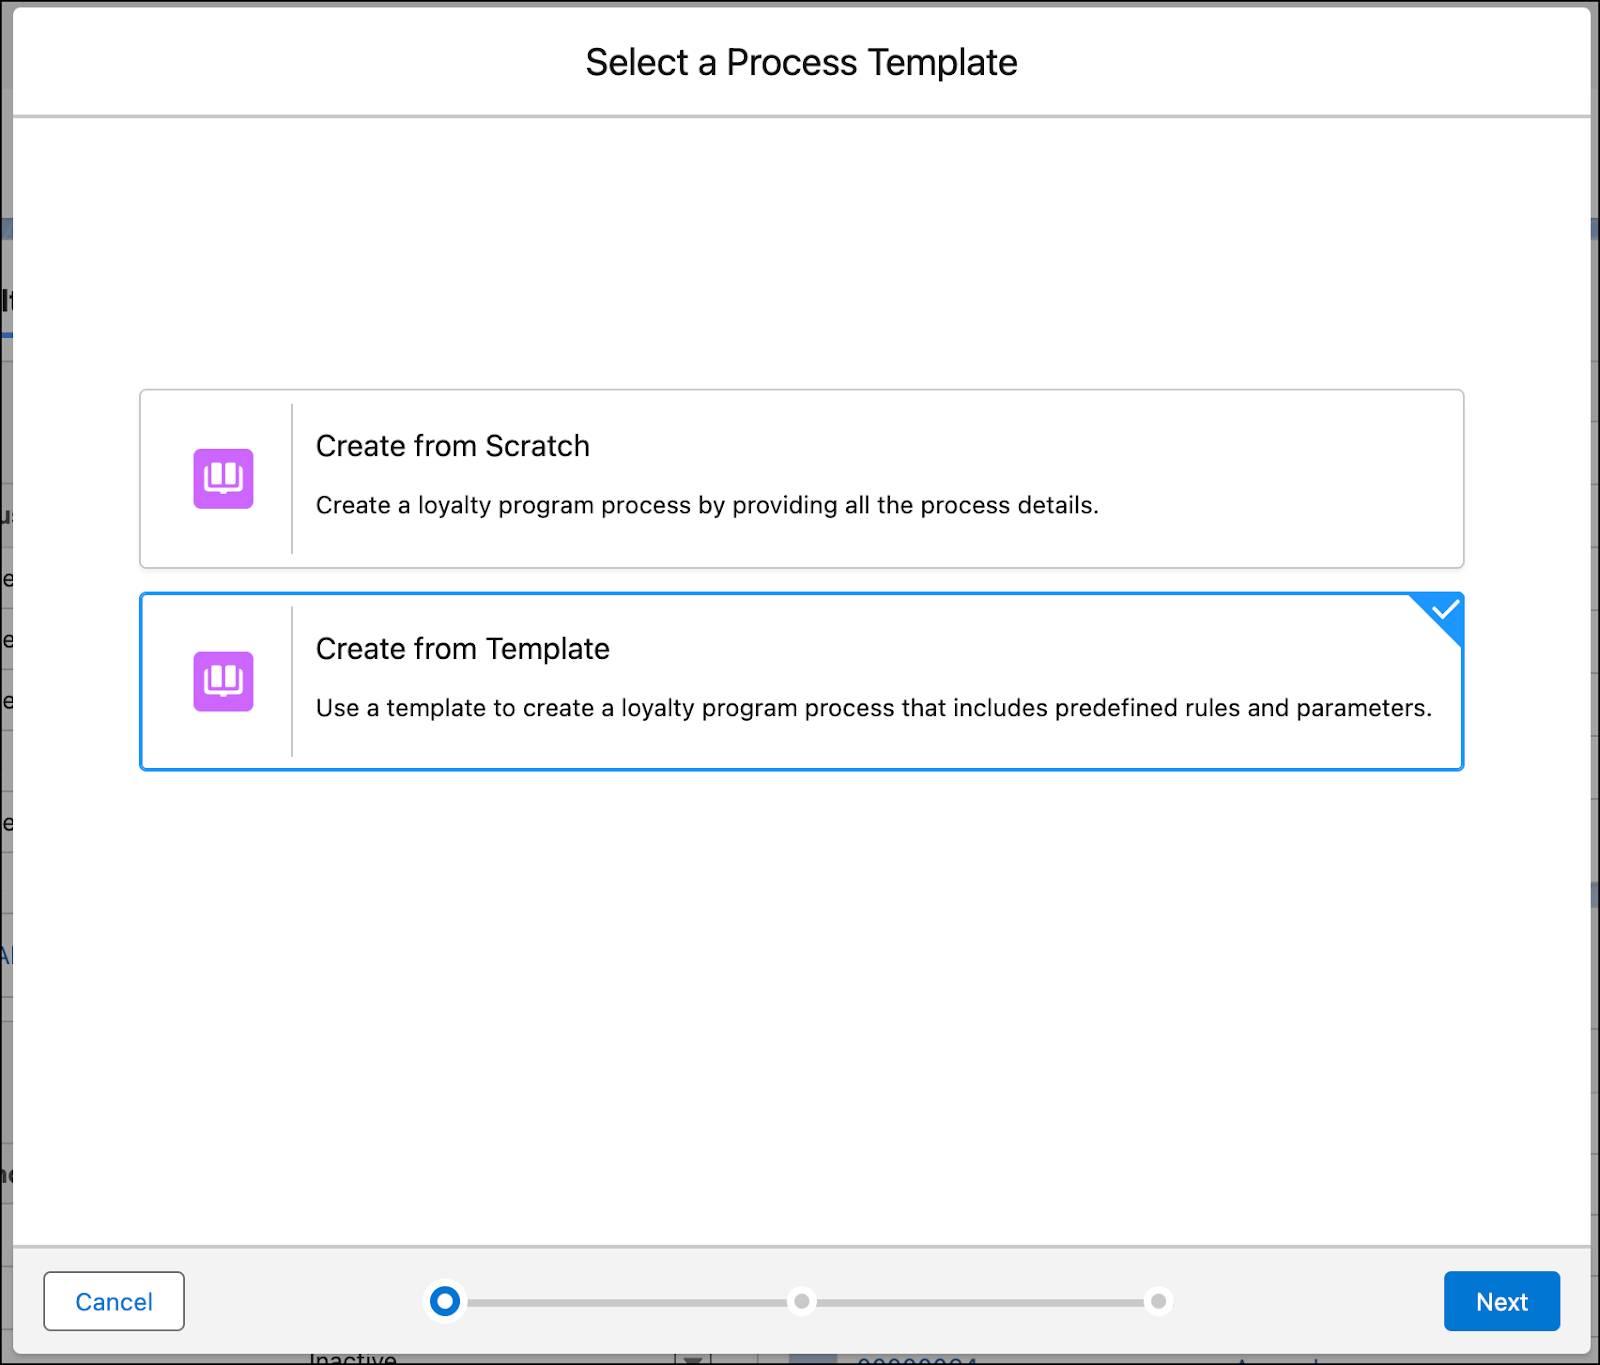
- In the Select a Process Template window, select Create from Template and click Next.
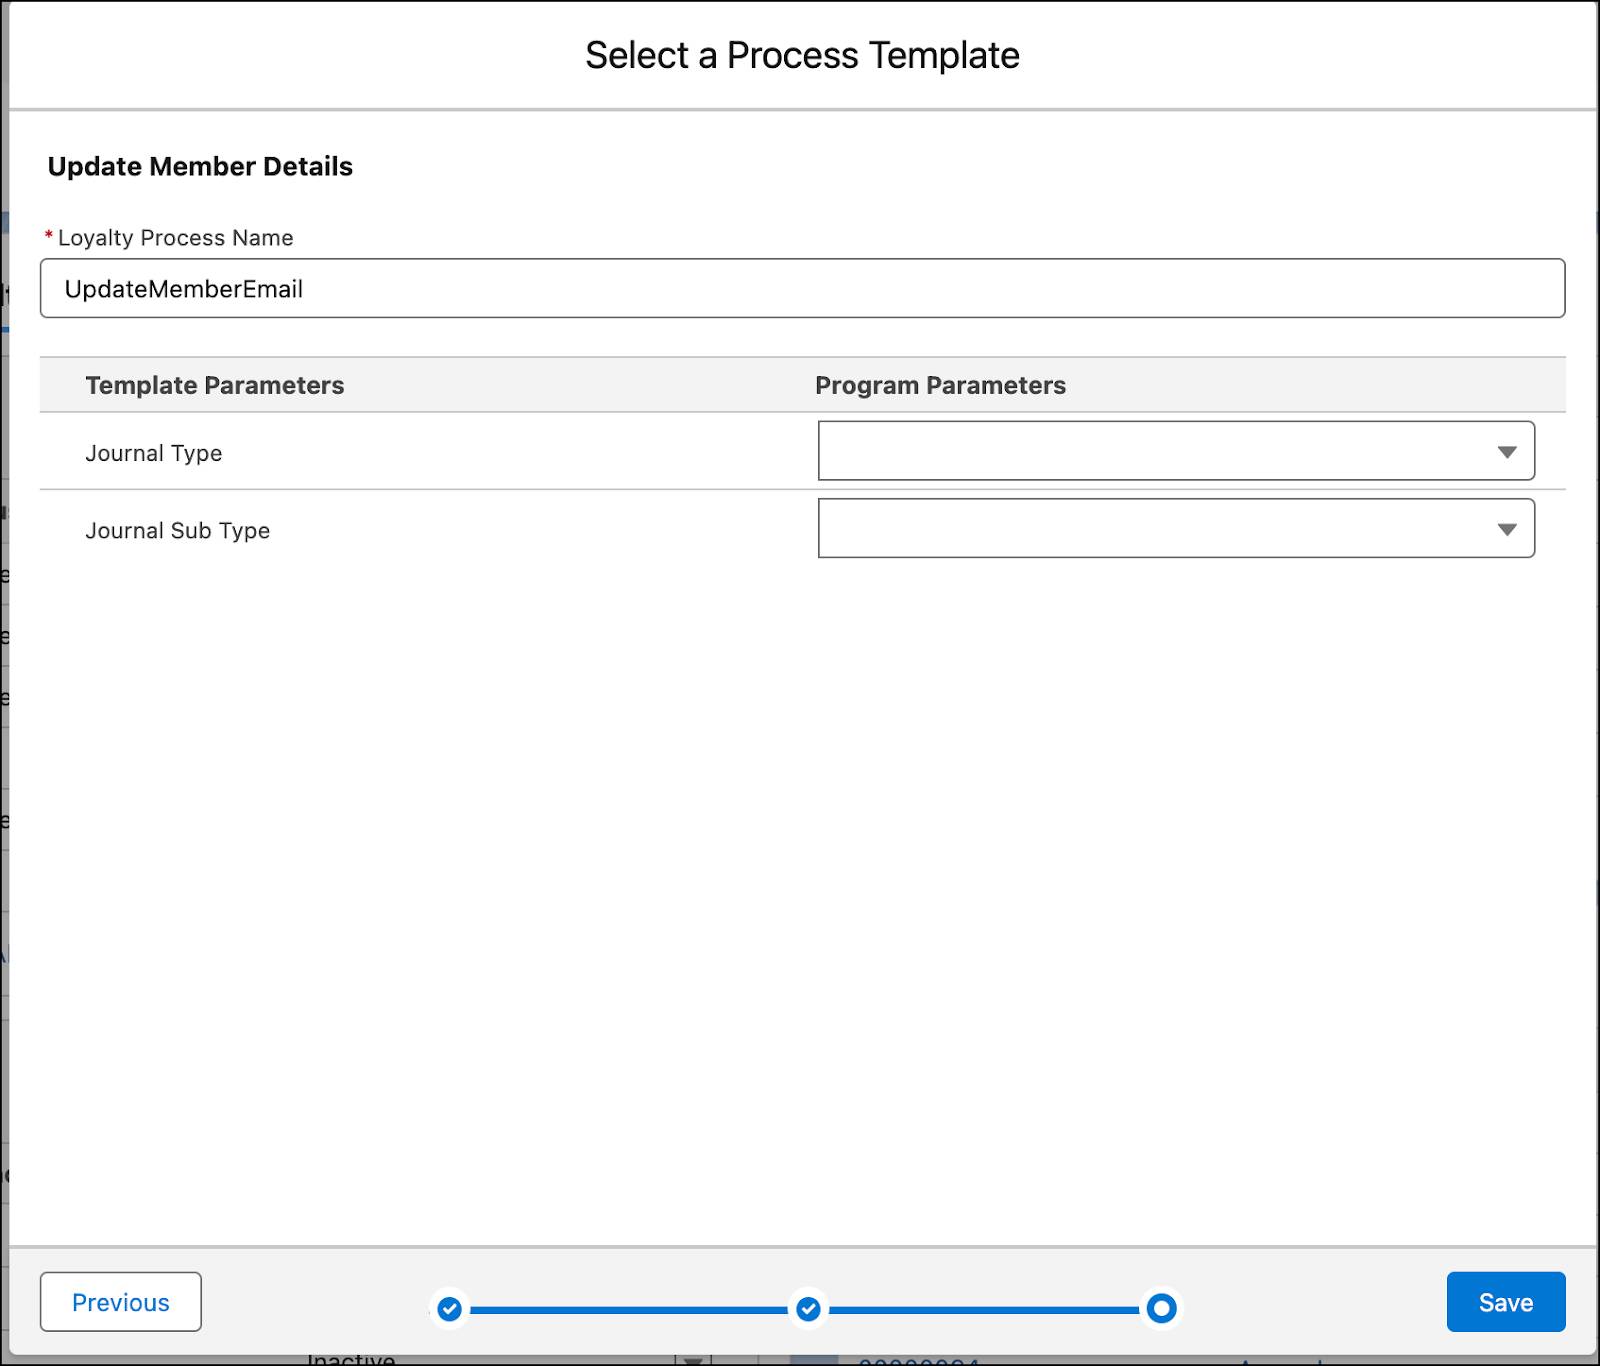
- Select Update Member Details and click Next.
- Enter Loyalty Process Name:
UpdateMemberEmail
- Click Save. Loyalty Management automatically creates the process and rules.
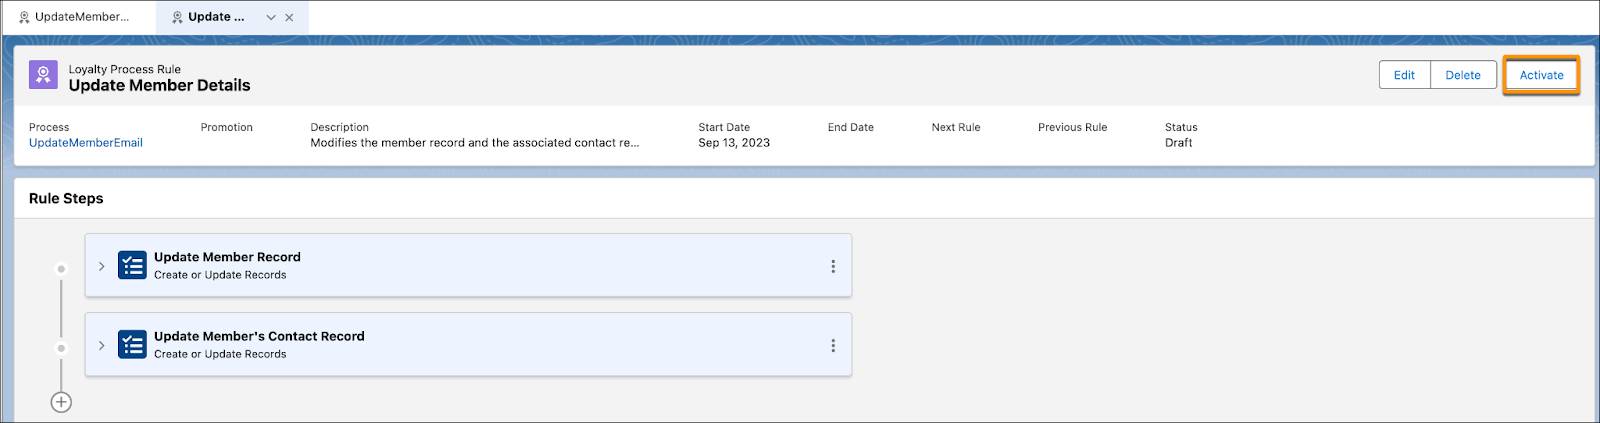
- Open the Update Member Details rule and click Activate.
- In the UpdateMemberEmail loyalty process record, click Activate.
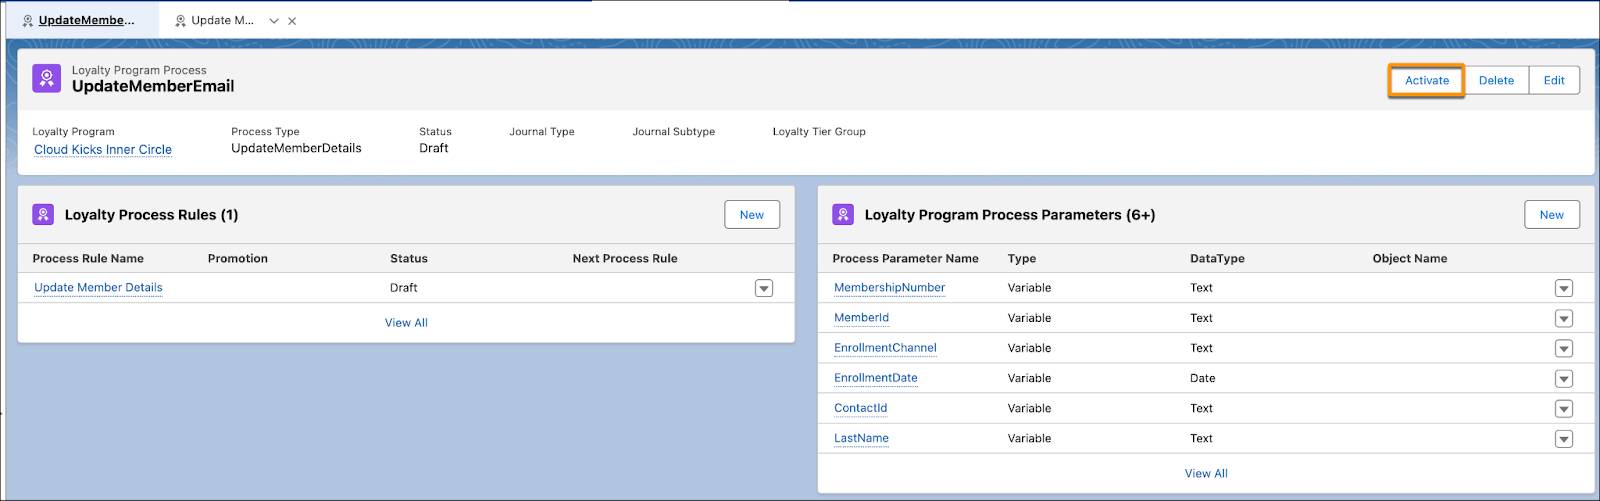
Eugene now has an active process with an active rule. Next, he uses the Update Member Details API to integrate the process with the ecommerce site. This ensures the process is executed when a member changes their details on the external site.
Eugene has set up the APIs for his requirement, which includes specifying the endpoints, data formats, request and response structures, authentication mechanisms, and other details. He documents the API specifications, such as configurations and endpoints, so other developers understand how to interact with the APIs effectively.
Before deploying the APIs, Eugene conducts extensive testing to ensure the APIs behave as expected.
Test and Deploy APIs
As a best practice, Eugene tests an API’s performance and functionality through an API development tool.
- Open a development tool of your choice.
- Log in using your Loyalty Management org credentials.
- Select the Environment and API Version.
- Navigate to Utilities and Rest Explorer.
- Select the HTTP method as POST.
- In the URL, enter
/services/data/v59.0/connect/loyalty/programs/Cloud+Kicks+Inner+Circle/program-processes/UpdateMemberEmail - Provide this payload and execute:
{
"processParameters": [
{
"CurrentMembershipNumber": "100009",
"MembershipNumber": "100009",
"EnrollmentDate": "2023-03-15",
"LastName":"Matthew",
"FirstName":"Abraham",
"Email":"abraham.matthew@nto.com"
}
]
}
The API runs and updates the member record with the email ID.
After ensuring the API executes the results correctly, he tests the remaining APIs. Finally, he deploys the APIs to the production environment, where external clients or applications can access them.
Having set up all the APIs, Eugene works with the User Experience team to design the end-user interactions that trigger the APIs.
Discover How APIs Are Triggered
As part of the API implementation, Eugene sets up API triggers, which are the events or conditions that initiate the execution of a specific API or a series of API calls. Here’s a look at some examples of these events.
Member Registration on Ecommerce Site
A new user lands on the Cloud Kicks site and sees a widget to enroll in the loyalty program. They enter their details and click the Join button. The registration process triggers the APIs to create a Person Account and a Loyalty Program Member record for the new user. The API receives user details and generates a unique member ID, storing relevant information in Loyalty Management.
Integration with Point-of-Sale (POS) Systems
A member makes an in-store purchase. An action button on the POS screen triggers a Loyalty API to synchronize transaction data. This ensures that points are credited to the member's account in real-time, providing a seamless experience.
Similar triggers can be set up on other sites and systems that trigger different APIs.
Conclusion
Using the available Loyalty Management APIs, Eugene successfully integrates the loyalty program with the POS and ecommerce systems. Mary has since been noticing enhanced customer engagement, improvement in user experiences, and improved loyalty program effectiveness. Use business APIs to integrate external systems with Loyalty Management for performing everyday processes. Use SObject APIs to retrieve basic metadata for a specified object, or create a record for the specified object. And use SObject APIs to retrieve basic metadata for a specified object, or create a record for the specified object.