Dig Deeper into Lightning Web Security
Learning Objectives
After completing this unit, you’ll be able to:
- Explain how Lightning Web Security works.
- Enable Lightning Web Security in your org for a component from another namespace.
Isolation Through Virtualization
We’ve already mentioned that Lightning Web Security works by isolating components in their own JavaScript sandboxes dedicated to their namespace. But how does that work? Let’s take a look at virtualization.
Virtualization is the industry standard for isolation. Virtualization works by transparently replicating the host environment, and running code for each namespace in its own virtual environment inside the host.
You can have many virtual environments running code simultaneously inside your host environment. This keeps all of the namespaces in your org running while preventing code in these namespaces from accessing or being affected by the resources in another virtual environment. Any malicious code in one virtual environment stays put and can only cause harm in the virtual environment where it’s running.
Virtualization Engine
At the browser level, the virtualization engine runs inside the host environment to create and manage these virtual environments. This engine can access all of the resources in the host environment and can also control which resources are available to other virtual environments.
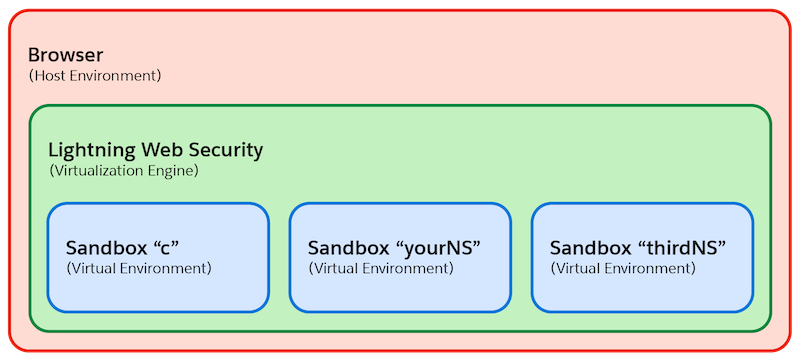
Lightning Web Security acts as the virtualization engine in the host environment (the browser). The namespace JavaScript sandboxes are the virtual environments.
Distortions
One of the benefits of Lightning Web Security is that it does not require the use of secure wrappers to prevent behaviors that are not safe. Instead, it controls access to the resources in each virtual environment by selectively modifying code at the JavaScript API level. These modifications are called distortions and are applied in the JavaScript sandboxes to resources like global objects, cookies, network access, local storage, and so on. Distortions subtly alter functionality to keep your environment more secure.
These JavaScript distortions:
- Prevent attempts of the API to alter content and data outside of the JavaScript sandbox.
- Confine running code to the sandbox.
- Restrict or reduce access inside the JavaScript sandbox to DOM and shared global objects such as window.location, and data like cookies.
Lightning Web Security API distortions fall into these three categories.
- Content filtering: Filters out attempts to access properties in other sandboxes—for example in document.cookie, localStorage, and sessionStorage—but still allows them in the current sandbox.
- Sanitization: Strips out malicious code, for example from innerHTML, and outerHTML elements.
- Property accessor modification: Prevents reading or writing values of certain properties like shadowRoot.mode.
To learn more about Lightning Web Security distortions follow the link in the Resources section.
Try Lightning Web Security in an Org
In this section, there are steps you can follow to see Lightning Web Security in action. We don’t have any hands-on challenges in this module, but you can practice the steps in your Trailhead Playground. To do so, you need some familiarity with Salesforce DX, and these tools installed.
- Visual Studio Code with the Salesforce Extension Pack
- Salesforce CLI
If you’re unsure about any of these requirements, complete the Quick Start: Lightning Web Components project.
You complete these steps in your own hands-on org. We recommend using a new Trailhead Playground to make sure it doesn’t contain anything that might conflict with these activities. To get a new playground, in Trailhead, click your profile picture, select Hands-On Orgs, then click Create Playground. When your playground is ready, open it and click Get Your Login Credentials and change your password. You need these details to authenticate into your org in a later step.
Lightning Web Security is automatically enabled in Trailhead Playgrounds as of the Winter '23 Release. This means that for this activity to work correctly, you first need to disable Lightning Web Security.
- In your new Trailhead Playground, click
 .
. - In the Quick Find box enter
Session Settings. - In Session Settings, locate Lightning Web Security and deselect the checkbox. Changes you make to this setting may take 10 or 15 minutes to reflect in your org due to caching.
- Click Save.

Start by using a component from another namespace. In this example you install the Lightning Messaging Utility package, then manipulate some code to see how Lightning Web Security allows you to use components from other namespaces. Lightning Messaging Utility is an AppExchange managed package that contains components to help you display messages and notifications using the Lightning Design System.
First, install the Lightning messaging utility package.
- In your playground, in the Playground Starter app, click the Install a Package tab.
- In the Package ID field, paste
04t5w000003gWWBAA2. - Having trouble installing the package? Read this article for help.
- Click Install.
- Select Install for All Users.
- Click Install.
- Click Done.
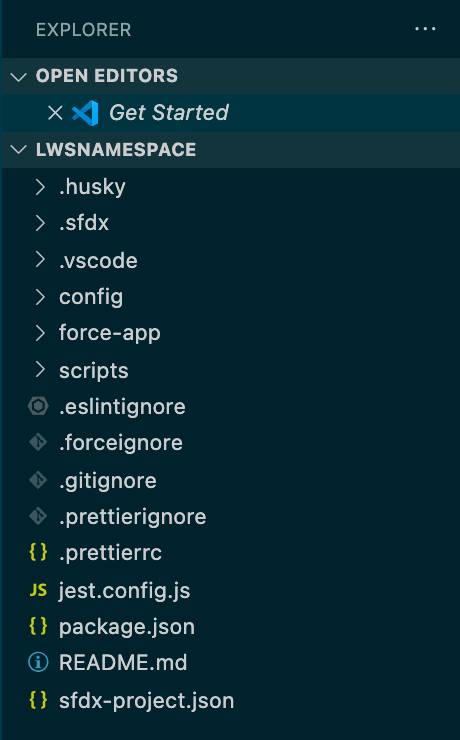
Next, create a project in Visual Studio Code. Since you’ve set up your development environment, you can create a simple Lightning web component.
- In Visual Studio Code, open the Command Palette by pressing Ctrl+Shift+P (Windows) or Cmd+Shift+P (macOS).
- Type
SFDX. - Select SFDX: Create Project.
- Press Enter to accept the standard option.
- Enter
lwsNamespaceas the project name, then press Enter. - Select a folder to store the project.
- Click Create Project. You should see something like this as your base setup.
Now, you can authorize your Trailhead Playground.
- In Visual Studio Code, open the Command Palette by pressing Ctrl+Shift+P (Windows) or Cmd+Shift+P (macOS).
- Type
SFDX. - Select SFDX: Authorize an Org.
- Press Enter to accept the Project Default login URL option.
- Type myDevorg as the alias, then press Enter.
This opens the Salesforce login in a separate browser window. - Log in using your Trailhead Playground credentials.
- If prompted to allow access, click Allow.
- After you authenticate in the browser, the CLI remembers your credentials. The success message should look like this.

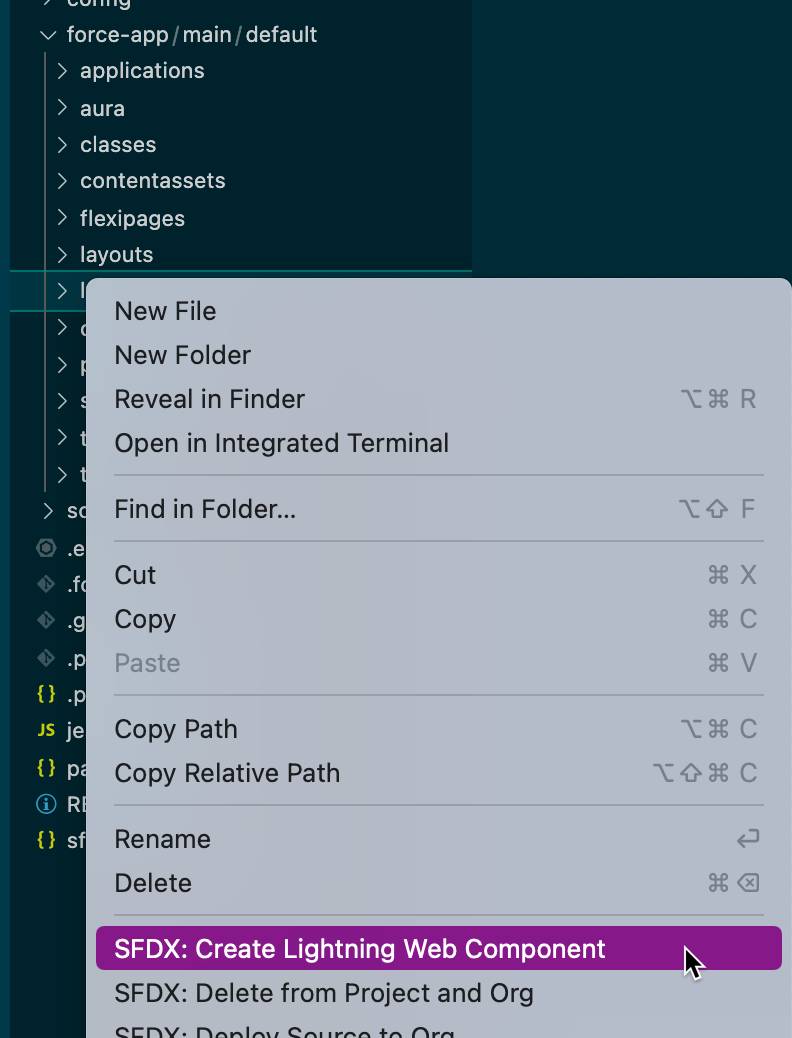
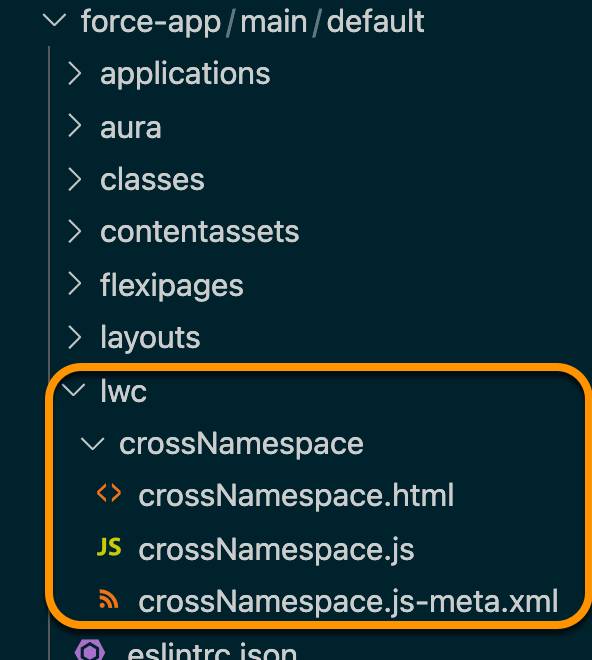
Next, create a Lightning web component.
- In Visual Studio code, in your new folder, expand
force-app. - Right click lwc, then select SFDX Create Lightning Web Component.
- In the Command Palette, enter
crossNamespacefor the name of the new component, then press Enter. - Press Enter again to accept the default
force-app/main/default/lwc. - You’ll see the newly created files in the lwc folder.
Now, update the code in the crossNamespace component so that it references a different namespace. Notice that this code references a component in the ltngmu namespace.
- In the
crossNamespace.htmlfile, replace the code with the following code. -
<template> <lightning-card> <div class="slds-p-around_small"> <p>Message displayed using Lightning Messaging Utility:</p> <ltngmu-lwc-messaging-utility message-type="alert" show-message="true" message-body="hello!" message-variant="warning" show-icon="true" icon-name="utility:warning" ></ltngmu-lwc-messaging-utility> </div> </lightning-card> </template> - Save.
- In the
crossNamespace.js.meta.xmlfile, replace the code with the following code. -
<?xml version="1.0" encoding="UTF-8" ?> <LightningComponentBundle xmlns="http://soap.sforce.com/2006/04/metadata"> <apiVersion>56.0</apiVersion> <isExposed>true</isExposed> <targets> <target>lightning__AppPage</target> </targets> </LightningComponentBundle> - Save.
Now, deploy the code to your Playground.
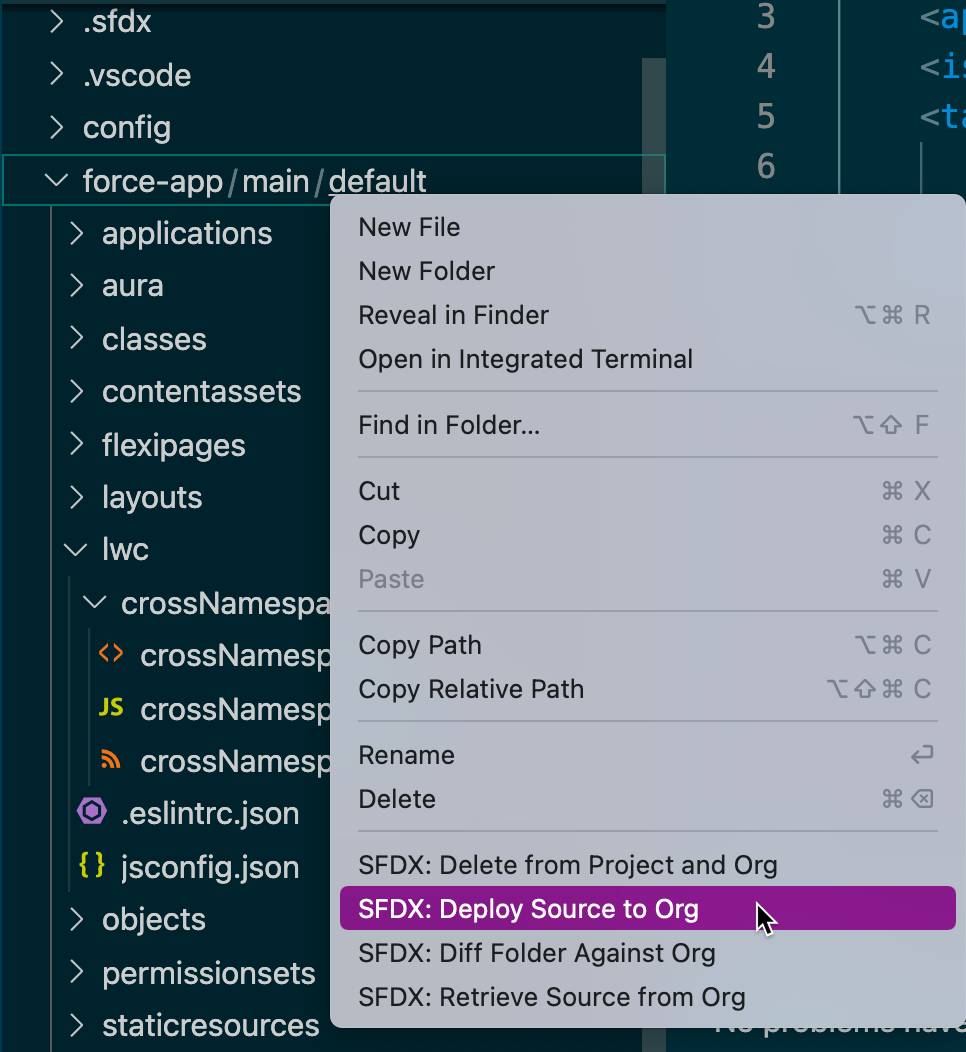
- Right click the
defaultfolder underforce-app/main. - Click SFDX: Deploy Source to Org.
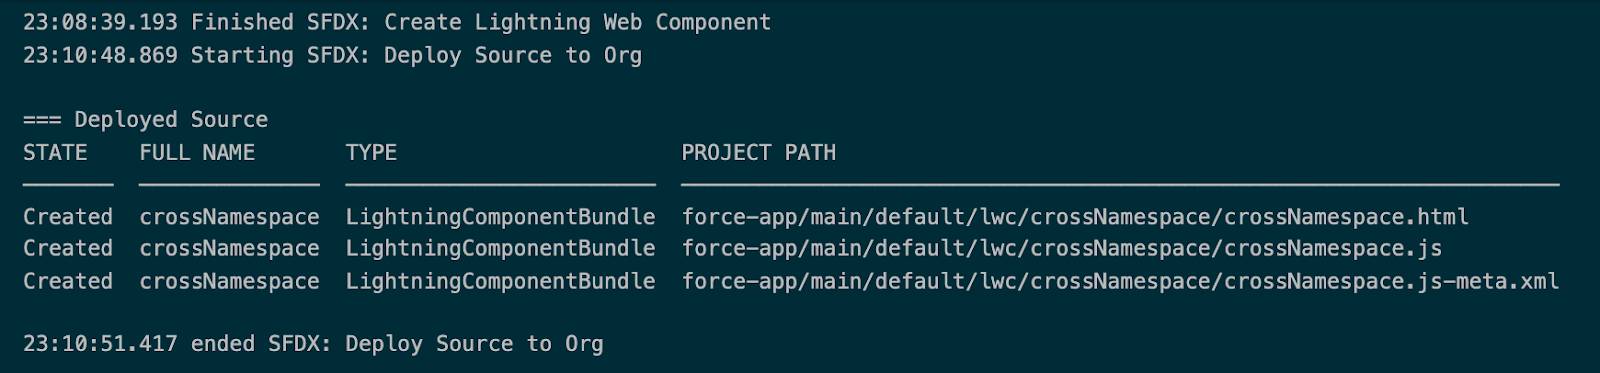
- You can see the status of your deployment in the Output tab of the integrated terminal.
Next, create a page in Lightning App Builder to view your component.
- In your Playground, click Setup.
- From Setup, enter
Lightning App Builderin the Quick Find box, and select it. - Click New.
- Select App Page and then click Next.
- In the Label field, enter
LWS Examplesand then click Next. - Select One Region.
- Click Finish.
- Click Save.
- Click Activate.
- Select Activate for all users and then click Save.
- Click Finish.
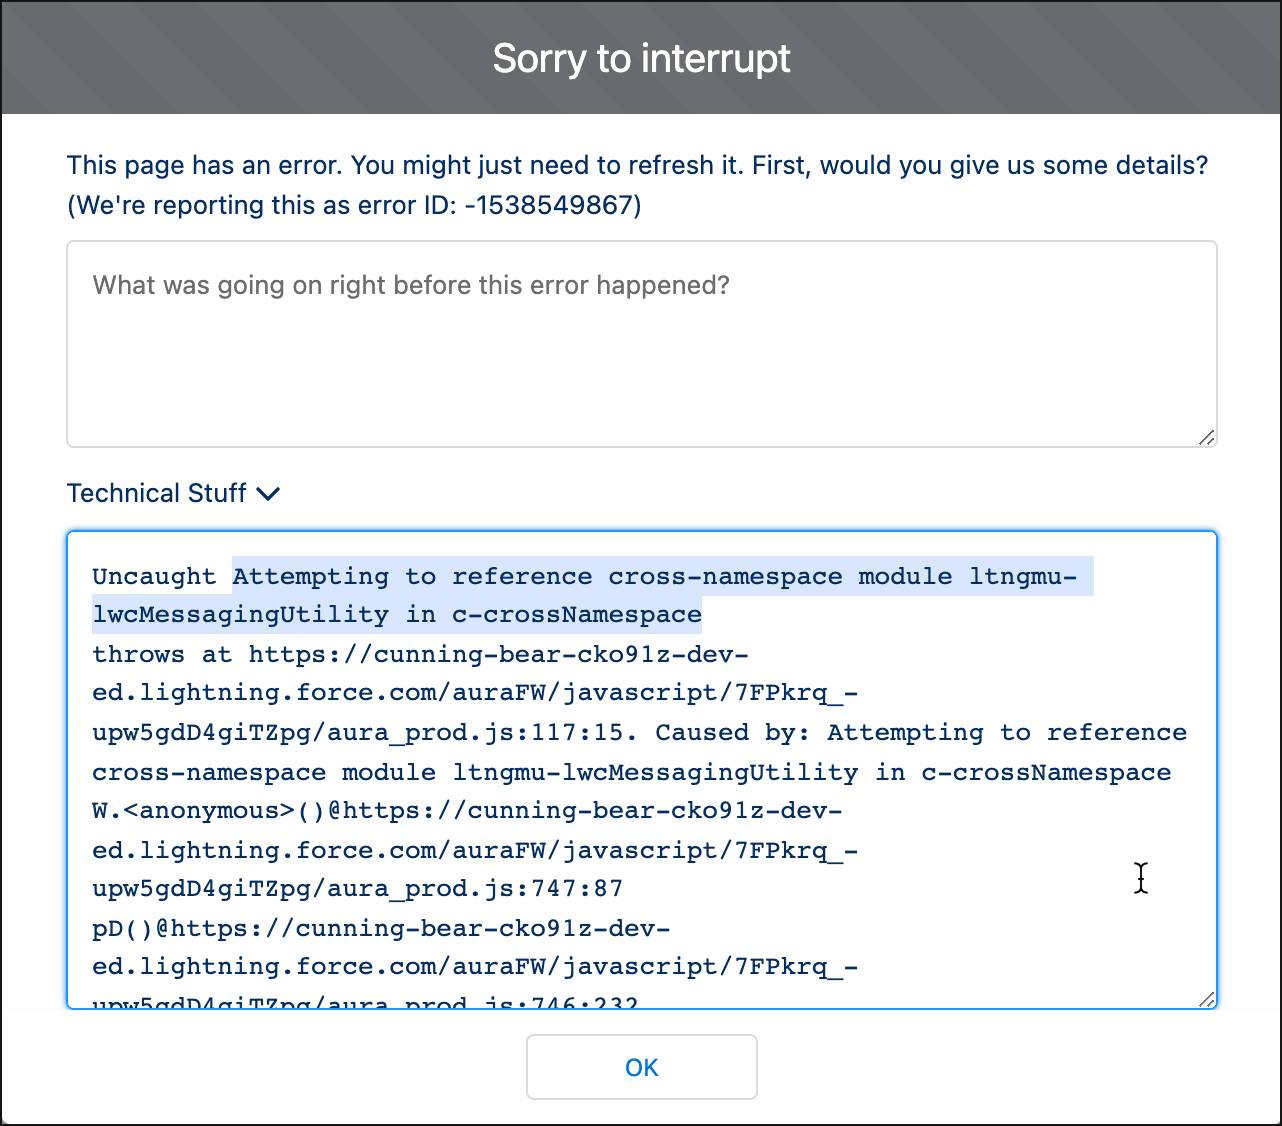
- Type crossNamespace into the component search box at the top left of the screen, then drag the crossNamespace component into the top frame on the page.
- Right away you see that an error message displays instead of your component. Expand the Technical Stuff field to see more details about the error. It tells you the component is attempting to reference a cross-namespace module.
Now, enable Lightning Web Security to see the component display correctly.
- Click OK to close the error message.
- Click
 then click Leave to return to Setup.
 - In the Quick Find box enter
Session Settings. - In Session Settings, locate Lightning Web Security and select the checkbox.
- Click Save.

Now, add the component to the LWS Examples page again.
- Return to Lightning App Builder.
- On LWS Examples, click Edit.
- Drag the crossNamespace component to the main window.
- Click Save.
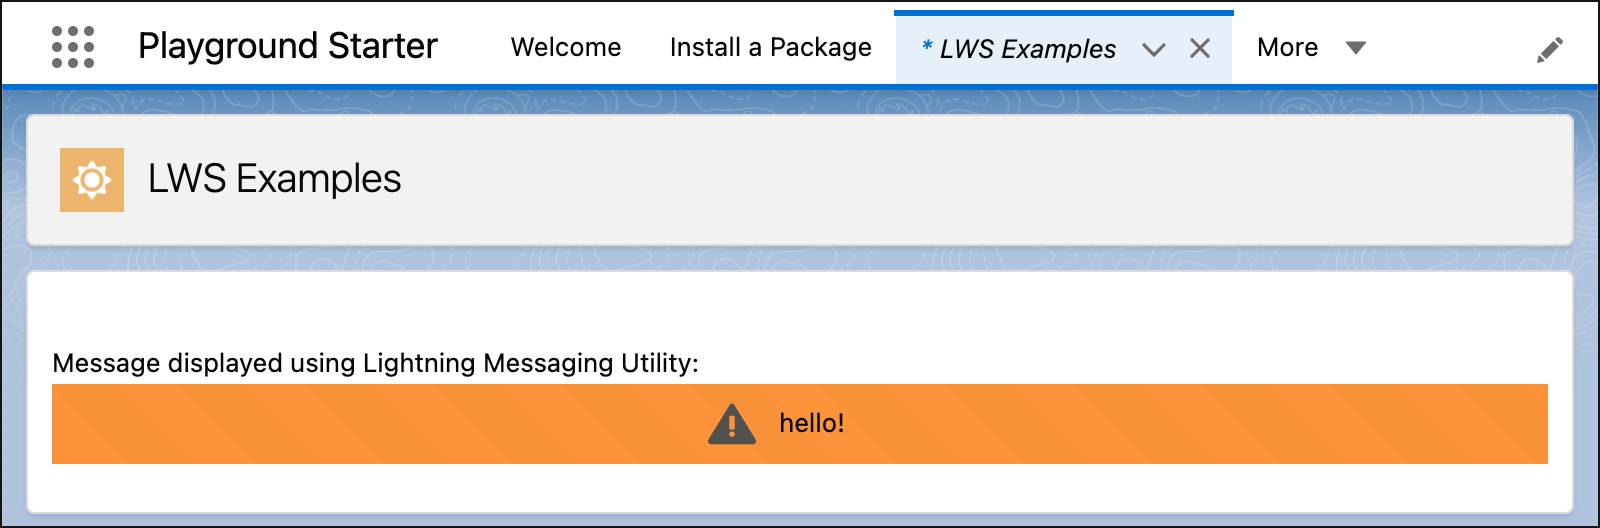
- You can already see the component display correctly!
Now see it in the LWS Examples app.
- Click .
- Click
 .
. - Search for and open LWS Examples.
- The Lightning Messaging Utility component that previously did not work correctly because it contains a component from another namespace now works correctly!
You learned how Lightning Web Security works to modify code to keep your components secure. In the next unit, learn about tools to help you create LWS-compatible components and troubleshoot issues that may arise.