Dive Into Issuing Policies
Learning Objectives
After completing this unit, you’ll be able to:
- Describe the basic business process for issuing a new policy.
- Discuss how provided services and components support the policy-issuance process.
Policy Issuance
Recall the typical lifecycle of an insurance policy.
First, you request a quote for a policy that covers you, your property, or your business. Next, a rules-driven underwriting process or manual underwriting review determines your eligibility and final rate. If you choose to proceed, you pay for the policy, and the system officially issues it. Once the policy is in force, you can optionally make changes to the policy, such as to add a new coverage, add an insured item, or change payment details. When the policy term ends, you can either renew or cancel the policy.
In this unit, let’s dive into the business process of issuing and paying for a new policy.

Let’s look at the standard sequence for issuing a policy.
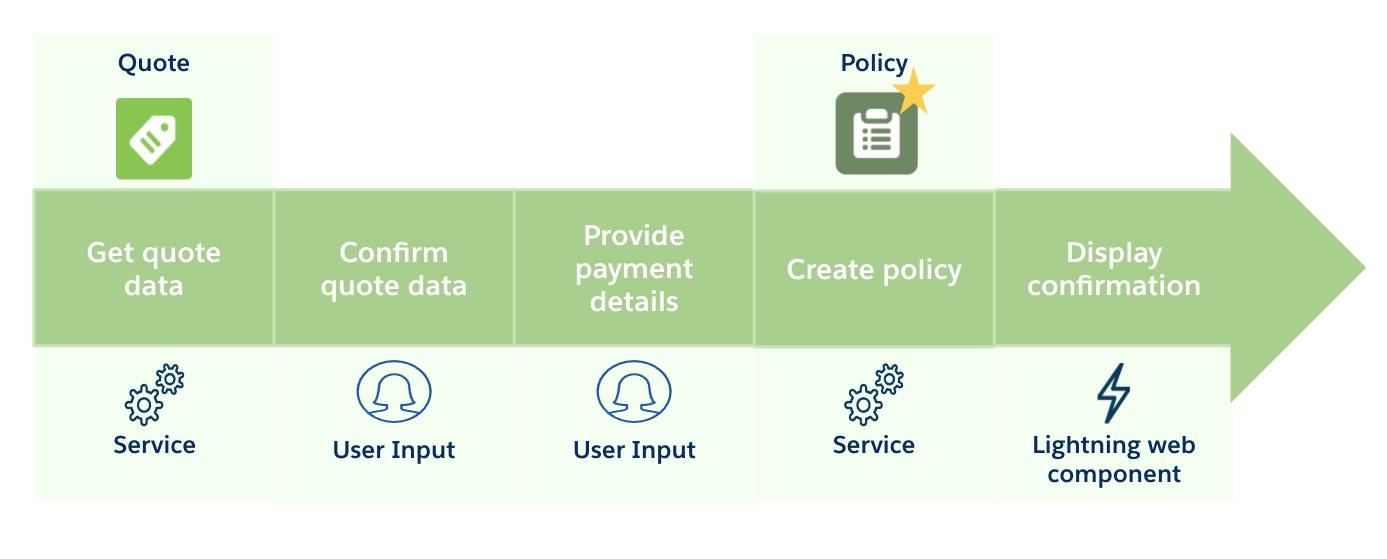
The key steps for issuing a policy include getting quote data, confirming quote data, providing payment details, creating the policy, and displaying a confirmation.
And here’s a summary of each step.
Step |
Summary |
|---|---|
Get quote data |
A dedicated service retrieves information about the quote. |
Confirm quote data |
The quote data is displayed to the user, who reviews the quote details and decides whether to proceed. |
Provide payment details |
The user pays in full or sets up a payment plan with their payment details. Services can call an external billing and payment processing system to set up and initiate policy payments. |
Create policy |
A dedicated service creates a new insurance policy record that contains all the policy information and associated records. Other services create a revenue schedule and any needed calls to external financial processors or documentation generation systems. |
Display confirmation |
A Lightning web component displays the policy information back to the user and links to the new policy record. |
Let’s dig a little deeper into this process by returning to Anna Murphy and her quest for an auto policy.
A Pleasant Policy Process
Just yesterday, Anna Murphy purchased a sparkling brand-new car.

Anna’s excited by the purchase but knows there’s much to be done. One of her first orders of business is to insure her new car. Anna already holds a health insurance policy with Cumulus Insurance. Her independent broker, Ernie, tells her that Cumulus just launched Individual Policy Administration for their auto insurance line of business.
Anna is intrigued and decides to check out the new quoting and policy administration experience. Immediately, she’s impressed.
Let's walk through her experience, from creating the quote, to setting up payment, to receiving the policy details.
Create the Quote
To create a quote, all Anna needs to do is visit the Cumulus website and enter some information about herself and her vehicle. Then, the website immediately presents her with available coverages, terms, and costs. Anna selects her preferred coverages and their limits and deductibles.
During this quoting flow, underwriting rules associated with the product automatically evaluate Anna’s input. Based on Anna’s information and her coverage selections, she’s eligible to purchase the policy without any additional changes or documentation.
Upon completing the quoting process, she immediately receives an email summarizing the coverages and her quote. She reaches out to Ernie, her broker, to discuss the quote and review her options.
View the Quote
Ernie logs into his broker portal, and together they check the details of the quote.
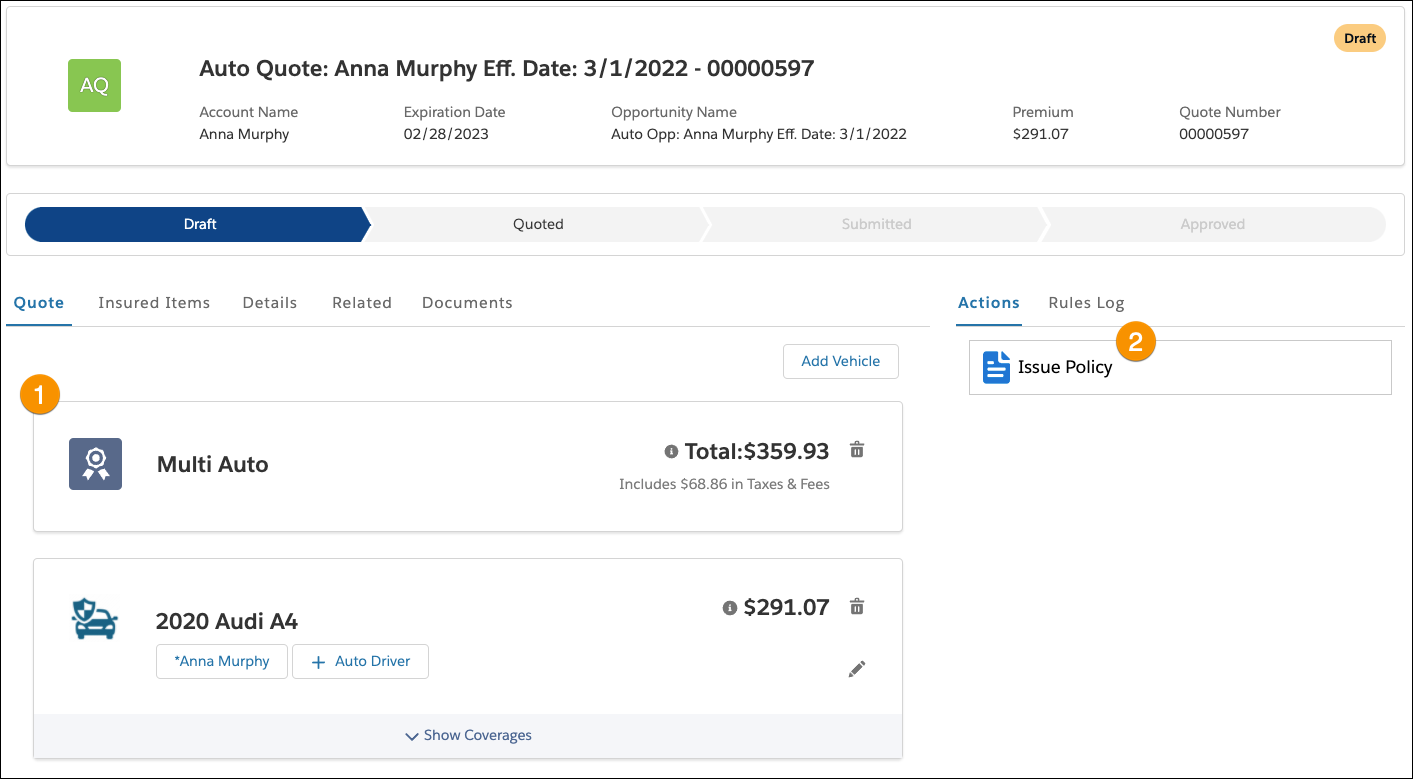
The Quote tab of the portal:
- Displays details (1) about the new quote. If desired, users can change the driver, auto, or coverage details. Based on these adjustments, the quote automatically reprices.
- Contains the Issue Policy button (2), which launches a guided flow (OmniScript) for issuing the policy. This same flow can launch from an internal view for captive agents and internal users. It can also display on a customer website for self-service.
The total price of the policy, after taxes and fees, is $359.93. Ernie and Anna review the coverages and their terms together. Anna decides to continue.
Confirm Quote Details
Next, Ernie clicks the Issue Policy button, launching a guided flow directly from the portal. Behind the scenes, a dedicated insurance service automatically retrieves the data for the recent quote.
Some quote details display, along with a couple of payment options.

The policy premium (1) matches the quoted premium, so Anna sets her desired effective date (2). For payment, she has two choices: Either pay in full or set up a payment plan. Anna decides to set up a payment plan (3).
Set Up the Payment Plan
Behind the scenes, the guided flow uses conditional components to present the correct steps to the user. Since Anna wants to set up a payment plan, the guided flow asks her tailored questions about paying for her bill.

The guided flow asks Anna if she wants to receive a separate bill for the auto policy or to consolidate payments across all policies for her account. She elects to keep her health and auto policy bills separate.
Set Up Billing Details
Now it’s time to choose a billing option. Anna can either set up direct billing or auto-pay. She hates having to remember to pay each month, so she opts for auto-pay.
After that, it’s time to provide her billing address and delivery method. Since her inbox is always overflowing, and important items inevitably slip through the cracks, she decides to receive her bill by traditional mail.
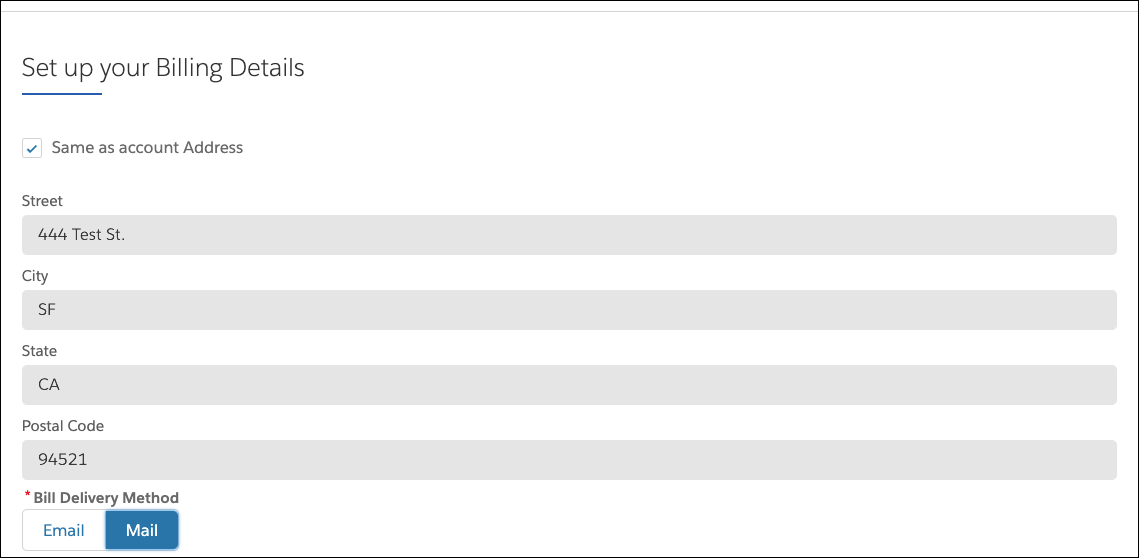
Under the hood, the policy-administration system automatically retrieves Anna’s address details from her account. She confirms the details and continues on.
Provide Payment Method Details
Once again, conditional steps initiate and display depending on the method type.
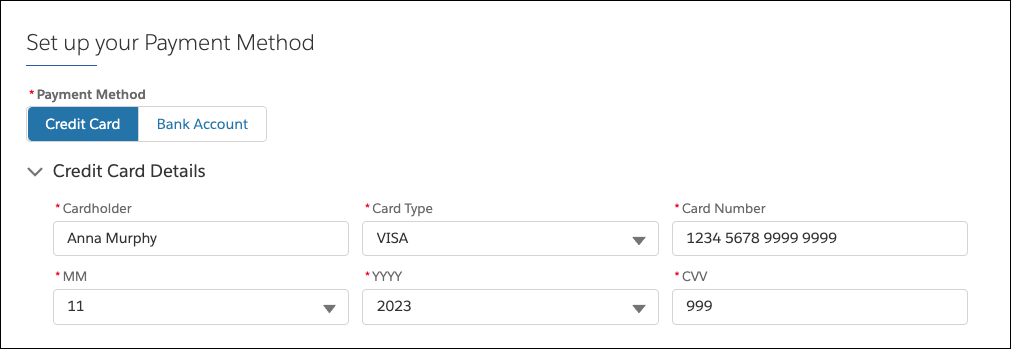
For this step, Anna provides her payment method details.
After that, the flow prompts Anna to select the payment frequency. 
She decides to pay quarterly. The system automatically calculates the appropriate modal payment for a quarterly cycle, which is $89.98.
Issue the Policy
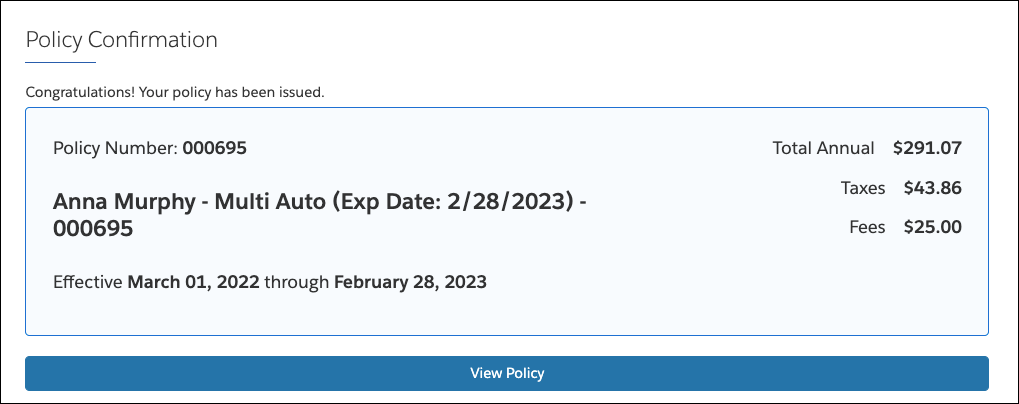
After payment, a dedicated service creates a new policy record. A confirmation screen displays key information about the new policy.
View the Policy Record
Ernie gives the policy number to Anna. She wants to check additional details, so Ernie clicks View Policy and navigates to the new policy record. Ernie uses the page to answer any questions that Anna has.
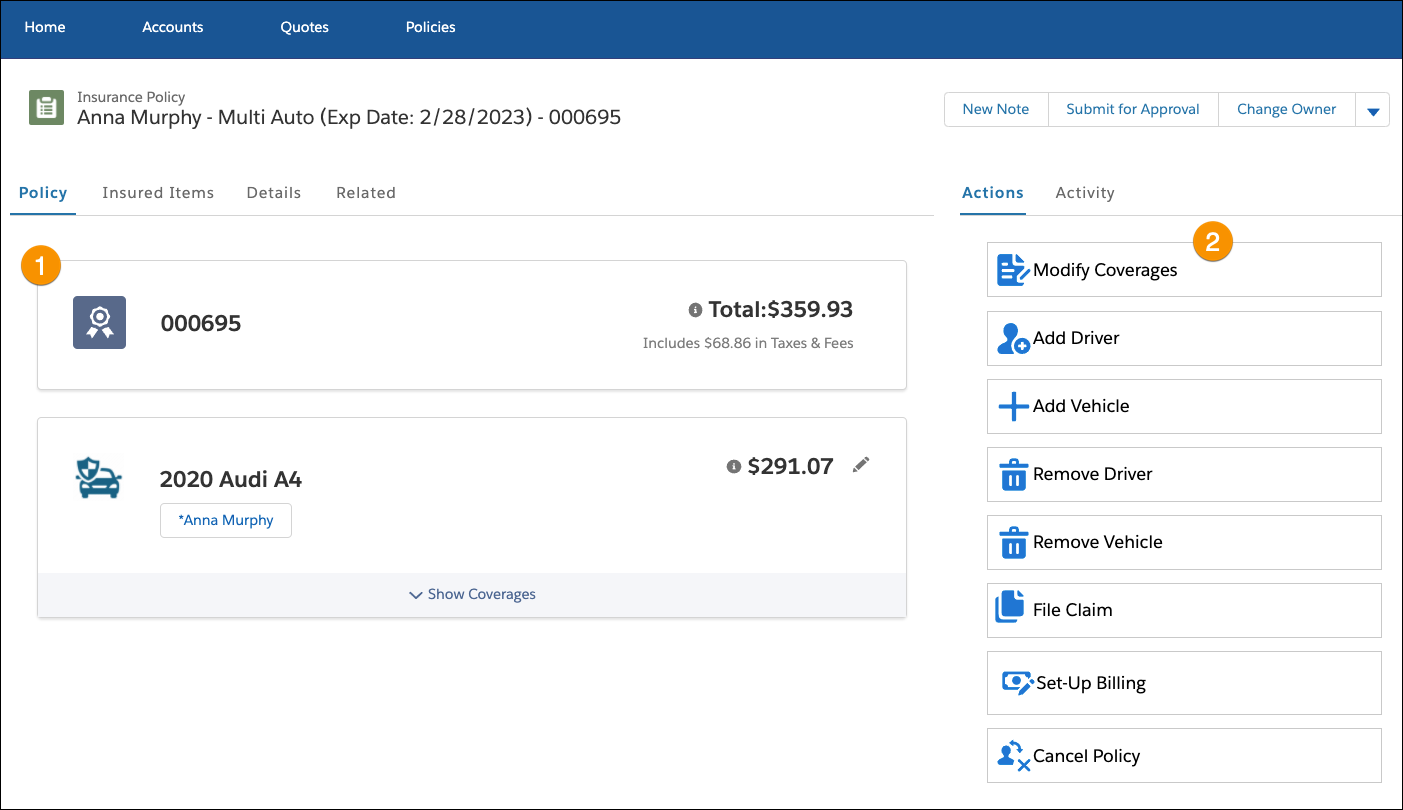
This policy record page contains:
- All the policy details (1), including the premium, insured driver, insured auto, and coverages. The Lightning web component displays this compactly and attractively.
- Several available actions (2), including modifying coverages and adding and removing drivers and vehicles. We take a closer look at these actions in the next unit.
Notice that all the actions on this record page are tailored to an auto policy. Administrators can easily configure different layouts for different lines of business.
The policy-administration system is now the system of record for Anna’s auto policy. It processes any new transactions related to the policy and keeps track of the revenue earned by the carrier. Anna can view and make changes to her policy with her policyholder portal, which we explore in the next unit.