Create Calculated Dimensions and Measurements
Learning Objectives
After completing this unit, you’ll be able to:
- Describe calculated dimensions and measurements.
- Create calculated dimensions and measurements.
- Use your calculated fields in Intelligence Reports Advanced.
What Are Calculated Dimensions and Measurements
Calculated measurements allow you to perform simple or advanced calculations and apply custom logic to your data. Because they are based on real-time queries, calculated measurements provide you the flexibility you need to build on top of your existing data and get the most out of it.
Let’s say you want to calculate open rate differently than the way Intelligence Reports currently calculates it. Generally, open rate is calculated using the formula: [Email_Unique_Opens]/[Email_Deliveries]. So it’s the unique opens of your emails divided by the number of emails delivered.
What if you wanted to create your own calculation? You might want to calculate open rate as the unique opens, divided by all the emails that were sent (not just delivered).
No problem! You can take any of the dimensions and measurements that exist in your data, and apply your own logic to them. Let’s learn how.
Create a Calculated Dimension or Measurement
You can create calculated fields in the Setup tab or directly from a widget.
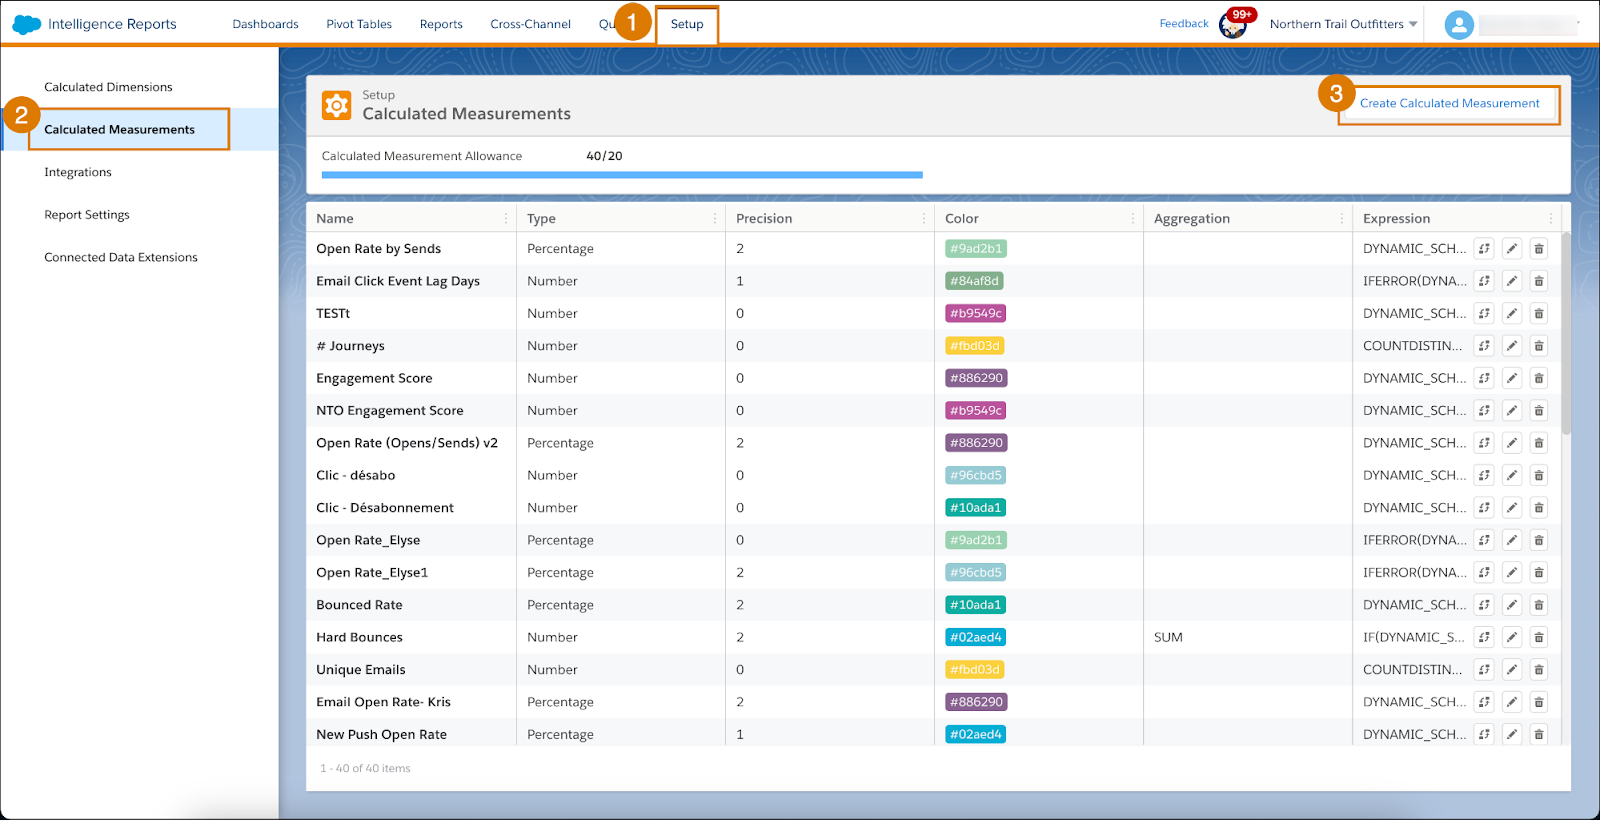
Let’s continue with our example of calculating open rates. First, navigate to the Setup tab(1), on the left, click Calculated Measurements (2), and then Create Calculated Measurement (3).
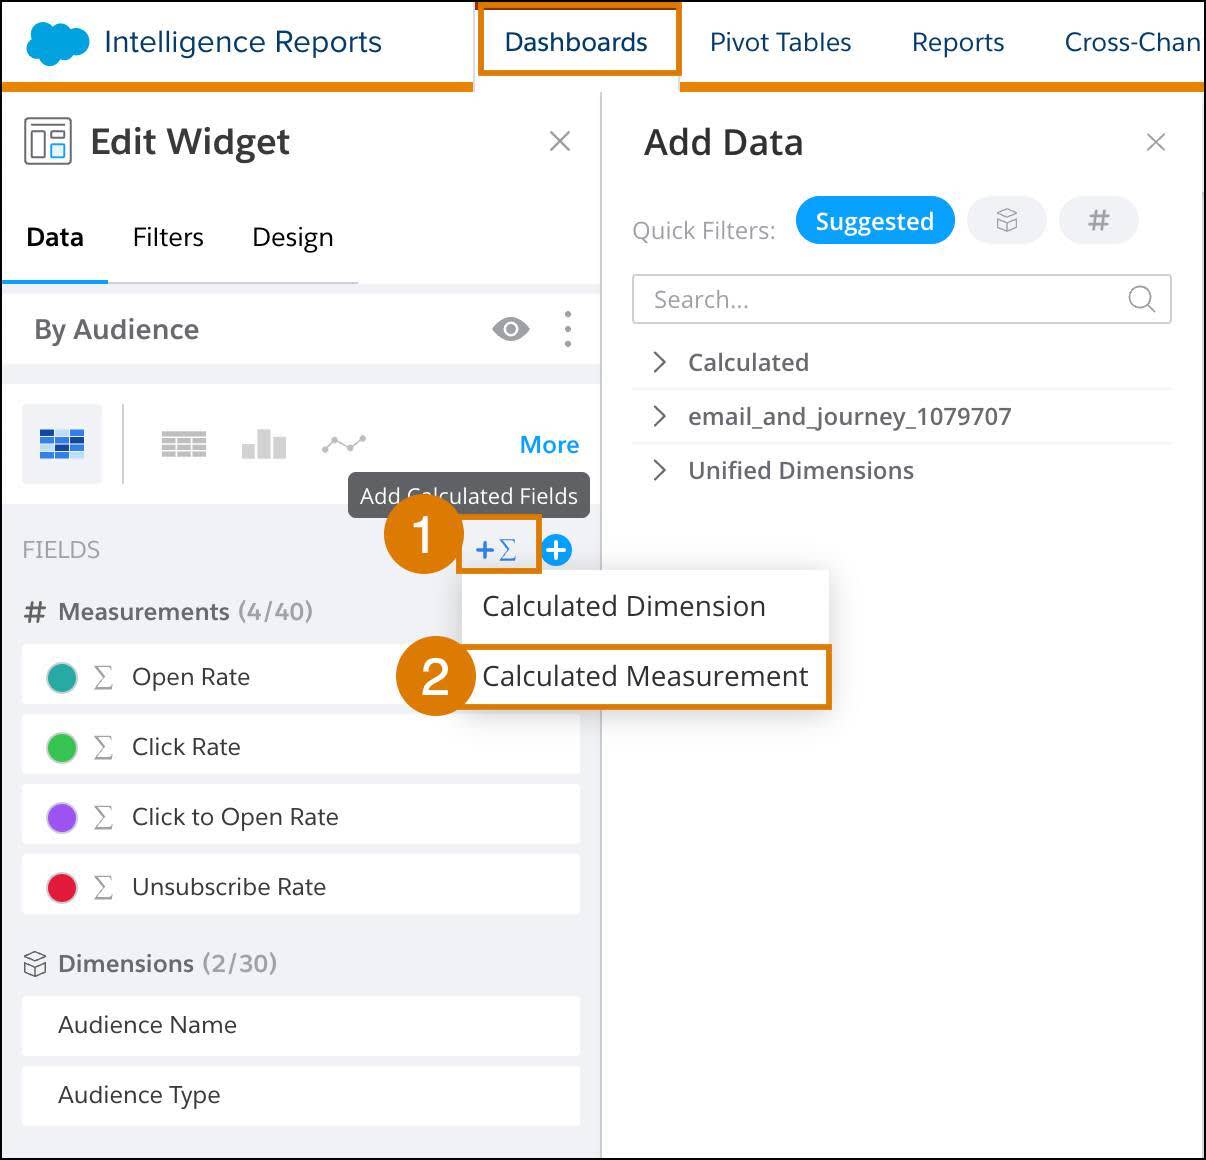
If you are creating your calculated measurement from a widget, make sure you are in the dashboard page you want to use the new calculated measurement, switch to edit mode, and select the relevant widget for your new open rate. Click the Add Calculated Fields icon (1) and then click Calculated Measurement (2).
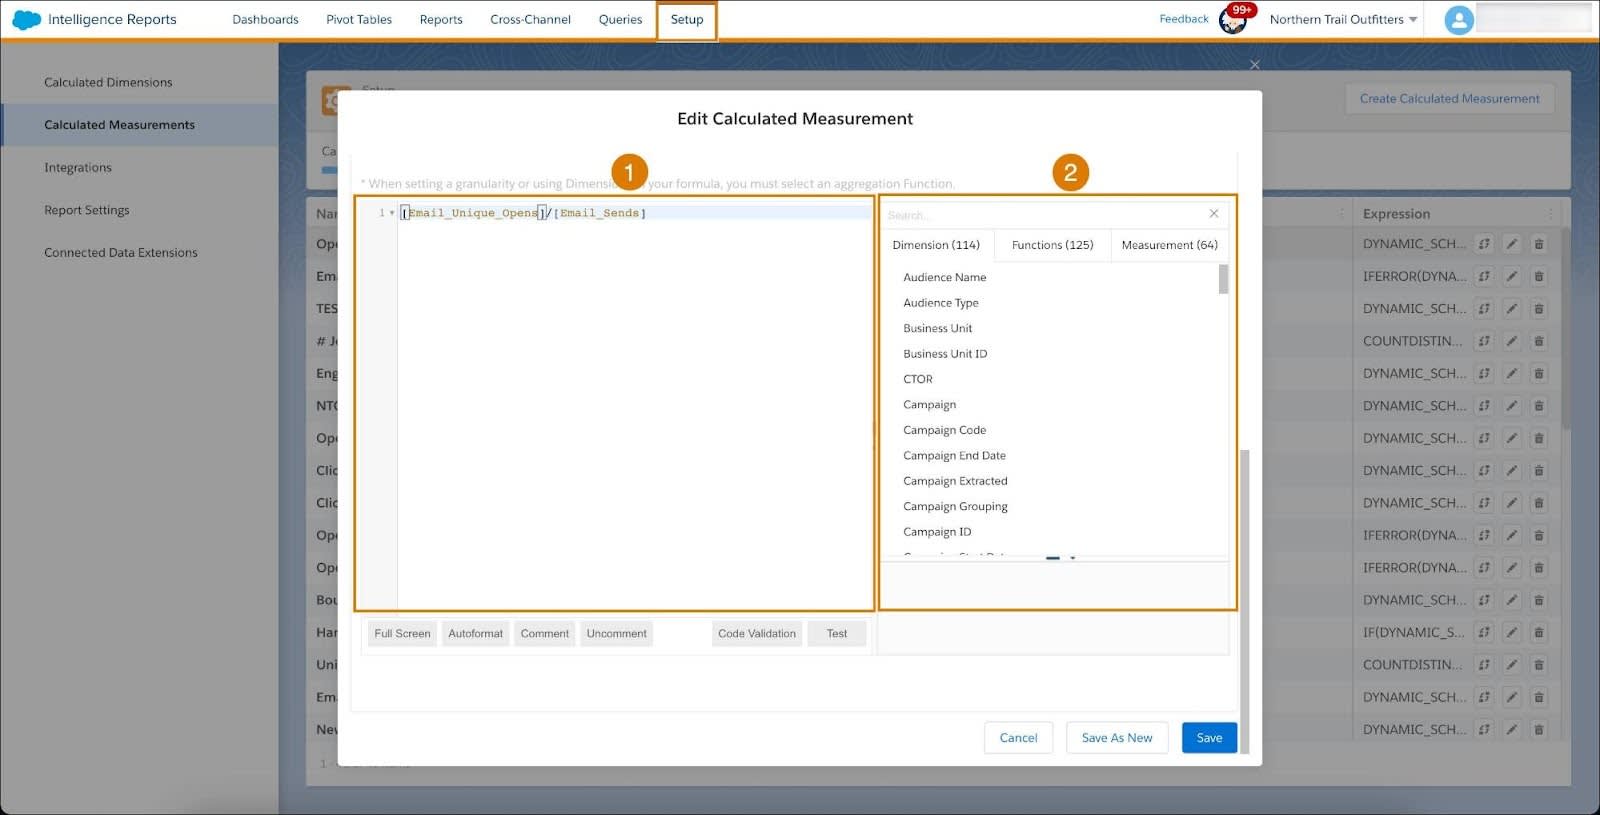
In the calculated measurement window fill in the details:
- Name your measurement.
- Determine the type—is it numeric, percent, or currency? In this case, we are using percent.
- Set the decimal places.
- Enter your new calculation.
In the Expression field, you can enter the formula you want to use (1). If you need some assistance, you can see the complete list of dimensions and measurements that exist in your data, and the functions you can use in your formula (2).
After you finish, click Save. The new calculated measurement is added to your setup tab or widget.
Put Your Calculated Dimensions and Measurements to Use
Luckily, any calculated measurement and dimension you create can be found in the setup tab and applied in Intelligence Reports Advanced! You can use them as you would use any other dimension or measurement in your dashboards, pivot tables, and reports. Here’s how.
In a dashboard page, simply select the new widget where you want to add the calculated field. From the data tab, click the Add New (+) icon to add data (1), and either search for the field (2), or locate it from the dropdown menu (3).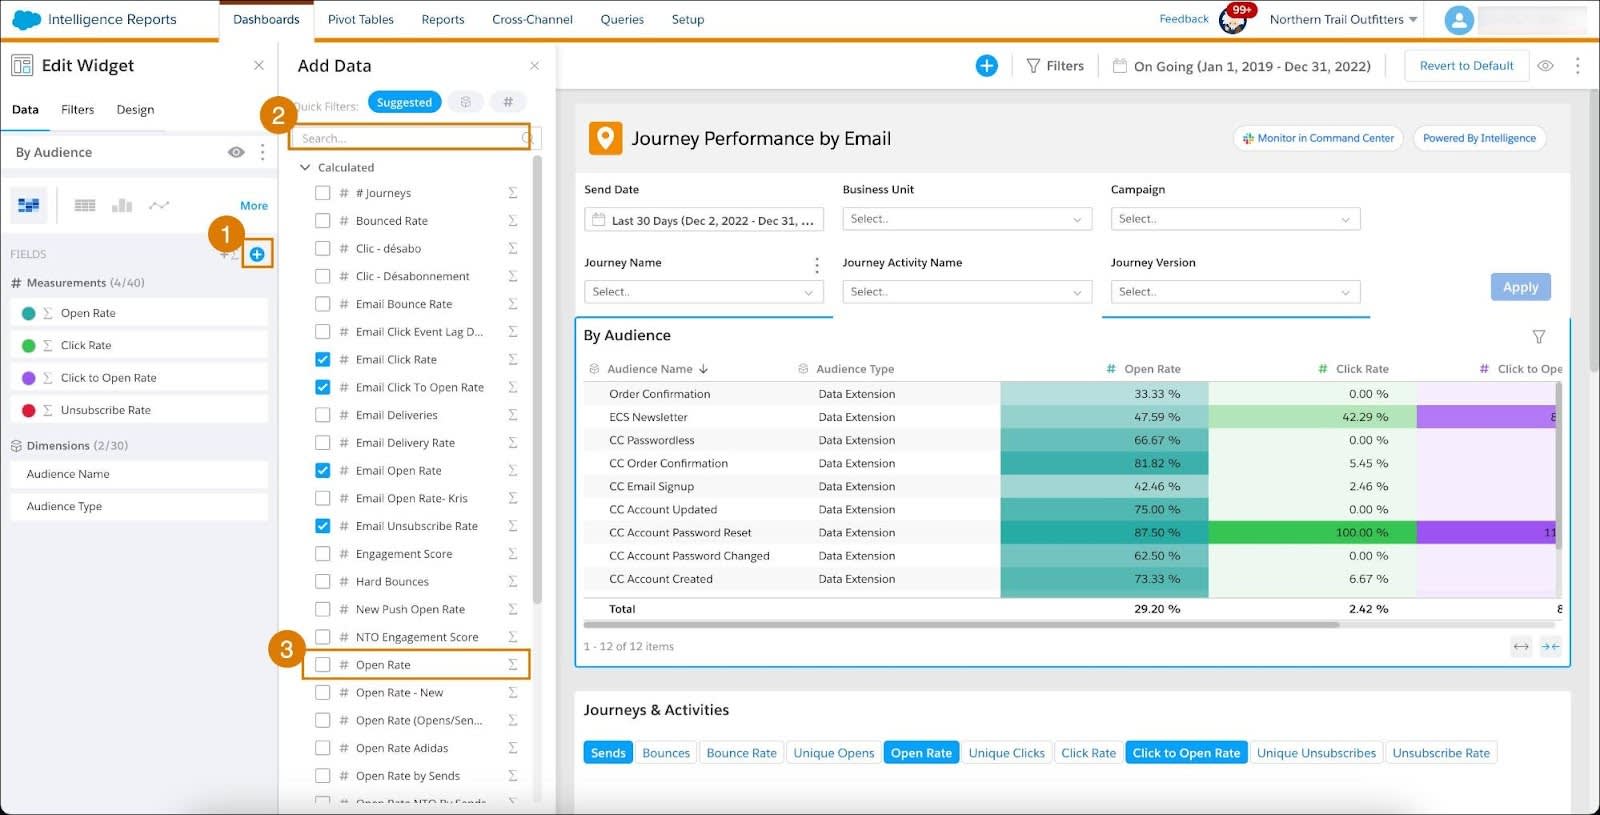
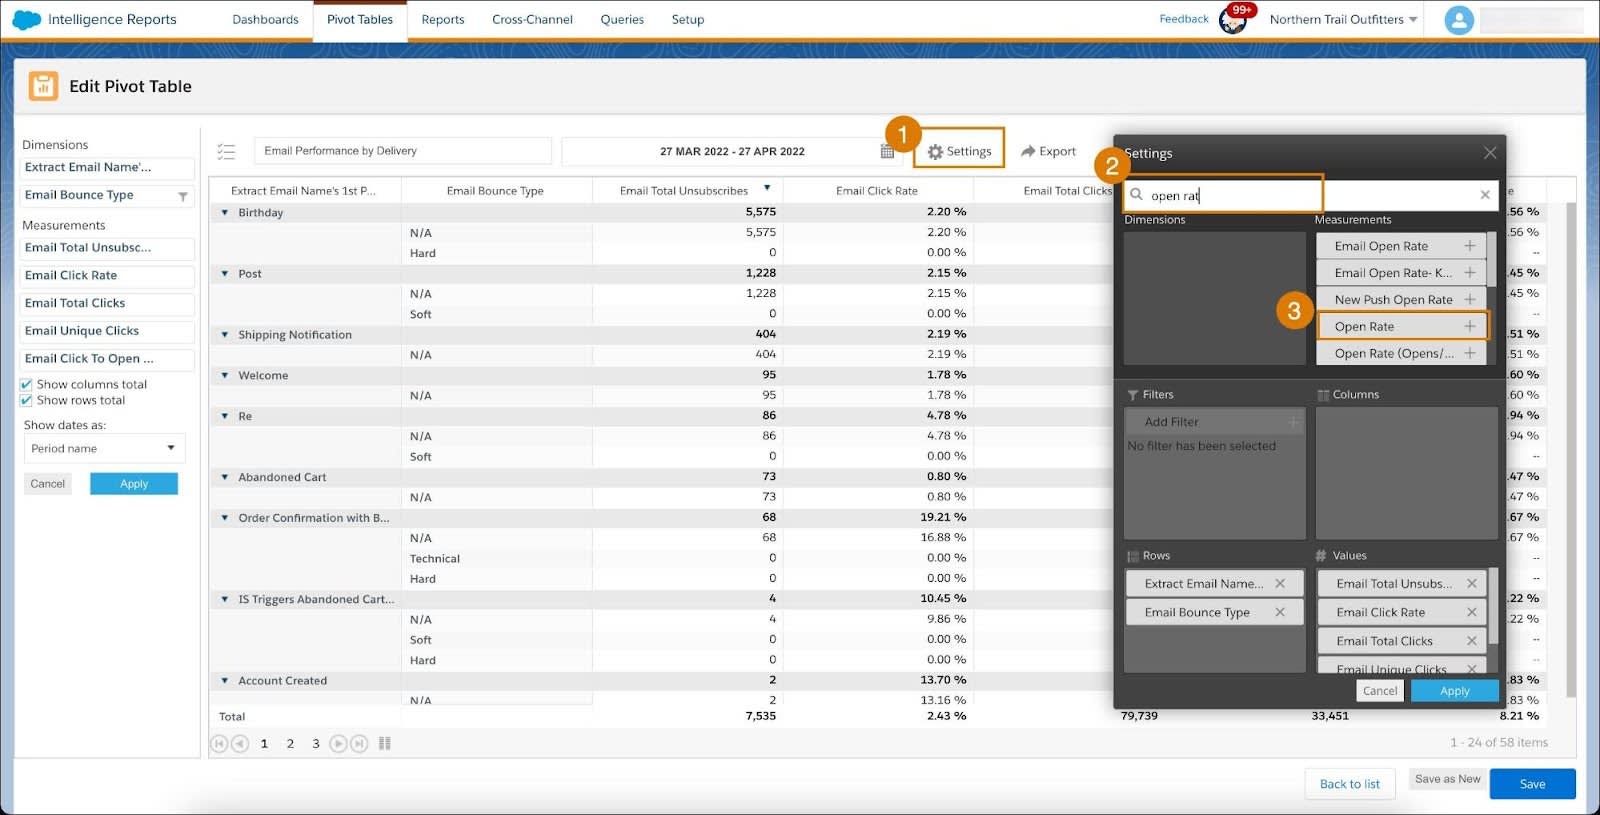
To find a calculated field in your Pivot Tables, click Settings (1), and search for your calculated field (2, 3).
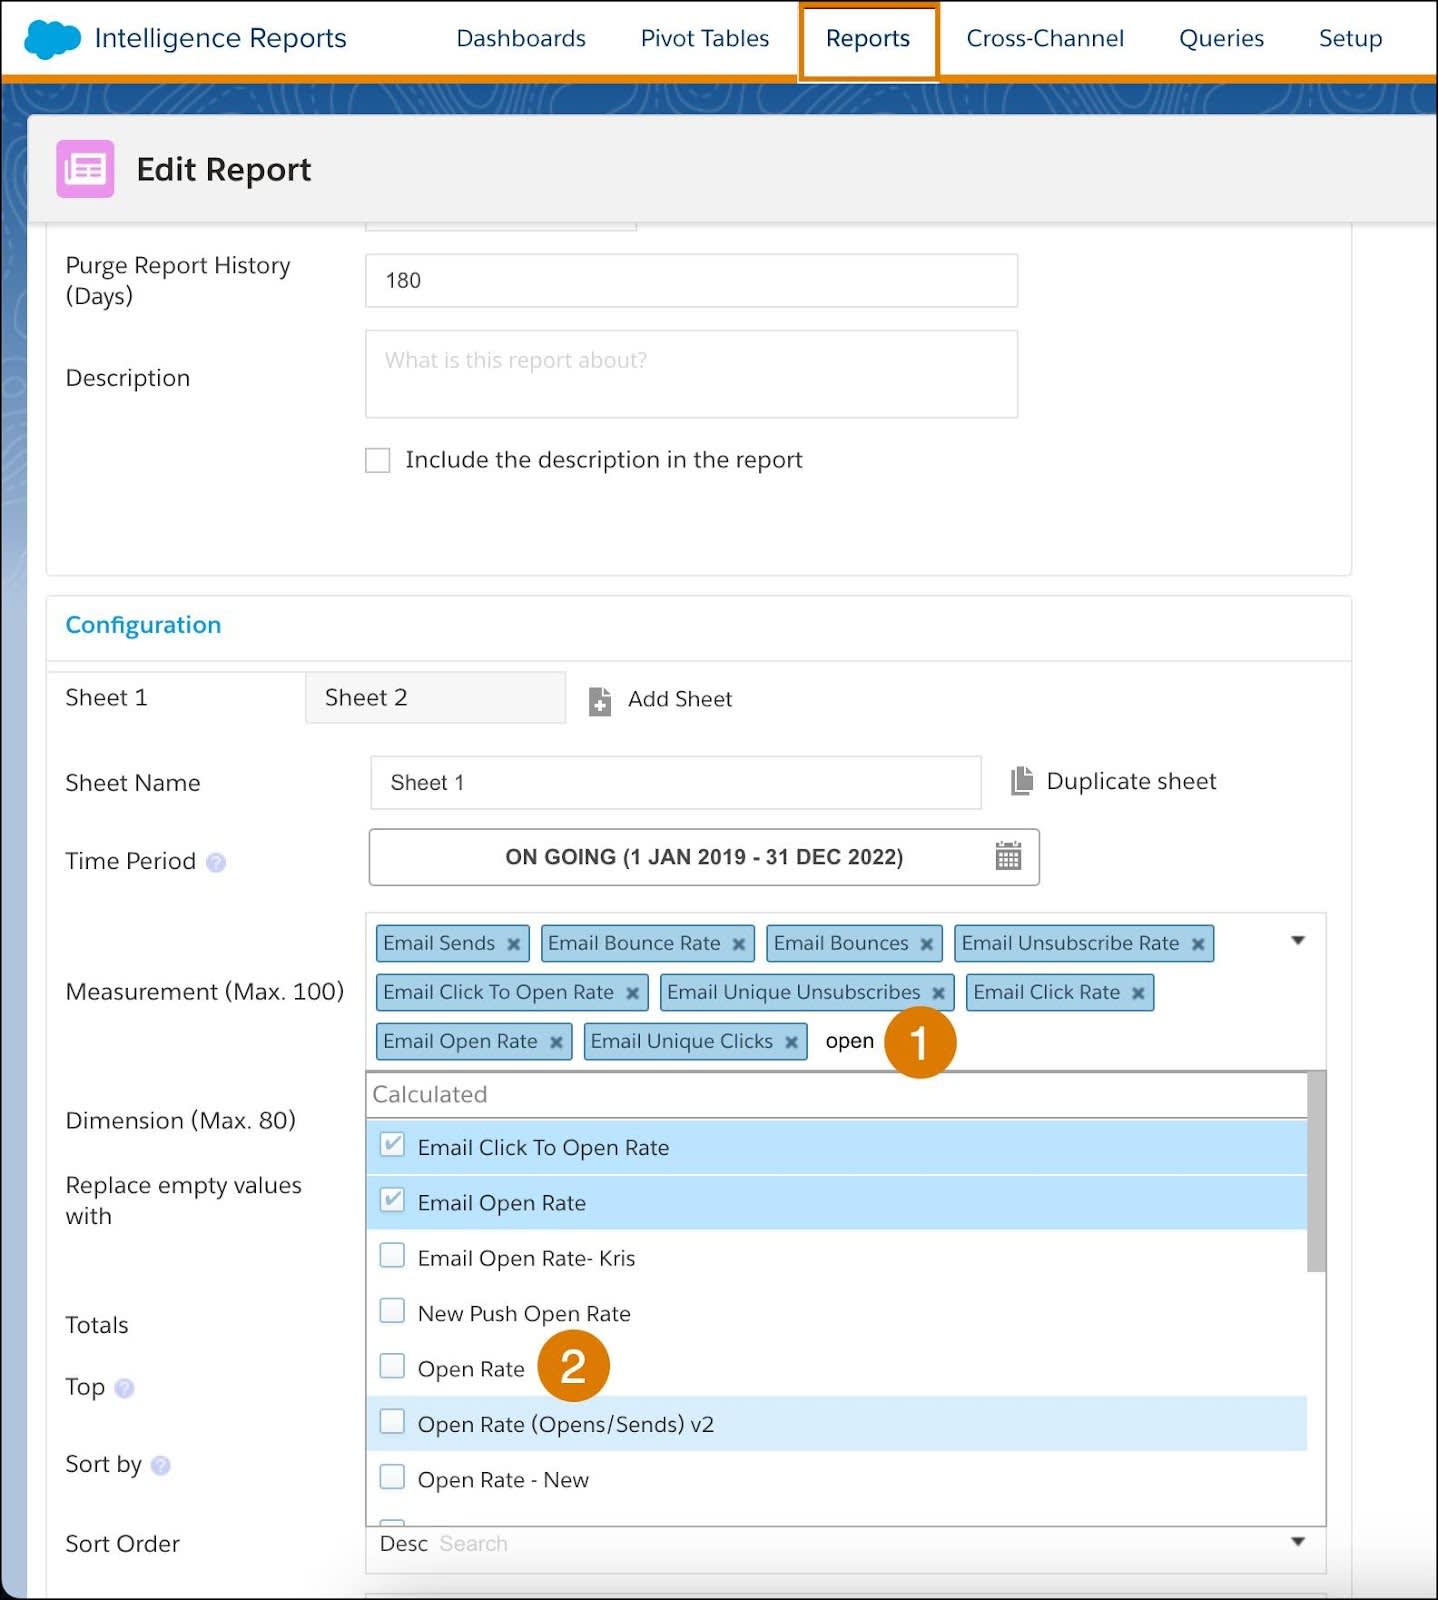
When in a report, scroll down to Measurement under the Configuration section, and type in the name of the field (1), or scroll down to the calculated section to add it manually (2).
In this unit, you learned how to create a calculated field, and how to use it from the different parts of Intelligence Reports Advanced. Continue to the next unit to learn how to install Cross-Channel solutions.
Resources
