Create Content for Mobile
Learning Objectives
After completing this unit, you’ll be able to:
- Create mobile messages in Content Builder.
- Create mobile messages in Journey Builder activities using the Content Builder editor.
Hoping to use Content Builder to create content for your mobile messages? Brace yourself for some great news—you can now create SMS text messages using the Content Builder editor! But the fun doesn’t stop there. You can also use Content Builder to create push notifications for your mobile apps. After creating SMS and mobile app content in Content Builder, you can then send it to your subscribers using Journey Builder. Let’s take a look at each of the ways you can use Content Builder to create messages for mobile devices.
In this module, we assume you are a Marketing Cloud Engagement user with access to Content Builder. If you’re not a Marketing Cloud Engagement user, that’s OK. Read the steps to learn how they do this in a production org. Don't try to follow these steps in your Trailhead Playground, as Marketing Cloud Engagement Content Builder isn't available in the Trailhead Playground.
Create SMS Messages
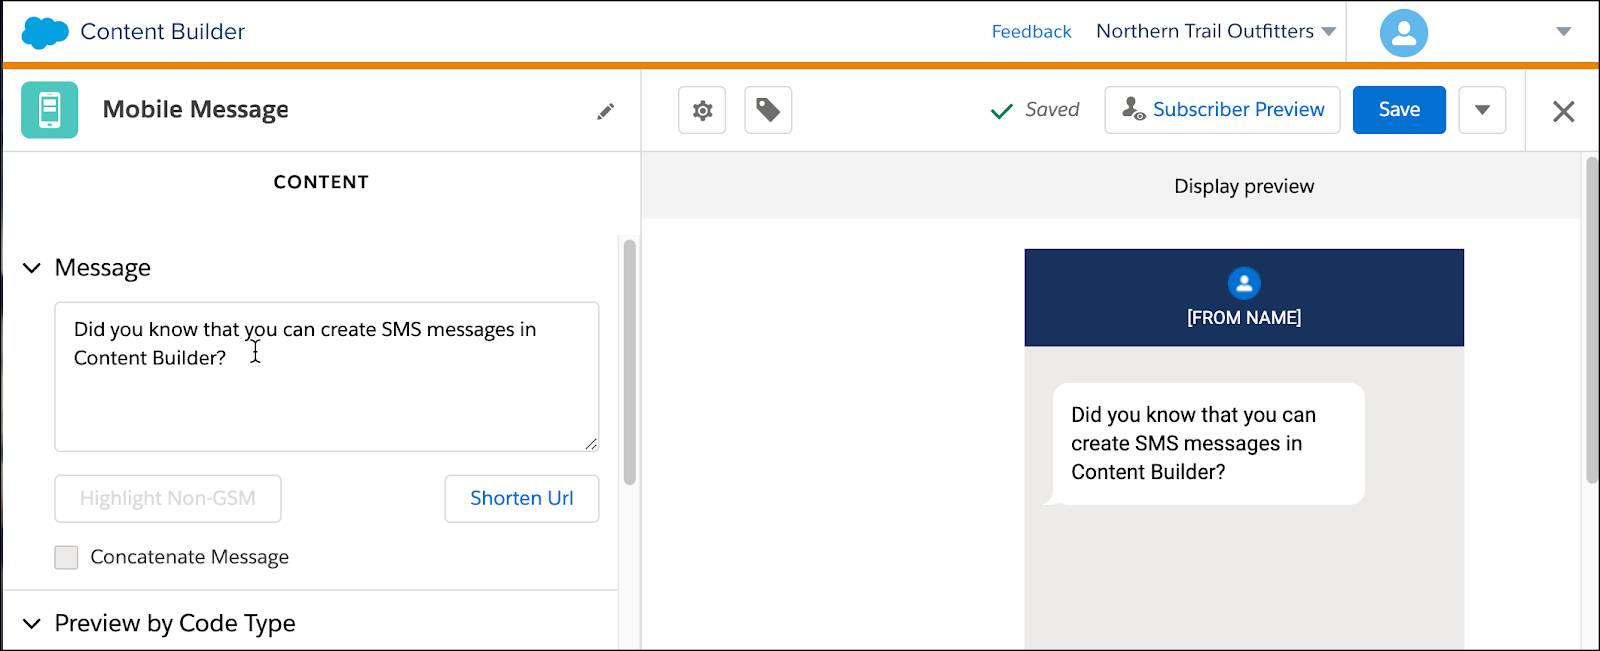
Let’s start with SMS messages. These are text messages that you send to your subscribers’ mobile devices through Marketing Cloud Engagement. To access them in Content Builder, click Create and select SMS Message. Now, let’s build your message.
- Enter a message.
- Use the personalization and link shortener options as needed.
- To find hidden non-GSM characters, such as unicode straight quotes that can be included when pasting text from another source, select Highlight Non-GSM.
- To combine messages beyond 160 characters into one, select Concatenate Message.
- If you have different locales for codes in your account, you can preview each of those by selecting a code type.
- Save your message.
Your SMS Message is ready to send!

Create In-App Messages
If you have a mobile app updated to SDK version 6.2.0 or above, anyone who installs your app on their mobile device can receive your custom messages within the app. To create in-app messages, navigate to Content Builder in Marketing Cloud Engagement. Click Create and select In-App Message under Mobile App.
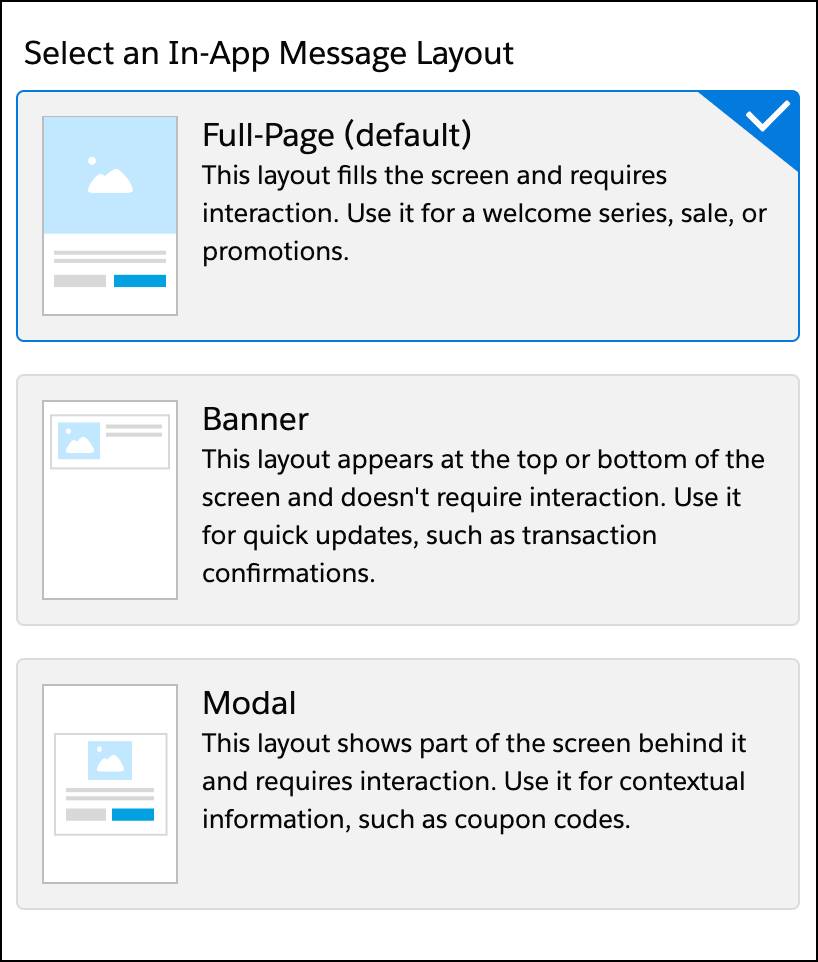
First, select a layout for your message: full-page, banner, or modal.
-
Full-Page: This layout fills the entire device screen and requires the subscriber to interact with it. For example, use full-page layout for a welcome series, sale, or promotion.
-
Banner: This layout appears at the top or bottom of the screen and doesn’t require interaction. Use banners for quick updates, such as transaction confirmations.
-
Modal: This layout shows part of the screen behind it and requires interaction. Choose this layout for contextual information within the app, such as coupon codes.

After you define a layout, customize your message.
- Browse for an image or enter a URL for an image.
- Give your message a title.
- Enter a message.
- If you want, you can add a button or two. Enter a name for each button. Then select an option for open behavior, or the action that occurs when the subscriber presses the button.
- Select a device to preview your message.
- Save your in-app notification.
Your new in-app notification is ready to use!
Create Push Notifications
Want to increase usage of your mobile app? Use Marketing Cloud Engagement to create push notifications that encourage your subscribers to interact with your mobile app. If you want to create a push notification in Content Builder, click Create and select Push Notification under Mobile App.
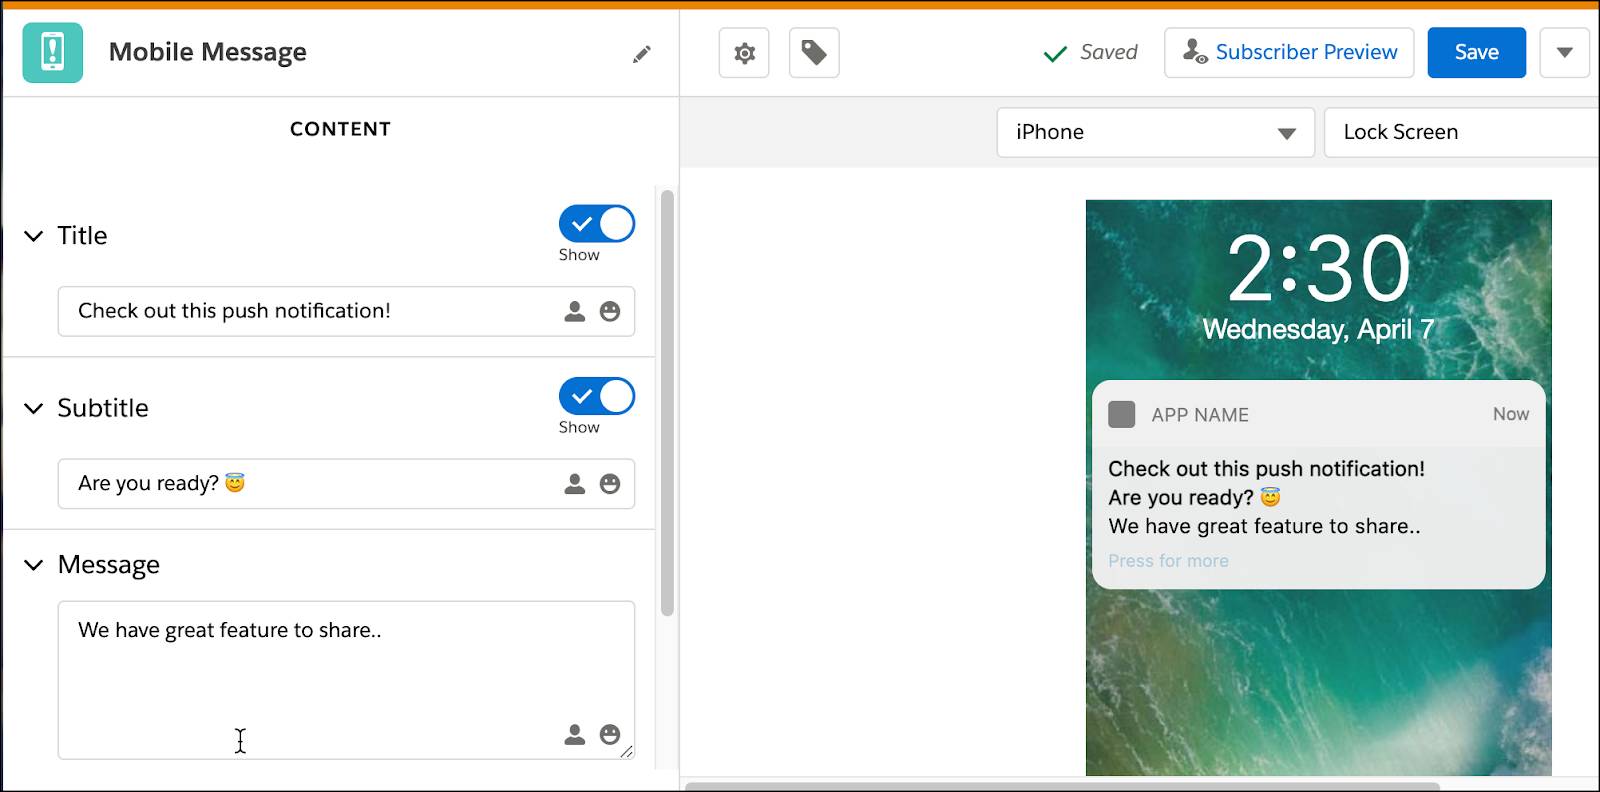
- Give your notification a title and an optional subtitle.
- Enter the message.
- Add media to your message if desired.
- Select an open behavior (remember: this is what happens when the user taps the message).
- Preview your message by device and by how it displays, such as a banner or on the lock screen.
- Save your push notification.

Want to spice up your push notification even more? When crafting your message, click to add personalized content, such as the subscriber’s first name, zip code, state, or city. You can even use AMPscript to extend personalization beyond those options.
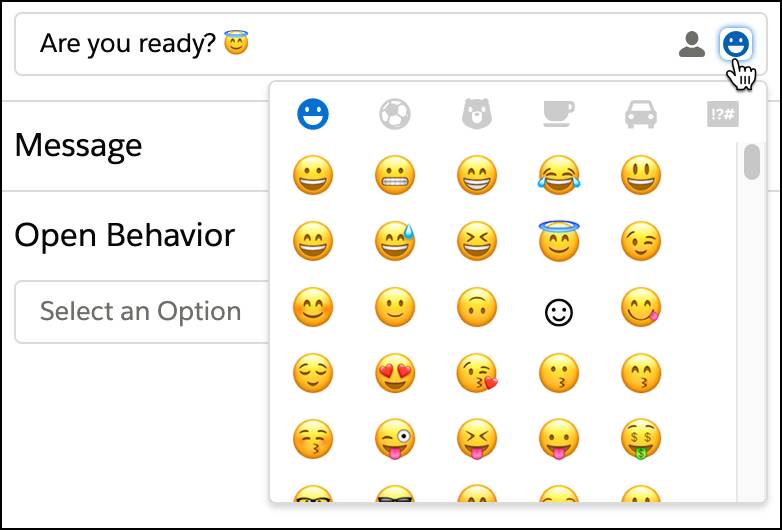
You can also insert emojis and other graphics by clicking  .
.

Content Builder and Journey Builder
If you work mostly in Marketing Cloud Engagement Journey Builder, you can create and send mobile messages directly within Journey Builder, using mobile activities. To get started, drag a mobile activity onto your journey canvas, such as SMS or In-App Message.
When you configure the activity, click New Message. The Content Builder editor opens within Journey Builder so that you can create a new mobile message. If you don’t want to create a new one, you can also select an existing mobile message from Content Builder. When you save your new message or select one, you return right back to your journey draft.
Your Content Is Ready—What’s Next?
Congratulations! You created a content strategy and set up Content Builder to align with that strategy. Then you learned how to use the powerful tools in Content Builder to create content blocks, dynamic content, code snippets, and more. With your newly created content library ready to go, learn about Email Studio in the Create and Send Targeted Emails with Email Studio trail to start creating powerful messages that engage your audience and build valuable customer relationships. When you’re ready to extend Content Builder even further with custom blocks, check out our Content Builder Block SDK module for Marketing Cloud Engagement developers.
Resources
- Salesforce Help: Create a Push Notification in Content Builder
- Salesforce Help: Create an SMS Message in Content Builder
- Salesforce Help: Message Concatenation
- Salesforce Help: Message Content Considerations
- Salesforce Help: Mobile Activities in Journey Builder
- Salesforce Developer: MobilePush and Journey Builder for Apps SDKs
- Salesforce: Mobilize the Customer Journey (Download)
