Learn About Amazon VPC Routing
Learning Objectives
After completing this unit, you’ll be able to:
- Explain the purpose of route tables in a VPC.
- Differentiate between the main route table and custom route tables.
Now that you have a VPC and subnets for your cat photo application, let’s learn how to route traffic to all of your resources within your VPC.
Route Traffic in a VPC
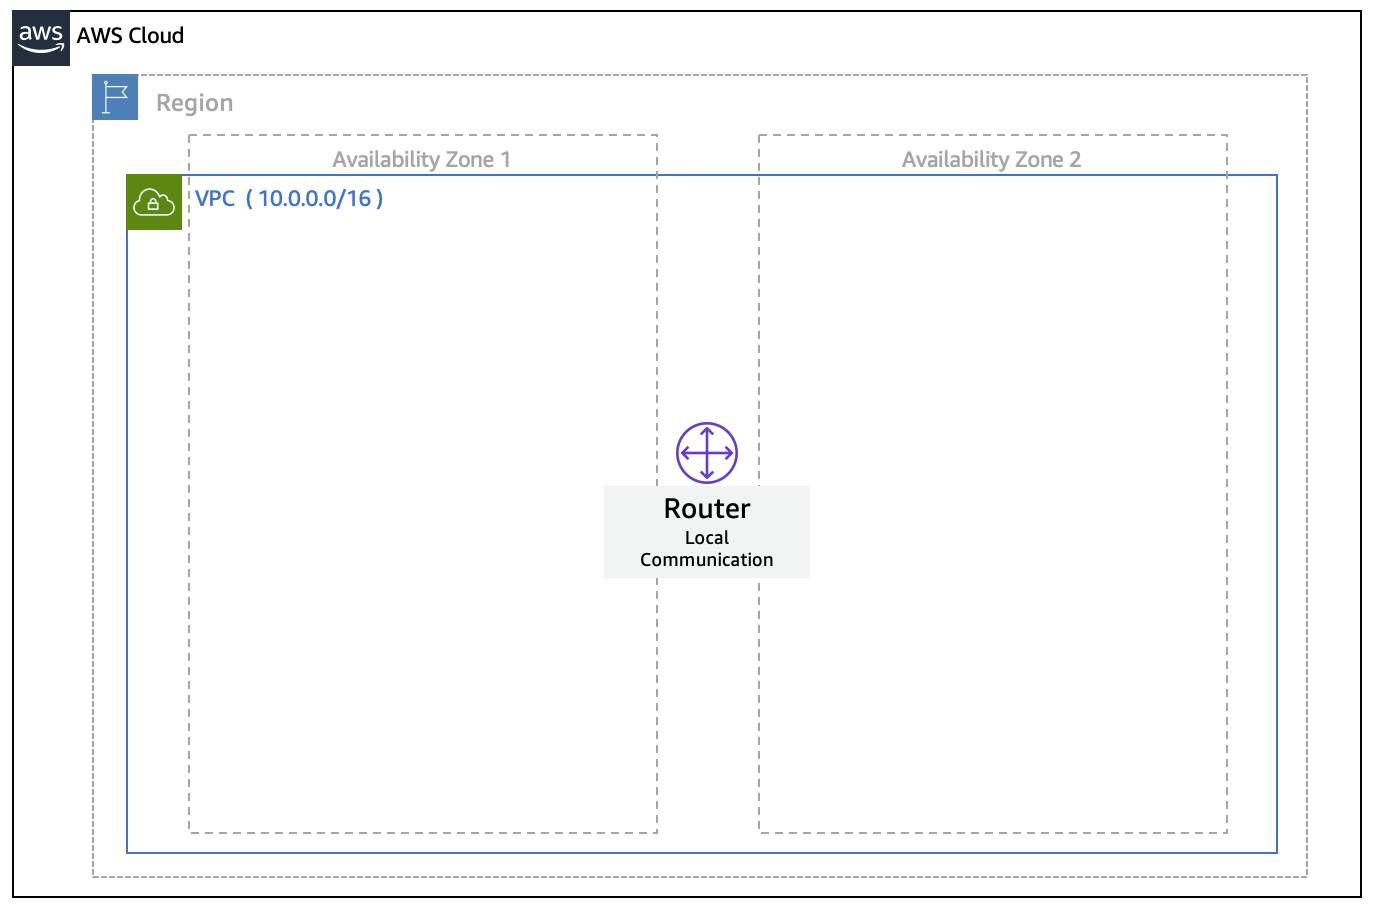
As you learned in the last unit, there are certain IP addresses that are reserved to enable networking. One of these addresses is reserved for the VPC router. In a traditional on-premises environment, you need networking hardware to route traffic. In AWS, that hardware is part of the VPC.
You don’t need to provision a router or switch to enable communication flow within the VPC. They’re already provided. It also separates the logical aspect of networking, such as IP allocation and routing away from the performance of networking equipment,
such as routers and switches.

Understand the Main Route Table
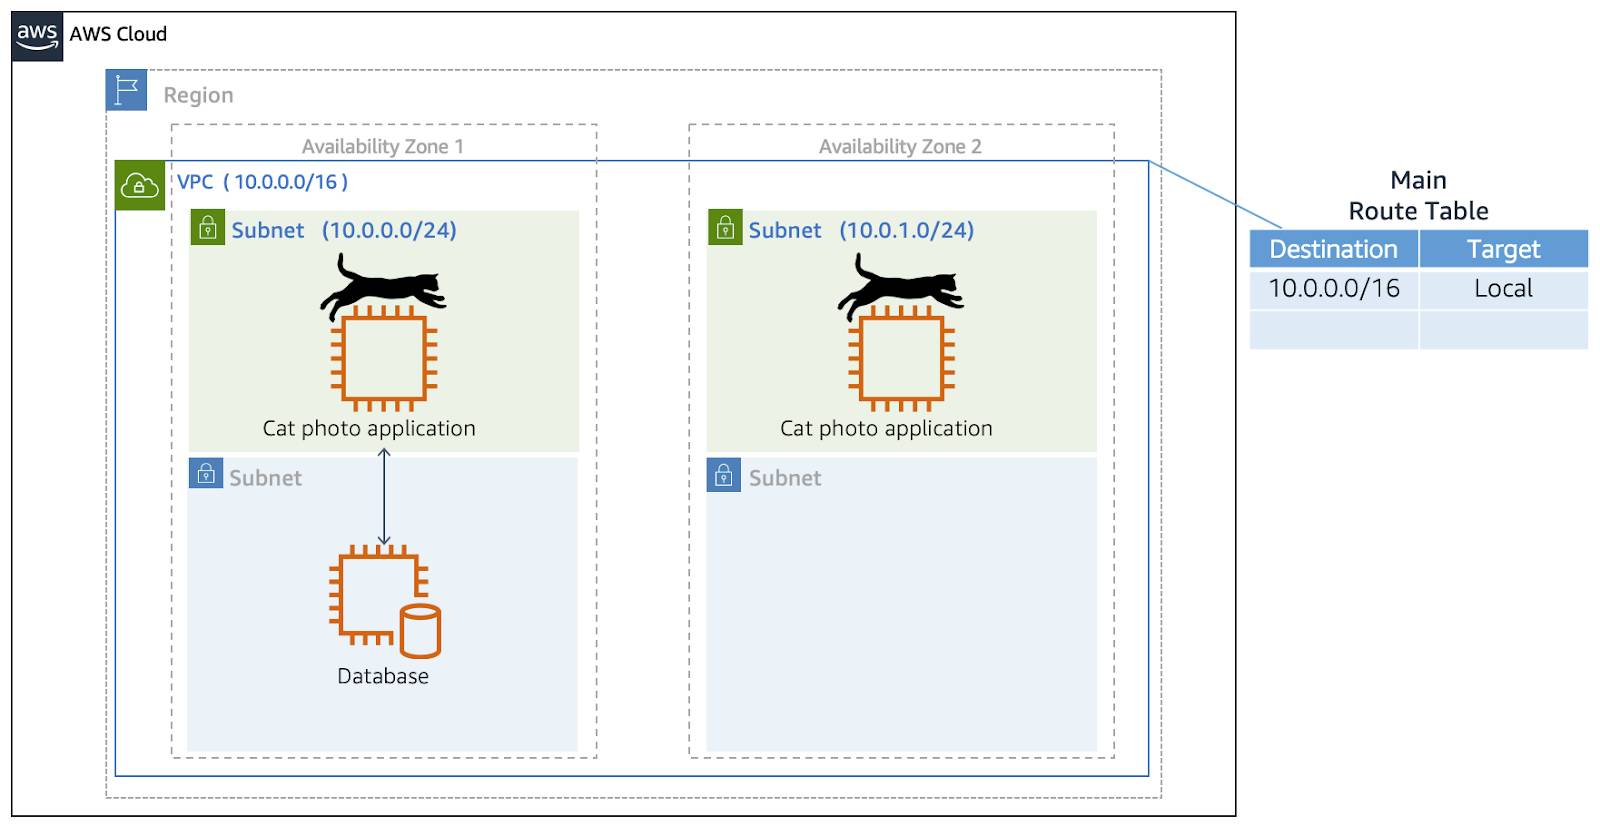
When you create a VPC, AWS creates a route table called the main route table. A route table contains a set of rules, called routes, that are used to determine where network traffic is directed.
AWS assumes that when you create a new VPC with subnets, you want traffic to flow between them. Therefore, the default configuration of the main route table is to allow traffic between all subnets in the local network.
Below is an example of the main route table:

There are two main parts to this route table.
- The destination, which is a range of IP addresses where you want your traffic to go. In the example of sending a letter, you need a destination to route the letter to the appropriate place. The same is true for routing traffic. In this case, the destination is the CIDR range of our VPC network.
- The target, which is the connection through which to send the traffic. In this case, the traffic is routed through the local VPC network.
This combination of destination and target allows traffic to flow freely within the VPC.
Add Custom Route Tables
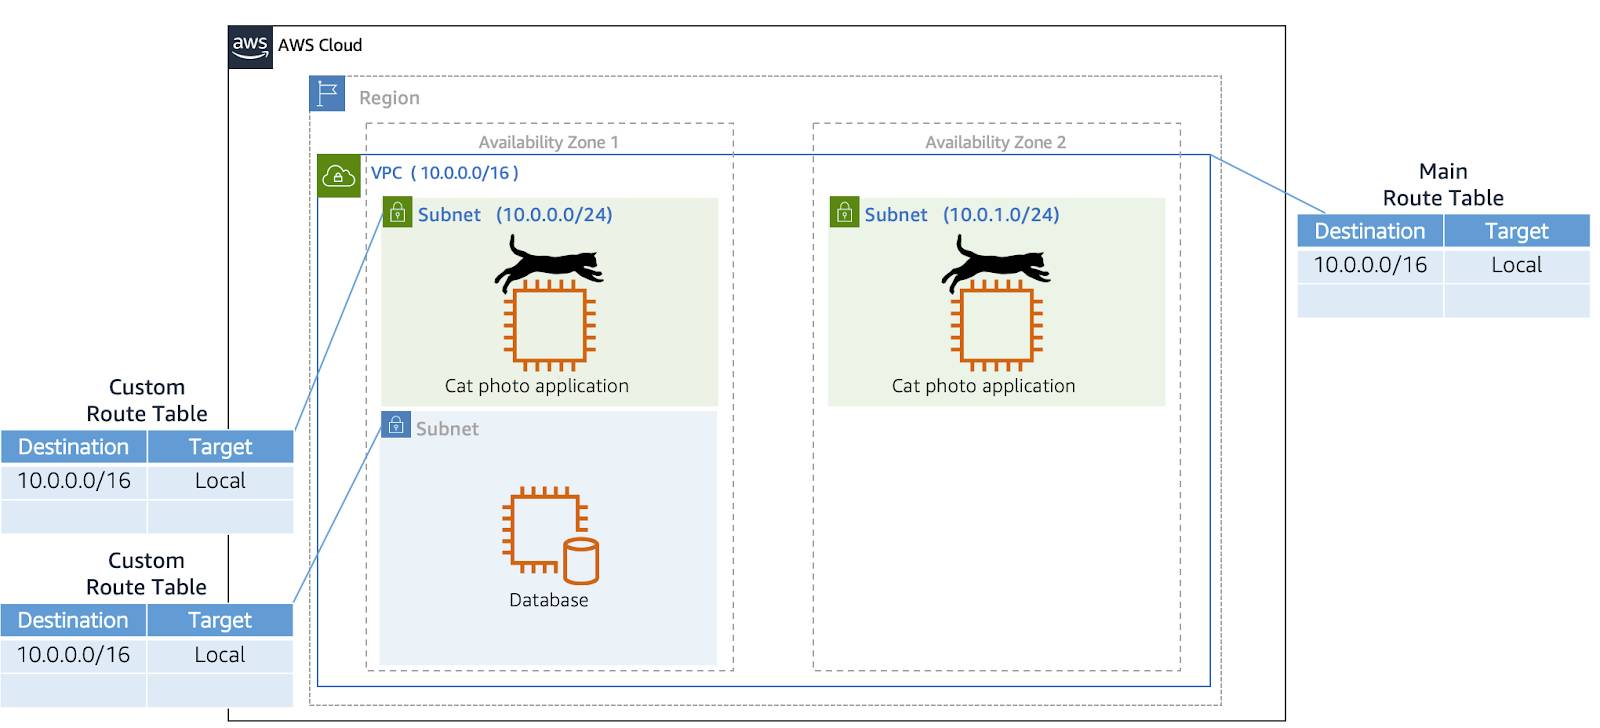
While the main route table controls the routing for your VPC, you may want to be more granular about how you route your traffic for specific subnets. For example, the cat photo application may consist of a frontend and a database. You can create separate
subnets for these resources and provide different routes for each of them.
If you associate a custom route table with a subnet, the subnet will use it instead of the main route table. By default, each custom route table you create will have the local route already inside it, allowing communication to flow between all resources
and subnets inside the VPC.

Know the Boundaries of a New Route Table
A newly created route table only routes data locally. This means that a new VPC is completely isolated, not connected to the internet. It also means that all resources inside your VPC can talk to each other automatically.
If you have your cat photo application in one subnet and a database in another subnet, these two resources can automatically route traffic to one another by default.

Wrap Up
In this unit, you learned how to route traffic to your cat photo application resources within your VPC by creating route tables. However, you’re still missing a piece of the puzzle. How can you allow traffic from the internet to access your application?
In the next unit, you learn how to route traffic to and from the internet by using route tables and internet gateway.