Primeros pasos con el Generador de Solicitud
Objetivos de aprendizaje
En este proyecto:
- Creará y probará una plantilla de solicitud que incluya campos de fusión.
- Asociará una plantilla de solicitud con un campo de texto para la generación de campos.

Agilizar la generación de contenido
El Generador de solicitudes le brinda a su organización una manera sencilla de aprovechar el poder de la IA generativa. Lo ayuda a combinar datos existentes con algunas instrucciones bien elaboradas para crear plantillas de solicitud. En pocas palabras, las plantillas de solicitud se utilizan para crear solicitudes, que son los mensajes que se envían a los modelos de lenguaje grande (LLM) para generar contenido.
Las plantillas de solicitud son especiales porque incluyen marcadores de posición para detalles específicos sobre clientes, productos, casos y más. Cada vez que se usa una plantilla de solicitud, se combinan los datos para crear una solicitud exclusiva y personalizada, que da como resultado una respuesta personalizada. Y como las plantillas de solicitud son reutilizables, son una parte clave de una implementación de IA escalable. Para obtener una explicación más detallada de las solicitudes y las plantillas de solicitud, consulte Fundamentos de las solicitudes.
En este proyecto, participará en la creación de una plantilla de solicitud y, luego, la usará para obtener respuestas reales generadas por un LLM. En concreto, se centrará en un escenario con el que todo el mundo está familiarizado: los casos de servicio de atención al cliente. En un esfuerzo por aumentar la productividad y la satisfacción del cliente, quiere utilizar la IA generativa para resumir los detalles de un caso en aproximadamente 100 palabras. Esto permite que los agentes se pongan al día rápidamente y facilita la identificación de casos que merecen atención especial.
Registrarse para obtener una organización de prueba con Agentforce
Para completar este proyecto, necesita una zona de pruebas personalizada especial por tiempo limitado que contenga IA de Einstein y los datos de muestra.
- Haga clic en Create Playground (Crear zona de pruebas).
- Su nueva organización está conectada a su cuenta de Trailhead de forma automática.
- Tome nota de la fecha de caducidad de su organización y complete esta insignia antes de dicha fecha.
Habilitar Agentforce Studio
Ahora, es momento de asegurarse de que Agentforce Studio esté habilitado en su organización.
- Si todavía no abrió su organización de prueba con tecnología de Agentforce, desplácese hasta la sección Challenge (Reto) y haga clic en Launch (Iniciar) para abrirla.
- Haga clic en
 y en Setup (Configuración). La página Setup (Configuración) se abrirá en una nueva ficha.
- En el cuadro de búsqueda rápida, busque y seleccione Salesforce Go.
- En el cuadro de texto Search features... (Buscar funciones...), ingrese y seleccione Agentforce Studio.
 [texto alternativo: La página de Salesforce Go muestra Agentforce Studio seleccionado en el menú de búsqueda de funciones].
- Haga clic en Empezar.
- Haga clic en Turn On (Activar).
- Haga clic en Confirm (Confirmar).
- Espere un momento hasta que vea que el botón Turn On (Activar) cambie a On (Activado) y, luego, actualice su navegador.
Crear una plantilla de solicitud de generación de campos
En este proyecto, quiere que aparezca un resumen del caso en un campo de texto del registro. Para ahorrar un poco de tiempo, el equipo de Trailhead ya creó un campo llamado Quick Summary (Resumen rápido) y lo agregó al formato de la página. En este punto no hay nada especial en ello, ¡pero cambiemos eso!
- Haga clic en
 , busque Agentforce Studio y selecciónelo.
- Haga clic en Prompt Templates (Plantillas de solicitud) para abrir el Generador de solicitudes en Setup (Configuración).
- Haga clic en New Prompt Template (Nueva plantilla de solicitud).
- En Prompt Template Type (Tipo de plantilla de solicitud), seleccione Field Generation (Generación de campos).
- En Prompt Template Name (Nombre de plantilla de solicitud), ingrese
Quick Summary(Resumen rápido).
- Presione la tecla Tab para completar el campo API Name (Nombre de API):
Quick_Summary.
- En Template Description (Descripción de plantilla), ingrese
A short summary of case details(Un breve resumen de los detalles del caso).
- Para Object (Objeto), busque y seleccione Case (Caso).
- Para Object Field (Campo de objeto), busque y seleccione Quick Summary (Resumen rápido).
- Haga clic en Next (Siguiente).
Genial, ahora tiene el comienzo de una plantilla de solicitud. Es hora de crearla escribiendo algunas instrucciones claras que describan lo que espera del LLM. A medida que aprende en la insignia Prompt Fundamentals (Fundamentos de las solicitudes), hay varias cosas que puede agregar para obtener mejores resultados. En este ejemplo, debe incluir el objetivo general, los límites de tamaño y algunas barreras de seguridad.
Escribir una buena solicitud es una especie de arte, por eso para este proyecto le damos una solicitud que sabemos que funciona bien.
- Pegue el siguiente texto en el campo Prompt (Solicitud) | Insert Resource (Insertar recurso).
Summarize the concatenation of the contents of the comment bodies of COMMENTS along with the text from SUBJECT, the case priority which is PRIORITY, and the case type which is TYPE. Keep the response to a single short paragraph.(Resume el encadenamiento del contenido de los cuerpos de los comentarios de COMMENTS junto con el texto de SUBJECT, la prioridad del caso que es PRIORITY y el tipo de caso que es TYPE. La respuesta debe tener un único párrafo breve). - Haga clic en Save (Guardar).
- En la lista Models (Modelos), asegúrese de que OpenAI GPT 4 Omni Mini esté seleccionado. Hay varios modelos para elegir en su organización con tecnología de Agentforce, y OpenAI GPT 4 Mini ofrece excelentes resultados.

Este texto de muestra incluye algunos marcadores de posición en mayúsculas para cosas como la prioridad del caso. Reemplacémoslos con campos de fusión reales para que el LLM pueda crear una respuesta adaptada a una variedad de situaciones.
- En el texto de muestra de la solicitud, coloque el cursor del mouse en frente de la palabra PRIORITY (PRIORIDAD).

- Haga clic en + Insert Resource (Insertar recurso) para abrir la lista de recursos.

- Haga clic en Case (Caso), y, luego, en Priority (Prioridad).
Se insertará un campo de combinación como texto azul.
- Eliminar PRIORITY (PRIORIDAD) para dejar solo el campo de fusión. Ahora, debería tener un aspecto similar al siguiente:
…the case priority which is Input:Case.Priority, and the case type…(la prioridad del caso que es Input:Case.Priority y el tipo de caso…)
Luego, repita el proceso para reemplazar los marcadores de texto COMMENTS (COMENTARIOS), SUBJECT (ASUNTO) y TYPE (TIPO).
- Coloque el cursor del mouse delante de COMMENTS (COMENTARIOS).
- Haga clic en el cuadro Resource (Recurso). Seleccione Case (Caso) y, luego, haga clic en CaseComments.
Nota: Tenga en cuenta el texto a color, indica que se trata de una lista relacionada (el color del texto puede variar según la configuración de su navegador).
- Eliminar COMMENTS (COMENTARIOS) para dejar solo el campo de fusión. Ahora debería tener un aspecto similar al siguiente:
Summarize the concatenation of the contents of the comment bodies of RelatedList: Case.CaseComments along with the text…(Resume el encadenamiento del contenido de los cuerpos de los comentarios de RelatedList: Case.CaseComments junto con el texto…)
- Coloque el cursor del mouse delante de SUBJECT (ASUNTO).
- Haga clic en el cuadro Resource (Recurso). Seleccione Case (Caso) y, luego, haga clic en Subject (Asunto).
- Eliminar SUBJECT (ASUNTO) para dejar solo el campo de fusión.
- Por último, coloque el cursor del mouse delante de TYPE (TIPO).
- Haga clic en el cuadro Resource (Recurso). Seleccione Case (Caso) y, luego, haga clic en Case Type (Tipo de caso).
- Eliminar TYPE (TIPO) para dejar solo el campo de fusión.
- Haga clic en Save (Guardar).
Con los campos de fusión implementados, su plantilla de solicitud debería verse así:
Summarize the concatenation of the contents of the comment bodies of RelatedList: Case.CaseComments along with the text from Input:Case.Subject, the case priority which is Input:Case.Priority, and the case type which is Input:Case.Type (Resume el encadenamiento del contenido de los cuerpos de los comentarios de RelatedList: Case.CaseComments junto con el texto de Input:Case.Subject, la prioridad del caso que es Input:Case.Priority y el tipo de caso que es Input:Case.Type).
Acote la respuesta a un único párrafo breve.
Así de fácil es basar su solicitud en datos reales. Ahora que su plantilla de solicitud incluye campos de fusión y buenas instrucciones, es hora de probarla. El Generador de solicitudes facilita la obtención de una vista previa de su plantilla de solicitud con datos reales. Solo necesita un registro de muestra para extraer información.
- Haga clic en Preview (Vista previa), a continuación, en Inputs (Entradas) para expandir el cuadro de entradas.
- En el cuadro Related Record (Registro relacionado), busque y seleccione el caso 00001002.

- Haga clic en Preview (Vista previa).
- Haga clic en Activate (Activar).
¡Este es el momento que estaba esperando! Sus instrucciones fueron enviadas al LLM y, en respuesta, recibe un resumen generado del caso en solo unas pocas oraciones en el campo Generated Response (Respuesta generada). El suyo puede verse un poco diferente a los ejemplos en este proyecto. Está bien, es normal que los LLM respondan a la misma solicitud de más de una manera.
Habilitar formularios dinámicos para casos
Su plantilla de solicitud está lista para usarse. El último paso es actualizar el formato de la página para que su equipo de servicio de atención al cliente pueda usar la nueva plantilla de solicitud.
- Mientras aún esté en la página Prompt Builder (Generador de solicitudes), verifique que haya hecho clic en Activate (Activar).
- Cierre la ficha Setup (Configuración) para volver a la aplicación Ventas.
- Haga clic en
 , busque Cases (Casos) y selecciónelo.
- Haga clic en la flecha junto a Recently Viewed (Vistos recientemente) y seleccione All Open Cases (Todos los casos abiertos).
- Haga clic en el caso número 00001002.
- Haga clic en
 y en Edit Page (Modificar página).
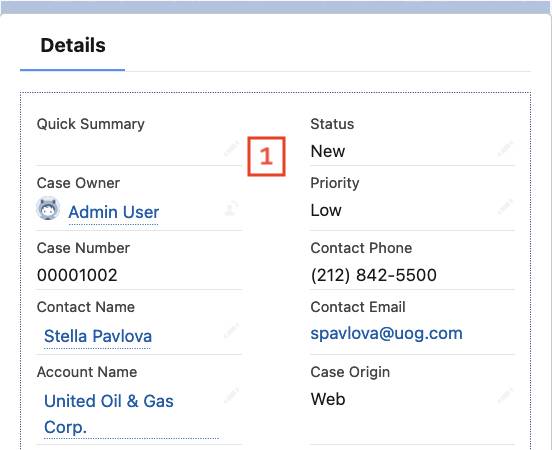
- En la sección Details (Detalles), haga clic en el componente Details (Detalles) del registro [1].
- En el panel de propiedades a la derecha, haga clic en Upgrade Now (Actualizar ahora) para actualizar a Dynamic Forms (Formularios dinámicos). (Si no ve el botón Upgrade Now [Actualizar ahora] en el panel de propiedades, haga clic en el centro del panel Details [Detalles]).
- Haga clic en Next (Siguiente).
- Seleccione el formato de página Case Layout (Formato del caso).
- Haga clic en Finish (Finalizar).
- En la sección Case Information (Información del caso), haga clic en el campo Quick Summary (Resumen rápido).
- Para obtener la plantilla de solicitud, busque y seleccione Quick Summary (Resumen rápido).

- Haga clic en Save (Guardar) y, a continuación, en Activate (Activar).
- Haga clic en el botón Assign as Org Default (Asignar como predeterminado de la organización). Es posible que tenga que desplazarse un poco hacia abajo. Luego, haga clic en Next (Siguiente).
- En la pantalla Assign form factor (Asignar factor de forma), seleccione Desktop and phone (Computadora y teléfono).
- Haga clic en Next (Siguiente) y, a continuación, en Save (Guardar).
- Haga clic en
 para salir del Generador de aplicaciones Lightning.
Excelente, el campo Quick Summary (Resumen rápido) está listo para usar la IA generativa de Einstein. Se dará cuenta porque ahora el botón de modificación tendrá una pequeña estrella junto al lápiz.
Vamos a probarlo.
- En el registro Case 00001002, en el panel Details (Detalles), haga clic en
 en el campo Quick Summary (Resumen rápido).

- Haga clic en
 a la derecha del campo.
Esto abre de forma automática la superposición de Einstein y utiliza su plantilla de solicitud para iniciar una nueva plática. En un momento Einstein sugerirá un resumen del caso. De nuevo, el suyo puede verse un poco diferente al nuestro:
Esto es lo que se me ocurrió
The comments regarding the case include the following actions: contacting engineering for a PDF of the wiring diagram, emailing the diagram to the customer while awaiting a reply, and noting that the generator was manufactured in 2019 (Los comentarios del caso incluyen las siguientes acciones: contactar a ingeniería para solicitar un PDF con el diagrama de cableado, enviar el diagrama por email al cliente mientras se espera una respuesta y hacer la aclaración de que el generador fue fabricado en 2019). En este caso, que tiene una prioridad baja y pertenece a problemas eléctricos, se busca orientación sobre la instalación del cableado eléctrico para GC5060.
En el panel de la superposición de Einstein, tiene este aspecto:

Esto les da a sus usuarios la oportunidad de revisar el resumen e incluso continuar la plática con Einstein para trabajar juntos en una versión revisada. Para este ejemplo, simplemente acepte la primera sugerencia.
- Haga clic en Use (Usar). Debería haber un botón Use (Utilizar) en la superposición de Einstein. Si no es así, simplemente actualice la página y repita los pasos 1 y 2.
- Haga clic en la X para cerrar la superposición de Einstein.
Tenga en cuenta que el campo Quick Summary (Resumen rápido) está completado.
- Haga clic en Save (Guardar).
Con solo unos pocos clics, sus usuarios pueden acceder al poder de Agentforce para crear rápidamente contenido útil y así poder concentrarse en cosas más importantes. La naturaleza conversacional de Agentforce les permite a los usuarios refinar el contenido generado en tiempo real; además, siempre pueden modificarlo después de ingresarlo en el campo.
Excelente trabajo al crear una plantilla de solicitud tan útil. Diviértase experimentando en el Generador de solicitudes para descubrir otras formas de automatizar la generación de texto para su organización.