Collaborate with Grantseekers
Learning Objectives
After completing this unit, you’ll be able to:
- Understand a grantseeker’s experience in the portal.
- Manage grantmaking processes with an understanding of how they’re surfaced in the portal.
- Work with your Salesforce admin or a consulting partner to automate processes.
The Grantee’s Perspective
Now that we’ve learned about how the Grants Management portal works, let’s check it out in action.
Let’s follow along with Aniyah Thompson, development director at the (fictional) nonprofit No More Homelessness (NMH), as she works through the grant lifecycle.


Register and Provide Organizational Information
Aniyah has never applied to the (fictional) Six Sides Fund for a grant. She subscribes to its email newsletters, though, and reads an announcement about the homelessness and poverty grants that Michon Levitt, a program coordinator at the Six Sides Fund, published. Aniyah is interested.
She visits the portal and looks at the Home page and How to Apply page. The Six Sides Fund uses the default setting that prevents guests from seeing funding programs, so Aniyah signs up for a new account. She creates a password, logs in, and then navigates to Funding Programs.
There’s the new poverty and homelessness funding program! She selects it to read the details.

It looks like a perfect fit, so Aniyah decides to apply with support from her executive director and program leadership. But first she needs to add some information about NMH to her profile.
New users are prompted on the Home page and other parts of the grantee portal to provide information about their organization if they haven’t already. They can also click the grantee portal user icon ( ) and then click My Organization and Request an Update.
Aniyah enters information in the form and then clicks Submit Request.

This request shows up in the Six Sides Fund’s Salesforce org as a new case record. The foundation staff can review the case and click Process Request to create an account, associate the user who submitted the request with that account, and close the case. (Check out Manage Account Update Requests in Resources for details.)

Apply for a Grant
When Aniyah’s organization details are processed she clicks Apply on the funding program page and launches the application window.
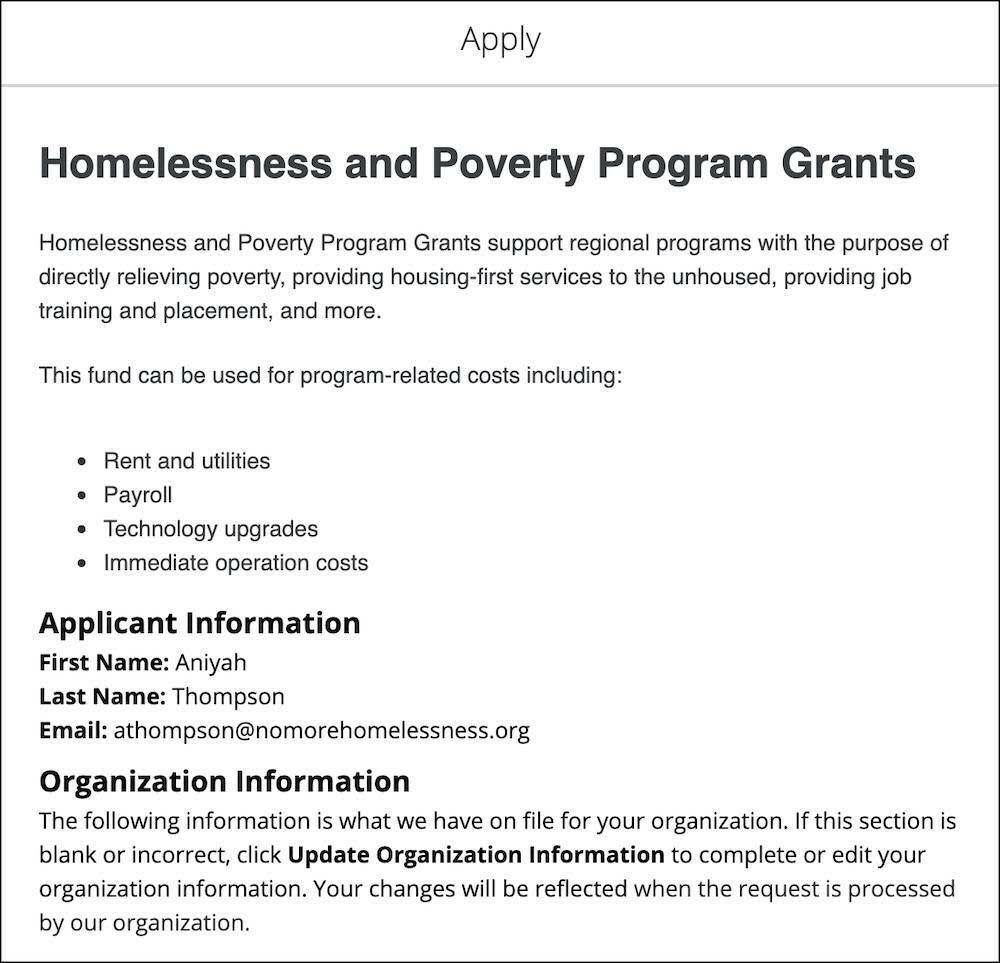
Because Michon selected the Six Sides Fund’s application form specific to this program, Aniyah sees details about the program first. She also sees some information about herself (the applicant) and her organization at the start of the application.
This initial application is relatively complicated, so Aniyah reviews the information she must provide. Each field—whether it records dates, open text, a picklist selection, or multi-select choices—corresponds directly to a field on Funding Requests and other objects in Salesforce.

There’s also a place to upload a few required documents.
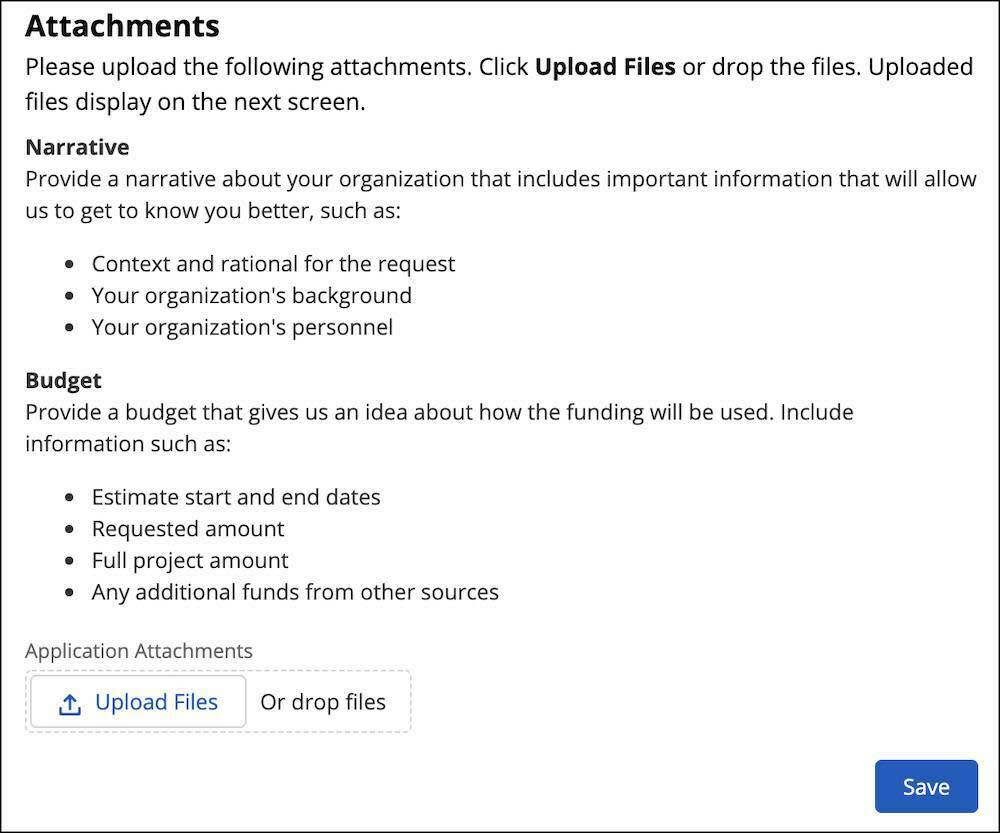
After Aniyah uploads the required documents, she clicks Save.
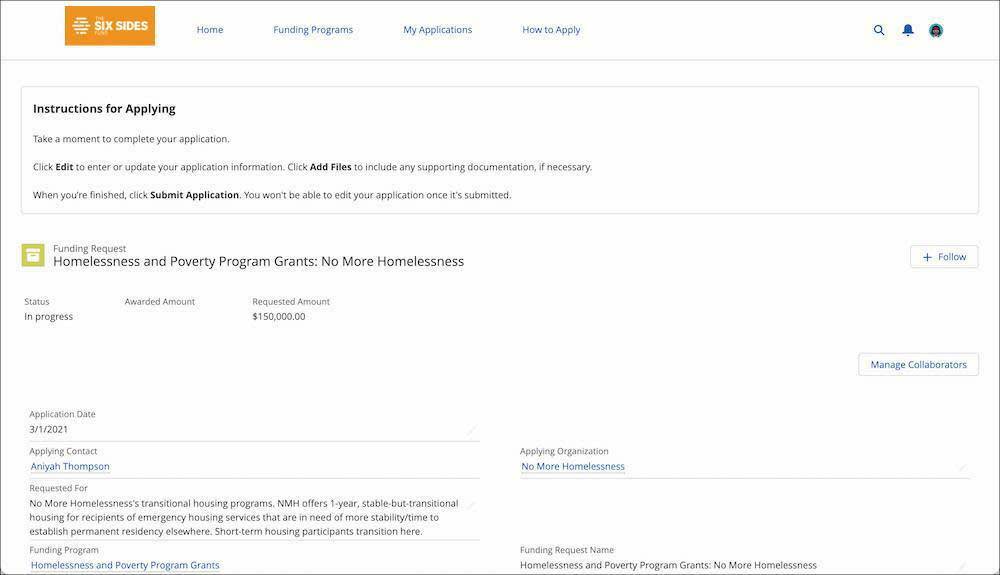
On the next page she has one more chance to review everything and edit her submission. Plus, she can invite others to help her complete the application by clicking Manage Collaborators. Those collaborators are then able to help her using their own portal accounts.
Finally, Aniyah clicks Submit Application at the bottom of the page, then Next on the confirmation window.
An automated message from the Six Sides Fund lets Aniyah know the application is submitted. Check out the section on automation at the end of the unit—and the related links in Resources—for more on automating your processes.
If you’ve been following the story throughout this module, this is the moment when Michon at the Six Sides Fund picked up the funding request record and went to work adding requirements. About those requirements...
Answer Requirements and Process Applications
Aniyah and Michon talk and she knows she has some work to do. Because Aniyah is assigned to the requirement records in Salesforce, she can see them in the portal. Let’s follow along as she completes one.
- Log in to the portal.
- Navigate to My Applications.
- Select the application with the recently added requirements.

- Find the Requirements related list and select a requirement. Aniyah selects Provide detailed two-year program budget.
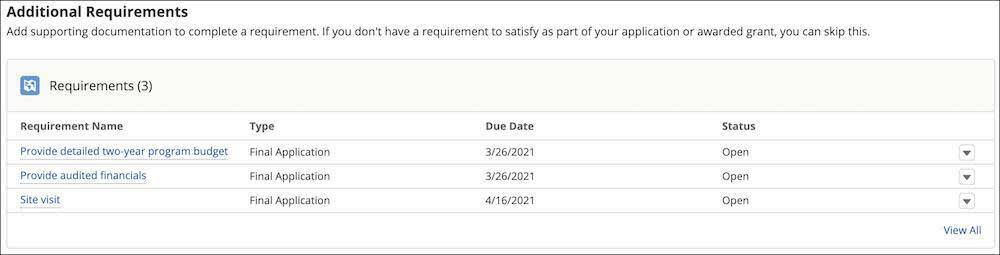
- The requirements record lists basic details and instructions at the top of the page and—because Michon checked Is Add Files Visible? on the record in Salesforce—an Upload Files button appears at the bottom of the page. Aniyah clicks the button.
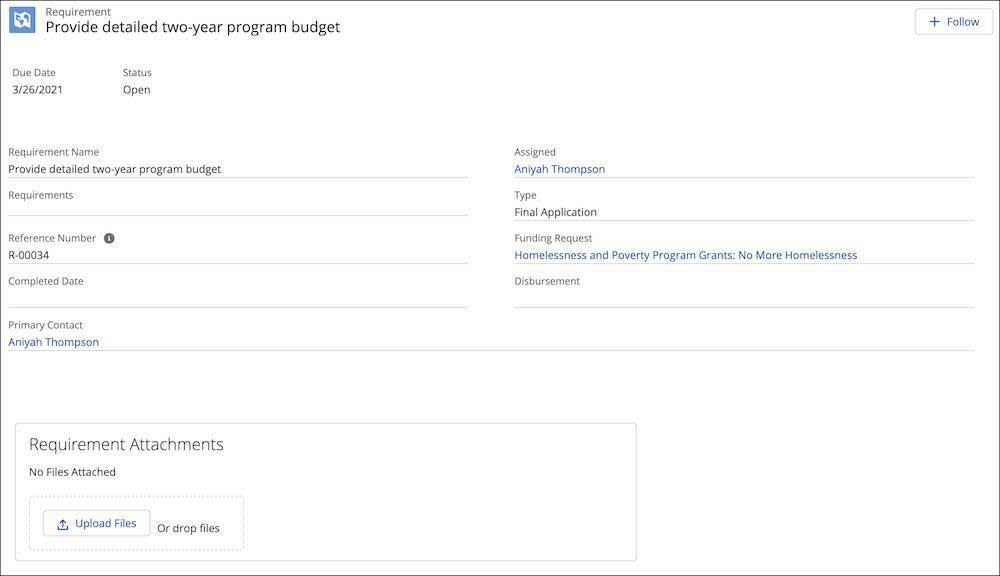
- Select and upload files, then click Done. Any uploaded files appear in the attachment area.
- Click Submit.
- In the Confirm Submission dialog box, click Submit again (or click Cancel and upload other documents).
In Salesforce, the requirement record changes status to Complete and Michon is able to review the attached file in the Files related list of the funding request record.

Michon reads through the completed requirements and marks them as Accepted, which Aniyah can see in the grantee portal. Michon and Aniyah can communicate like this until the time the grant is awarded—and even later to file interim reports and outcomes.
Michon creates a requirement record for a site visit that he schedules with Aniyah over the phone, then marks it Complete and Accepted in Salesforce after he stops by NMH.
Decisions, Payments, and Progress
The Six Sides Fund decides to award the grant to Aniyah and NMH. The portal helped them get this far together, and it’s about to help them go further.
On Michon’s end, he fills out the required fields to award the grant. He creates two disbursement records and an interim report requirement for the second payment.
In the portal, these new elements are now visible to Aniyah, too.

Let’s select a disbursement record to see how it appears in the grantee portal for Aniyah.

- The Details tab (1) includes basic information about the disbursement like the amount, status, scheduled date, and disbursement record.
- The Related tab (2) includes related lists for any requirements that must be completed before disbursement, along with any files the grantmaker or grant recipient have added.
- The Chatter panel (3) allows the grant recipient and grantmaker to communicate in a way that creates a transparent record between both parties.
Aniyah’s program team at NMH gets to work after the first disbursement is made, and she moves on to her next fundraising opportunity. Not every grantmaker is so transparent with the entire process, so Aniyah really appreciates the Six Sides Fund's process.
Michon’s process has been streamlined, as well. He has one place where he can look for files and track the status of each step of the grant lifecycle. But the process could always be easier.
Manage Processes with Automation
Michon learned a lot through his first few grants made with Grants Management. Now he knows where he repeats steps or where certain actions can automatically run on their own.
Grants Management and the portal use Flow Builder, a point-and-click process automation tool for every Salesforce app, experience, and portal. Talk with your Salesforce admin or a Salesforce consulting partner to determine what fits your process and how more of your process can be automated. (We included a few links in Resources to help you.)
A few ideas to automate in your process:
- Receive notifications in Salesforce or via email when new requirements are assigned or completed.
- Send and receive email reminders on upcoming due dates.
- Send a message to accounting staff to process a disbursement when those records reach a certain status.
- Send award letters and email confirmations to keep grantees notified of their application status.
While there will never—and should never—be a replacement for talking to your grantee, these types of process enhancements can improve the experience for grantmakers and recipients, giving them more time to do the work they do best.
That’s certainly true for Michon, who is starting to work on a new funding request.
Resources
- Salesforce Help: Manage Account Update Requests
- Salesforce Help: Create or Modify a Flow
- Salesforce Help: Create Approval Processes (plus click here to access other automation options using Outbound Funds Module objects)
- Trailhead: Build Flows with Flow Builder
- Salesforce Site: Find the Right Salesforce Consulting Partner