Edit, Embed, and Explore with Tableau Public
Learning Objectives
After completing this unit, you’ll be able to:
- Edit viz details.
- Make changes to a viz that you published.
- Embed your visualizations on a personal website or social media.
- Explore vizzes and be inspired.
Build a Viz
In the previous unit, you used web authoring to create and publish a viz. Before we move on, let’s take a quick look at the different ways you can create and publish visualizations using Tableau Public.
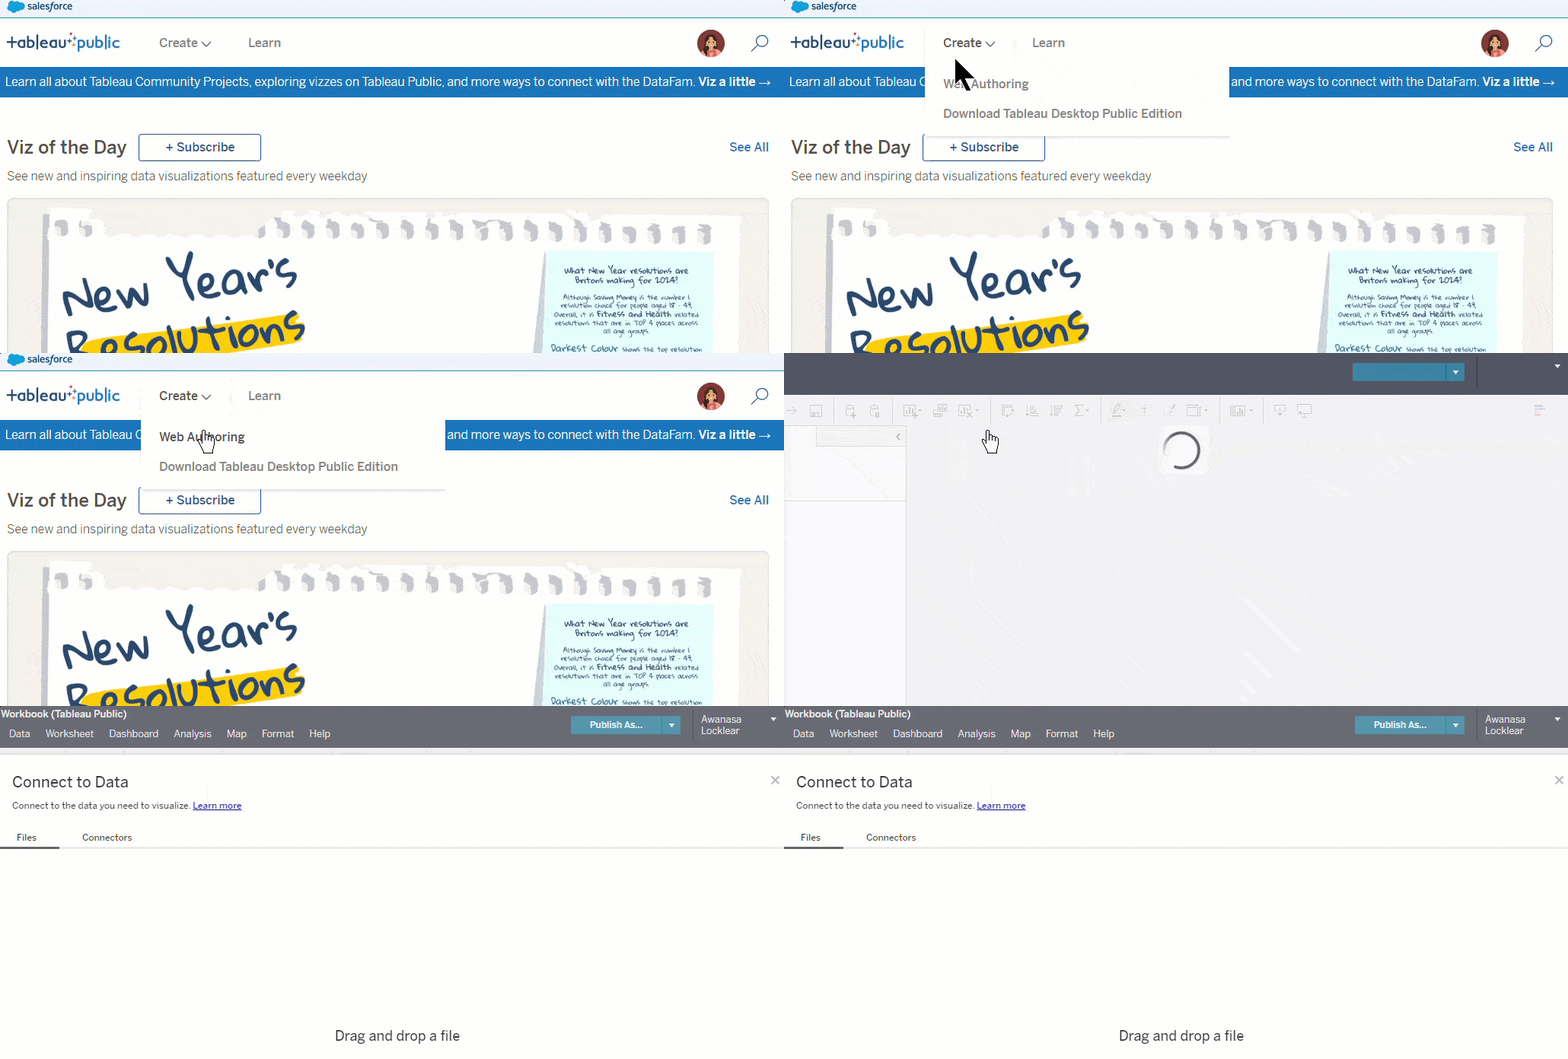
To create using Tableau Public’s web authoring platform:
- Select Create on the navigation tab
- Then choose Web Authoring.
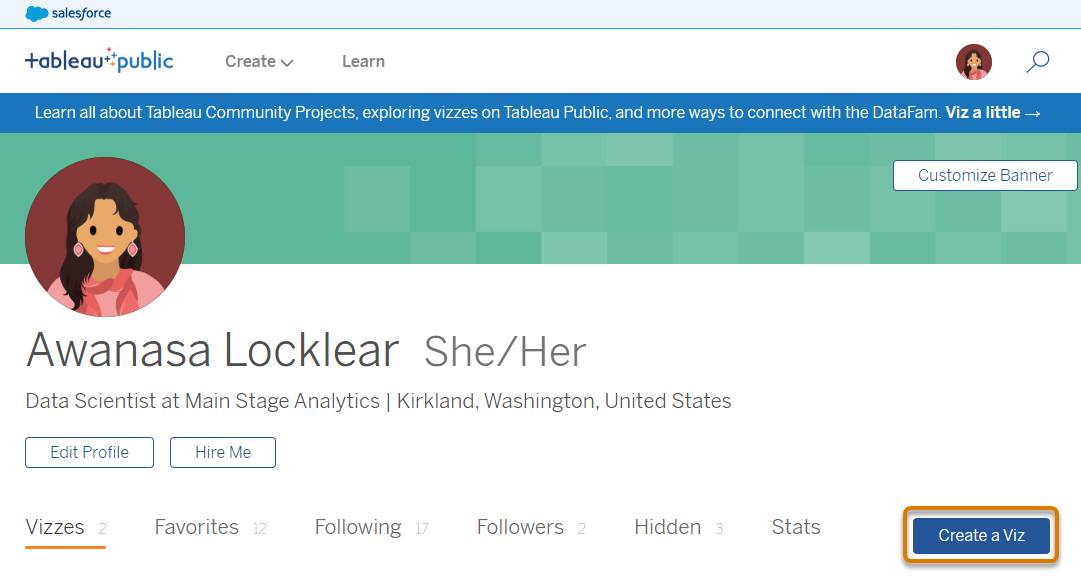
- Or, from your profile page, select Create a Viz.
- Or, from your profile page, select Create a Viz.
- When you’re ready to share your work, select File | Publish As
- Or select Publish As in the area above the toolbar.
- Or select Publish As in the area above the toolbar.
You can also access the web authoring platform from your profile page. Just click My Profile and then select Create a Viz.
If you prefer to work offline, you can use Tableau Desktop Public Edition for free or Tableau Desktop Professional Edition if you're a paid subscriber. When you’re ready to share your work to Tableau Public, if you use Tableau Desktop Public Edition, open the File menu, then select Save to Tableau Public. If you use Tableau Desktop Professional Edition, open the Server menu, sign in using your Tableau Public account, name your viz, and click Save. There are already a lot of resources you can leverage to become a data rockstar using those tools, so we won't go into too much detail here.
You can also save workbooks locally using both the free Tableau Desktop Public Edition and Tableau Desktop Professional Edition. Saving locally allows you to work with private data that can’t be shared on Tableau Public. Both versions of Tableau Desktop also automatically save your work every few minutes.
To learn the ins and outs of authoring, check out these resources.
-
Tell Stories with Data Using Tableau Public on Trailhead.
-
Get Started with Data Visualization in Tableau Desktop on Trailhead
-
The Tableau Desktop Workspace on Trailhead.
-
Get Started with Tableau Desktop tutorial on the Tableau Help site.
-
How-to videos on the Tableau Public website.
-
Tableau eLearning, web-based, interactive training where you can learn at your own pace.
Edit Viz Details
Once you've published a viz to Tableau Public, you can add more information to let others know what it’s all about.
From Tableau Public, click View on a viz thumbnail to go to the viz and interact with it. Scroll down to see the viz details. If it’s your viz, click Edit Details to change what people see here.
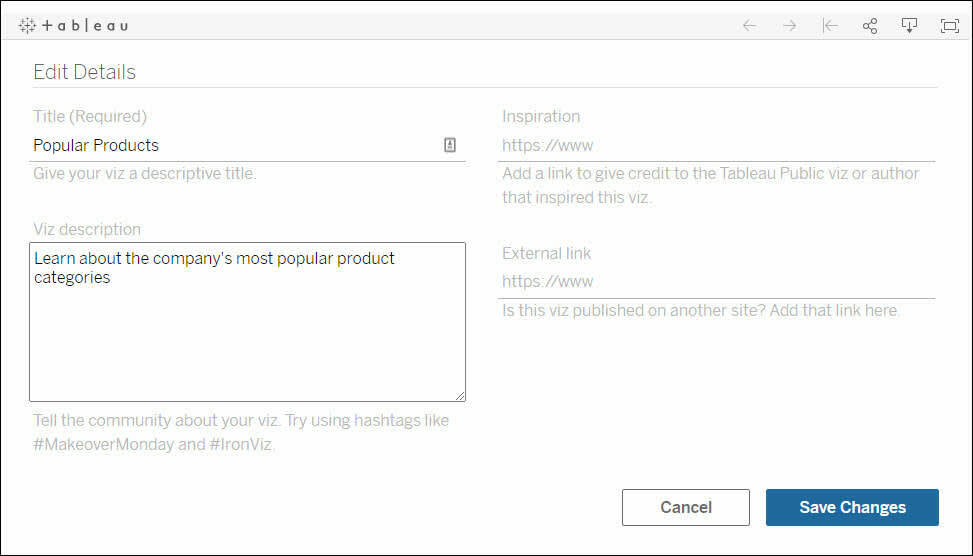
Most of the fields and settings are self-explanatory, but let’s review a few key details.
-
Viz description: Add a short description to let others know what your viz is about. Include hashtags to make your viz even more discoverable.
-
Inspiration: This is where you can credit another author or viz. One of the strengths of the platform is that you can download and build upon a viz (if the author has turned on this setting). If your viz was inspired by another’s work, don’t forget to indicate that here!
-
External link: You can add a URL here so that when people view your viz, they see “Published on” and the link to your website.
Edit a Viz on the Web
To make tweaks to one of your vizzes, click the viz thumbnail, and then click the Edit icon in the toolbar.
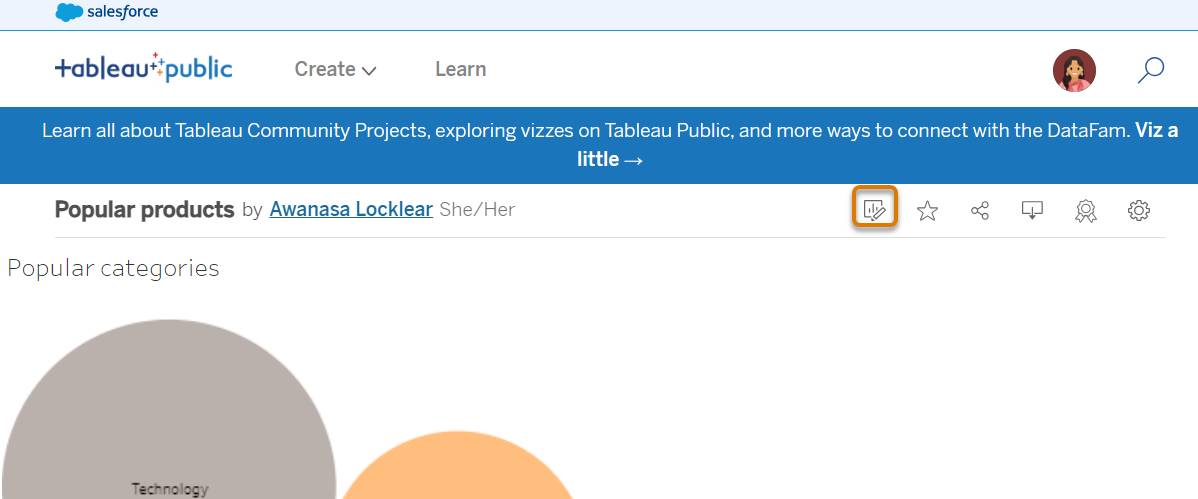
To practice, edit the viz that you published in the previous unit and see what other insights you can uncover. If you just published your viz, you can find it in the Hidden section of your profile.
- Log into Tableau Public.
- Click on your profile image at the top right of the homepage.
- Click My Profile.
- Click Hidden.
- Navigate to your viz and open it.
Once in your viz, here are some things you can try.
- Click the color shelf button and change the colors.
- Bring Season to the Column's shelf—what happens? What happens if it's
 versus
 ?
?
- Use the mark type dropdown on the marks card to change the mark type from Automatic to Bar or Area.
- Create a new sheet and try something entirely different!
And if you're interested in getting deeper into understanding how Tableau works—and exploring a more robust version of this data set—be sure to check out the trail Tell Stories with Data Using Tableau Public.
Embed a Viz
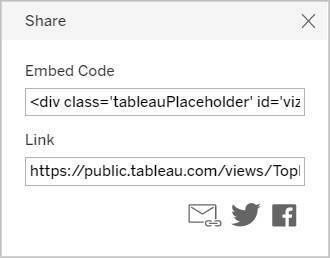
Your viz can live outside the Tableau Public website, if you want. You can embed your viz in web pages, blogs, wiki pages, and web applications.
Click the Share icon in the viz footer to get the embed code or link.
Explore a Viz
One of the best ways to improve your Tableau skills is to explore the work of others. By reverse engineering another author’s viz, you can gain insights into how it was built. Sure, you can always download a viz to see how it was created, but sometimes you might want just a quick peek under the hood. For instance, you might come across a viz and wonder, “What calculated fields did they use?” or “How did they get that parameter working?”
Click the Make a Copy icon in the viz toolbar to explore the viz directly in your browser, right away. Don’t worry—any changes you make won’t overwrite the original viz. Once you finish your edits and save your work, the modified viz is published to your own profile, and the original author is credited automatically.


Now you’re ready to tell your data story!
