Set Up Apex Replay Debugger
In this step, you create a Salesforce DX project with Apex code to test and debug with Apex Replay Debugger.
Create a Salesforce DX Project
- In Visual Studio Code, click the View menu then choose Command Palette.... Alternatively, you can use the keyboard shortcut Ctrl+Shift+P (Windows or Linux) or Cmd+Shift+P (macOS) to open the Command Palette.
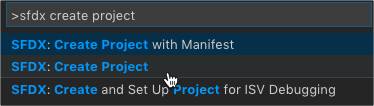
- Enter
sfdx create projectin the search box, then choose SFDX: Create Project.
- Select Standard project template (default).
- Enter
debugger-projectas the project name.
- Choose a folder in which to create the project and click Create Project.
- After a few seconds, Visual Studio Code reloads itself. Click Yes, I trust the authors to open the new project folder.
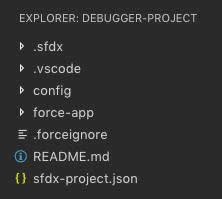
- In the Explorer sidebar, expand the folders
force-app/main/default/classes. Notice that the folder is empty, we change that in the next section.
Create an Apex Class
- In the Explorer sidebar, right-click the folder
classes, then choose SFDX: Create Apex Class. Do not choose the New File command, as that won’t create the necessary metadata .xml file.
- Enter
AccountServiceas the name and accept the default directory.
- Replace the contents of AccountService.cls with the following code. Any bugs 🐞 in this file are intentional, so don’t fix them yet! 😉
public with sharing class AccountService {
  public Account createAccount( String accountName, String accountNumber, String tickerSymbol ) {
    Account newAcct = new Account(
      Name = accountName,
      AccountNumber = accountNumber,
      TickerSymbol = accountNumber
    );
    return newAcct;
  }
}
- Save the file.
Code Highlights
- The
AccountServiceclass has one method:createAccount.
- The method creates and returns an account sObject variable with its name, account number, and stock ticker symbol fields assigned to the method parameters.
Create an Apex Test
- In the Explorer sidebar, right-click the folder
classes, then choose SFDX: Create Apex Class.
- Enter
AccountServiceTestas the name.
- Replace the contents of AccountServiceTest.cls with the following code.
@IsTest
private class AccountServiceTest {
  @IsTest
  static void should_create_account() {
    String acctName = 'Salesforce';
    String acctNumber = 'SFDC';
    String tickerSymbol = 'CRM';
    Test.startTest();
      AccountService service = new AccountService();
      Account newAcct = service.createAccount( acctName, acctNumber, tickerSymbol );
      insert newAcct;
    Test.stopTest();
    List<Account> accts = [ SELECT Id, Name, AccountNumber, TickerSymbol FROM Account WHERE Id = :newAcct.Id ];
    Assert.areEqual( 1, accts.size(), 'should have found new account' );
    Assert.areEqual( acctName, accts[0].Name, 'incorrect name' );
    Assert.areEqual( acctNumber, accts[0].AccountNumber, 'incorrect account number' );
    Assert.areEqual( tickerSymbol, accts[0].TickerSymbol, 'incorrect ticker symbol' );
  }
}
- Save the file.
Code Highlights
- The
AccountServiceTestclass has one test method:should_create_account.
- The test method creates an account sObject variable with expected field values of a name of 'Salesforce', an account number of 'SFDC', and a stock ticker symbol of 'CRM' using the
AccountService.createAccountmethod.
- The test method queries for the inserted account record and asserts the expected field values.
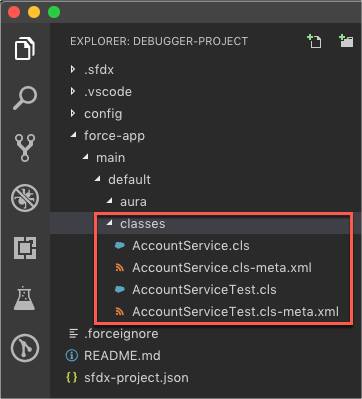
After you’ve created these Apex classes, your classes folder should contain four files: AccountService.cls, AccountServiceTest.cls, and their metadata files. If you don’t see these files, make sure you created the files with the SFDX: Create Apex Class command and not the New File command.
Authorize an Org

Next, authorize your hands-on org with Salesforce CLI so that you can use the CLI and Salesforce Extensions for Visual Studio Code to interact with your org.
- In Visual Studio Code, click the View menu then choose Command Palette.... Alternatively, you can use the keyboard shortcut Ctrl+Shift+P (Windows or Linux) or Cmd+Shift+P (macOS) to open the Command Palette.
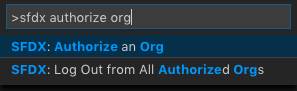
- Enter
sfdx authorize orgin the search box, then choose SFDX: Authorize an Org.
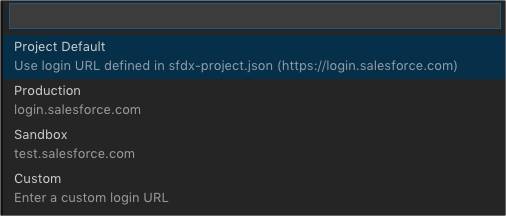
- Choose a login URL option. For Trailhead Playground orgs, you can select Project Default or Production.
- Enter
debuggerOrgfor the org alias.
- Your browser opens a Salesforce login page. Enter your Trailhead Playground credentials.
- If prompted to allow access, click Allow.
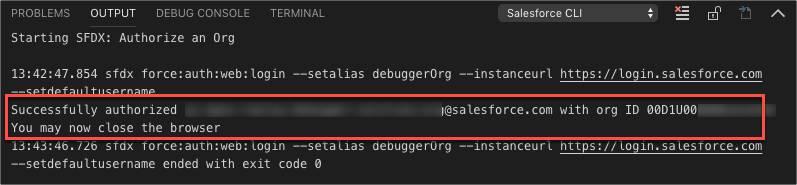
- Switch back to Visual Studio Code to confirm your Trailhead Playground org was authorized. You should see output like
Successfully authorized <username> with org ID <orgid>.
Well done. Click Verify Step to confirm your hands-on org has authorized Salesforce CLI and to move on to the next step, where you debug code with Apex Replay Debugger.
Resources
- External Site: Salesforce Extension Pack
- Salesforce DX Developer Guide: Salesforce DX Project Setup
- External Site: Debugging in Visual Studio Code