Add Users and a Softphone to Salesforce Call Center
Learning Objectives
After completing this unit, you’ll be able to:
- Add users to a Call Center.
- Add a softphone utility to a Lightning console app.
- Locate the softphone in the service console app.
Follow Along with Trail Together
Want to follow along with an expert as you work through this step? Take a look at this video, part of the Trail Together series.
(This clip starts at the 24:51 minute mark, in case you want to rewind and watch the beginning of the step again.)
Manage Call Center Users
Before Maria or Ursa Major Solar’s support team can access a softphone to make calls from Salesforce, she must assign users to a call center. This takes less time than calling a cell-phone provider, and it won’t be anywhere near as painful. Plus, since Maria already added a call center to an org, she’s well on her way to hearing ringtones. Here’s how Maria adds users.
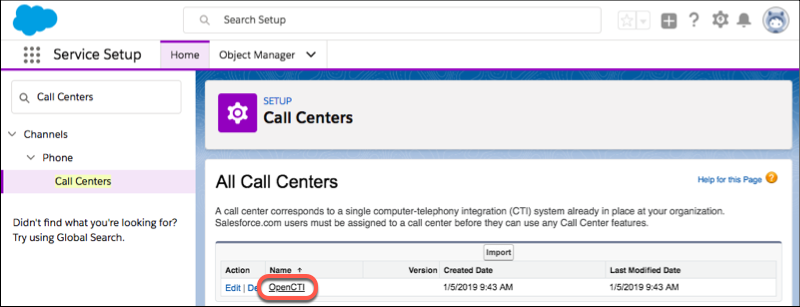
- From Service Setup, enter Call Centers in the Quick Find box, then select Call Centers.
- If an overview page displays, click Continue.
- Click the name of the call center you added to your Trailhead Playground. (If you haven’t yet completed the challenge in the previous unit, go complete it now.)

- In the Call Center Users related list, click Manage Call Center Users.

- Click Add More Users.
- Specify search criteria to find agents who should be assigned to the call center. Since you want to use a softphone, let’s enter the criteria of Full Name Contains Your Name. In the example below we use the name John, but you should enter your own name.

- Click Find.
- Check the box next to your name, and click Add to Call Center.
We just assigned you to a call center. Next, we follow Maria as she adds a softphone to the service console app so that Ursa Major Solar’s support agents can begin making and receiving calls from the call center in Salesforce.
Add a Softphone to the Service Console
Maria adds a softphone to the utility bar of the service console app so that it’s easily accessible in the footer next to the console’s other productivity tools. Here’s how she does it.
- From Service Setup, enter App Manager in the Quick Find box, then select App Manager.

- Select the dropdown arrow next to the Service Console app and select Edit.

- Click Utility Items, then click Add Utility Item.
- In Search..., enter Open CTI Softphone and select it.

- Click Save.
- In User Profiles, make sure that your profile is assigned to the console app. If it’s not, add it and click Save.

- Click Back.
By completing a few simple steps, Maria has added a phone support channel to connect with Ursa Major Solar’s customers. Next, let’s see how to view a softphone.
View a Softphone
Now that Maria has created a call center, assigned users to it, and added a softphone to the service console app, Ursa Major Solar can support customers by phone.
Remember, the softphone is just an on-screen phone. It’s used to make, receive, transfer, and hold phone calls through Salesforce. How a softphone looks and what you can do with it is determined by the Open CTI integration created by a developer or partner; but every CTI integration gives you some sort of softphone.
Viewing a softphone is easy.
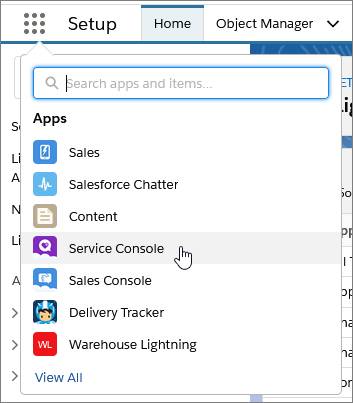
- From the App Launcher, find and select Service Console.

- In the footer, click Phone to see the blank softphone. That's it!
In the real world, you’d see a softphone designed by a developer, and you could start dialing the phone numbers of your customers.

There you have it—we’ve set up a demo call system that integrates with Salesforce. Sita’s excited that there’s a new, low-effort channel for customers to reach out for help. Now, Ursa Major Solar’s service team can make and receive calls while helping other customers on various channels.
Resources
-
Salesforce Help: Adding a User to a Call Center
-
Salesforce Help: Softphones for Lightning Console Apps
-
Salesforce Help: Get to Know Your Softphone Features