Meet Flow Builder
Learning Objectives
After completing this unit, you’ll be able to:
- Describe the building blocks of a flow.
- List the categories of flow elements.
Ready to Get Hands-on with Flow Builder?
Launch your Trailhead Playground now to follow along as we explore Flow Builder in this unit. To find your Trailhead Playground, open a unit or badge with a hands-on challenge (such as the 'Learn About Flow Variables' unit of this badge), scroll down to the challenge, and click Launch. For example, you can find a hands-on challenge in the 'Learn About Flow Variables' unit of this badge.
The Flow Builder User Interface
When you build flows, you work in Flow Builder.
To get to Flow Builder:
- Click the App Launcher (
 ).
).
- In the Search apps and items box, enter
autoand then select Automation.
- In the Flows panel, click New.
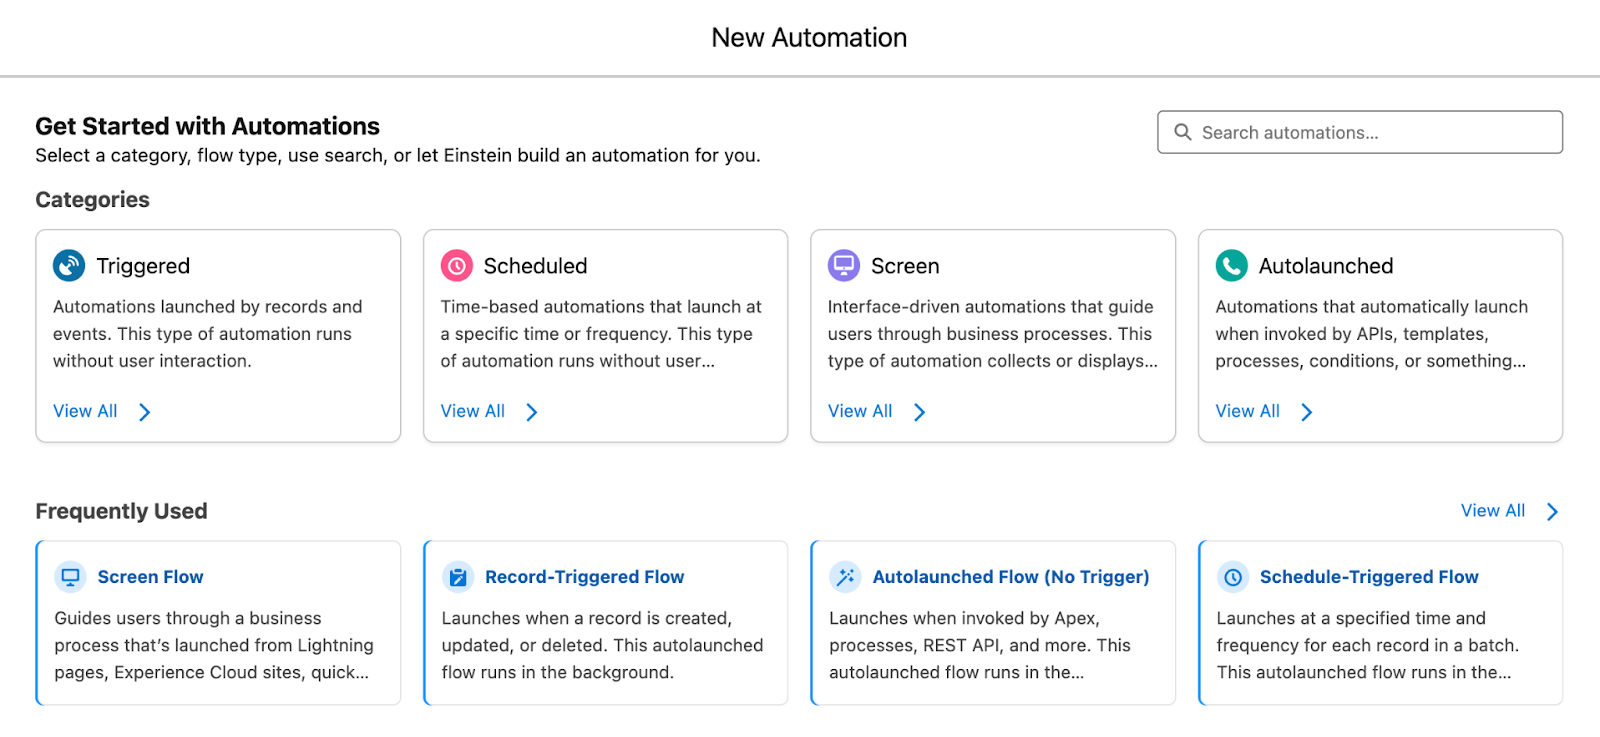
The New Automation window shows the types of flows you can create. Do those types sound familiar? They match the automation types we mentioned earlier in this module.
Under Frequently Used, select a flow type, and say hello to Flow Builder. Let’s take a look at its parts and pieces.
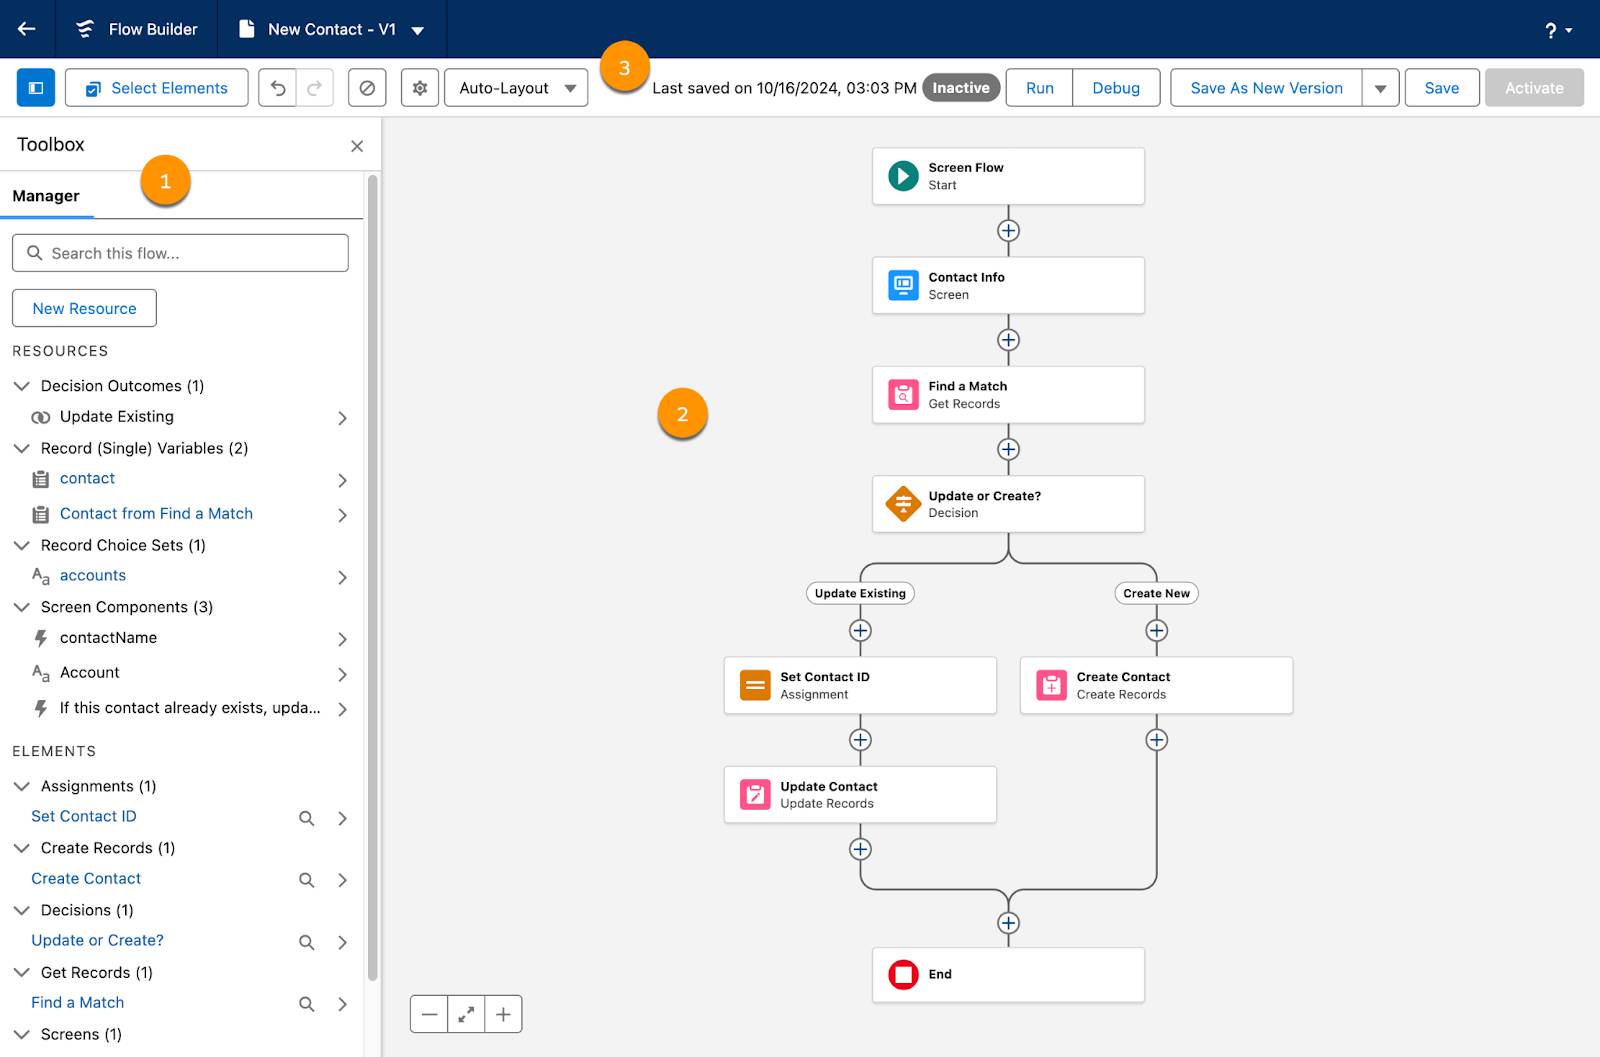
Toolbox (1)
The toolbox lists the elements and resources you’ve built in your flow. You can also create resources such as variables, formulas, and choices to use in your flow.
Canvas (2)
The canvas is the working area, where you build a flow by adding elements. Adding elements to the canvas creates a visual diagram of the flow.
Button Bar (3)
The button bar provides information about the flow, such as:
- Whether the flow is active or not
- How long ago the flow was saved
- Whether the flow has any warnings or errors
The button bar also contains some features that let you control the flow.
- Use
 to show the Toolbox. Click it again to hide the Toolbox.
- Use Select Elements to select multiple elements, so you can copy them to a different spot in the flow
-
Undo and Redo
- Use
 to show the flow’s errors and warning messages. Click it again to hide the Errors and Warnings pane.
- Use
 to open the Version Properties window, where you can rename this version of the flow and configure how it runs
- Use Auto-Layout/Free-Form to choose the layout style for the flow (We recommend using Auto-Layout whenever possible, because it has additional features. Plus, all of the examples in this badge show Auto-Layout!)
- On record-triggered flows, use View Tests to create test scenarios that run automatically when the flow runs. These tests confirm that the flow is working as intended, and show custom error messages when it doesn't.
-
Save and Save As New Version
- Use Activate to make the current version of a flow the version that users encounter (Because a single flow can have multiple versions, you can activate a specific version, even if it’s not the most recent version.)
Finally, the button bar also includes two buttons for running a flow: Run and Debug.
-
Run runs the most recent saved version of the flow that you have open. If you have unsaved changes, they aren’t included in the run.
-
Debug lets you test the most recent saved version of the flow by feeding it sample data and reviewing what it does when it runs, so you can verify that the flow is doing what you want it to do.
Flow Building Blocks
Flows use three building blocks: elements, connectors, and resources.
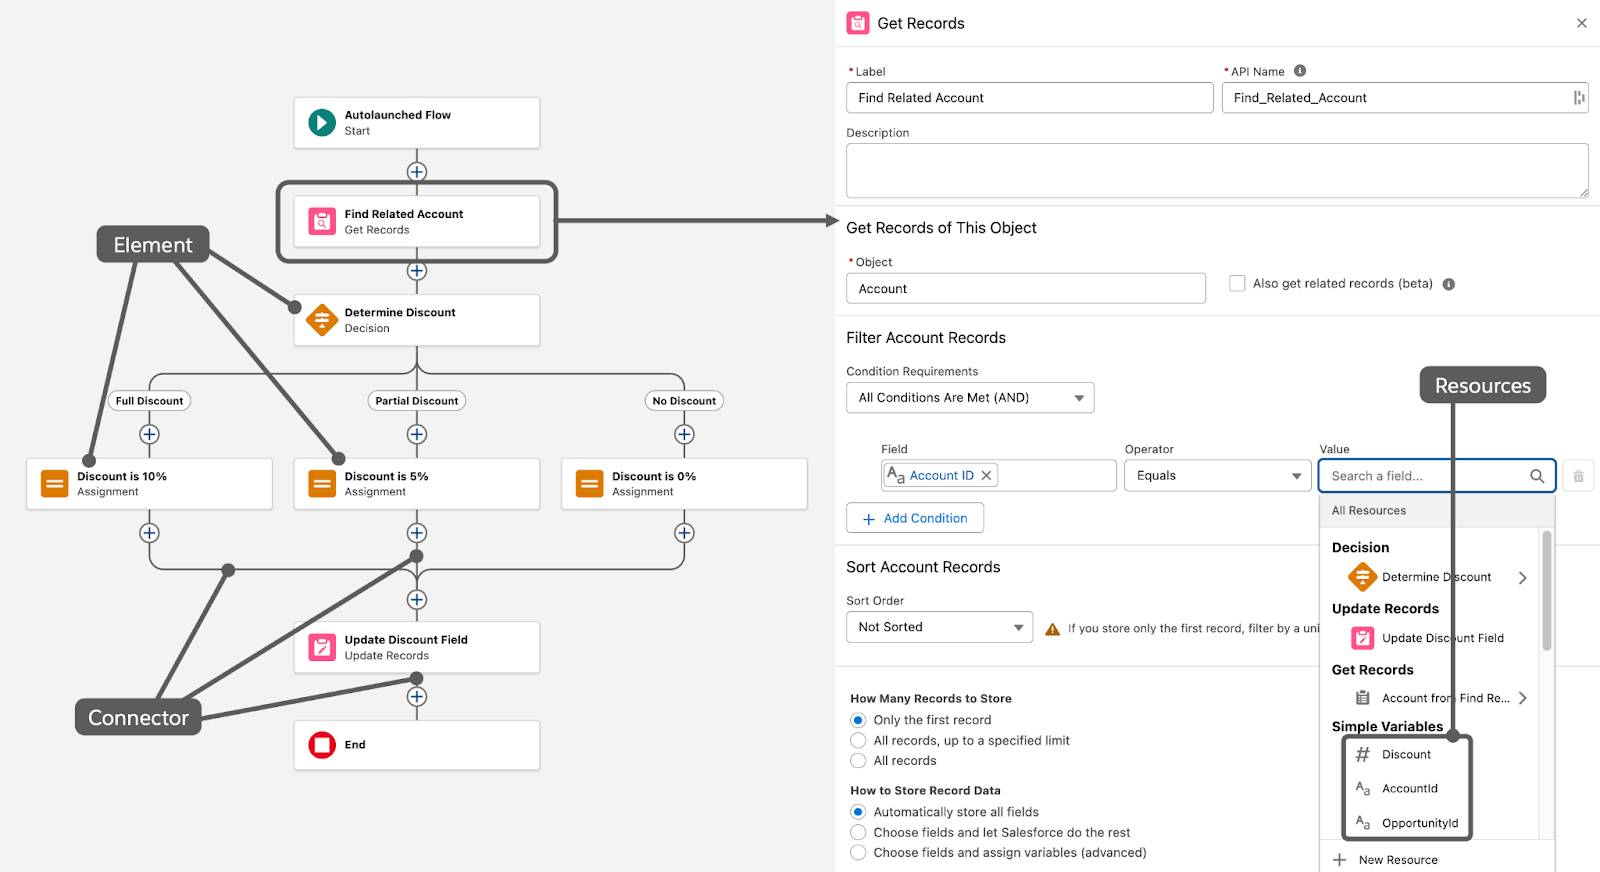
-
Elements are nodes on the canvas that make things happen. To add an element to the canvas, click
 .
.
-
Connectors are lines on the canvas that define the path the flow takes when it runs. They tell the flow which element to execute next.
-
Resources are containers that don’t appear on the canvas, but are referenced by the flow’s elements. Each resource contains a value or a formula that resolves to a value. For example, your flow can search for an account’s ID, store that ID in a variable, and later use that variable to tell the flow which account to update.
Elements
Each element is a step that tells the flow what to do, and each type of element does something different. Think of flow elements as three types.
Element Type |
What It Does |
|---|---|
Interaction |
Interacts with users
|
Data |
Interacts with data
|
Logic |
Interacts with the flow itself |
Let’s consider each type of element.
Interaction Elements
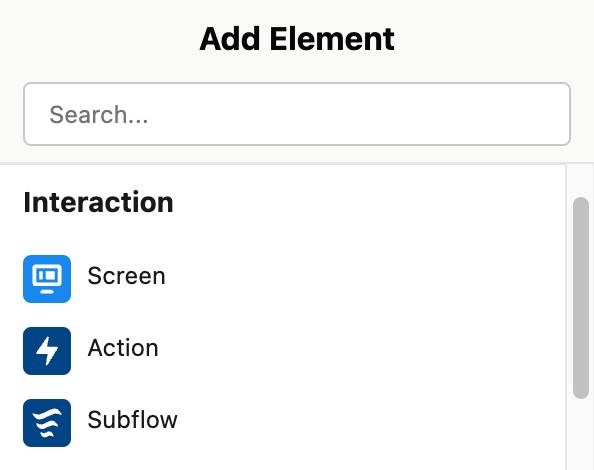
Flows can interact with users by presenting questions and information on a screen, or by sending various types of communications. The Screen element and the Action element make these interactions possible.
The Screen element can display data to users or collect information from them. Choose from a treasure trove of standard components to customize how users interact with your flows. You can display text or images, ask users to enter text, have users make a choice from radio buttons or a dropdown, and more. You can even use a Screen element to ask users to upload a file.

Plus, if you need more interaction options in your flow screens, you can install third-party components or work with a developer to build custom components.
The Action element can do many things, but most notably, it allows your flow to reach out to your users, associates, customers, and even external systems. This element can create Chatter posts, send emails, submit records for approval, send mobile notifications, and push outbound messages. And if you need your flow to do more, you can have a developer build custom actions in Apex.
Finally, the Subflow element lets you call an autolaunched flow from another flow. Instead of interacting with users, it interacts with other flows.
Data Elements
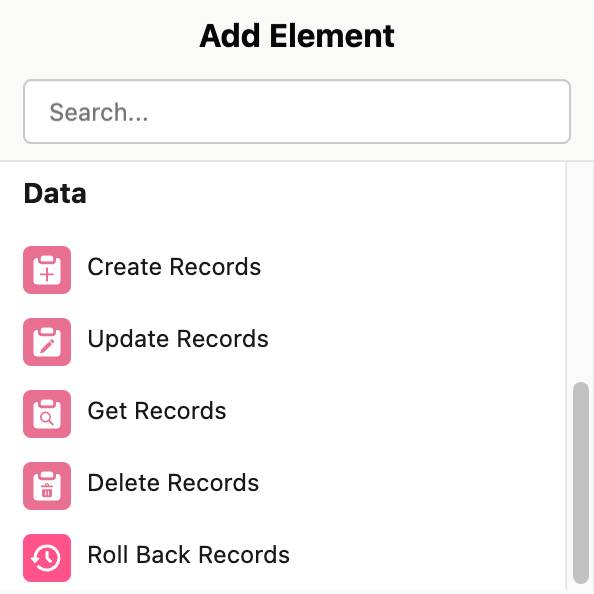
Data elements instruct the flow to interact with records in the Salesforce database. Use data elements to look up, create, update, and delete Salesforce records. You can work with one record at a time, or many records all at once.
Logic Elements
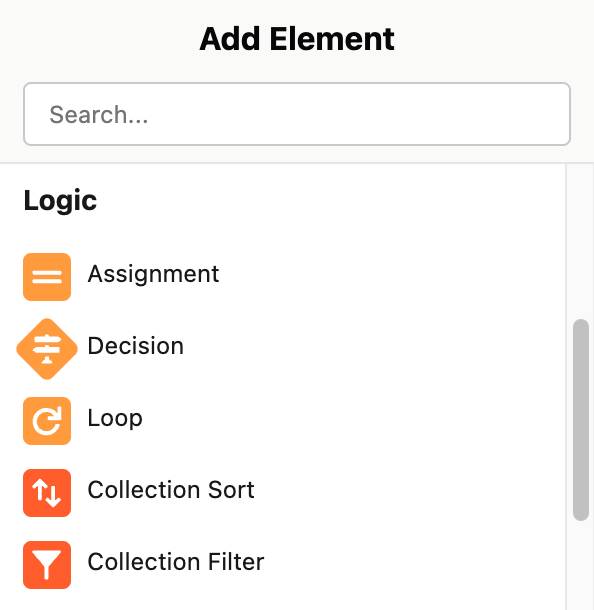
After you collect the data you need, what do you want to do with it? With logic elements, you can evaluate that data and manipulate it according to your business requirements. You can:
- Create multiple paths that the flow can take, and define criteria for when the flow takes each path.
- Update temporary data so you can use it later in the flow.
- Create a looping path to work with groups of data.
- Pause the flow until a specified time.
- Change the contents or order of a collection of data.
Logic operates only in the flow. If you use logic elements to change data in your flow, the resulting data is accessible only until the flow finishes running. To store data outside the flow and access it after the flow runs, you use a data element or an action that sends the data to an external system.
Connectors
Connectors define the path that the flow takes as it runs. They tell the flow which element to execute next. There are different types of connectors that tell the flow to take a different path in certain circumstances, but most of the time, the flow follows its connectors from one element to the next. You can learn more about these other connectors in other Flow badges.
Flow Resources
Resources are containers that you reference throughout your flow. You can create resources as needed, but many elements create them for you. Each resource can store a single value, a formula, a formatted block of text, a whole record with all of its values, or even a collection of records. You learn more about the most common type of resource, called variables, in the next unit.
Keyboard Shortcuts
Use keyboard shortcuts to quickly navigate your flow. Here are the keyboard shortcuts on Windows and Mac.
Action |
Windows keyboard shortcut |
Mac keyboard shortcut |
|---|---|---|
Move the canvas |
Arrow keys |
Arrow keys |
Zoom in |
CTRL+Alt+= or CTRL+Mouse Wheel Up |
Command+Option+= or Command+Mouse Wheel Up |
Zoom out |
CTRL+Alt+- or CTRL+Mouse Wheel Down |
Command+Option+- or Command+Mouse Wheel Down |
Zoom to fit |
CTRL+Alt+1 |
Command+Option+1 |
Reset zoom |
CTRL+Alt+0 |
Command+Option+0 |
Switch focus to another panel |
F6 |
F6 |
Undo |
CTRL+Z |
Command+Z |
Redo |
CTRL+Y |
Command+Y |
Save as |
Shift+CTRL+S |
Shift+Command+S |
Plan Out the Flow
Now that we’ve learned a bit about the types of elements that flow offers, let’s think back to Flo’s request. She’s tempted to jump right into Flow Builder, but she knows it’s best to map requirements to a plan before she starts building the flow.

Requirement |
Element Type to Use |
|---|---|
Collect information from user (contact’s first name, last name, and account) and ask what to do if a matching contact exists. |
Interaction (Screen) |
Look for a matching contact record. |
Data (Get Records) |
Check if a matching record was found and follow the corresponding path: |
Logic (Decision) |
If no match exists, create the contact. |
Data (Create Records) |
If a match exists, update that contact. |
Data (Update Records) |
Rejoin the branches together and then confirm what the flow did in Chatter. |
Interaction (Action) |
Confirm that the flow is done. |
Interaction (Screen) |
Resources